Dec 13.
the oct 20 post had in it a problem with the scope showing non-existant signal repeats.
the cause of those repeats is still an unknown. a new idea has arisen since then.
via looking at the timeline of the signals and noting some large mS delays between pulses
with uS spacing . and then it all repeating.
the new idea is to just have the 506 uC emit 3 pulses then stop. and push
the reset switch to set up a repeat with ADRES the same or a new value. we avoid the scope
having to trap a whole bunch of signals we really dont need with their wildly varying spacing.
since we are using the reset pin on the 506 we have to set up the __CONFIG register
to read '_MCLRE_ON ' and then add a switch , 2 resistors and a 0.1 cap to deal with contact
bounce of the switch when its pushed.
the method of gathering these signals is changed too. instead of using the scope's 'auto' mode , 'single' is used instead. by 'single' just one sweep of the scope occurs. all you gotta do
is play with the H- time base until you get the signals spaced how you want them.
a bonus is catching the 'dummy' spacing between the first -70 pulse and the following fire pulse.
its a 'dummy' as it is a hard-coded value and not the result of the range-test section of code
the job the cdi uC , the 508 , has to do can be done with just 3 pulses. a -70 , a -10, and then
the next -70. its life is to just look at them over and over. and with information derived
from them know when to emit a fire-pulse to the cdi ckt bd.
the cdi uC , the 508, looks at the first 70 deg pulse and delays some time then emits a fire
pulse to the cdi ckt. bd. then it next looks for the 10 deg pulse. and records the time to it from
when the earlier 70 pulse arrived. next , after the 10 pulse arrives, it does some 'range-test'
work to get a fresh fire-delay value. then when the next 70 pulse comes along this new delay
value is applied and another fire pulse emitted. then these steps are all repeated .
this post is also bringing light to an error i have been making with my testing.
the practice has been to code both the 506 with its 70 and 10 pulse signals and apply them
to the 508 uC. the error was to not first test each uC for its stand-alone behavior.
for instance it was discovered the 508 was emitting a fire-pulse with no 70/10 input pulses.
and the 1054 was not showing the 10 pulse out of the 506, nor the 1'st 70 pulse either.
it turns out there is a icon at the top of the screen with a T in it for trigger. and it was
lining up with the first -70 pulse, and with the pulse having no side-lines its presence
was missed.
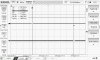
look above on the b/w LCD image and you can see this icon at the LE of the first
pulse on the CH 1 line. with a H=.002 sec spacing the top of this 96uS wide pulse
is narrow enough to be hidden by this icon.
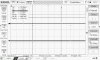
the material posted today is some 506 code that is well behaved. its output pulses
are shown on the scope screen image. the 70 and 10 pulses
emit with spacing = (ADRES) x (32uS) as coded. in this case ADRES is 10 hex for a
16x32 = 512 uS delay. and this is just the spacing seen on the 1054 screen image.
the ADRES is a result of the external pot and the amount of voltage on its output pin
that is read by the 506 AN2 input pin. you've seen this circuit before.
by the H=200us setting you can eyeball 512us between CH 1 TE to CH 2 LE.
and again 512 us from CH 2 TE to the 2'd CH 1 pulse's LE.
the careful reader will point out that the 2'd spacing , 10 to 70 is not the same as
70 to 10 on the engine. one is 60 deg or arc , and the other is about 300 deg.
ok , i fudged some. this was done to keep the signals all on the same scope screen image
with a small 200us H value. later , when the 506 and 508 are connected the delay from 10 to the next 70 will likely be increased. depending on how much 508 code has to run after
the -10 pulse is detected.
CH 1 is the simulated -70 deg pulse off the flywheel.
and CH 2 is the -10 deg pulse.
these 2 pulses represent all the information we get from the engine.
and it is enough for the 508 uC to determine when
to fire the spark according to the timing advance curve.
the code as a *.txt file was simply a faster way to post it. one sacrifices the line
numbers with this method. despite that though you can take it and re-label it
as a *.asm file and use the MPLAB Project Wizard and re-construct the project
from which it came. then print it out with line numbers if you so choose.