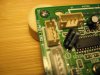
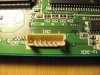
Sir Alektron . . . .
Isn't it great to have so ma a a a ny choices . . . now, just take yer' pick.
( HINT . . . . use same-same- or the 2nd-3rd or 14th down wire leaded radial units )
https://www.mouser.com/Passive-Comp...apacitors/_/N-5x76s?P=1yztzayZ1yo19p6Z1z0z7l5
SOLDERING . . . .
MY own preferred and highly effective modus'es operandi-muss-ess-es . . . . .
For the pulling or installation of a problematic component.. . . .
Pulling:
Orient the chassis / board so that the 2 tips of the installed capacitor are pointing straight up and that the board is level to the bench. That orientation will then let you place a dot of rosin flux onto each of the existing solder joints and feed in fresh 60/40 solder, until you achieve a much larger molten solder mass of each, with them being about the size of a 3/16 ths of an inch ball at each joint.
When those solder masses have been achieved, surfactal tension will hold the balls centered upon the pins.
You then start rapidly moving the soldering iron tip between the two molten solder masses. This leaves the free hand to move to the bottom side of the board and exert "micro" wiggles upon the component. At the proper amassed heat level the component will be felt to loosen and it can then be pulled straight downward to release from the board.
If you have either a multi level board or a terminal / ground plane that is laterally sapping heat away, you will eventually reach that heat threshold, where the part will loosen free from its solder bond.
In that manner, you only have only had to come up to that heat threshold, and thereby not having subjected the immediate mass of the board to any excessive heating.
Any failure to quickly achieve that could be blamed upon trying to use too low of a wattage of soldering iron.
A 50 or 60 watt iron, wherein you get in and out in a hurry, just about always works, whereas a 40 or less wattage of iron might not be able to deliver the required heat threshold.
You also want to use a well and continuously tinned iron tip.
INSTALL:
You have the now cooled solder balls at the connection holes. You get either a bamboo skewer with its sharpened end OR you can replicate that shape with an aluminum or stainless rod or from hardwood dowel stock. Since that solder won't stick to them.
Prep the new component by rosin flux coating of its terminals and then do a solder tinning its terminal/ lead.
You heat up one solder ball to its just molten state and insert just enough of the bamboo skewer from the bottom such that you will have left a dimple in the solder present at the bottom of the board.
Repeat for the other solder ball and its foil land.
You now have two dimples that you can "FEEL" for, with the end tips of your new component, to then position themselves down within the two cavities..
TIME to triple check the polarity of the SUUUUPER cap on its + to - terminals to be that they are going into the proper holes.
Place the board / chassis in the same positioning that the component was being in when pulled.
Place dots of rosin flux upon the solder balls and then start the same fast back and forth movement of the soldering iron tip between them until they both become molten.
Then you place the components lead tips resting within the earlier created solder divots, and being constantly pressed towards the board, the component should eventually move fully down within its mount holes at the lowest applied heat threshold .
Then you move to the top of the board and slope the board / chassis 45 degrees to heat a solder ball and drain off the excess solder to your irons tip, leaving the residual solder at that perfect " not too much-not too little " amount. Move to the other solder ball and do the same.
Move the board / chassis back to a level position and place a drop of rosin flux on the ball and heat and watch that mystical / magical flux, then fully enhance the solder flow and leave a perfectly re flowed solder joint.
Thassssssssssit . . . . .
73's de Edd
Last edited by a moderator:


")