Maker Pro
Maker Pro

Repairing a Premier Health Products PHP 2026 / 2027 Massage Chair

Hi again. I'm not clear on how deeply you want to dig into the electronics, but you can get a great initial view of much of the internals in two steps:
  • After unplugging the chair, stand behind it and gently flip it on its front so that the back of the chair is facing your ceiling. The chair is heavy, so you'll want to get the assistance of an additional person to prevent it from hitting your floor too hard.
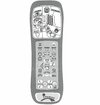
  • Once the chair is flipped and the back is facing the ceiling, there are 6 screws you can remove to lift off that cover to open up the back.
From there, you can make decisions concerning what you want to investigate, including (since you didn't say in your response above) checking the possibility that something is simply jammed around the rollers preventing them from freely moving up & down.

When you're all done your investigation and putting the cover back on, I've found I had to take extra time & effort to make sure I lined up the screw holes on the cover accurately so that the back cover can be snuggly replaced with all 6 screws going in as deeply as they're designed to do.
 
Thanks mfoster7, I will do what you say first and see what develops. Hoping for a simple fix!!
I may have to wait a bit until I start as we've just had a family emergency which will take me out of town until Mid to late March. Thanks again.
 
Hi PeeWee. When you get back in town, you might find one of the attached documents helpful. You said you're an old Avionics Electronics Tech, so perhaps something in one of them will help you pinpoint your chair's problem if it's not something simple/basic.

I believe I found these documents either earlier in this forum or elsewhere online. Anyway, there are six attached. I think the longest is only 8 pages.

I hope your family emergency isn't severe.
 

Attachments

  • diagnostic steps for 2026 & 2027 main PCB_Reduced_Size.pdf
    811.3 KB · Views: 0
  • main-PCB-board.pdf
    159 KB · Views: 0
  • PHP_2026-27-HOW_TO_REMOVE_PCB_boardassembly-replace.pdf
    385.8 KB · Views: 0
  • PHP2026_2027_technical_diagnostic_procedure_Pages_01-08.pdf
    889.9 KB · Views: 0
  • PHP2026_2027_technical_diagnostic_procedure_Pages_08-12.pdf
    898 KB · Views: 0
  • PHP2026_2027_technical_diagnostic_procedure_Pages_13-18.pdf
    736 KB · Views: 0
First, I'd like to thank everyone for the help. I installed a new toroidal transformer VPT48-5200 from Mouser Electronics in the PHP2026 today and it worked great!

I can add that since it is 24V AC on the output side, the blue and yellow wire ordering is not critical - just so you get 24V AC to each circuit. I suggest the following consolidated procedure:

1. Unplug the unit.

2. Disconnect the old transformer connector.

3. Cut the old transformer leads near the transformer and remove the old transformer.

4. Wire the connector to the inputs of the new transformer:
4.1 Transformer Blue and Violet to the Black Connector Lead
4.2 Transformer Gray and Brown to the White Connector Lead

5. Place new transformer in the chassis. Make sure you have some minimum clearance between the 12V transformer so they are not touching. You will need a couple washers to get it snug. Connect the input connector.

6. Connect the output side:
6.1 Transformer Red to either Yellow Lead
6.2 Transformer Black to the remaining Yellow Lead
6.3 Transformer Orange to either Blue Lead
6.4 Transformer Yellow to the remaining Blue Lead

7. Plug in the unit and test.

8. Chair assembly is the opposite of disassembly.

Thanks again for all the help from Kevin, Desertrider, and all. So glad to find a readily available toroidal transformer.

Cheers!
 
Last edited:
Top