Get familiar with the machine learning program Wekinator by creating your first simple machine learning task.
In this article, you are going to learn about what machine learning is and how we can use the Wekinator platform to do machine-learning-based projects. This article is just about setting up the environment for the machine-learning projects. In future articles, we will be talking about how you can use the microcontrollers (Arduino, Raspberry Pi) for these projects.
What is Machine Learning?
According to Wikipedia, “Machine learning is a field of computer science that gives computers the ability to learn without being explicitly programmed.”
So machine learning is about training the computer in such a way that it can perform some others tasks without the use of programming.
There are many platforms available for machine learning, and Wekinator is one of them. We will use the Wekinator platform and train it to perform different tasks.
What is Wekinator?
Wekinator is a platform for machine learning created by Rebecca Fiebrink in 2009. It allows you to use machine learning to make projects such as building musical instruments, creating computer listening systems, making gesture control systems, and other interactive projects.
We give the input to the Wekinator from other software, such as processing, through the serial port, and then we train it to control the output. The input will be such as the value of the X and Y coordinates. In this article, we will train the Wekinator to control the background color of the processing whenever the box in the other processing window is dragged.
Installing the Software
First of all, you need to download the Wekinator software.
After downloading, extract the ZIP file and install it in your computer.
You will also need a software called processing, through which we will give the input to the Wekinator. Download the latest version of processing.
Unzip it and install the setup.
Getting Started
After that, you need to go to the quick walkthrough page on the Wekinator website and you need to download one input and one output program from there to control the Wekinator. So we are going to download the on-screen mouse control as the input program and the continuous control of animation color as the output program.
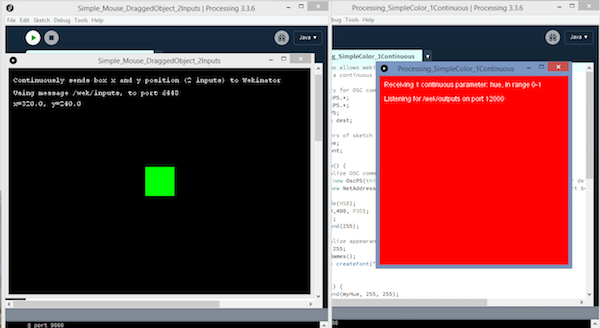
Run both the programs using processing software and you will see the two windows as shown below.
Now it’s time to train the Wekinator and control the output using it. So open the Wekinator and it should look as shown below.
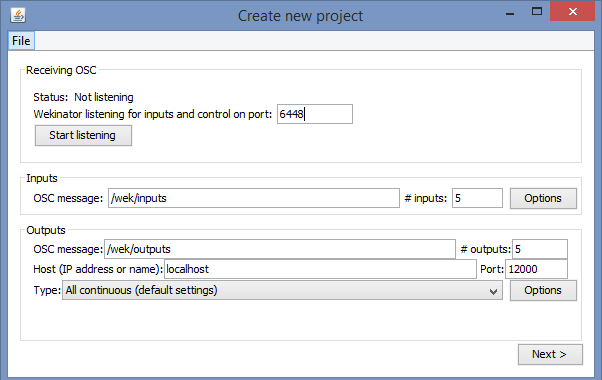
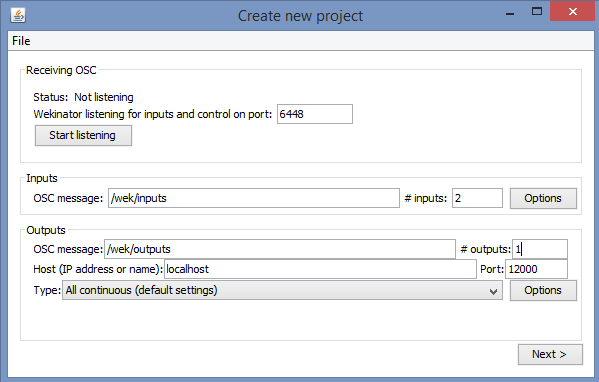
In this window, you just need to change inputs and outputs. Leave the other options as they are. We are going to give two inputs to the Wekinator and we will control one output from it.
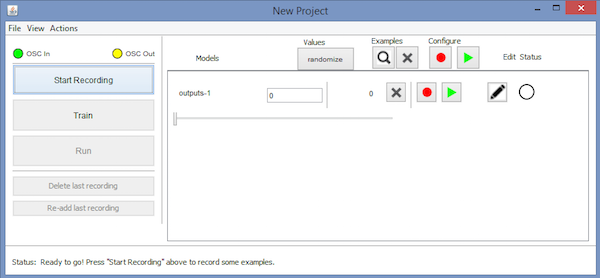
Click on “next” and you will see a new window as shown below.
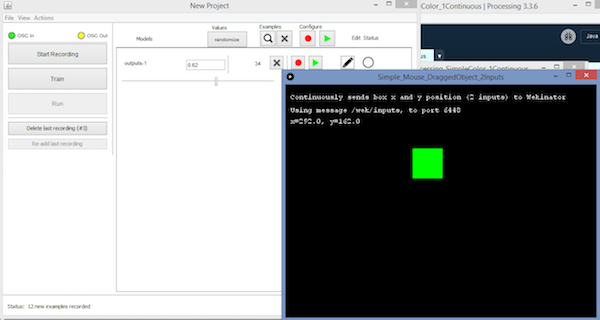
Go to the on-screen mouse control window and drag the green box near to the bottom left corner as shown below. In the Wekinator window, click on “randomize” and start recording for half a second.
Now drag the green box near the top center as shown below, and similarly, in Wekinator, click on “randomize” and start recording for half a second.
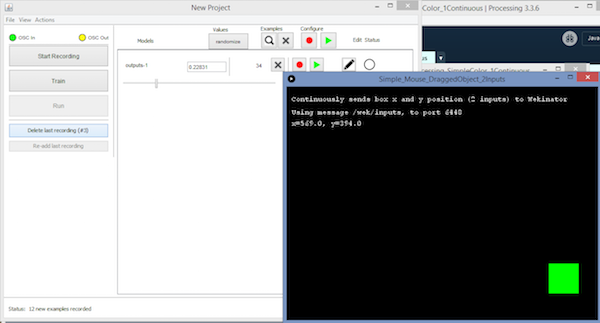
Now drag the green box near to the right bottom corner as shown below, and in Wekinator, click on “randomize” and start recording for half a second.
Now click on “Train” in the Wekinator window and then click “Run”. Now when you drag the box in the on-screen mouse control window, the background color in the continuous control of animation color window will change.
Conclusion
In this article, you just learned how you can use the Wekinator to do a simple machine learning task. In the upcoming articles, you will learn that how you can do the machine learning projects with microcontrollers (Arduino, Raspberry Pi) using the Wekinator platform.