Learn how you can use voice commands to create a simple interface with Wekinator and openFrameworks.
In this article, you will learn how you can control a simple user interface which could be used for building a game via voice commands and recognition using dynamic time warping and Wekinator.
We will give the input to Wekinator from the application made in openFrameworks. This application is known as MFCCs (Mel-frequency Cepstral Coefficients) and it records our voices and gives output to the Wekinator.
Wekinator will be trained according to the samples we send through the application and will send the output to Processing, which will control the game. This interface is made in processing and there is a square box that jumps and moves right or left according to the output from Wekinator.
Setting up Processing
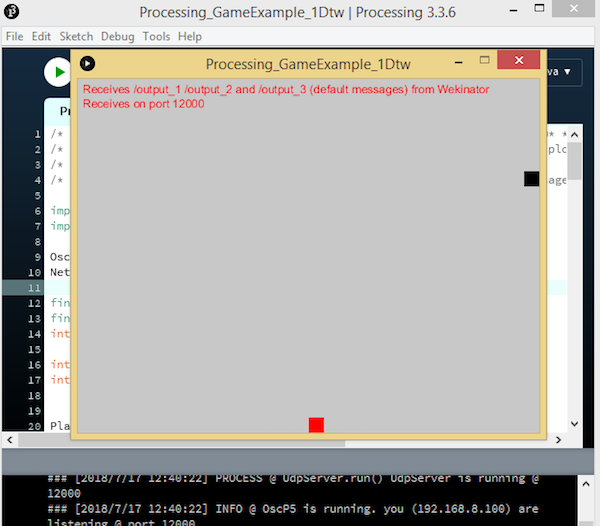
For Processing, we have a simple game that receives one DTW (dynamic time warping) output from Wekinator. In this interface, there is a square box that jumps and moves left or right according to the output it receives from Wekinator. The Processing sketch is available on Wekinator's example page.
Download the example titled Simple DTW-controlled Game, unzip the file, and run the sketch in Processing. The Processing window will look like this:
The Processing window after you download the sketch.
Setting up openFrameworks
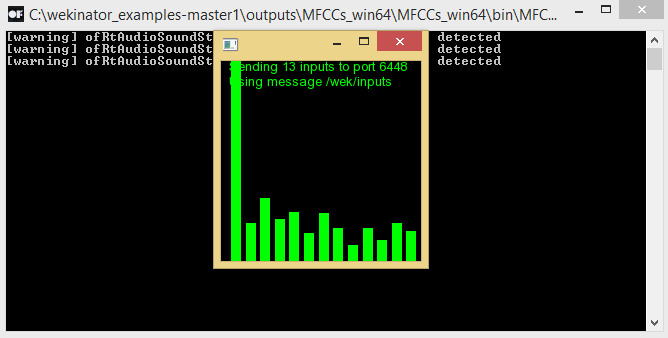
On the openFrameworks side, we have an application made in openFrameworks that is going to record our voice and provide outputs to Wekinator. It is also available on Wekinator's example page.
You can download either the executable version or the source code. If you want to run it through source code, you need to have openFrameworks installed on your system so that you can compile and run it. Otherwise, download the executable version, unzip the file, and run it. It will look like this:
The openFrameworks window.
Setting up Wekinator
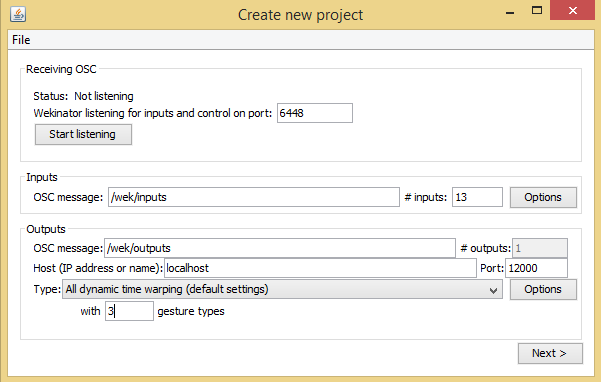
Now open Wekinator and update your settings to mimic the image below.
Start your new project by setting up Wekinator to mimic these settings.
Set the inputs to 13 and outputs to 1. Select the output type to all dynamic time warping with 3 gesture types. Leave all other settings as they are.
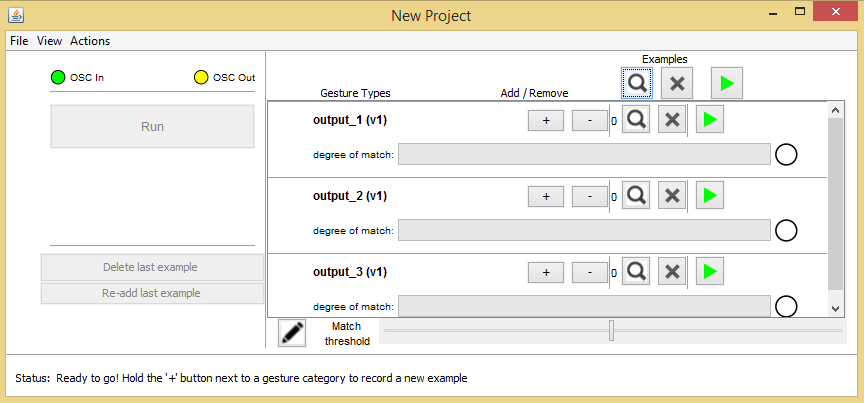
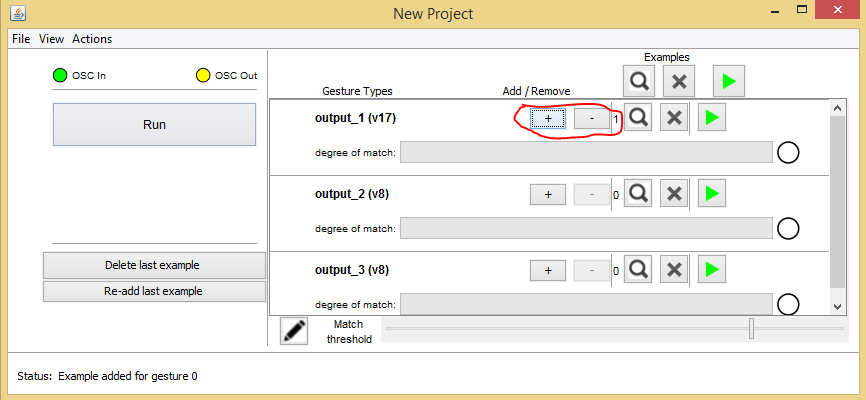
Now, click Next and you'll be brought to this window:
Click on the plus button on the right-hand side of output 1 and say "left" into your microphone. The output of this command will move the box to the left.
Record the command "left" for output 1.
Click on the plus button on the right-had side of output 2 and say "right" into your microphone. The output of this command will move the box to right.
Record the command "right" for output 2.
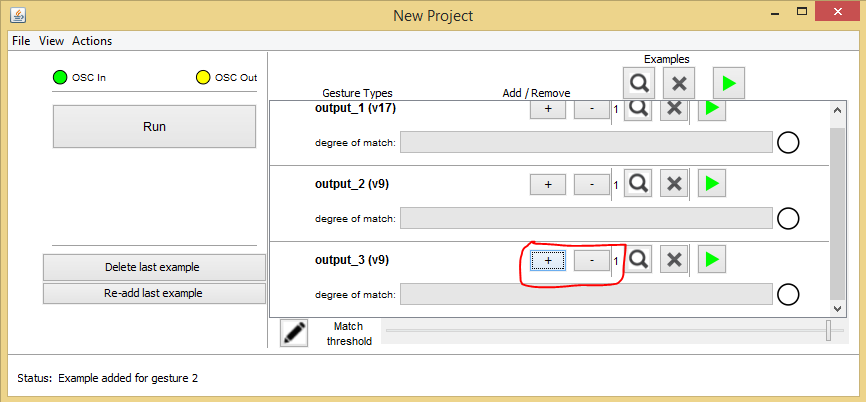
Click on the plus button on the right-hand side of output 3 and say "jump" into your microphone. The output of this command will make the box jump.
Record the command "jump" for output 3.
After recording the samples, click 'train' to train Wekinator according to the input and then click 'run'. Now when you say "left" the box will move left, when you say "right" the box will move right, and when you say "jump" the box will jump.
Related Articles