Learn how you can train Wekinator to control sound pitch using sliders in Processing and Chuck.
This article will teach you how to control the pitch of sound using ChucK programming language, Processing, and Wekinator.
We will use the on-screen slider in Processing to send X and Y coordinate values to Wekinator. Wekinator will be trained according to the samples sent and send back outputs to ChucK, changing sound pitches.
If you're unfamiliar with the machine learning program Wekinator, read how to get the software set up on your computer.
Setting up Processing
The Processing sketch for sending the input to the Wekinator software is available on the examples page of the official Wekinator website.
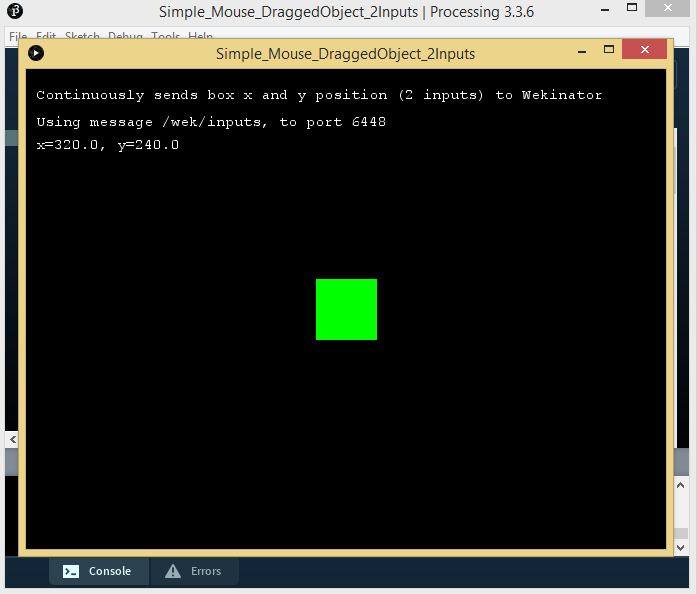
From the Wekinator examples page, download the sketch titled ‘simple mouse dragged object’ file under Processing (animation, screen-based input) category. Then unzip the file and run the sketch.
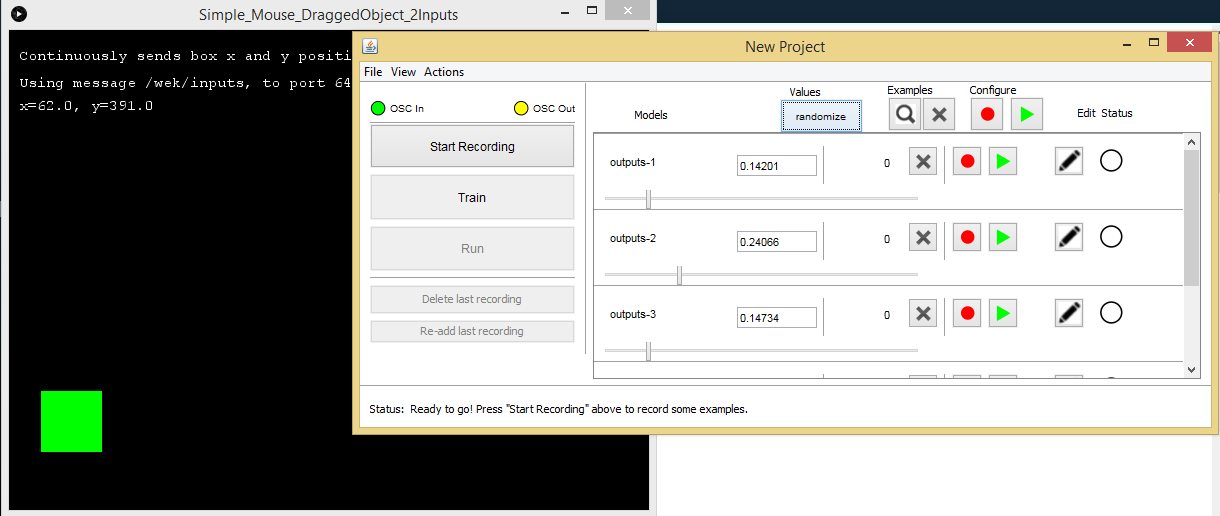
The Processing window will look like this:
The Processing window in Wekinator.
Setting up ChucK
ChucK is a programming language for real-time sound synthesis and music creation. It is open-source and freely available on MacOS X, Windows, and Linux platforms. ChucK presents a unique time-based, concurrent programming model that's precise and expressive (we call this strongly-timed), dynamic control rates, and the ability to add and modify code on-the-fly.
The code for this project is available on the Wekinator website. From there, download the ‘FM Synthesis’ suitable for the operating system that you are using.
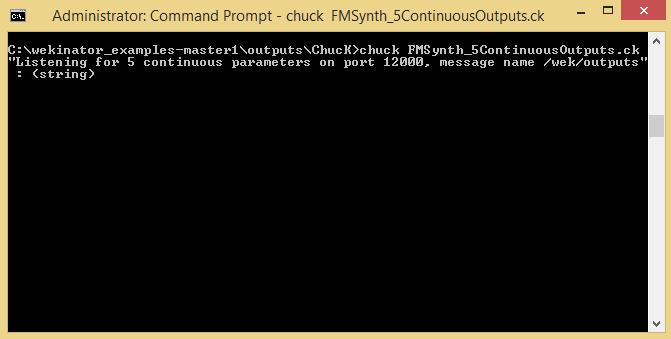
Open the terminal and go to the directory where you placed it and write the following code into the window:
chuck FMSynth_5ContinousOutputs.ck
The ChucK program will wait for the output from the wekinator and upon receiving the output, will change the pitch of sound accordingly.
Setting up Wekinator
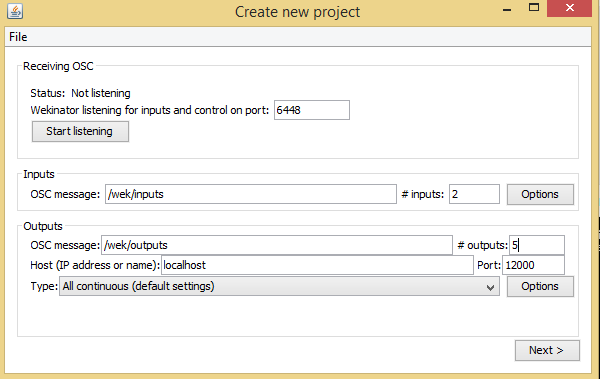
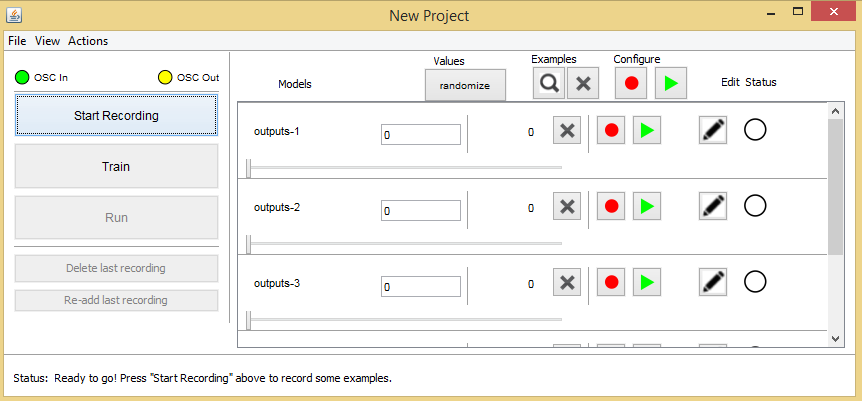
Open Wekinator and copy the settings shown in the figure below. Set the inputs to 2 and outputs to 5. Leave all other settings as default.
Set up the Wekinator projects window as show above.
Wekinator will send 5 different outputs to the ChucK program and in response, ChucK will produce different sounds according to the Wekinator output.
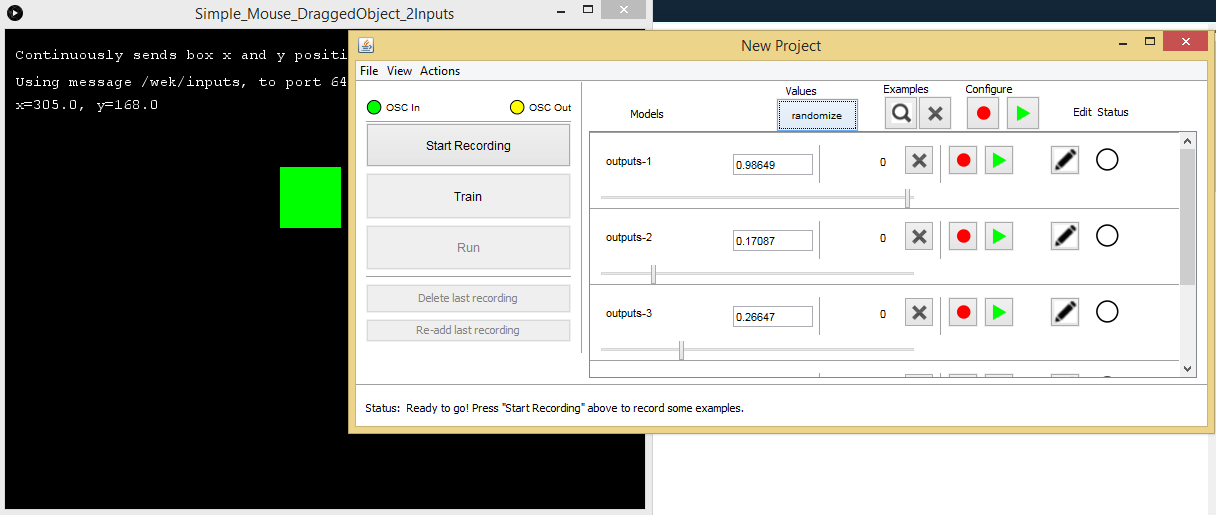
Select the ‘Next’ button to display a new window like the one shown below.
Once the project is set up, it's time to record our outputs! Drag the green box in the Processing window to any place. Click ‘randomize’ and start the recording for a second to record some samples.
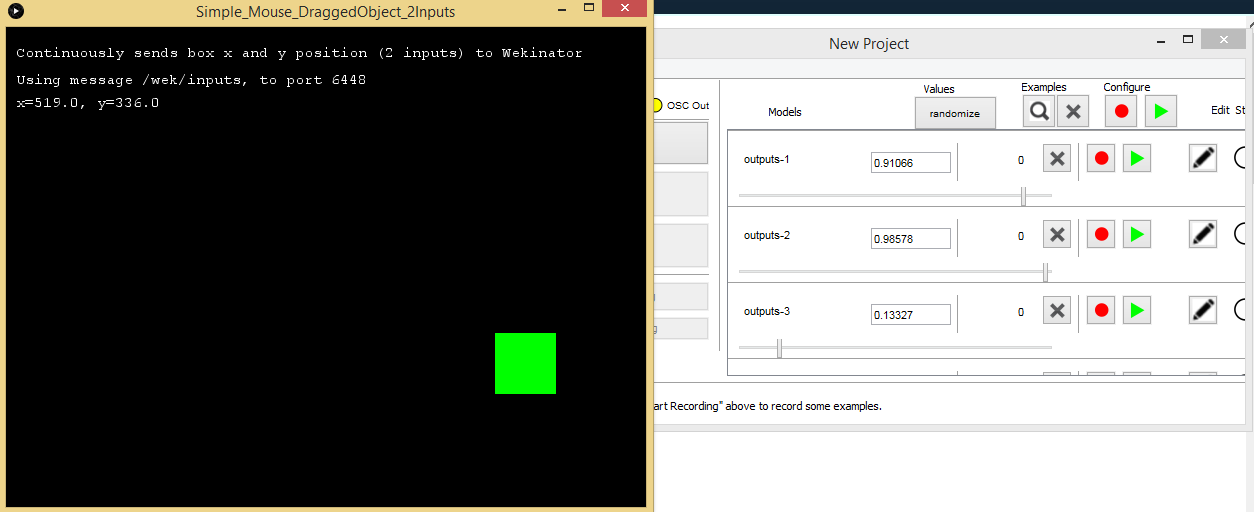
Repeat the process two times. Each time to another spot and click ‘randomize’ and start the recording for half a second.
We have recorded the samples for three different places in the Processing window. You can send more samples to Wekinator by dragging the green box in the Processing window at some other spot and then recording these samples on Wekinator.
After recording all of your samples, click on ’Train’ to train Wekinator according to the inputs, then click ‘Run’.