Learn how to mobilize a servo motor through voice commands using the Wekinator software.
In this article, we’ll be learning to use the machine learning software Wekinator while connected to an Arduino to move a servo motor through voice commands. Using an executable file from the Wekinator software, we’ll send audio outputs to the Wekinator for it to process. Following processing, the output will reach the Arduino and influence the servo motor’s mobility.
How to Run the Audio File in the Wekinator Software
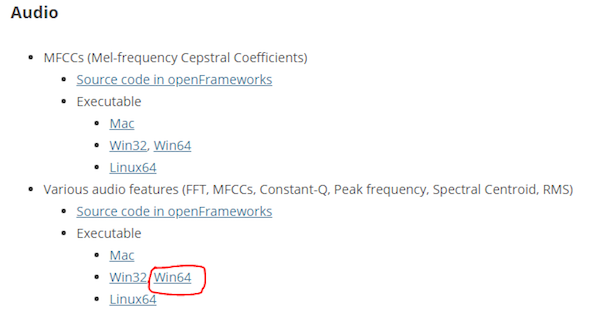
First, we’ll download the executable file from a Wekinator examples page and run it.
Note: Download the file version corresponding with your operating system, e.g. the 64-bit version if that’s the operating system you use. If you’re having any trouble reference the screenshot below.
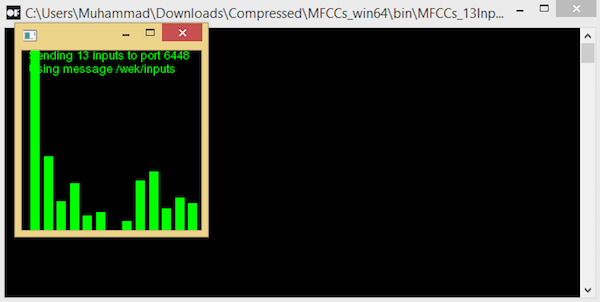
The folder you’ll need to download will be compressed, unzip it, and navigate to the bin folder, where you’ll run the MFCCs_13Inputs_RUN_THIS.exe file within it. After running the file, two windows will open as shown below.
Loading the Project Details into the Wekinator Software
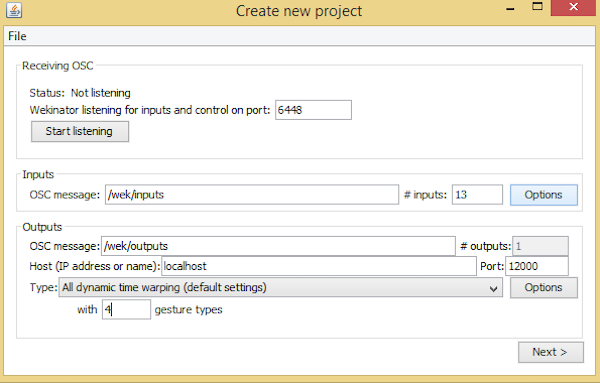
The next step is to set up a new project in the Wekinator. First, set the input values to 13 in the Wekinator software because the program we’ll be running is sending 13 inputs at port 6448. Next set the output type to ‘all dynamic time warping’ with 4 gesture types that will act as the 4 voice commands the Wekinator will ultimately process.
The 'all dynamic time warping setting' is a special mode in the Wekinator allowing it to compare two different voice sequences. E.g., if you say: “Turn the LED on” the Wekinator is capable of measuring the similarity between the two voice sequences, though they vary in speed/time.
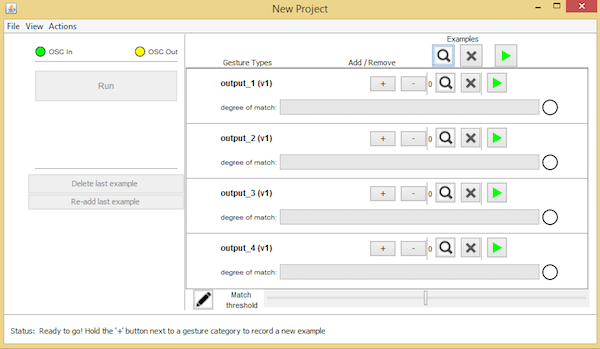
After clicking on the next button, you will see a new window as shown below.
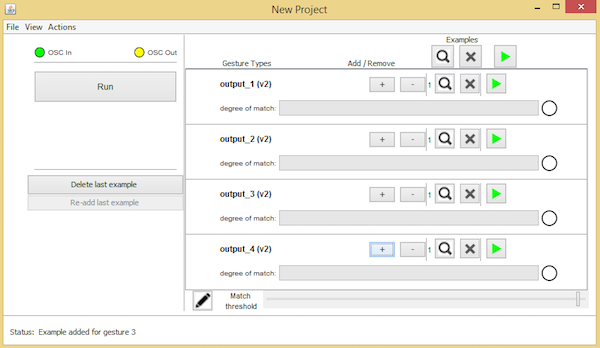
You’ll need to click on the plus button in front of output_1 and speak any phrase or word into the program. ‘right’ I chose to speak ‘right’ because I’ve set the servo to move right for this output. You’ll follow the same pattern for output_2, output_3, and output_4 for designating the voice commands “center,” “left,” and “stop” respectively.
The processed Wekinator’s output code is sent to the Arduino at this point in the project.
import vsync.*; // Importing the library that will help us in sending and receiving the values from the Arduino
import processing.serial.*;  // Importing the serial library

// Below libraries will connect and send, receive the values from Wekinator
import oscP5.*;
import netP5.*;

// Creating the instances
OscP5 oscP5;
NetAddress dest;
ValueSender sender;

// This variable will be syncronized with the Arduino and it should be same on the Arduino side.
public int output;

void setup()
{
  // Starting the serial communication, the baudrate and the com port should be same as on the Arduino side.
  Serial serial = new Serial(this, "COM10", 19200);
  sender = new ValueSender(this, serial);

  // Synchronizing the variable as on the Arduino side.
  sender.observe("output");


  // Starting the communication with wekinator. listen on port 12000, return messages on port 6448
  oscP5 = new OscP5(this, 12000);
  dest = new NetAddress("127.0.0.1", 6448);
}

//This is called automatically when OSC message is received
void oscEvent(OscMessage theOscMessage) {
 if (theOscMessage.checkAddrPattern("/output_1")==true)
 {
        output = 1;
 }
 else if (theOscMessage.checkAddrPattern("/output_2")==true)
 {
     output = 2;
 }
 else if (theOscMessage.checkAddrPattern("/output_3") == true)
 {
     output = 3;
 }
 else if (theOscMessage.checkAddrPattern("/output_4") == true)
 {
     output = 4;
 }
 else
 {

 }
}

void draw()
{
  //  Nothing to be drawn for this example
}
The Arduino will receive the processed output and move the servo accordingly.
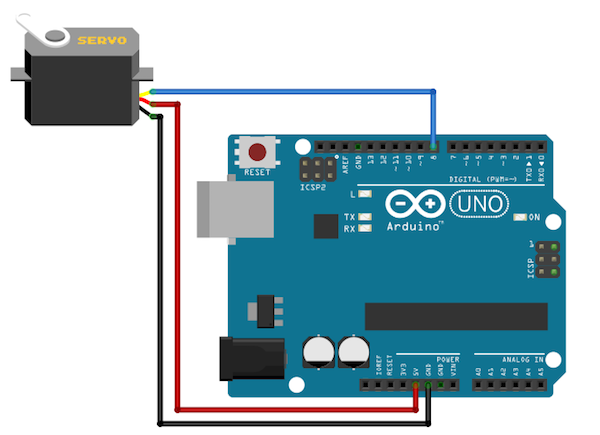
Before uploading the code, connect the servo with the Arduino as shown below.
Circuit diagram showing how to connect servo with Arduino
#include <VSync.h>    //Including the library that will help us in receiving and sending the values from processing
ValueReceiver<1> receiver;  /*Creating the receiver that will receive 1 value.
Put the number of values to synchronize in the brackets */
#include <Servo.h>   //including the servo library
Servo sg90;          //including a variable for servo named sg90

/* The below variable will be synchronized in the processing
and they should be same on both sides. */
int output;
int angle = 90;
int servo_pin = 8;

void setup()
{
  /* Starting the serial communication because we are communicating with the
  Processing through serial. The baudrate should be same as on the processing side. */
  Serial.begin(19200);
  sg90.attach(servo_pin);

  // Synchronizing the variable with the processing. The variable must be int type.
  receiver.observe(output);
}

void loop()
{
  // Receiving the output from the processing.
  receiver.sync();

  // Matching the received output to move the servo
  if (output == 1)
  {
    if(angle > 5){
      sg90.write(angle);
      angle--;
      delay(100);
    }
  }
  else if (output == 2)
  {
    angle = 90;
    sg90.write(angle);
  }
  else if (output == 3)
  {
    if(angle < 180){
      sg90.write(angle);
      angle++;
      delay(100);
    }
  }
  else if (output == 4)
  {
  }
}
How to Run the Code Through Wekinator
You’ll first upload the code from the Arduino IDE then run it in the processing software.
At this point, the servo should move when you use a voice command. If you say, “right” the servo will move right for 90 degrees. If you say “left” the servo will move left until it reaches 180 degrees. If you need to stop the servo from moving completely, simply say, “stop.”
Check out the video below to see the end result of this project.
If you feel that the servo’s movements aren’t accurate enough, try further customizing the values used in this project, and enjoy exploring new ways to use the Wekinator software.