Looking for an Arduino Uno alternative? Try out STMicroelectronics’s STM32 Nucleo-L476 microcontroller!
After the Arduino Uno’s debut and subsequent popularity, many companies quickly came up with their own takes on it due to its open-source nature. While some were clones, others expanded upon the capabilities of Arduino’s original board and design. One such board is the Nucleo-L476.
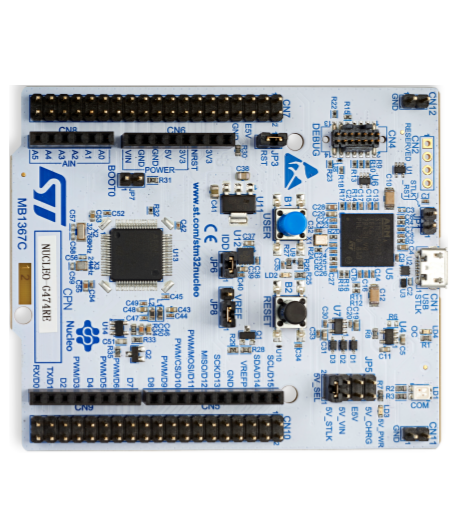
A Nucleo-64 board without the STLink debugger portion. Image courtesy of STMicroelectronics(PDF).
I recently tried out STMicroelectronics’s STM32 Nucleo-L476 along with the BHKGVJGJVKG expansion board and was surprised by their combined capabilities. Although I already covered my favorite feature of the STM32 family — one-click code generating — in the STM32CubeIDE tutorial, there are still plenty of other promising elements to utilize in the board itself.
From my perspective, the best features of the Nucleo are its compatibility with other boards’ expansions and the simplicity of programming it. In this tutorial, I’ll show you how easy it is to get the board up and running.
STM32 Nucleo-L476 Hardware
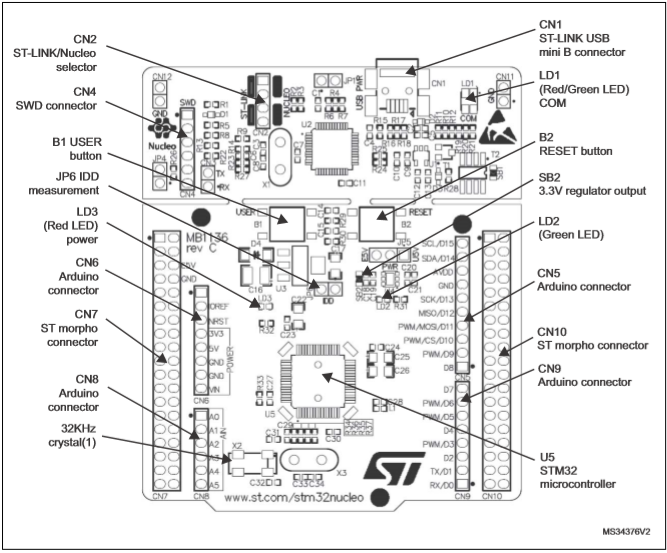
Let’s start by taking a look at the Nucleo-L476’s main hardware features, including it’s MCU, USB connector, and shield compatability.
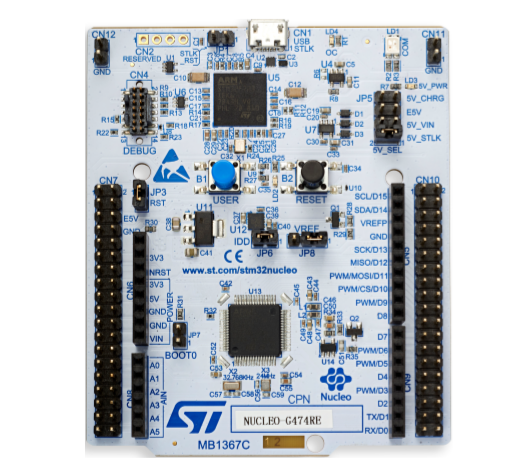
Hardware as viewed from the front of the board, including the removable STLink debugger (top). Image courtesy of STMicroelectronics
The STM32L4 MCU
This board’s MCU the STM32L4 is one of the ultra-low-power microcontrollers offered by STMicroelectronics featuring a Cortex-M4 processor with a speed of 80MHz and a flash of 1MB. It is designed for IoT projects that require more I/O pins and a 32-bit processor for data acquisition.
ST-LINK
All Nucleo-64 boards, including the Nucleo-L476, employ their integrated ST-LINK/V2-1 debugger as removable mini-boards. Even if removed, it retains the ability to program the main board if reconnected with jumper wires between CN4 and the corresponding SWD signals available on the ST morpho connector.
Shield Compatibility
The STM32 Nucleo board shares its pinout with the Arduino Uno, making it compatible with Arduino Uno shields. It also features ST morpho headers for STMicroelectronics’s own expansion boards.
How to Program the Nucleo
Once the correct drivers are installed, the Nucleo shows up as an Mbed board since it is Arm Mbed Enabled compliant. It can, of course, be programmed with Mbed’s IDE which is similar to the Arduino IDE, or from the STM32CubeIDE.
The Mbed IDE is easy to use, simple, and available online. It is great for quickly prototyping ideas, or modifying existing projects on the go. While the Cube IDE may be a bit bulkier than its Mbed counterpart, I find that the number of time-saving features built into it are worth the installation.
Even with a plethora of libraries available, a graphical interface that assigns pins their different functions, and the fact that Cube is built upon the popular Eclipse IDE all improving the development process, the automatically generated code is what ultimately led to my decision of downloading and installing STM32CubeIDE.
However, if you feel more comfortable with the Arduino IDE, that could be your best option. In the end, you can pick from a wide variety of IDEs.
More Information about the Nucleo-L476
More about this board, including a full datasheet, Gerber files, schematics, and other files are available from the Nucleo Resource Page.