Learn all about Robot Operating System 2, including how it's used and how it differs from the original ROS.
Robot Operating System (ROS) has long been one of the most widely used robotics middleware in academia and sparingly in the industry. While the huge robotics community has been contributing to new features for ROS 1 (hereafter referred to as ROS in this article) since it was introduced in 2007, the limitations in the architecture and performance led to the conception of ROS 2 which addresses these issues. This article covers comparisons between ROS 2 and ROS, introduces ROS 2 concepts, and it’s basic uses.
Why is ROS 2 so Important?
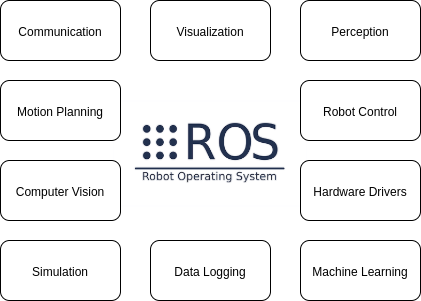
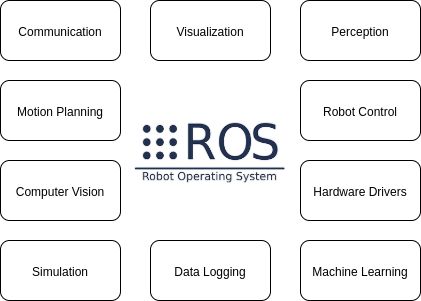
The software stack for any robot platform needs several software tools like hardware drivers, networking modules, communication architecture, and several robot algorithms. ROS has all these tools under one umbrella so developers do not need to reinvent the wheel.
ROS is more than just a middleware and the availability of umpteen solutions and packages for robot navigation, perception, control, motion planning, simulation, and more makes ROS impossible to do away with.
The ROS Feature Umbrella (Image Source - Original)
However, the architecture and features in the skeletal framework for ROS do not meet the demands of the rapidly evolving robotics industry today. ROS 2 was developed with an enhanced architecture feasible for use in the industry and academia. To avoid deprecation of the current applications developed with ROS, ROS 2 was not developed as an update to ROS, but as software to run alongside the existing version.
Limitations of ROS
There are several feature requirements that ROS architecture fails to accommodate. The most important limitations of ROS are:
- ROS does not support multiple robots with the same master node.
- ROS inherently does not support real-time operation and thus not preferred for time-critical applications.
- ROS needs high-compute resources and network connectivity on-board for the best performance.
- Package management on deployed robots is limited.
- Monitoring, logging, analytics and maintenance tasks for multiple robots are difficult in commercial settings.
- Multi-robot/fleet management and interaction is not possible.
For these reasons, ROS 2 was introduced with a revamped architecture and enhanced features and is being rapidly adopted in the robotics community. It is still in its infancy and several companies and developers have been contributing towards porting the existing packages to ROS 2 compatibility.
ROS 1 vs. ROS 2
ROS | ROS 2 |
|---|
Uses TCPROS (custom version of TCP/IP) communication protocol | Uses DDS (Data Distribution System) for communication |
Uses ROS Master for centralized discovery and registration. Complete communication pipeline is prone to failure if the master fails | Uses DDS distributed discovery mechanism. ROS 2 provides a custom API to get all the information about nodes and topics |
ROS is only functional on Ubuntu OS | ROS 2 is compatible with Ubuntu, Windows 10 and OS X |
Uses C++ 03 and Python2 | Uses C++ 11 (potentially upgradeable) and Python3 |
ROS only uses CMake build system | ROS 2 provides options to use other build systems |
Has a combined build for multiple packages invoked using a single CMakeLists.txt | Supports isolated independent builds for packages to better handle inter-package dependencies |
Data Types in message files do not support default values | Data types in message files can now have default values upon initialization |
roslaunch files are written in XML with limited capabilities | roslaunch files are written in Python to support more configurable and conditioned execution |
Cannot support real-time behavior deterministically even with real-time OS | Supports real-time response with apt RTOS like RTPREEMPT |
All the differences mentioned above justify the development of ROS 2 which has the potential to address all limitations and pain points of ROS experienced in the industry and academia. It opens the path for more widespread adoption of ROS 2 in the industry which had larger concerns around the flexibility, extensibility, real-time behavior, and safety about ROS.
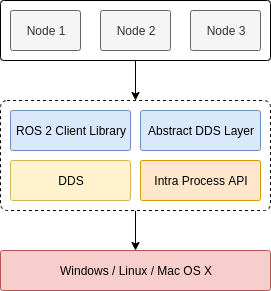
ROS 2 Architecture Overview (ImageSource - Original)
Getting Started With ROS 2
The elaborate steps for ROS 2 installation using sources or binaries can be found from the official ROS website. It is fairly straightforward and installation using binaries is recommended for default path and symlink configuration. For completeness, this article shall discuss the steps on Ubuntu 16.04 Xenial Xerus.
1. Add ROS 2 apt repositories to the system and authorize the GNU Privacy Guard (GPG) apt keys.
~$ sudo apt update && sudo apt install curl gnupg2 lsb-release
~$ curl -s https://raw.githubusercontent.com/ros/rosdistro/master/ros.asc | sudo apt-key add -
2. Add the repository to the sources.
~$ sudo sh -c 'echo "deb [arch=amd64,arm64] http://packages.ros.org/ros2/ubuntu `lsb_release -cs` main" > /etc/apt/sources.list.d/ros2-latest.list'
~/Downloads/ros2-crystal-linux-x86_64.bz2
~$ mkdir - p ~/ros2_crystal && cd ros2_crystal
~$ tar xf ~/Downloads/ros2-crystal-linux-x86_64.tar.bz2
4. Install and initialize rosdep (a command-line tool to install system dependencies for software being installed from source).
~$ sudo apt update
~$ sudo apt install -y python-rosdep
~$ sudo rosdep init # if already initialized you may continue
~$ rosdep update
5. Install the various dependencies using rosdep.
~$ CHOOSE_ROS_DISTRO=crystal # or bouncy
~$ rosdep install --from-paths ros2-linux/share --ignore-src --rosdistro $CHOOSE_ROS_DISTRO -y --skip-keys "console_bridge fastcdr fastrtps libopensplice67 libopensplice69 osrf_testing_tools_cpp poco_vendor rmw_connext_cpp rosidl_typesupport_connext_c rosidl_typesupport_connext_cpp rti-connext-dds-5.3.1 tinyxml_vendor tinyxml2_vendor urdfdom urdfdom_headers"
6. Install Python libraries and source the ROS installation.
~$ sudo apt install -y libpython3-dev
~$ source ~/ros2_crystal/ros2-linux/setup.bash
The machine should now be ready to use ROS 2 with all the basic packages and the Rviz simulation platform.
Similar to ROS, ROS 2 uses development location workspaces. ROS 2 allows users to have multiple workspaces for independent development against different versions of ROS 2, different packages and different build systems. It is important that the setup files are sourced in the shell to access ROS 2(packages, commands or launch files etc).
As ROS 2 can be interacted with over the network, each machine installation of ROS 2 needs a unique domain ID for identification and to avoid conflicts between programs. Steps to set up these configurations in different OS environments can be found on the ROS website.
Graph concepts as topics, publishers, subscribers, nodes, messages, and launch files are consistent across ROS and ROS 2. However, implementation and use have changed subtly. As the ROS Master has been deprecated, ROS 2 nodes advertise their creation and deletion to other nodes via the middleware for interaction.
Running a ROS 2 Package
The ROS 2 source ships numerous packages with examples for publisher and subscriber nodes, visualization, and service clients. The software is under heavy development and at the moment, the best tools like MoveIt from ROS have not yet been ported to stable releases.
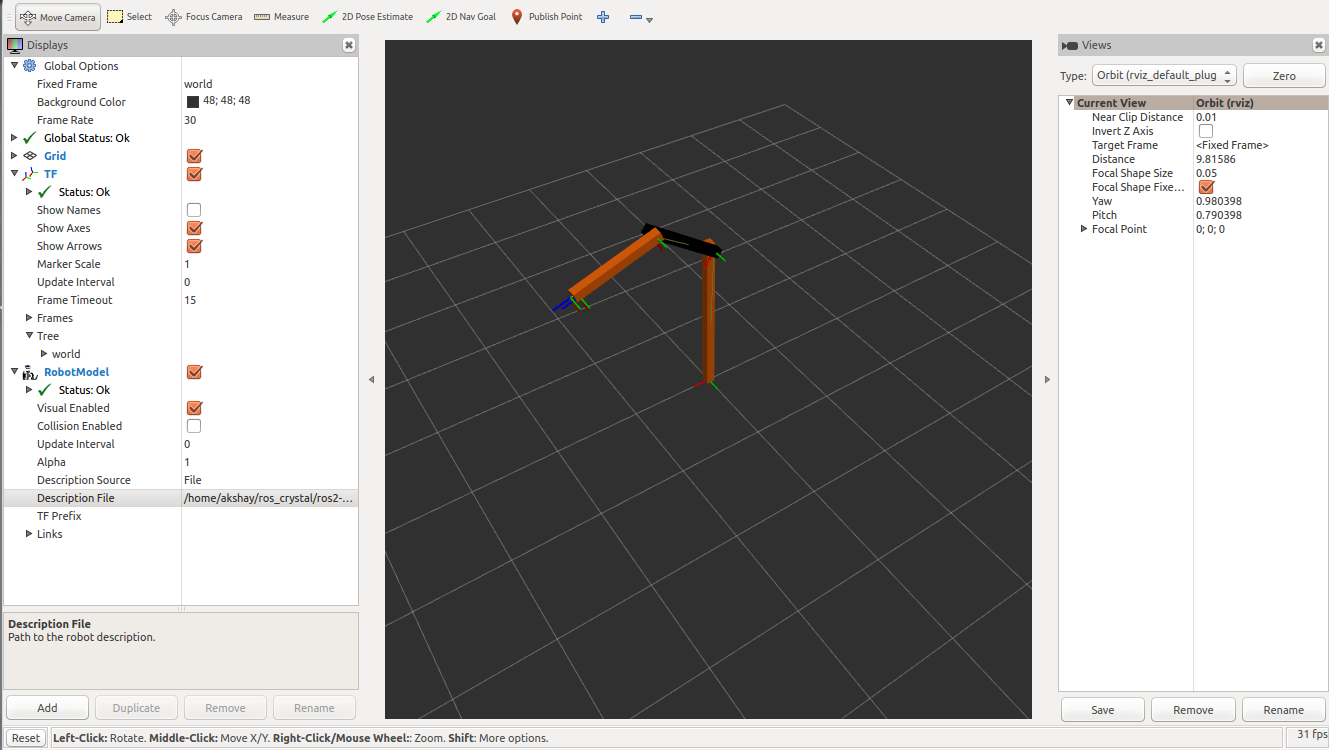
The Rviz simulation platform ships along with the ROS 2 installation and we will use it here to visualize a 3-DOF robot manipulator arm and diagnose the different topics and data being published.
1. Launch the file.
~$ source ~/ros2_crystal/ros2-linux/setup.bash
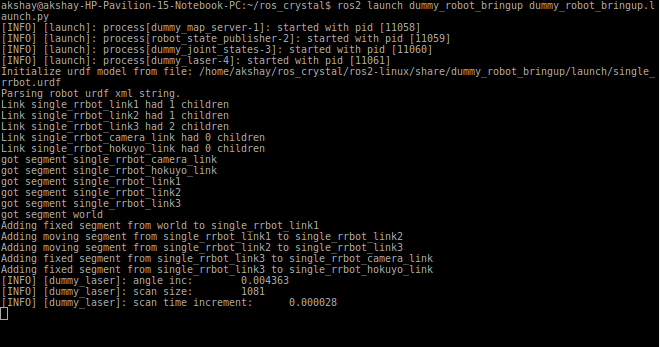
~$ ros2 launch dummy_robot_bringup dummy_robot_bringup.launch.py
You may notice, as mentioned earlier, the launch file is a Python file and not an XML. If you investigate the file, you can see that the file launches multiple nodes: dummy_map_server, robot_state_publisher, dummy_joint_states, dummy_lasers.
Terminal output logs with URDF model parsing messages (Image Source - Original)
2. After the nodes have been launched, launch the Rviz simulator.
3. See the current list of active nodes and the topics to which messages are being published.
ros2 topic list
ros2 node list
List of active nodes and topics (Image Source - Original)
4. Configure Rviz with the correct frame. Select the world frame from the list of frames in the Global Options on the Displays panel.
5. Use the Add button on the bottom left and select TF and Robot Model from Create Visualization -> By display type options.
6. For the Robot Model option, you can see the URDF model using two options.
- Select Topic for Description Source and /robot_description to visualize.
- Select File for Description Source and browse to the URDF file to visualize.
Final view of the Rviz simulator (Image Source - Original)
ROS 2 has a lot of promising features to serve as a more emphatic tool for robotics software development than its predecessor ROS 1. The addition of real-time support makes it suitable for time-critical and high-performance systems. Additionally, supporting platforms like the Docker makes ROS a very commercially viable, deployable, and extensible tool.
