Learn how to convert and visualize an image and video in different color spaces using OpenCV and Raspberry Pi.
Images are stored in memory in different color spaces. Color space is a combination of a color model and a mapping function. There are more than 150 color space conversion methods available in OpenCV, and it is very easy to convert from one to another.
In this post, we will convert and visualize an image and video in different color spaces. After that, we will track a colored object using OpenCV on Raspberry Pi.
BGR Color Space
BGR color can be understood by thinking of it as all the possible colors that can be made from three colors: blue, green, and red. So, the image in the BGR color space is a linear combination of three different channels: blue, green, and red.
Pixel intensity of each channel in this color space ranges from 0 to 255. You have 256 different shades of red, green, and blue. Mixing these colors in different proportions gives you your desired color.
Thus, the number of possibilities for one color represented by a pixel is approximately 16 million [255 x 255 x 255]!
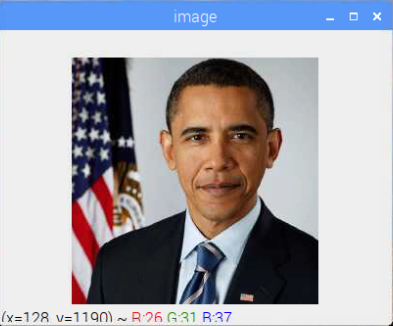
OpenCV Default Color Space
Here is the default color space in which OpenCV reads an image:
import cv2

image = cv2.imread('obama.jpg')

cv2.imshow('image', image)

cv2.waitKey(0)
cv2.destroyAllWindows()
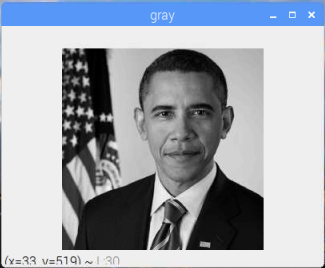
Grayscale Images
Grayscale images only contain a single channel so only the intensity (how bright a color is) information is required. Pixel intensities in this color space are represented by values ranging from 0 to 255. The higher the value, the greater the intensity. Thus, the number of possibilities for one color represented by a pixel is 256.
OpenCV Default Grayscale
import cv2

image = cv2.imread('obama.jpg')
gray = cv2.cvtColor(image, cv2.COLOR_BGR2GRAY)

cv2.imshow('gray', gray)

cv2.waitKey(0)
cv2.destroyAllWindows()
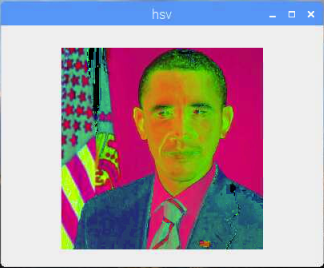
HSV Color Space
Like the BGR color space, the HSV color space also has three channels: hue, saturation, and value. Hue represents the dominant wavelength, saturation represents the shades of color, and value represents the intensity.
Sometimes, HSV can also be known as HSB (hue, saturation, brightness). HSV is often used by artists because it is often more natural to think about a color in terms of hue and saturation than in terms of additive or subtractive color components.
HSV is basically a rearrangement of RGB in a cylindrical shape. The HSV ranges are:
- 0 > H > 360 ⇒ OpenCV range = H/2 (0 > H > 180)
- 0 > S > 1 ⇒ OpenCV range = 255*S (0 > S > 255)
- 0 > V > 1 ⇒ OpenCV range = 255*V (0 > V > 255)
OpenCV Default HSV
import cv2

image = cv2.imread('obama.jpg')
hsv = cv2.cvtColor(image, cv2.COLOR_BGR2HSV)

cv2.imshow('hsv', hsv)

cv2.waitKey(0)
cv2.destroyAllWindows()
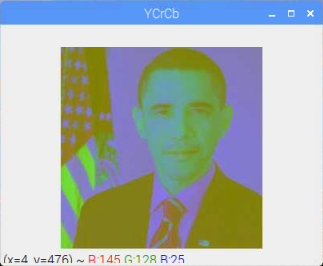
YCrCb Color Space
YCrCb (or YCbCr) color space is widely used in video and image compression schemes. Y represents luminance (sometimes you can see ‘Y’ as luma), Cr represents red-difference and Cb represents blue-difference. Cr, Cb are chroma components. The YCrCb ranges are:
- 0 > Y > 255
- 0 > Cr > 255
- 0 > Cb > 255
OpenCV Default YCrCb
import cv2

image = cv2.imread('obama.jpg')
YCrCb = cv2.cvtColor(image, cv2.COLOR_BGR2YCrCb)

cv2.imshow('YCrCb', YCrCb)

cv2.waitKey(0)
cv2.destroyAllWindows()
LAB
In this color-opponent space, L represents lightness, A represents color component ranging from green to magenta and B represents color component ranging from blue to yellow. The LAB ranges are:
- 0 > L > 100 ⇒ OpenCV range = L*255/100 (1 > L > 255)
- -127 > a > 127 ⇒ OpenCV range = a + 128 (1 > a > 255)
- -127 > b > 127 ⇒ OpenCV range = b + 128 (1 > b > 255)
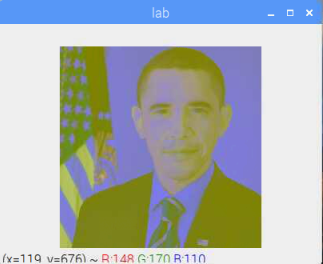
OpenCV Default LAB
import cv2

image = cv2.imread('obama.jpg')
lab = cv2.cvtColor(image, cv2.COLOR_BGR2LAB)

cv2.imshow('lab', lab)

cv2.waitKey(0)
cv2.destroyAllWindows()
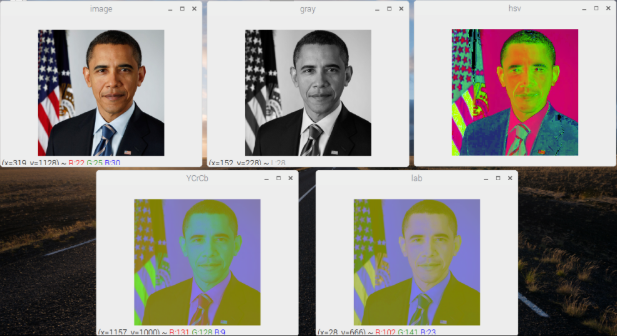
Visualizing Images in Different Color Spaces
Let’s write a code in Python that will convert and show us an image in different color spaces.
import cv2

image = cv2.imread('obama.jpg')
gray = cv2.cvtColor(image, cv2.COLOR_BGR2GRAY)
YCrCb = cv2.cvtColor(image, cv2.COLOR_BGR2YCrCb)
hsv = cv2.cvtColor(image, cv2.COLOR_BGR2HSV)
lab = cv2.cvtColor(image, cv2.COLOR_BGR2LAB)

cv2.namedWindow('image', cv2.WINDOW_NORMAL)
cv2.namedWindow('gray', cv2.WINDOW_NORMAL)
cv2.namedWindow('hsv', cv2.WINDOW_NORMAL)
cv2.namedWindow('YCrCb', cv2.WINDOW_NORMAL)
cv2.namedWindow('lab', cv2.WINDOW_NORMAL)

cv2.imshow('image', image)
cv2.imshow('gray', gray)
cv2.imshow('hsv', hsv)
cv2.imshow('YCrCb', YCrCb)
cv2.imshow('lab', lab)

cv2.waitKey(0)
cv2.destroyAllWindows(
The same image in different color spaces.
Visualizing Videos in Different Color Spaces
Now, let’s write a code that will convert frames captured from Picamera in different color spaces and will show us on different output windows.
import cv2
from picamera.array import PiRGBArray
from picamera import PiCamera
import numpy as np

camera = PiCamera()
camera.resolution = (640, 480)
camera.framerate = 30
rawCapture = PiRGBArray(camera, size=(640, 480))

for frame in camera.capture_continuous(rawCapture, format="bgr", use_video_port=True):
	image = frame.array

	gray = cv2.cvtColor(image, cv2.COLOR_BGR2GRAY)
	hsv = cv2.cvtColor(image, cv2.COLOR_BGR2HSV)
	YCrCb = cv2.cvtColor(image, cv2.COLOR_BGR2YCrCb)
	lab = cv2.cvtColor(image, cv2.COLOR_BGR2LAB)

	cv2.imshow("image", image)
	cv2.imshow("gray", gray)
	cv2.imshow("hsv", hsv)
	cv2.imshow("YCrCb", YCrCb)
	cv2.imshow('lab', lab)

	key = cv2.waitKey(1)
	rawCapture.truncate(0)
	if key == 27:
		break
cv2.destroyAllWindows()
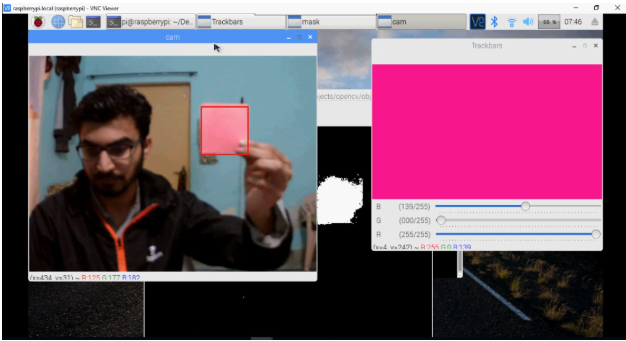
Tracking a Colored Object
Import the packages required for this project.
import cv2
from picamera.array import PiRGBArray
from picamera import PiCamera
import numpy as np
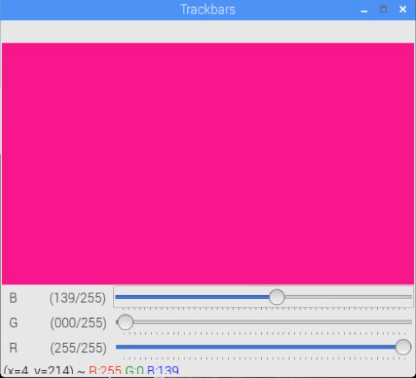
Now we can create the trackbars that will help us select a color. To create the trackbars, we have the cv2.createTrackbar() function with five arguments:
- The trackbar name
- The window name to which it is attached
- The default value
- The maximum value
- The callback function which is executed every time trackbar value changes
The callback function always has a default argument which is the trackbar position. In our case, the function does nothing, so we will simply ignore it.
We are going to create three trackbars for blue, green, and red. Each trackbar will have a default value of 0, a maximum value of 255, and will be attached to the window named ‘Trackbars’.
def nothing(x):
    pass

cv2.namedWindow("Trackbars")

cv2.createTrackbar("B", "Trackbars", 0, 255, nothing)
cv2.createTrackbar("G", "Trackbars", 0, 255, nothing)
cv2.createTrackbar("R", "Trackbars", 0, 255, nothing)
Now, we can initialize the camera object that will allow us to play with the Raspberry Pi camera. We set the resolution at (640, 480) and frame rate at 30 fps.
camera = PiCamera()
camera.resolution = (640, 480)
camera.framerate = 30
PiRGBArray() gives us a 3-dimensional RGB array organized(rows, columns, colors) from an unencoded RGB capture. PiRGBArray’s advantage is in its ability to read the frames from the Raspberry Pi camera as NumPy arrays making it compatible with OpenCV. It avoids the conversion from JPEG format to OpenCV format which would slow our process.
It takes two arguments:
- The camera object
- The resolution
rawCapture = PiRGBArray(camera, size=(640, 480))
Now we are going to use the capture_continuous function to start reading the frames from the Raspberry Pi camera module.
The Capture_continuous function takes three arguments:
- rawCapture
- The format in which we want to read each frame. OpenCV expects the image to be in the BGR format rather than the RGB so we specify the format to be BGR.
- The use_video_port boolean. Making it true means that we are treating the stream as video.
Once we have the frame, we can access the raw NumPy array via the .array attribute.
for frame in camera.capture_continuous(rawCapture, format="bgr", use_video_port=True):
	image = frame.array
Now we are going to convert an image from BGR to the HSV color space. The HSV space gives us better results when performing color-based segmentation.
imgHSV= cv2.cvtColor(img,cv2.COLOR_BGR2HSV)
Next, we set the trackbars we will use to select the color.
B = cv2.getTrackbarPos("B", "Trackbars")
G = cv2.getTrackbarPos("G", "Trackbars")
R = cv2.getTrackbarPos("R", "Trackbars")
After that, we find out the lower and upper limit of the color in HSV.
green = np.uint8([[[B, G, R]]])
hsvGreen = cv2.cvtColor(green,cv2.COLOR_BGR2HSV)
lowerBound = np.uint8([hsvGreen[0][0][0]-10,100,100])
upperBound = np.uint8([hsvGreen[0][0][0]+10,255,25])
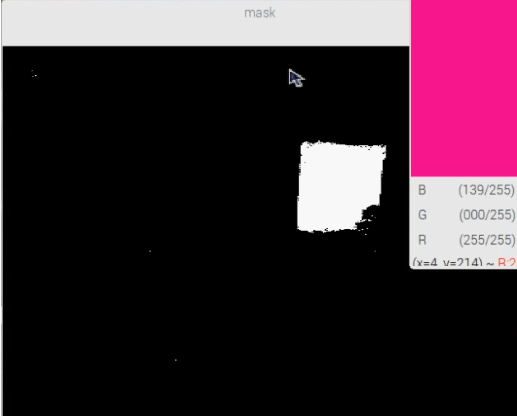
Now, we can set the filter that creates the mask for the selected color.
mask=cv2.inRange(imgHSV,lowerBound,upperBound)
Creating the mask for a selected color.
We can now set some morphological operation called opening and closing. Opening removes all the dots randomly popping here and there and closing closes the small holes that are present in the actual object.
maskOpen=cv2.morphologyEx(mask,cv2.MORPH_OPEN,kernelOpen)
maskClose=cv2.morphologyEx(maskOpen,cv2.MORPH_CLOSE,kernelClose)
Finally, we can find out the contours. The variable conts is a list of contours —in this case, only one contour is present but if multiple objects are there it will contain all the contours. We will loop through all the contours and put a rectangle over it.
_, conts,h=cv2.findContours(maskFinal.copy(),cv2.RETR_EXTERNAL,cv2.CHAIN_APPROX_NONE)

    for i in range(len(conts)):
        x,y,w,h=cv2.boundingRect(conts[i])
        cv2.rectangle(img,(x,y),(x+w,y+h),(0,0,255), 2)
With those steps complete, we’ll need to be able to show the result in the output window using cv2.waitkey(), which is a keyboard binding function which waits for a specified millisecond for any keyboard event. It takes one argument — the time in milliseconds. If a key is pressed in that time, the program will continue. Passing 0 means it will wait infinitely for a key.
cv2.imshow("mask",mask)
cv2.imshow("cam",img)
cv2.imshow("Trackbars",im)
key = cv2.waitKey(1)
Clear the stream in preparation for the next frame by calling truncate(0) between captures.
rawCapture.truncate(0)
Clearing the stream by calling truncate(0).
Python Code
The Python code for object detection using color segmentation can be found below.
import cv2
import numpy as np
from picamera.array import PiRGBArray
from picamera import PiCamera

def nothing(x):
    pass

im = np.zeros((300,512,3), np.uint8)
cv2.namedWindow("Trackbars")

cv2.createTrackbar("B", "Trackbars", 0, 255, nothing)
cv2.createTrackbar("G", "Trackbars", 0, 255, nothing)
cv2.createTrackbar("R", "Trackbars", 0, 255, nothing)

lowerBound=np.array([33,80,40])
upperBound=np.array([102,255,255])

kernelOpen=np.ones((5,5))
kernelClose=np.ones((20,20))

camera = PiCamera()
camera.resolution = (640, 480)
camera.framerate = 30

rawCapture = PiRGBArray(camera, size=(640, 480))

for frame in camera.capture_continuous(rawCapture, format="bgr", use_video_port=True):
	img = frame.array

	# Convert BGR to HSV
	imgHSV= cv2.cvtColor(img,cv2.COLOR_BGR2HSV)

	B = cv2.getTrackbarPos("B", "Trackbars")
	G = cv2.getTrackbarPos("G", "Trackbars")
	R = cv2.getTrackbarPos("R", "Trackbars")

	im[:] = [B, G, R]

	green = np.uint8([[[B, G, R]]])
	hsvGreen = cv2.cvtColor(green,cv2.COLOR_BGR2HSV)
	lowerBound = np.uint8([hsvGreen[0][0][0]-10,100,100])
	upperBound = np.uint8([hsvGreen[0][0][0]+10,255,255])

	# Create the Mask
	mask=cv2.inRange(imgHSV,lowerBound,upperBound)

	# Morphology
	maskOpen=cv2.morphologyEx(mask,cv2.MORPH_OPEN,kernelOpen)
	maskClose=cv2.morphologyEx(maskOpen,cv2.MORPH_CLOSE,kernelClose)

	maskFinal=maskClose
	_, conts,h=cv2.findContours(maskFinal.copy(),cv2.RETR_EXTERNAL,cv2.CHAIN_APPROX_NONE)

	for i in range(len(conts)):
		x,y,w,h=cv2.boundingRect(conts[i])
		cv2.rectangle(img,(x,y),(x+w,y+h),(0,0,255), 2)

	cv2.imshow("mask",mask)
	cv2.imshow("cam",img)
	cv2.imshow("Trackbars",im)

	key = cv2.waitKey(1)
	rawCapture.truncate(0)
	if key == 27:
		break

cv2.destroyAllWindows()