Learn how you can use Tesseract and OpenCV to extract text from images on PDFs and more with a Raspberry Pi camera!
In this tutorial, I will show you how to use optical character recognition to extract text from an image using a Raspberry Pi camera and a Raspberry Pi. The Pi camera will capture an image and, using OpenCV and Tesseract, we will extract text from the image.
For step-by-step instructions covering how to connect your Pi camera to a Raspberry Pi, check out Raspberry Pi Security Camera with Face Recognition. To learn how to get OpenCV set up with your Raspberry Pi, read How to Set Up OpenCV on Raspberry Pi for Face Detection.
What is Optical Character Recognition?
Optical character recognition (OCR) refers to the process of electronically extracting text from images (printed or handwritten) or documents in PDF form. This process is also known as text recognition.
What is Tesseract?
Tesseract is a tool originally developed by Hewlett Packard between 1985 and 1994, with some changes made in 1996 to port to Windows, and some C++izing in 1998. Tesseract became open-source by HP in 2005, and Google has been further developing it since 2006.
Tesseract recognizes and reads the text present in images. It can read all image types — png, jpeg, gif, tiff, bmp, etc. It is also widely used to process everything from scanned documents.
Tesseract has unicode (UTF-8) support and can recognize more than 100 languages out of the box. In order to integrate Tesseract into C++ or Python code, we have to use Tesseract’s API.
How to Install Tesseract on a Raspberry Pi
First, you need to make sure your Raspberry Pi is up-to-date by typing the following commands:
sudo apt-get update
sudo apt-get upgrade
These commands will update the installed packages on your Raspberry Pi to the latest versions.
Then type the following command in the terminal to install the required packages for OpenCV on your Raspberry Pi:
sudo apt install libatlas3-base libsz2 libharfbuzz0b libtiff5 libjasper1 libilmbase12 libopenexr22 libilmbase12 libgstreamer1.0-0 libavcodec57 libavformat57 libavutil55 libswscale4 libqtgui4 libqt4-test libqtcore4
After that, type the following command to install OpenCV 3 for Python 3 on your Raspberry Pi.
Note: Pip3 means that OpenCV will get installed for Python 3.
sudo pip3 install opencv-contrib-python libwebp6
Next, install the Tesseract library by typing:
sudo apt install tesseract-ocr
Install the command line Tesseract tool by typing:
sudo apt install libtesseract-dev
Finally, install Python wrapper for Tesseract by typing:
sudo pip install pytesseract
Checking the Installations
Let’s double-check the versions on our newly-installed packages.
To check if OpenCV is installed or not, try importing OpenCV by typing:
Python3
import cv2
If no errors pop up, your installation was successful.
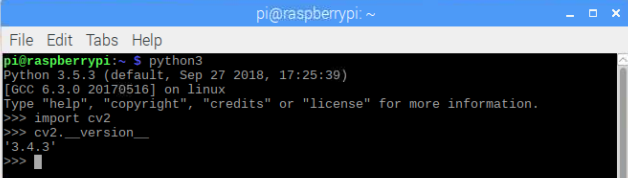
To know your OpenCV version, type:
cv2.__version__
Checking OpenCV installation
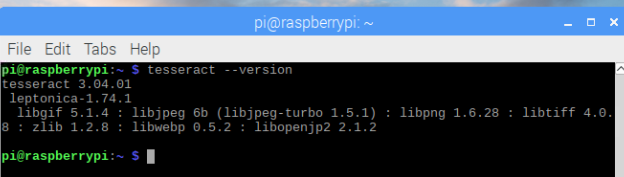
To check Tesseract's installation, type the following command in the terminal:
tesseract --version
If installed correctly, the terminal should show output similar to the one shown in the image below.
Checking Tesseract installation
Python Code
Copy and save this Python code in a text file with .py extension.
import cv2
import pytesseract
from picamera.array import PiRGBArray
from picamera import PiCamera

camera = PiCamera()
camera.resolution = (640, 480)
camera.framerate = 30

rawCapture = PiRGBArray(camera, size=(640, 480))

for frame in camera.capture_continuous(rawCapture, format="bgr", use_video_port=True):
	image = frame.array
	cv2.imshow("Frame", image)
	key = cv2.waitKey(1) & 0xFF

	rawCapture.truncate(0)

	if key == ord("s"):
		text = pytesseract.image_to_string(image)
		print(text)
		cv2.imshow("Frame", image)
		cv2.waitKey(0)
		break

cv2.destroyAllWindows()
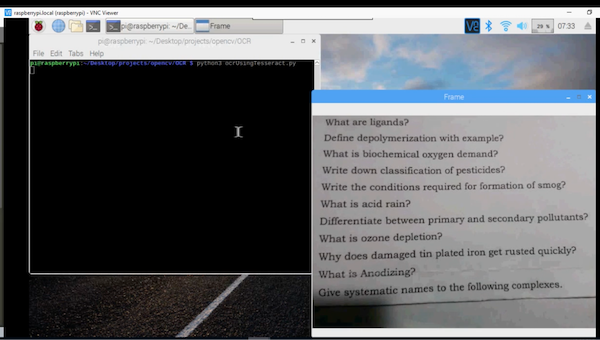
Now run this code using the command python filename.py.
The code is working on Raspberry Pi.
You can see the text recognition in action in the video below.
OCR Code Walkthrough
Let's break down the sections of the above code to understand the role of each part.
First, we import the required packages for this project: - The OpenCV library helps to show the frames in the output window
- Pytesseract is a Python wrapper for Tesseract — it helps extract text from images.
- The other two libraries get frames from the Raspberry Pi camera
import cv2
import pytesseract
from picamera.array import PiRGBArray
from picamera import PiCamera
Then we initialize the camera object that allows us to play with the Raspberry Pi camera. We set the resolution at (640, 480) and the frame rate at 30 fps.
camera = PiCamera()
camera.resolution = (640, 480)
camera.framerate = 30
PiRGBArray() gives us a three-dimensional RGB array organized (rows, columns, colors) from an unencoded RGB capture. The advantage of using PiRGBArray is that it reads the frames from the Pi camera as NumPy arrays, making it compatible with OpenCV. It avoids the conversion from JPEG format to OpenCV format which would slow our process.
The code contains two arguments: the first is the camera object and the second is the resolution.
rawCapture = PiRGBArray(camera, size=(640, 480))
After that, we use the capture_continuous function to start reading frames from the Raspberry Pi camera module.
The capture_continuous function takes three arguments:
- rawCapture
- The format in which we want to read each frame. Since OpenCV expects the image to be in the BGR format rather than the RGB we must specify the format to be BGR.
- The use_video_port boolean. Making this true means that we are treating stream as video.
for frame in camera.capture_continuous(rawCapture, format="bgr", use_video_port=True):
Once we have the frame, we can access the raw NumPy array via the .array attribute. After accessing, it shows in the output window.
cv2.waitkey() is a keyboard binding function and it waits for a specified number of milliseconds for any keyboard event. It takes only one argument which is the time in milliseconds. If a key is pressed during that time, the program will continue. Passing 0 means it will wait infinitely for a key.
image = frame.array
cv2.imshow("Frame", image)
key = cv2.waitKey(1) & 0xFF
Next, we clear the stream in preparation for the next frame by calling truncate (0) between captures.
rawCapture.truncate(0)
The code will then keep on looping until 'S' on the keyboard is pressed. When 'S' is pressed, it takes the last frame and extracts the text from the image. After extracting, it shows it on the terminal.