Learn how to power a Raspberry Pi with a 9V Solar Panel using an LM2596 buck converter and access it via SSH.
In this tutorial, I'll show you how to power a Raspberry Pi Zero using a solar panel. Supplying power to your Raspberry Pi allows you to build power-efficient projects and while reducing your electricity bills. This can come in especially handy if you want to create a project that needs to be outdoors, for example, an IoT forest data collection system or an IoT garden system.
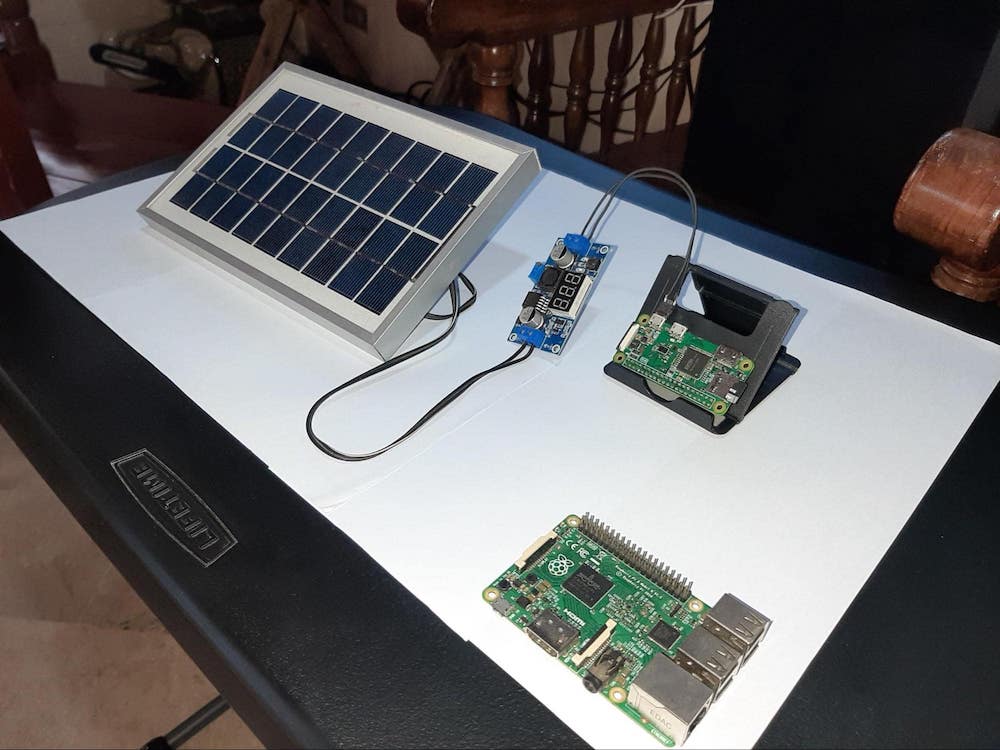
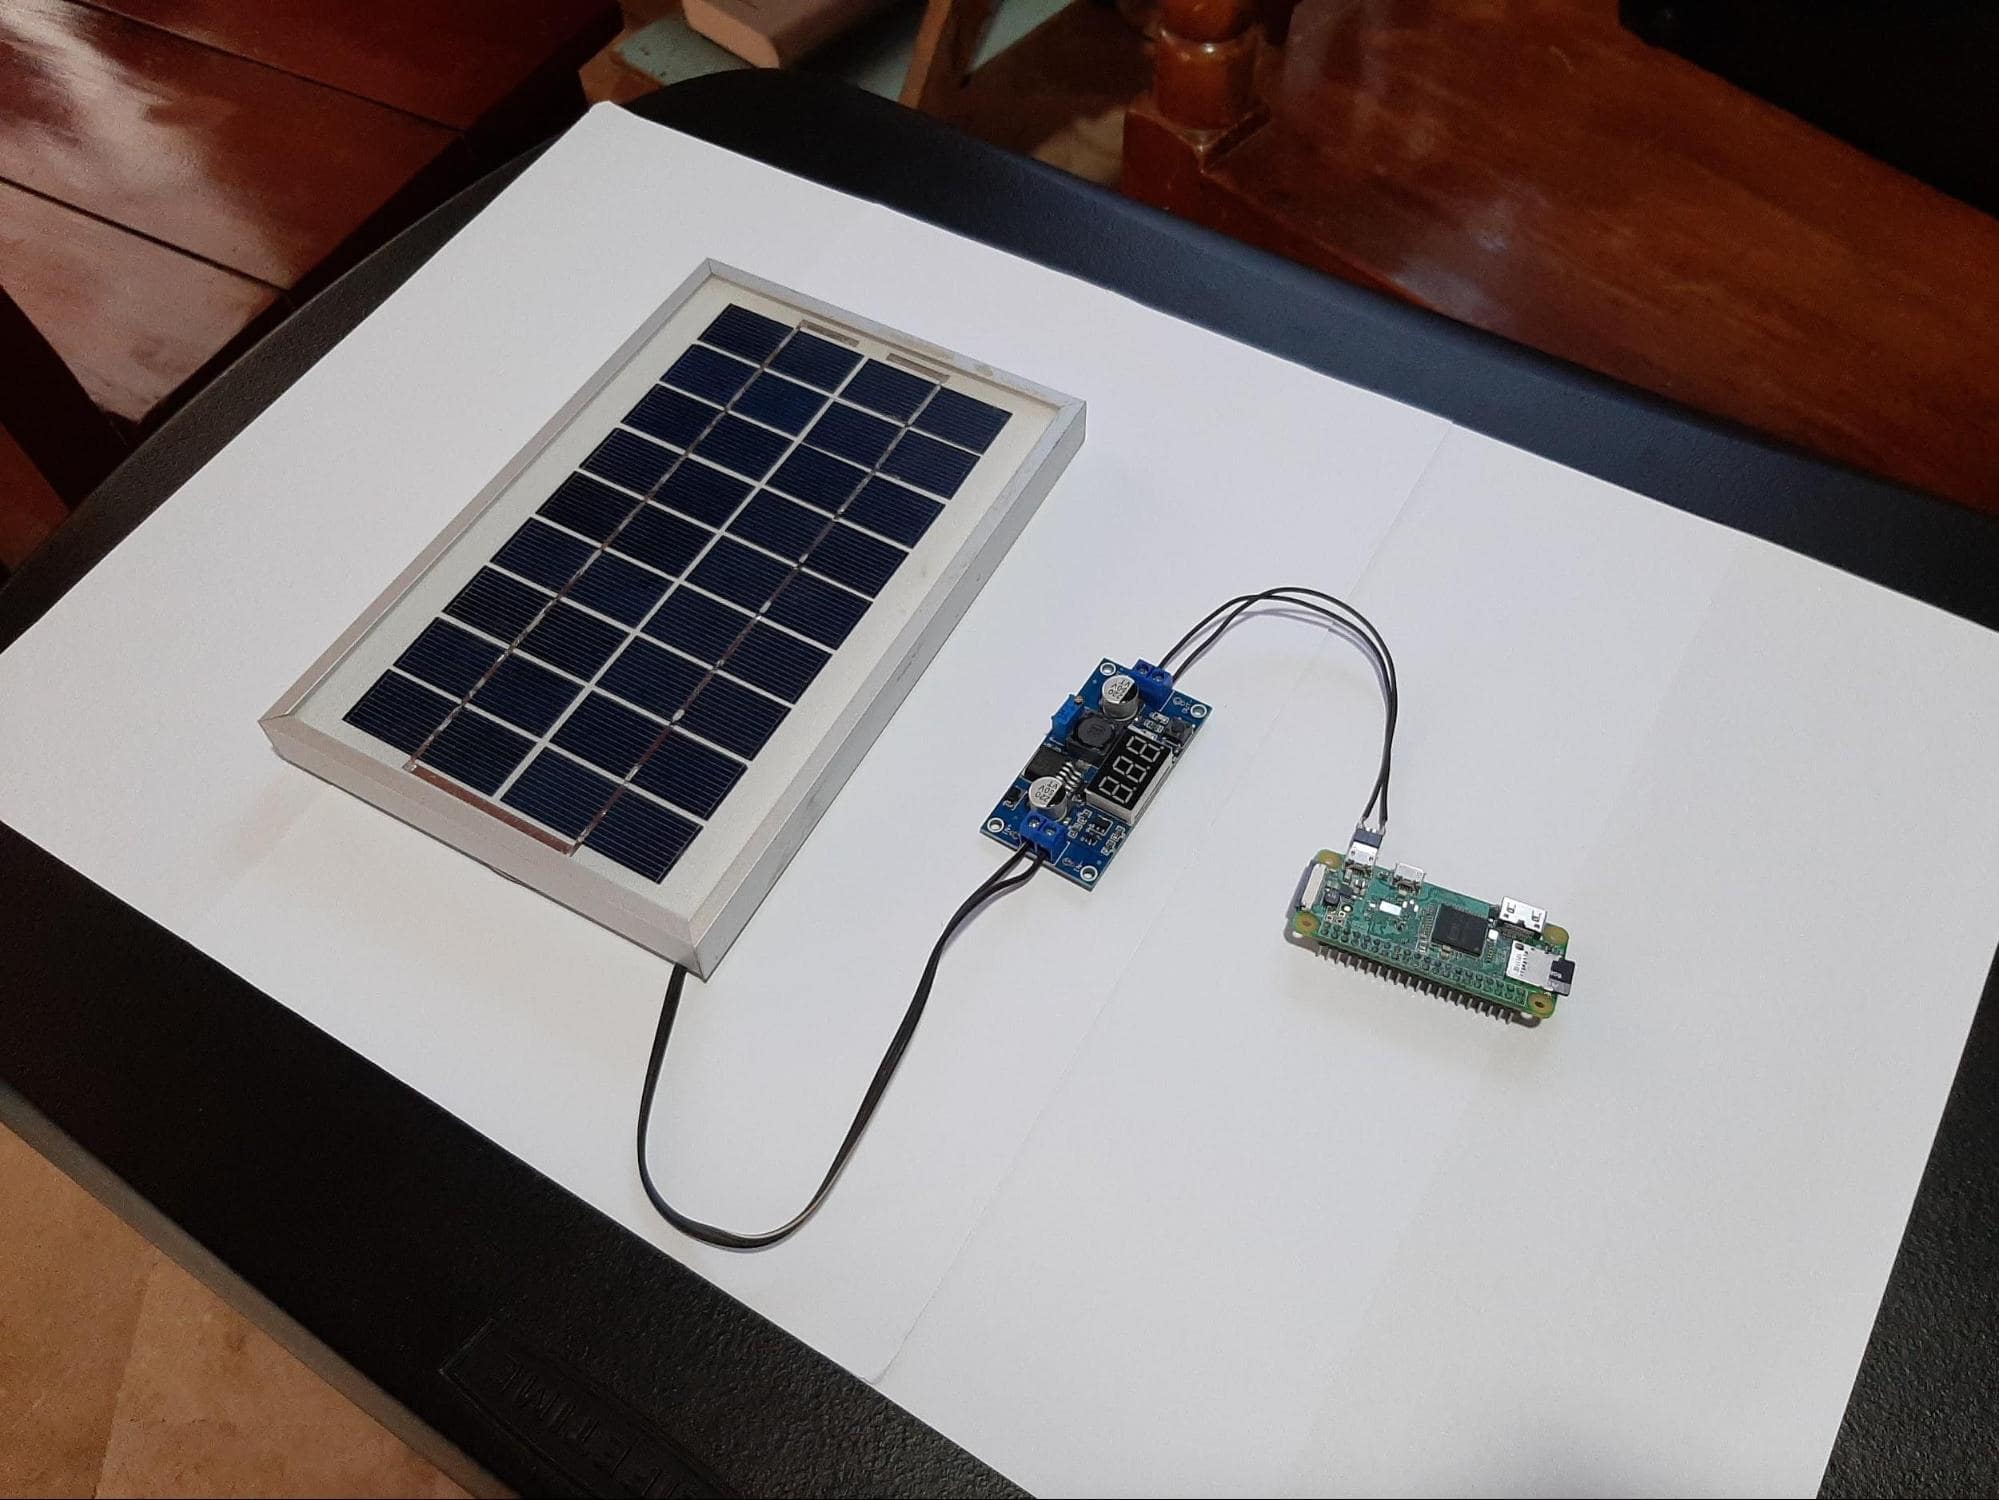
To power the Raspberry Pi, we will need a 9V solar panel and LM2596 buck converter. Before diving into this project, collect the necessary hardware.
Required Hardware
- Raspberry Pi Zero v1.3
- LM2596 Buck Converter
- 9V Solar Panel
- DIY Micro USB male plug (just strip off a micro USB cable)
Raspberry Pi Zero v1.3
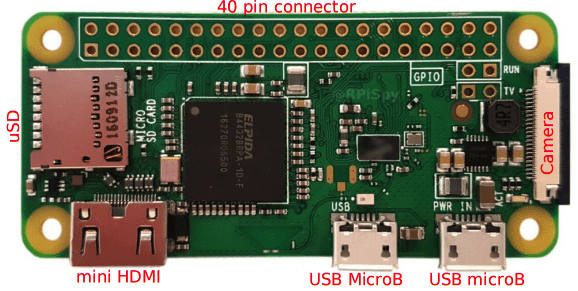
The Raspberry Pi Zero is a credit-card-sized computer that is affordable enough for any project. It promotes teaching of basic computer science in schools and in developing countries. It has a 1GHz single-core CPU, 512MB RAM, a mini HDMI port, a micro USB power port, and has 802.11n wireless LAN, which makes it perfect for IoT enthusiasts and hobbyists.
Front view of the Raspberry Pi Zero with its important pins and ports marked.
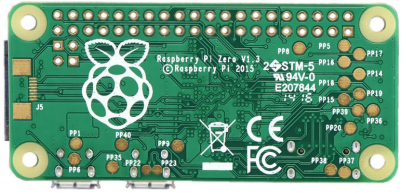
Rear view of the Raspberry Pi Zero.
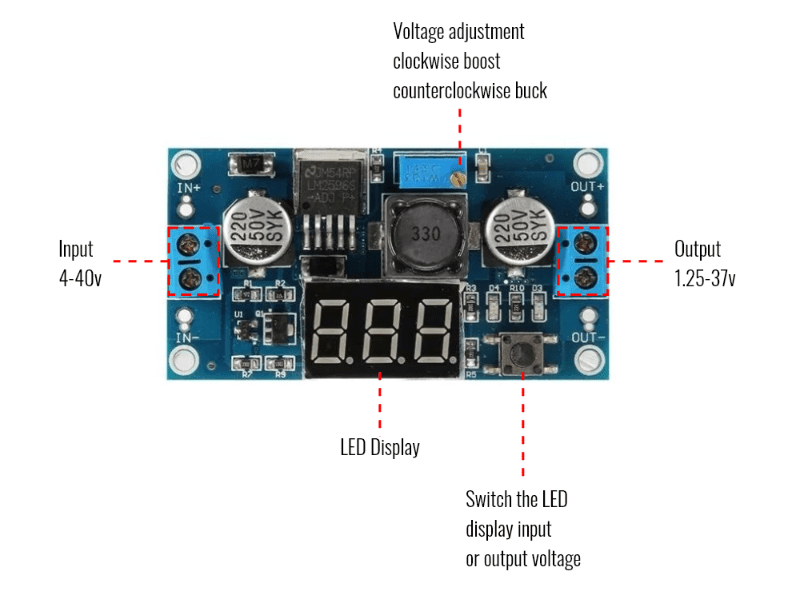
What is an LM2596 Buck converter?
The DC to DC buck converter LM2596 is a step-down power module with an adjustable voltage range. It can drive a load of up to 3A with high efficiency. It also has a seven-segment display that shows the current input and output voltages. The LM2596 also has an adjustable voltage output of 1.25 – 30V via the trimpot.
The LM2596 DC to DC buck converter.
LM2596 Features
- Input voltage: 4V-35V
- Output voltage: 1.23V to 30V
- Input Current: 3A (maximum)
- Maximum Power Dissipation: 10 watts (Without Heat sink)
A Note on Output Voltages
If you are using a different version of Raspberry Pi, you can still power it with a 9V solar panel and LM2596 buck converter. However, make sure that the output voltage is 4.75V to 5.25V as shown in the LED display.
Raspberry Pi Zero Current Requirement
It is very important that you provide the right amount of regulated power to the Pi Zero. If the power supplied is not sufficient, your Raspberry Pi will keep rebooting. Moreover, it will also show a low power symbol on the top right of your screen.
If you Pi isn’t getting enough power, a low power symbol will display.
The more popular Raspberry Pi 4’s supply is recommended to be at 5V, 2-2.5A current. However the Pi Zero needs only 1/1.5A, so make sure to adjust accordingly.
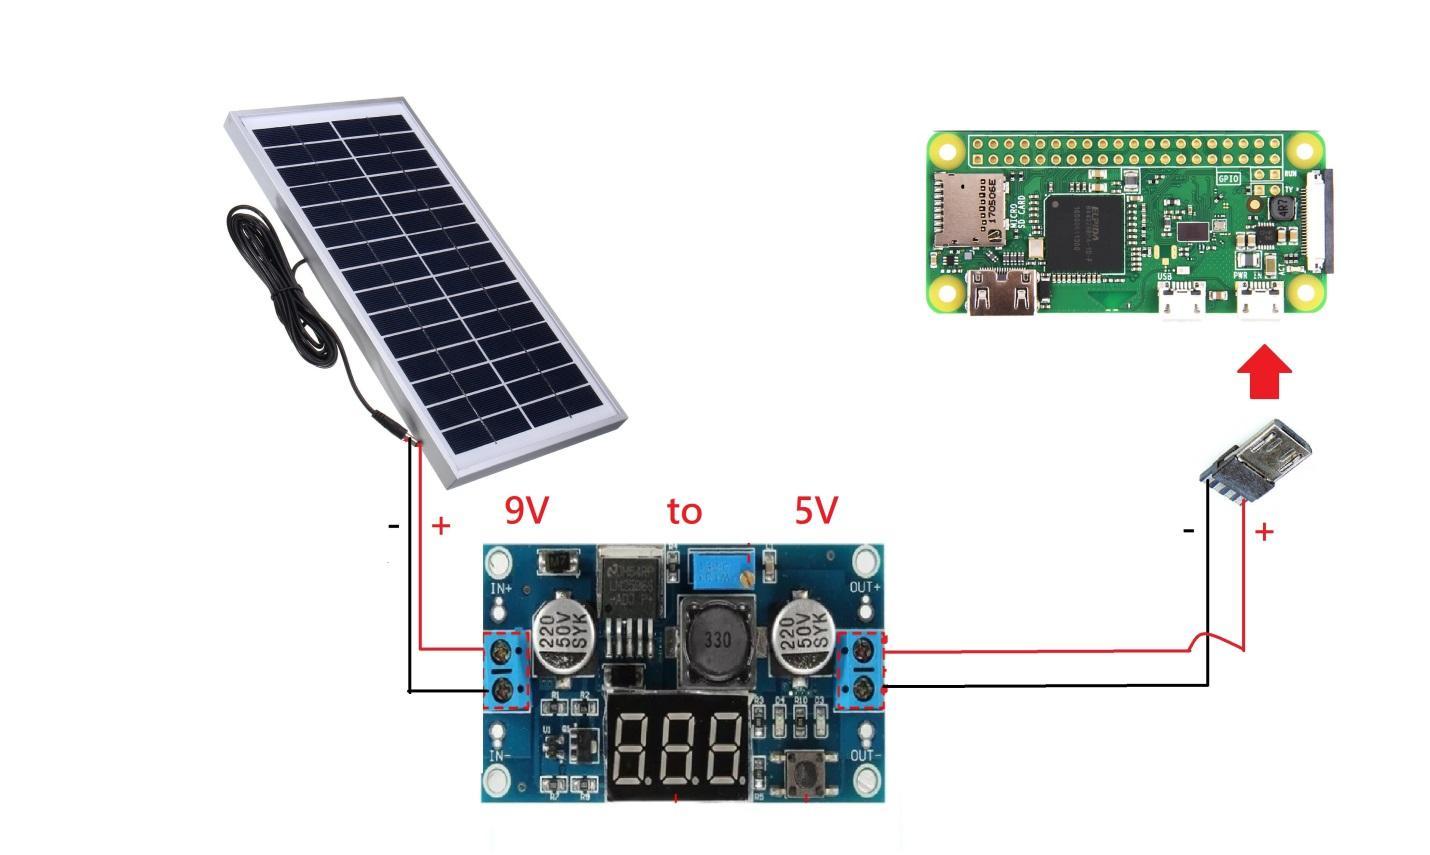
Connecting the Solar Panel to the Pi Zero
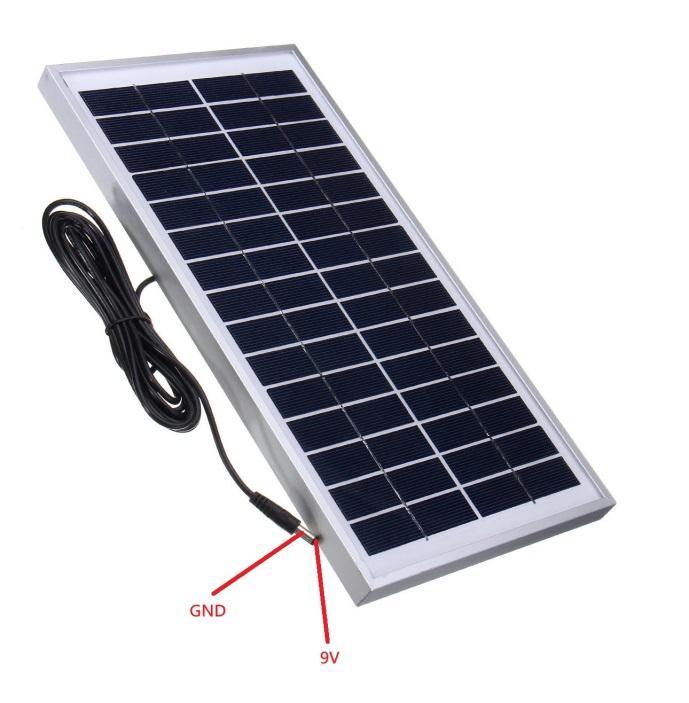
Most solar panels in the market today are 9V. They’re cheap and you can buy them anywhere. Therefore, I would recommend getting a 9V solar panel for running any model Raspberry Pi.
The 9V solar panel has a male DC connector on it — the sleeve is the negative and the tip is the positive.
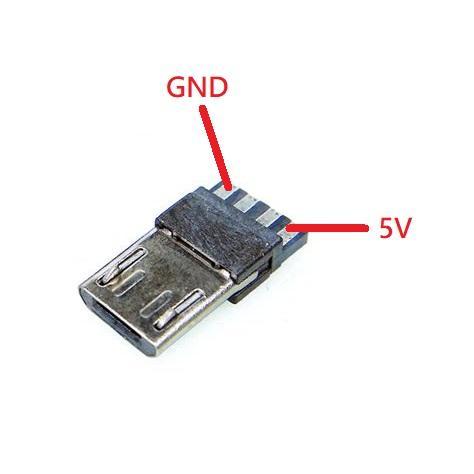
For the DIY micro USB male plug, there are four pins. From left to right:
Pin 1: 5V
Pin 2: D+
Pin 3: D-
Pin 4: GND
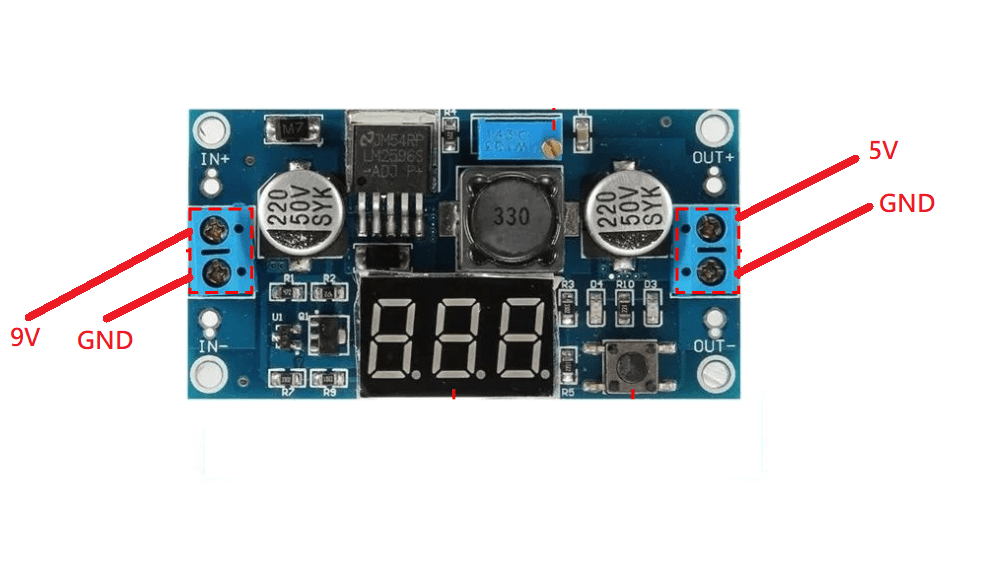
You can remove the male DC connector from the solar panel and directly connect it to the buck converter. Just make sure the ends of the wires are properly soldered and screwed. After soldering all the necessary pins, add the connections for the LM2596, by following this diagram:
It's always best practice to measure the output from the buck converter using a multimeter, just to be sure that the output voltage is around 5V. You can now enable SSH on your Pi and, after it has finished booting, implement your project. I recommend configuring the Wi-Fi for your Pi and setting up the SSH before bringing it outdoors.