Learn how to connect and interface your Pi NoIR V2 Camera with the Raspberry Pi using Raspbian.
The Raspberry Pi has many accessories and modules, and the camera module is one of the most commonly used. It can be used to take pictures or videos for a variety of different applications and projects.
The Pi NoIR is one of the many camera modules you can use to integrate with the Raspberry Pi R3. This camera is not the same as your typical daylight photography camera. The Pi NoIR has functions that a regular camera module has, but has one big difference: it does not have an infrared filter. This is where the NoIR name came from (No Infrared).
Since this camera has no infrared filter it won’t have the same quality as an IR camera during the daytime. When it comes to low light environments, however, the NoIR camera sees much better, making it a good camera for applications like night surveillance systems.
This tutorial will show you how to interface the Pi NoIR to the Raspberry Pi. Let’s get started!
Installation of Raspbian and the Pi NoIR
In this tutorial, we will be using Raspbian. If you haven't installed Raspbian onto your Raspberry Pi yet, check our this guide on installing Raspbian on your Raspberry Pi.
By default, Raspbian has a picamera module installed, which we’ll use to work on our Pi NoIR. To check if picamera is already installed in your version of Raspbian, try importing picamera in the terminal of the Raspberry Pi:
python -c “import picamera”
python3 -c “import picamera”
If picamera is already installed, you won’t get an error. The image below shows Raspbian’s terminal importing picamera with no error, meaning that picamera is already installed.
PiCamera is installed, no error returned.
A traceback message will appear if the picamera module is not installed.
python -c "import picamera"
	Traceback (most recent call last):
		  File "<string>", line 1, in <module>
	ImportError: No module named picamera
python3 -c "import picamera"
	Traceback (most recent call last):
 		 File "<string>", line 1, in <module>
	ImportError: No module named 'picamera'
When installing the picamera, it is best to use apt to simplify the process of the Unix-like operating system. To install picamera using apt, input the following line in the Pi’s terminal:
sudo apt-get update
sudo apt-get install python-picamera python3-picamera
Connecting the Pi NoIR V2 Camera with the Raspberry Pi
When connecting peripheral and modules, the Raspberry Pi must be switched off. This is a good practice to avoid damage to any devices.
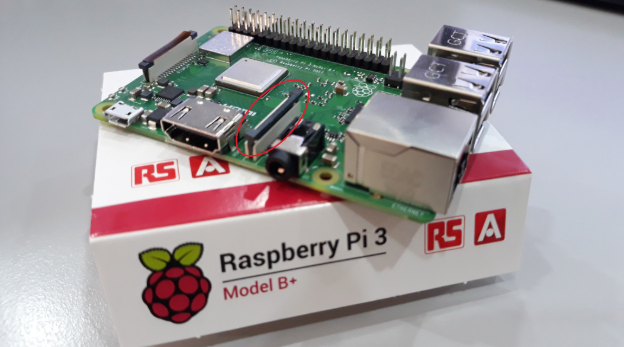
To connect the Pi NoIR camera, locate the Pi’s Camera Serial Interface (CSI). This is highlighted with a red circle.
Raspberry Pi Camera Serial Interface (CSI)
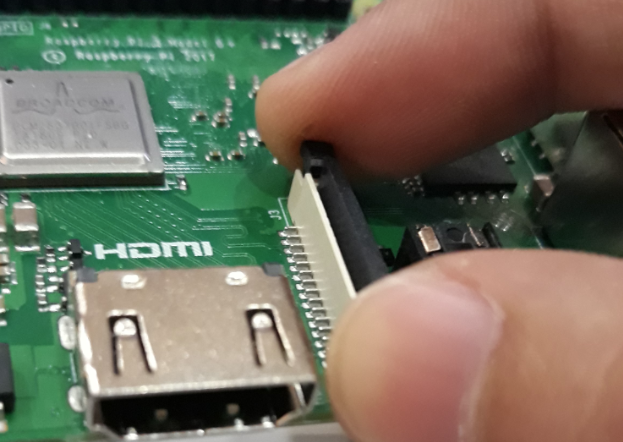
Gently lift the CSI port plastic clip
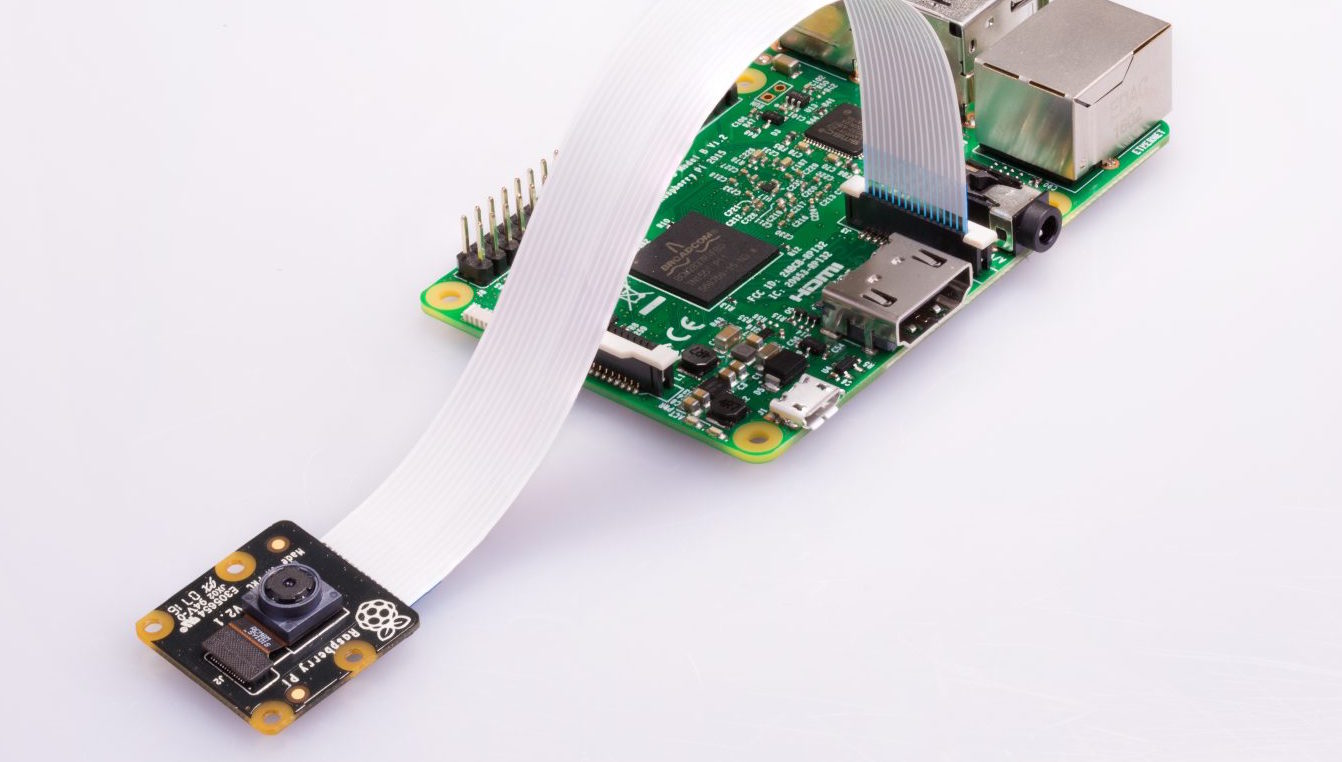
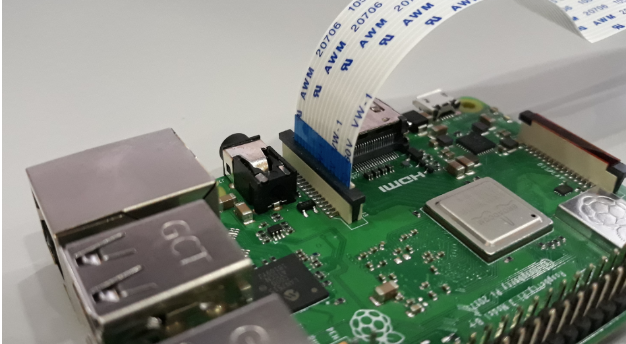
Now, insert the Pi NoIR Camera V2 ribbon into the CSI of the Raspberry Pi.
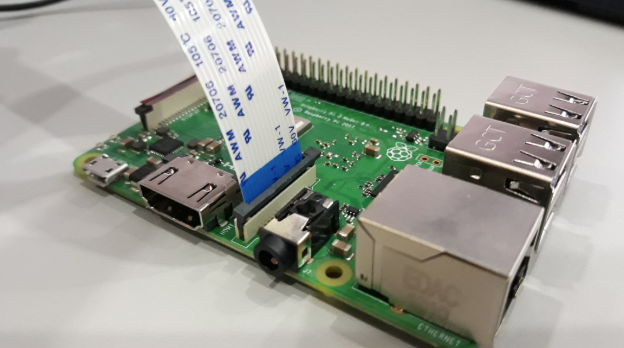
NoIR ribbon inserted to the CSI Port of the Raspberry Pi
After inserting the ribbon, push the plastic clip of the CSI back into place.
Place the CSI plastic clip back into place
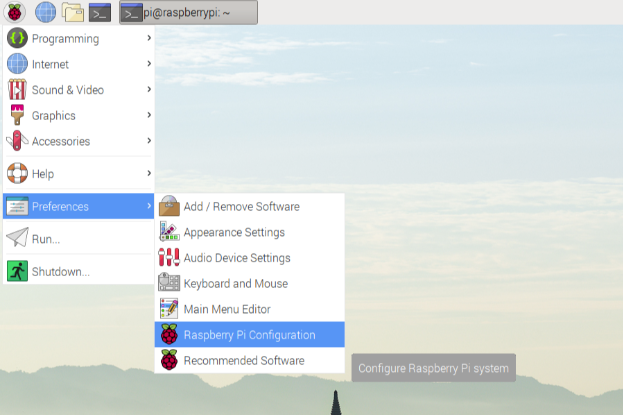
After connecting the Pi NoIR camera, we can boot up the Raspberry Pi. We must enable the camera interface configuration of the Pi before we can test our camera. To do this, begin by opening Raspberry Pi Configuration.
Opening Raspberry Pi Configuration
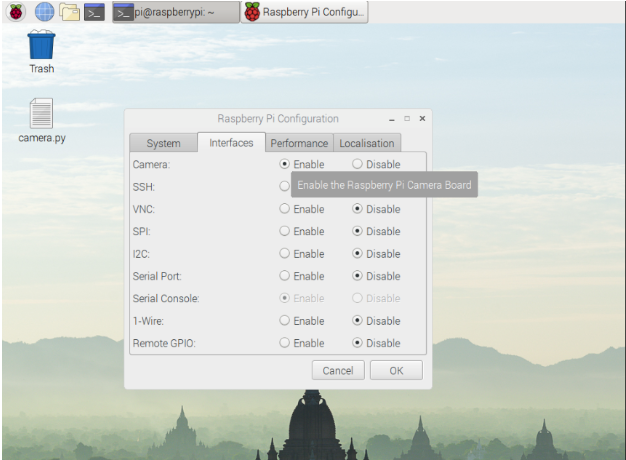
In Raspberry Pi Configuration, enable the camera module as seen in the image below.
Raspberry Pi Configuration Tool
After enabling the camera module, reboot the Raspberry Pi.
Once rebooted, see if the camera is working by typing the following command in the terminal:
The raspistill is a command line tool for capturing still photographs after a five-second delay with the camera module. If everything is working accordingly, this command will let us see a preview of the camera using the terminal.
If the camera preview appears, congratulations on your first interfacing of the camera module to the Raspberry Pi!
Try Your First Code
After running the camera preview, we can try a basic program to capture an image to a file using Python.
NOTE: When naming the .py script, do not name the file picamera.py. Naming scripts after an existing Python module will cause errors when you try to import those modules.
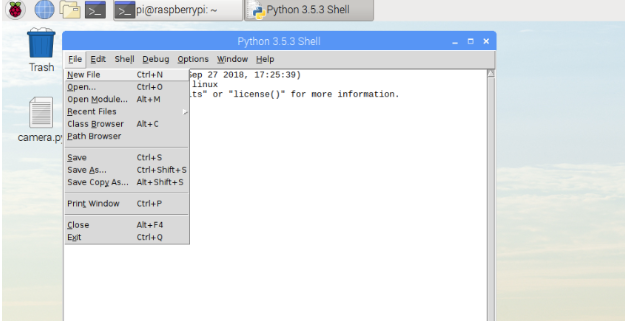
First, we need to open Python IDLE
After opening Python IDLE, we need to create a new file, since it is a default Python shell which directly executes any command we input.
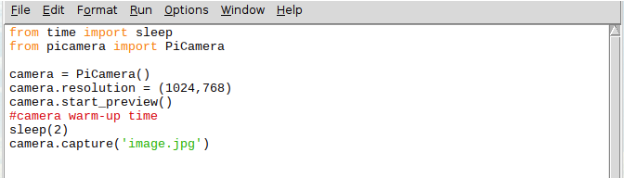
The code below is an example code for the capture() method from picamera’s documentation.
Using the new file we created, input the following Python code and save as “/home/pi” with a filename camera.py.
from time import sleep
from picamera import PiCamera
camera = PiCamera()
camera.resolution = (1024, 768)
camera.start_preview()

#camera warm-up time
sleep(2)
camera.capture( ‘image.jpg’ )
The capture() method will save the captured image to the output file named image.jpg.
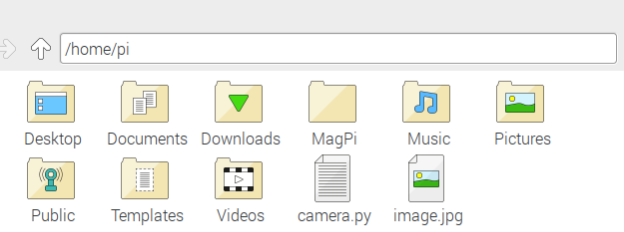
To execute the Python code you’ve saved within the file “/home/pi”, open the Raspbian terminal and input:
This will run the camera and take a picture after a two-second delay. The captured image can be seen within “/home/pi” directory.
You now know how to do the basic interfacing and coding on your Pi NoIR! For more details and function checkout picamera’s documentation.
You can also check some projects involving picamera:
Cover image courtesy of the Raspberry Pi Foundation.