Interface a Raspberry Pi with an Arduino so the two boards can communicate with one another.
Sometimes you may need to connect an Arduino to a Raspberry Pi. For example, if you have sensors, motors, and actuators, you can connect these to the Arduino and make the Arduino send values to and from the Raspberry Pi. This way, we can separate the computing intensive tasks (done by the Raspberry Pi) and controlling tasks (done by the Arduino).
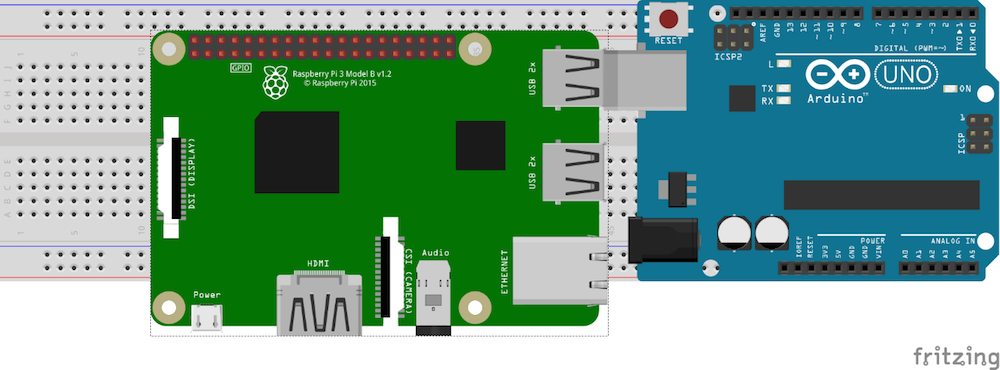
In this tutorial, we will connect an Arduino to a Raspberry Pi and have the Arduino send “Hello from Arduino” to the Raspberry Pi, and the Raspberry Pi will blink an LED upon receiving the command from the Arduino.
For communication, we will use simple serial communication over USB cable.
So, let’s get started!
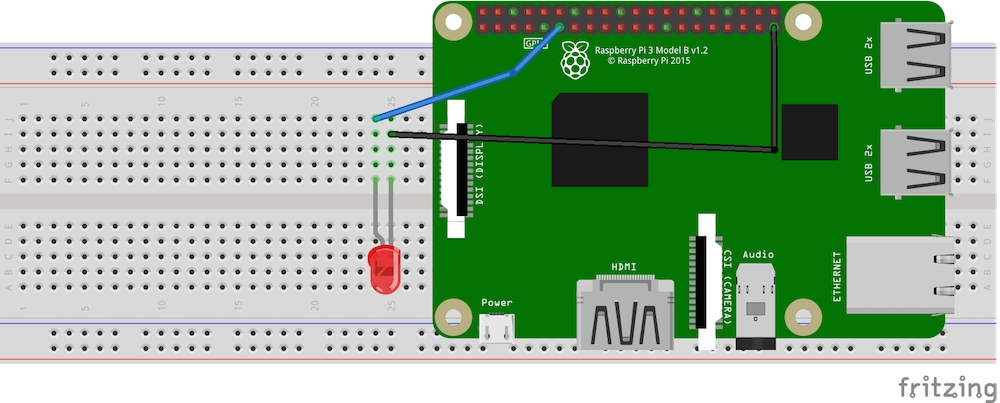
Connect the LED to pin number 11 as shown in the picture below.
Turn on the Raspberry Pi and open Python 3 in a new window.
Write the following code in the new window and save it. (Save to your desktop so you don't lose it.)
import serial
import RPi.GPIO as GPIO
import time

ser=serial.Serial("/dev/ttyACM0",9600)  #change ACM number as found from ls /dev/tty/ACM*
ser.baudrate=9600
def blink(pin):


GPIO.output(pin,GPIO.HIGH)
time.sleep(1)
GPIO.output(pin,GPIO.LOW)
time.sleep(1)
return

GPIO.setmode(GPIO.BOARD)
GPIO.setup(11, GPIO.OUT)
while True:

read_ser=ser.readline()
print(read_ser)
if(read_ser=="Hello From Arduino!"):
blink(11)
Now open Arduino IDE and upload the following code to your Arduino.
String data="Hello From Arduino!";

void setup() {
// put your setup code here, to run once:
Serial.begin(9600);

}

void loop() {
// put your main code here, to run repeatedly:
Serial.println(data);//data that is being Sent
delay(200);
}
Make sure the code is uploaded to Arduino.
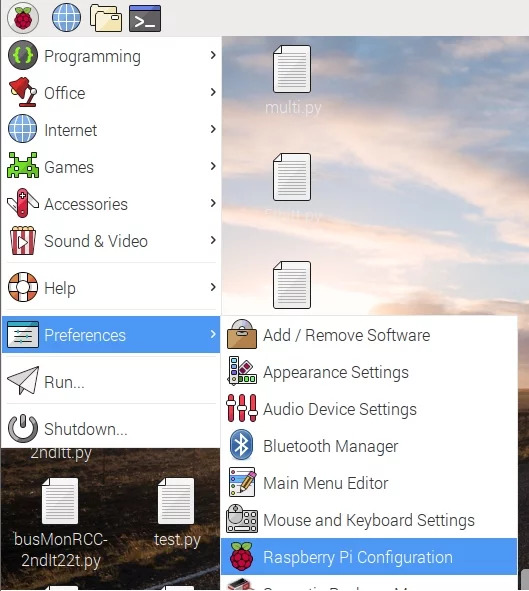
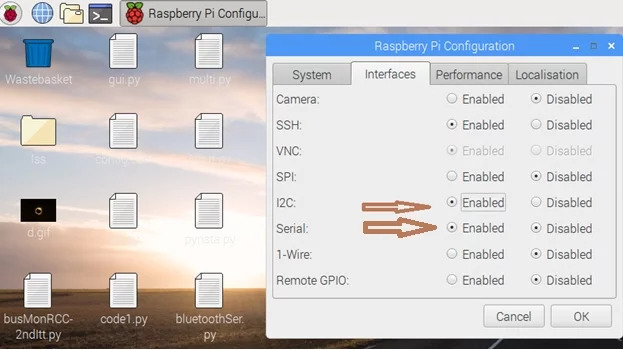
In your Raspberry Pi interface, be sure to enable Serial and I2C in PiConfig.
Next, you'll need to restart your Raspberry Pi. Open the Terminal and execute these commands:
sudo apt-get install python-serial

sudo pip install pyserial
Connect your Arduino to your Raspberry Pi.
Execute.
Then find a line with /dev/ttyACM0 or something like /dev/ttyACM1 etc. (check for an ACM with any number 0,1,2 etc.)
Open Python again and change ser=serial.Serial(“dev/ttyACM1”,9600) to the ACM number you found. So, if in your case you got ACM0, the line should look like this: ser=serial.Serial(“dev/ttyACM0”,9600)
Now run the program you just created in Python3. You will see “Hello From Arduino!” in the Python terminal, and your LED should be blinking as well!