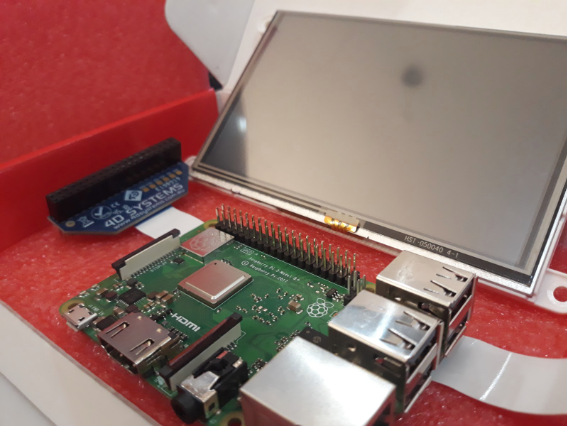
Learn how to interface the 4D Systems gen4 touchscreen with a Raspberry Pi.
Technology has rapidly changed within the last few years. As technology improves, activities and processes are simplified and made faster than ever before.
One such technology that has made a lot of progress is touchscreen monitors. Touchscreen monitors allow users to click on buttons or objects on the screen with their fingers or a stylus pen.
In this tutorial, we’ll cover how to interface the 4D Systems gen4 touchscreen to a Raspberry Pi, including software installation, hardware connection, touchscreen calibration.
Installation and Setting up the Pi
First, we need to download and install the latest Raspbian image from the Raspberry Pi website. If you haven’t installed Rasbian yet, check out this guide for installing Rasbian OS to your SD card.
After installing Raspbian on your SD card, insert the SD card into your Raspberry Pi. Don’t connect the gen4 touchscreen yet. The hardware connection to the Raspberry Pi is not recommended until the RPi has been specifically set up for the gen4 drivers.
Power up your Raspberry Pi with a keyboard and monitor or on an SSH session.
To add additional package installation to the Rasbian image, we need to expand the file system on the Raspbian image before we interface the gen4 touchscreen. To do this, open the terminal and input in the command line
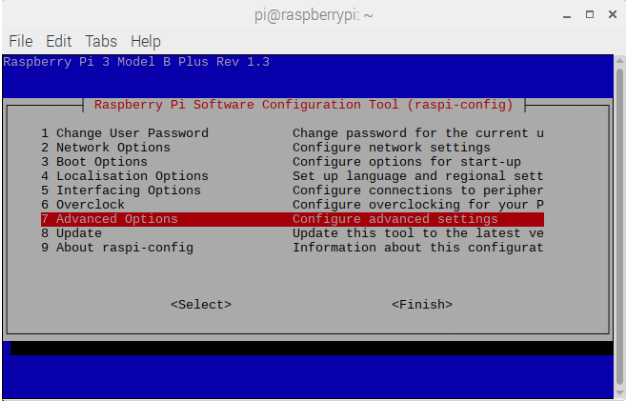
Now select Advanced Options.
Figure 1. Select Advanced Options
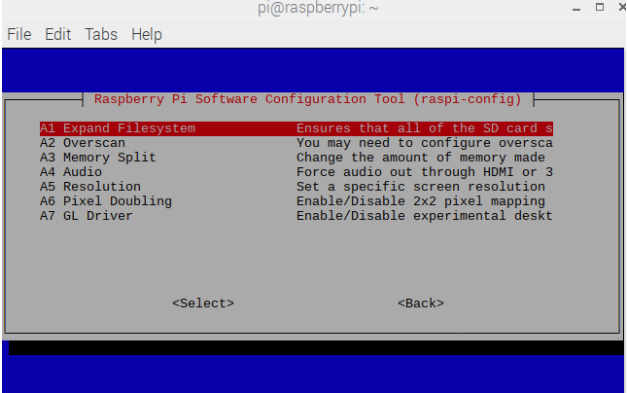
Select Expand Filesystem.
Figure 2. Select A1 Expand Filesystem
After expanding the filesystem, reboot your Pi by selecting <Finish> and reboot.
Download and Install the 4D Kernel Pack
After rebooting, we can download and install the 4D kernel pack.
First, open the terminal and download and install the kernel that supports the 4DPi-24-HAT. Make sure that your 4D display module supports the 4DPi-24-HAT. If it does not, you can find the right kernel on their website.
Enter the following command in the terminal:
wget http://www.4dsystems.com.au/downloads/4DPi/All/gen4-hats_4-14-34_v1.1.tar.gz
After downloading, we can install the downloaded file with the following command:
sudo tar –xzvf gen4-hats_4-14-34_v1.1.tar.gz–C
The latest Raspbian images have a default desktop GUI system boot. To use the gen4-4DPi, we need to set the boot system to the command line.
Enter the following command in the terminal:
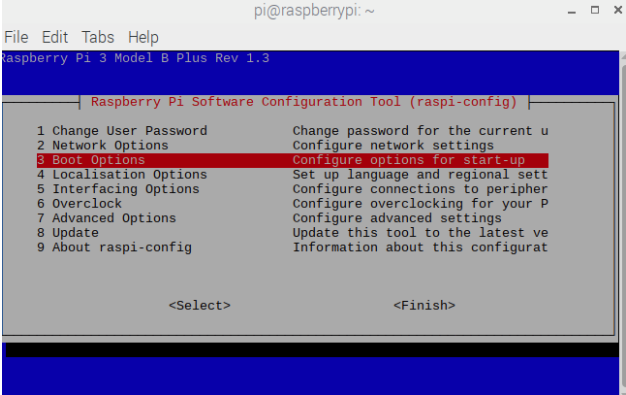
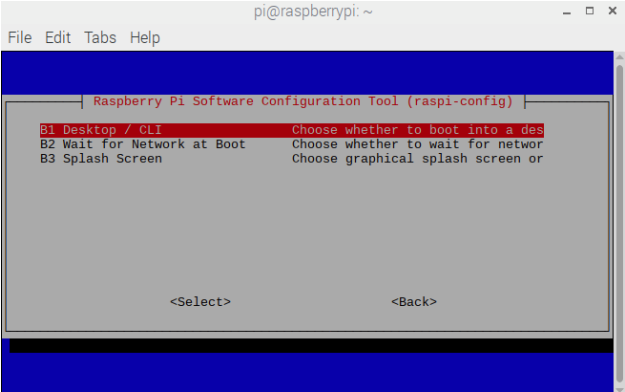
In raspi-config, select Boot Options.
Figure 3. Selecting Boot Option
Figure 4. Selecting Desktop/CLI
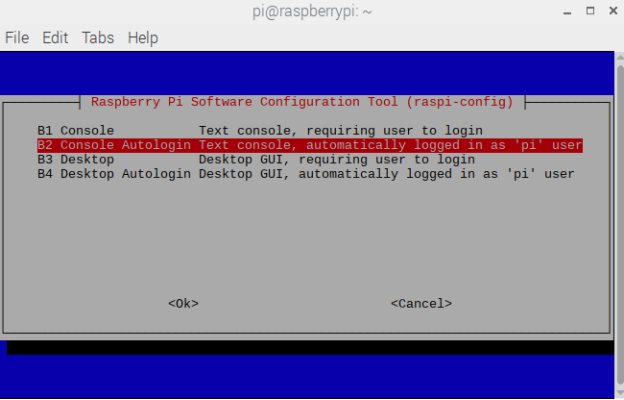
Select either Console Auto Login as Pi user or Console requiring user login.
Figure 5. Select Console and either login automatically or require user to login.
Select <Finish> and reboot. Once rebooted, the Pi will boot on the console command line and the software configuration is complete. Before we can connect the hardware, we need to safely shut down the Raspberry Pi.
To safely shut down, use the following command:
sudo poweroff
# Or
# sudo halt
After the Pi is completely shut down, remove the power supply.
Hardware Connection
Again, before beginning any hardware connections between the gen4-4DPi and the Raspberry Pi, make sure that the Pi is powered off.
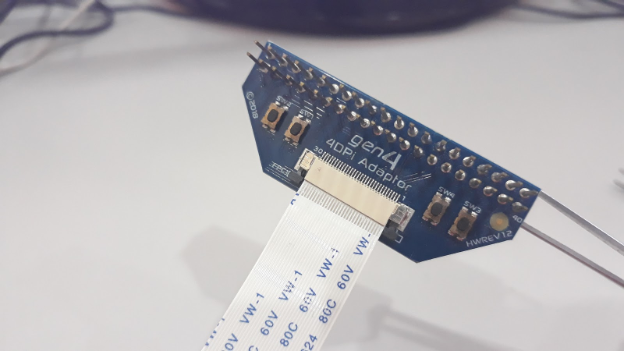
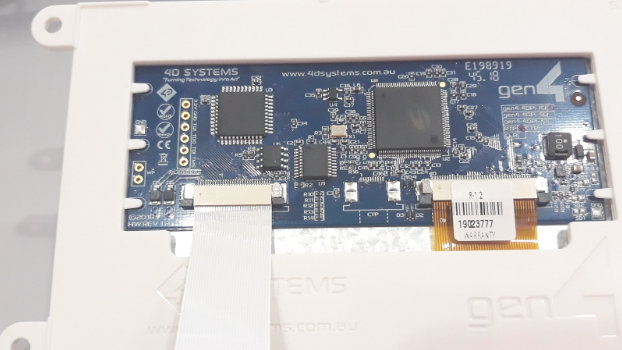
First, connect the 30-way FFC cable between the FFC connector of the gen4-4DPi and the gen4-4DPi-Adaptor, ensuring the copper pins are facing upward on the connector. See the image below.
Figure 7. Connecting 30-way FFC cable to the gen4-4DPi Adaptor
Figure 8. Connecting 30-way FFC cable to the gen4-4DPi
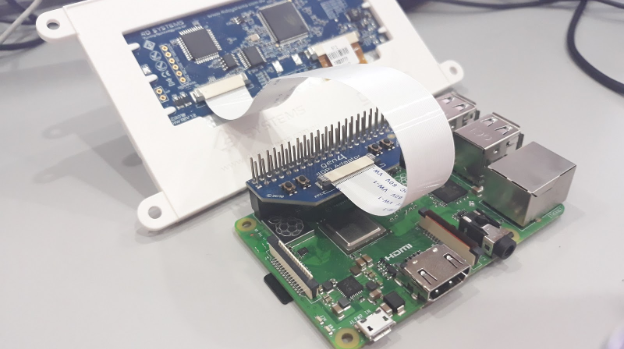
Attach the 40-way header on the gen4DPi-Adaptor with the Raspberry Pi’s male 40-way header.
Figure 9. Attached gen4-4DPi adaptor with the Raspberry Pi
We’re all done setting up the Raspberry Pi’s software and connecting the gen4-4DPi to the Raspberry Pi. It's time to power up the Pi.
The terminal should begin to show on the gen4-4DPi and will be ready to use once the Raspberry Pi has booted. You may notice that the Raspberry Pi will boot at the console command line. This is because we haven’t change the boot configuration of the Raspberry Pi.
Calibrating the Touch Screen
Before changing back the boot config of the Pi, let us calibrate the touch screen monitor first. We need to install xinput_calibrator to calibrate the gen4-4DPi. Open terminal and input:
sudo apt-get install xinput-calibrator
Install the event device input driver:
sudo apt-get install xserver-xorg-input-evdev
Rename the 10-evdev.conf file to 45-evdef.conf.
sudo mv /usr/share/X11/xorg.conf.d/10-evdev.conf /usr/share/X11/xorg.conf.d/45-evdev.conf
Check if evdev.conf has a higher number than libinput.conf. The terminal output should look like this:
10-quirks.conf 40-libinput.conf 45-evdev.conf 99-fbturbo.conf
Reboot the Raspberry Pi by entering:
After reboot, make the boot Option of the Raspberry Pi to Desktop or Desktop Autologin.Next, run the xinput calibrator with:
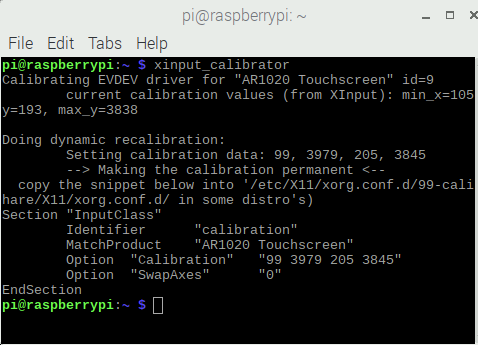
Perform the calibration and copy results. It should be similar to the text below:
Section “InputClass”
	Identifier 		“calibration”
	MatchProduct 	“AR1020 Touchscreen”
	Option “Calibration” “99 3979 205 3845”
	Option “SwapAxes” “0”
EndSection
Figure 10. Performing the Xinput Calibrator
Check the changes after the xinput calibrator ends. If you are satisfied, save it to make it permanent with:
sudo nano /usr/share/X11/xorg.conf.d/99-calibration.conf
Paste the result here. Save the file and reboot the Raspberry Pi with:
Now the display should be calibrated. Congratulations on successfully setting up and running your touchscreen monitor!