Stream content from all your devices with this Raspberry Pi-powered NAS.
Network attached storage (NAS) is the best way to keep your data backed up. Through this, you can also stream and access content from all the devices connected to the network. But common NAS systems are based around PCs, which can draw a large amount of current, especially as they’re powered on all the time.
In this tutorial I'm going to show you how you can convert your Raspberry Pi into an NAS. A Raspberry Pi is a low-powered device that draws only a fraction of power used by an actual NAS, and it’s also much cheaper. You lose some performance when you use a Raspberry Pi, but unless you want to stream very large files and want to stack up your hard drives in a raid configuration, the Raspberry Pi should work just fine.
Getting Started
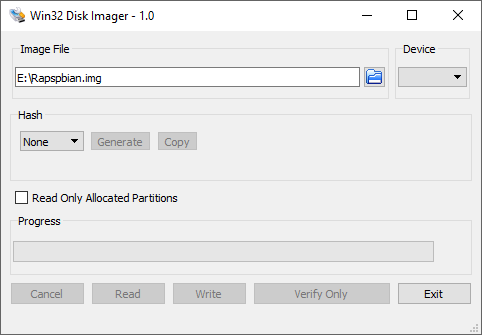
If you just got your Pi or have any other OS running, you will first need to install the Raspbian OS. First, you need to visit the Raspberry Pi official website and download a copy of Raspbian OS. Once the download is complete, you need to download a free tool called the win32 disk image maker. An alternative to this would be Power ISO.
After you have installed the disk image maker, it is now time to connect your SD or micro SD card to your computer. Next, open up the tool and locate the image file on the computer and select the drive to write to.
Once it is done writing, plug it into the Raspberry Pi and it should now boot up Raspbian OS.
Serial Communication
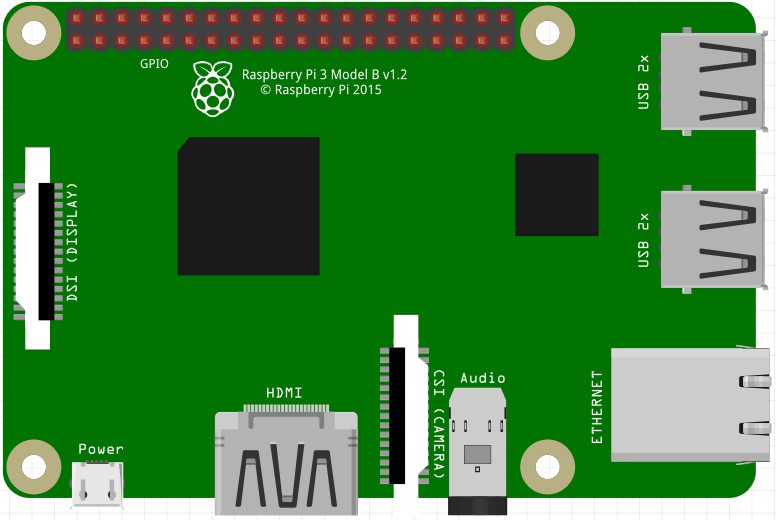
I’m using serial to establish communication between the computer and the Raspberry Pi. You could also ssh your Pi or attach a physical keyboard, mouse, and monitor to program it. To establish a serial communication, I'm using a USB-to-serial cable I found on eBay. You can also use an Arduino to establish this communication. The serial cable has four terminals that connect to the Raspberry Pi GPIO pins, and the other end to a computer. You can learn more about connecting it here.
If you are using Windows, install the drivers for the serial module and find out which port the serial communication is established using device manager in Windows as shown above.
Updating Raspberry Pi
After you have set up the serial communication between the Pi and PC, open up PuTTY and select serial as the type of connection. Enter in the correct com port, set the baud rate to 115200, and open a connection.
If everything went well, you should now see a login page. The default username is "pi" and password is "raspberry". Now let’s update the Pi; now would be a good time to plug in the LAN cable for internet access if you have not already done it. Type in the command below to update your Raspberry Pi:
If you are using a hard disk formatted to NTFS, you need to install an additional package called NTFS-3g that can be done by typing the following command:
sudo apt-get install ntfs-3g
Mounting the Hard Disk
Now let’s install Samba. Samba is the software that turns your Raspberry Pi into an NAS. You can install Samba by typing the following command:
sudo apt-get install samba samba-common-bin
After installing Samba, let’s configure it. This can be done by typing the following commands:
sudo cp /etc/samba/smb.conf /etc/samba/smb.conf.old

sudo nano /etc/samba/smb.conf
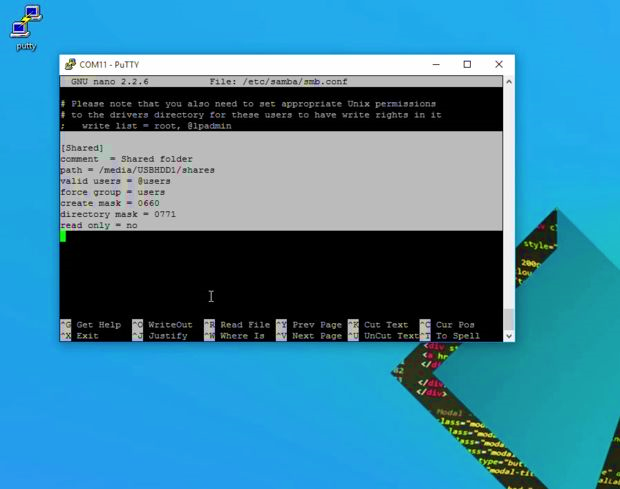
Scroll down to the bottom of the file and enter these few lines to enable sharing of the folder:
[shared]
comment = shared folder
path = /media/USBHDD1/shares
valid users = @users
force group = users
create mask = 0660
directory mask = 0771
read only = no
Adding Users
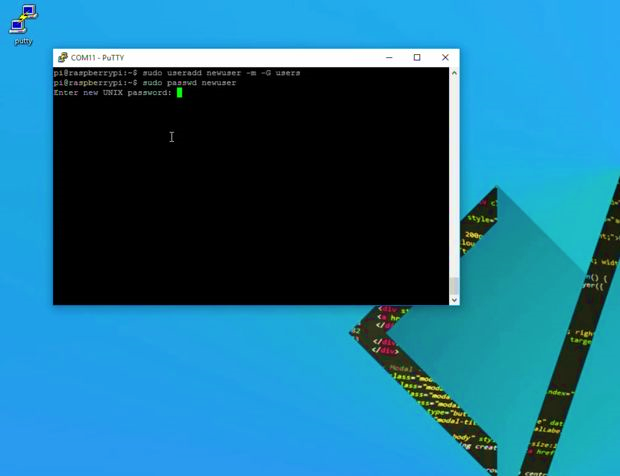
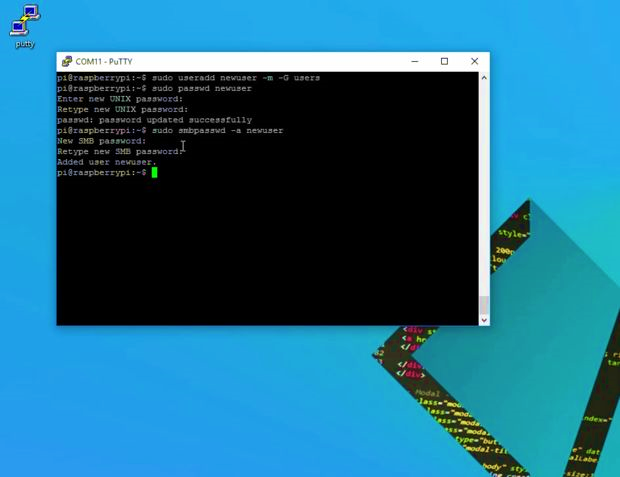
Now it’s time to add users who can access the files on the server:
sudo useradd admin -m -G users<br>sudo passwd admin
The user I created is called admin, but you can name it anything you want. Now let Samba know about the new user:
The above commands will ask you for passwords to access the server. You will need to remember that to access the files.
Testing
Now you have finished installing the NAS server, the server can be accessed by any client connected to the same network as that of the server. You can share user folders and protect them using a password. You can power the Raspberry Pi using a micro USB cable and a mobile charger, and mount it in an enclosure along with the hard drives.
To add additional users, you can repeat the previous step.
