Use EduBlocks with Raspberry Pi as a tool for learning programming with this tutorial.
There are several coding languages you can use to build awesome Raspberry Pi Zero WH projects. Some of the popular languages used in developing Raspberry Pi Zero WH applications are C, C++, and Python.
The popular graphical programming language Scratch allows young learners and adults with no prior coding experience to build cool Pi Zero WH projects as well. In this hands-on tutorial, you will learn how to install EduBlocks Connect on your Pi Zero WH. Also, you will learn of the graphical programming language called EduBlocks to make a simple Hello World/What Time is it Python 3 applications.
Materials: Hardware
- (1) Raspberry Pi Zero WH ( Pi ZeroWH)
What is EduBlocks?
EduBlocks acts as a programming language stepping stone of sorts between Scratch blocks and pure Python text.
The traditional approach to coding a Pi Zero WH is to use text-based programming languages such as C++ and Python. Between the two programming languages, Python is often more popular within the maker community. K-12 schools have introduced coding concepts to non-programming learners using the MIT-developed Scratch language.
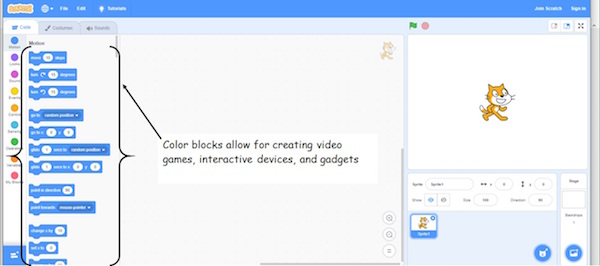
Scratch uses colorful shaped blocks that have embedded computer instructions. Stacking these blocks allows a variety of applications and smart devices to be created by K-12 learners. Adults with no programming experience have embraced Scratch allowing concepts in computer science and coding to be learned using the colorful instruction blocks. Figure 1 shows the Scratch Programming Environment.
Figure 1. Colorful blocks allow for the creation of interactive devices, video games and animation to be created with Scratch.
In contrast, you can learn Python 3 coding language with EduBlocks. EduBlocks has a similar graphical user interface (GUI) like Scratch.
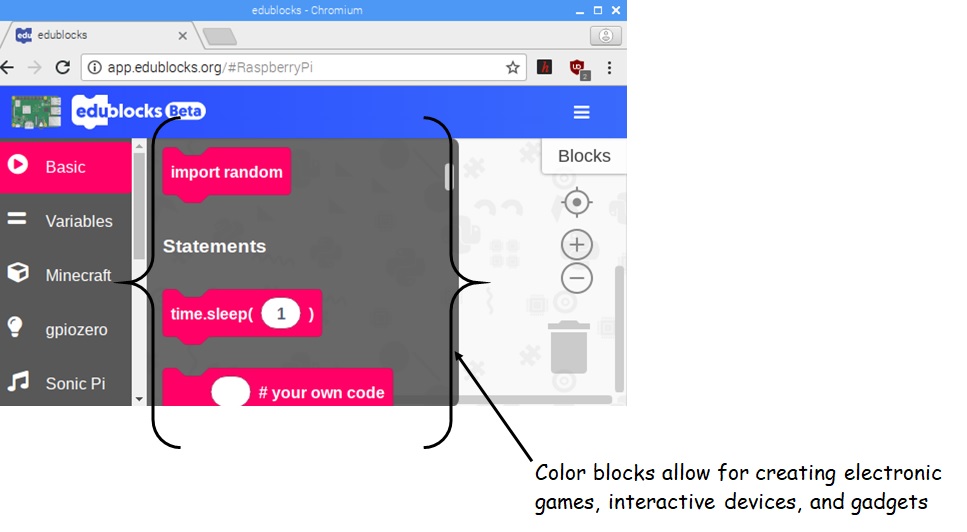
The GUI consists of color blocks that allow you to create programming applications. Such programming applications consist of physical computing devices, robots, interactive art, and electronic games. The colorful blocks have embedded Python 3 programming instructions. Stacking the blocks allows you to construct your coding application-based product.
Figure 2. The EduBlocks programming environment consists of a library of color blocks for creating interactive devices, electronic games, and gadgets.
In addition to the Pi Zero WH, the EduBlocks programming environment works with RPi Model B+ and 3 Model B+ single board computers (SBCs).
An internet connection is required to gain access to the online programming platform. Also, you can connect remotely with EduBlocks using a VNC connection. This approach allows you to create applications in remote sensing and mobile robotics controls using a virtual connection.
Now that you understand EduBlocks, you are ready to install the connect application onto the RPi SBC.
Installing EduBlocks Connect
You can install EduBlocks Connect quite easily using the following procedure.
- Connect your Pi Zero WH to the internet using an ethernet or wireless (WiFi) connection.
- At the top left-hand corner, select the terminal icon with your mouse.
- At the “$” prompt type the following LINUX command to install EduBlocks Connect onto your RPi SBC:
curl- -sSL connect.edublocks.org | bash
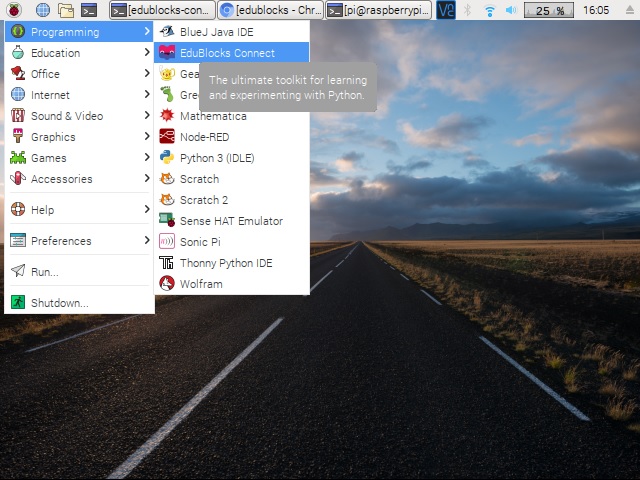
Note: This installation will take several minutes to complete, so be patient. - After the installation is completed, you will find the EduBlocks Connect icon located under the Raspberry Pi menu > Programming.
See Figure 3.
Figure 3. Launching the EduBlocks Connect application
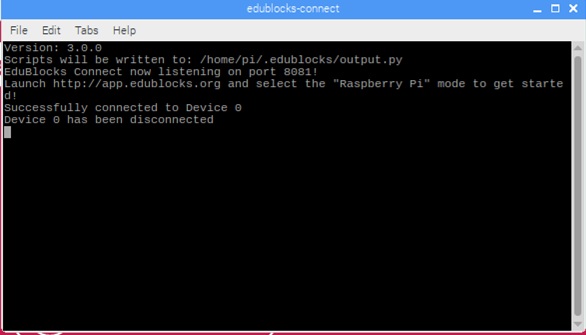
5. Launch the application with your mouse. The application launch will allow you to go to the app. edublocks.org website. See Figure 4. Copy the URL and paste onto your web browser.
Figure 4. An active EduBlocks Connect session
6. Select the Raspberry Pi icon with your mouse.
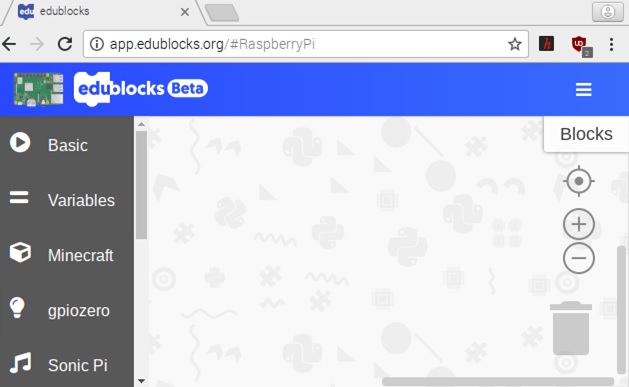
The EduBlocks programming environment will be visible on your HDMI monitor’s screen as shown in Figure 5. You are now ready to create your first EduBlocks Python 3 application.
Figure 5. The EduBlocks programming environment.
Hello World/What Time Is It EduBlocks Python 3 Application
You are now ready to program your first Python 3 application using EduBlocks.
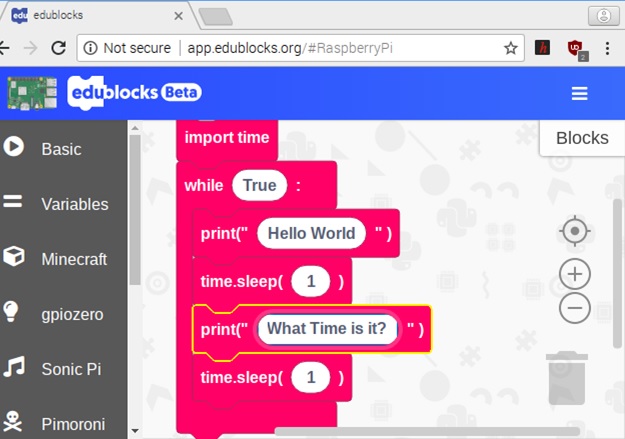
To obtain your code blocks, go to the right-hand side of the screen and select Basics with your mouse. You will see a variety of blocks available for programming. Build your Hello World/What Time is It Python 3 application using Figure 6.
Figure 6. The Hello World/What Time is it? EduBlocks Python 3 application.
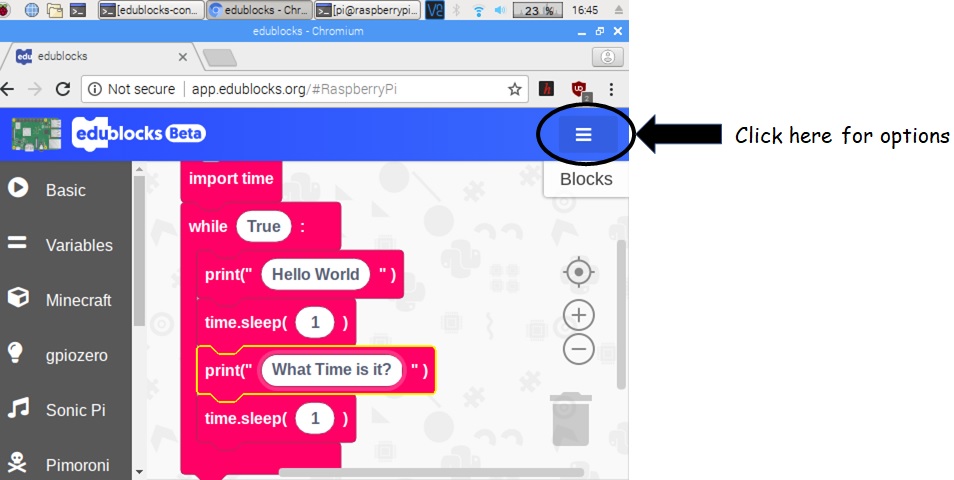
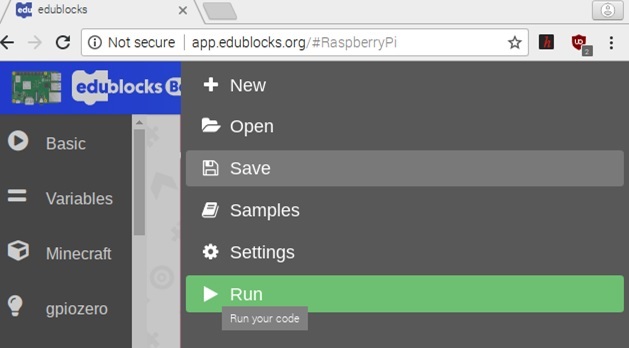
Next, click on the triple lines (options) located on the right side of the programming environment. See Figure 7.
Figure 7. Obtaining EduBlocks’ options.
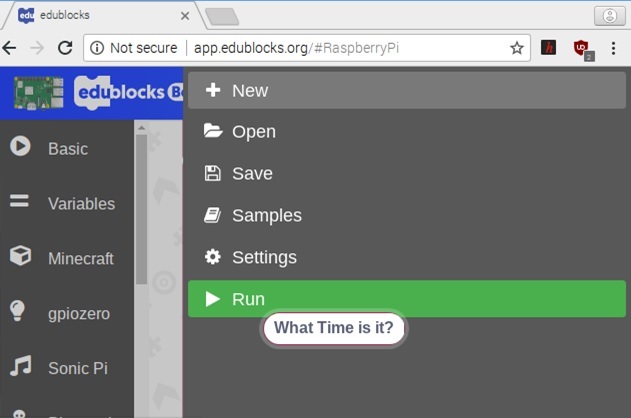
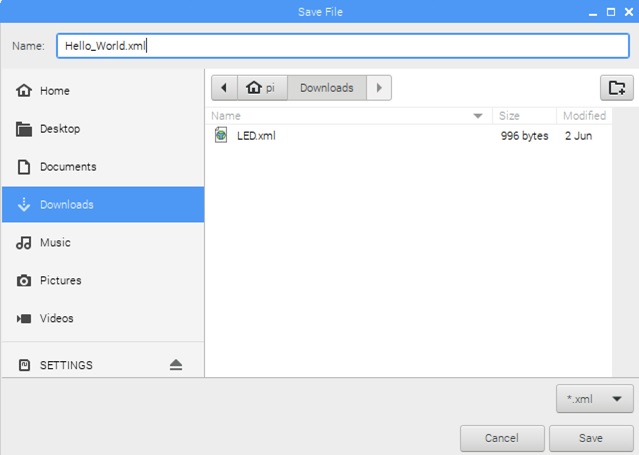
You will see a list of options to choose from as shown in Figure 8. Save your code application by clicking the icon. Save the Python 3 application as Hello_World.xml
Figure 8. Saving the Python 3 application by clicking the Save icon.
Change the default filename of main.xml to Hello_World.xml. See Figure 9.
Figure 9. Saving your Python 3 Application as Hello_World.xml.
With your Python 3 code saved, you are now ready to run the application. Click the Run-play button as shown in Figure 10.
Figure 10. Running the Hello World/What Time is it? Python 3 code.
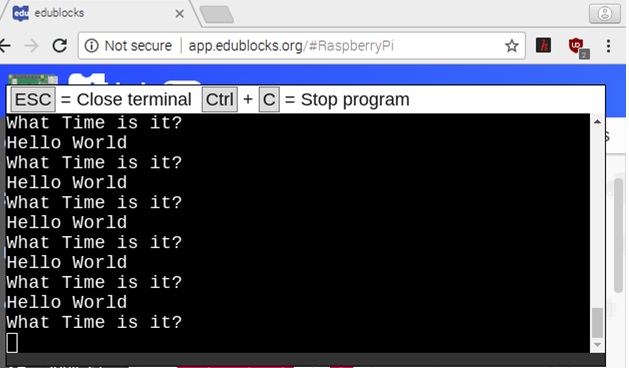
You will see two messages toggling and scrolling on your monitor. The code toggles between Hello World and What Time is it? every second. The total code execution time is two seconds.
Figure 11. The Python 3 code running.
To stop the application, click in the window and press the Ctrl +C keys on the computer keyboard. You can close the terminal by pressing the ESC key on your computer keyboard.
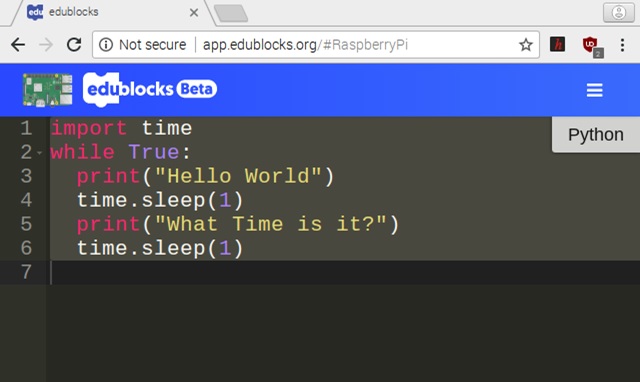
To view the equivalent Python 3 code, click the BLOCKS button with your mouse. On the screen, you will see the Python 3 code. Change the time to see various scrolling rates of the two messages as well as the toggling text. Run the code an observe the results.
Explore the other code blocks on Pi Zero WH with EduBlocks. Happy Coding!
Figure 12. The Python 3 code running.