In this post, you are going to learn how to build a Wireless Video Surveillance Robot using Raspberry Pi.
In this post, you are going to learn how to build a Wireless Video Surveillance Robot using Raspberry Pi. You will be able to control it from your smartphone browser or PC browser. Not only you will be able to move the robot but also the camera as we will add a pan tilt system.
Required Components for Wireless Video Surveillance Robot using Raspberry Pi
Installing required Packages
For video streaming, we are going to use Flask. Flask is micro web framework written is Python that is very easy to use and requires no libraries.
Use following command to install Flask.
pip3 install Flask
Then we need to install Numpy as we will have to map values in between our code.
pip3 install numpy
Then we need to install OpenCV to captures frames from pi-camera. Before install OpenCV, we need to install some dependencies required by OpenCV.
sudo apt-get install libhdf5-dev -y && sudo apt-get install libhdf5-serial-dev -y && sudo apt-get install libatlas-base-dev -y && sudo apt-get install libjasper-dev -y && sudo apt-get install libqtgui4 -y && sudo apt-get install libqt4-test -y
pip3 install opencv-contrib-python==3.4.2.16
After that, we need to install pigpio package required for controlling servo motors.
pip3 install pigpio
In last, we need RPi.GPIO package required for controlling DC Motors.
pip3 install RPi.GPIO
Code
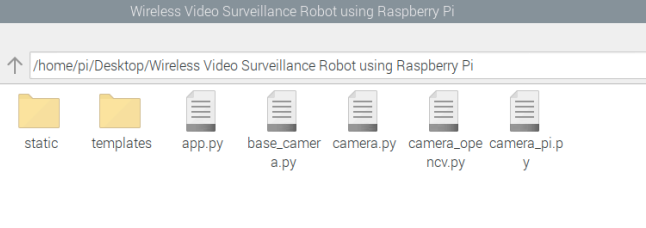
Project directory will look as follows
app.py is the main file which contains the flask code and is creating the server to send and receive information from the webpage.
In this file, first we have imported packages required for our project. You can use both picamera package or OpenCV to capture frames from pi-camera. I have used OpenCV as it gave better results. Video streaming code is taken from flask-video-streaming-revisited by Miguel Grinberg.
from camera_opencv import Camera
# Uncomment below line and comment above line if you want to use picamera package
# from camera_pi import Camera
For controlling the servos, i have used pigpio package as the servos run smoother using this package. There was jittering while using RPi.GPIO package.
import pigpio
Our Flask App has 4 [email protected](‘/’) will host the home page. Calling this url will return the index.html file.
@app.route(‘/video_feed’) will be used to send a stream of video frames to the webpage captured from camera. It starts a new thread each time a new user is connected and thread is closed when the user disconnects.
To know more how this is done, check out article by Miguel Grinberg i linked above.
@app.route(‘/DCmotor’) will get data when moving left joystick.
@app.route(‘/ServoMotor’) will get data when moving right joystick.
We are basically sending XMLHttpRequest when moving the joysticks. These requests are used to interact with servers without the need to do a full page refresh. These can both send and receive data but we are only sending in our case.
Below code from line 126 in index.html sends the data on moving left joystick.
var xhr = new XMLHttpRequest();
xhr.open('GET', "./DCmotor?x_dist=" + (sendJoystickL_xDist) + '&y_dist=' + (sendJoystickL_yDist))
xhr.send();
To add virtual joysticks on webpage, i have used nipplejs by Yoann Moinet.
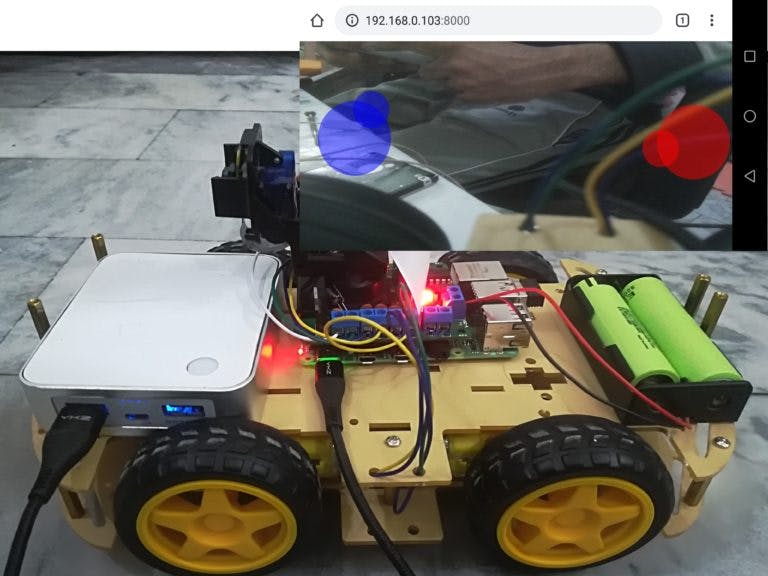
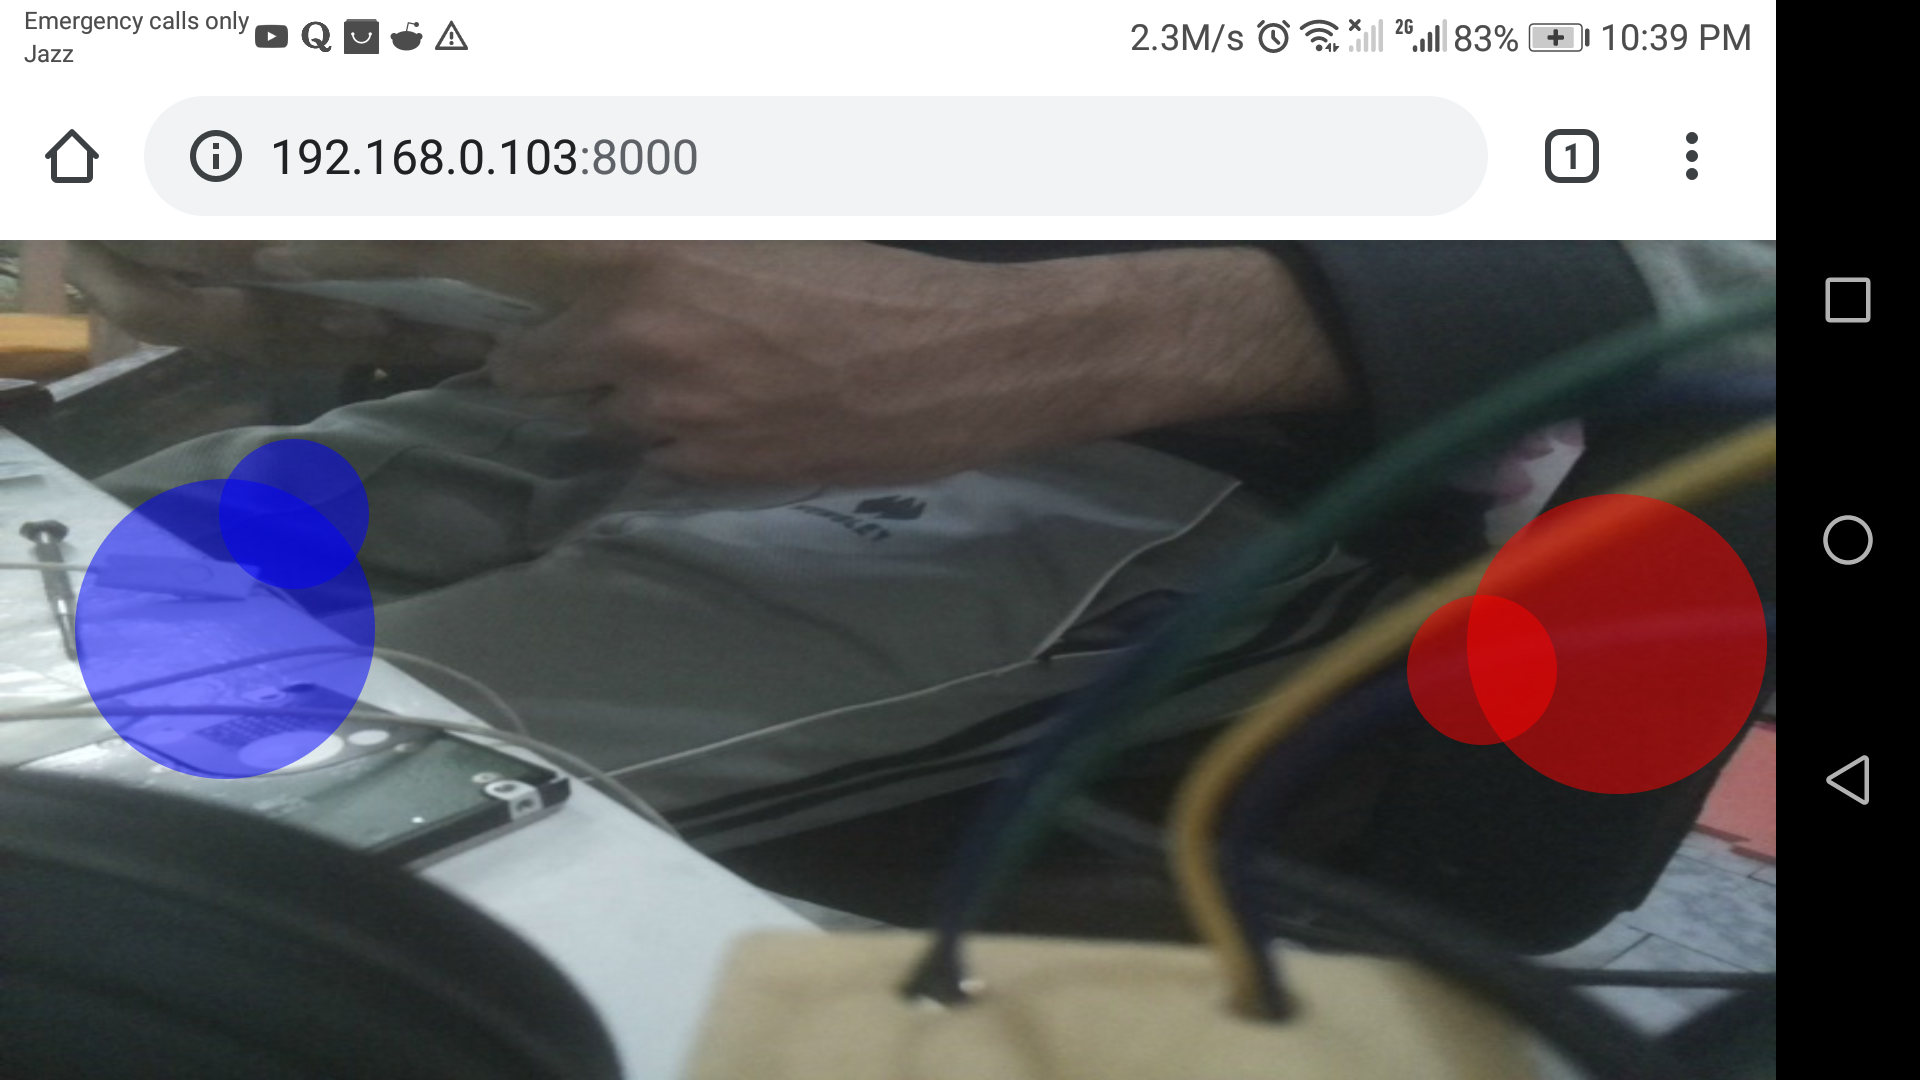
There are two joysticks available on the webpage. Red one on the right will control servo Motor and blue one on the left will control DC motors. Blue joystick will be available in 40% area from left and red joystick will be available in 40% area from right. Joysticks will not be available in 20% area in the centre.
How to Run
Before running the code, you need to turn on the pigpio daemon.
sudo pigpiod
Then type following command to run the code.
python3 app.py
Then from your browser, type the IP address of your Raspberry pi followed by :8000.
If you don’t know IP address of your Raspberry Pi, type ifconfig in terminal and it will show IP address. My Raspberry Pi’s address is 192.168.0.103 so i will type 192.168.0.103:8000 and it will show webpage.
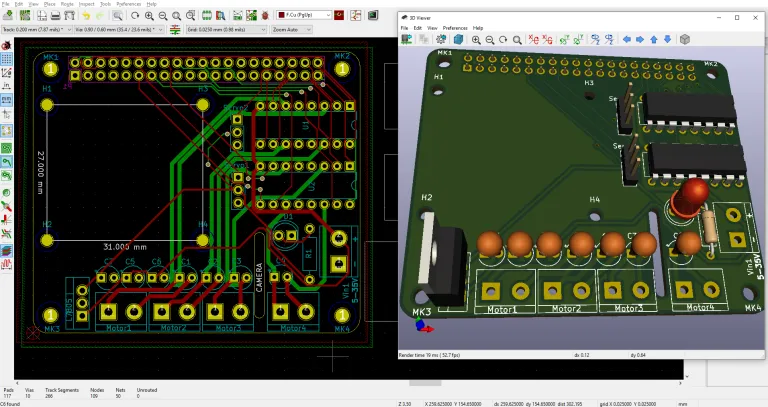
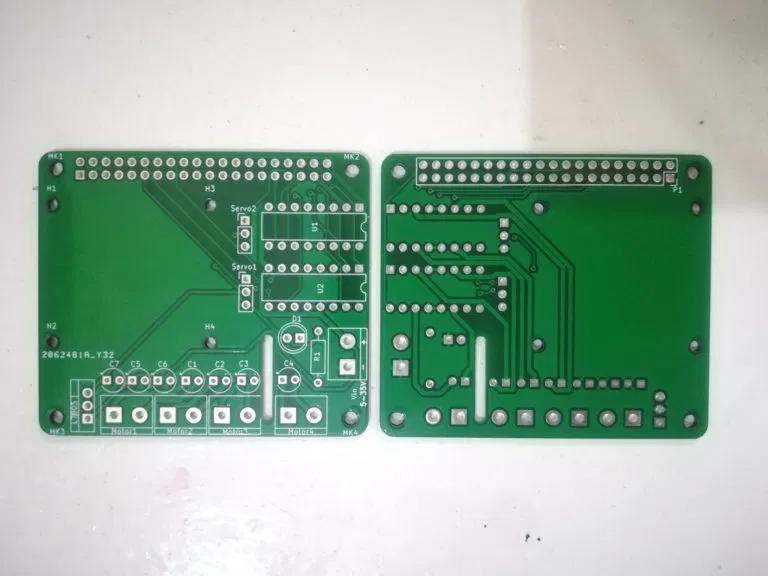
PCB Design
I have designed the PCB on KiCad.
Following is a link to the project folder of this project.
After designing the PCB’s, I generated the Gerber file needed for manufacturing of PCB.
You can download the Gerber file through following link
Ordering the PCB’s
Now we have got the PCB design and it’s time to order the PCB’s. For that, you just have to go to NEXTPCB, and click on “QUOTE NOW” button.
NextPCB is one of the most experienced PCB manufacturers in China, has specialized in the PCB and assembly industry for over 15 years, providing some of the most innovative printed circuit board with assembly technologies in terms of the highest quality standards, fastest delivery turnaround as fast as 24hours, lowest manufacturer direct prices, and the most dedicated customer service in the industry.
Next, enter dimensions of PCB and click on calculate.
Then it will ask for Pricing and Build Time, choose these and click on ADD TO CART.
Then it will ask to add the PCB file. So add the Gerber file I gave in the last step.
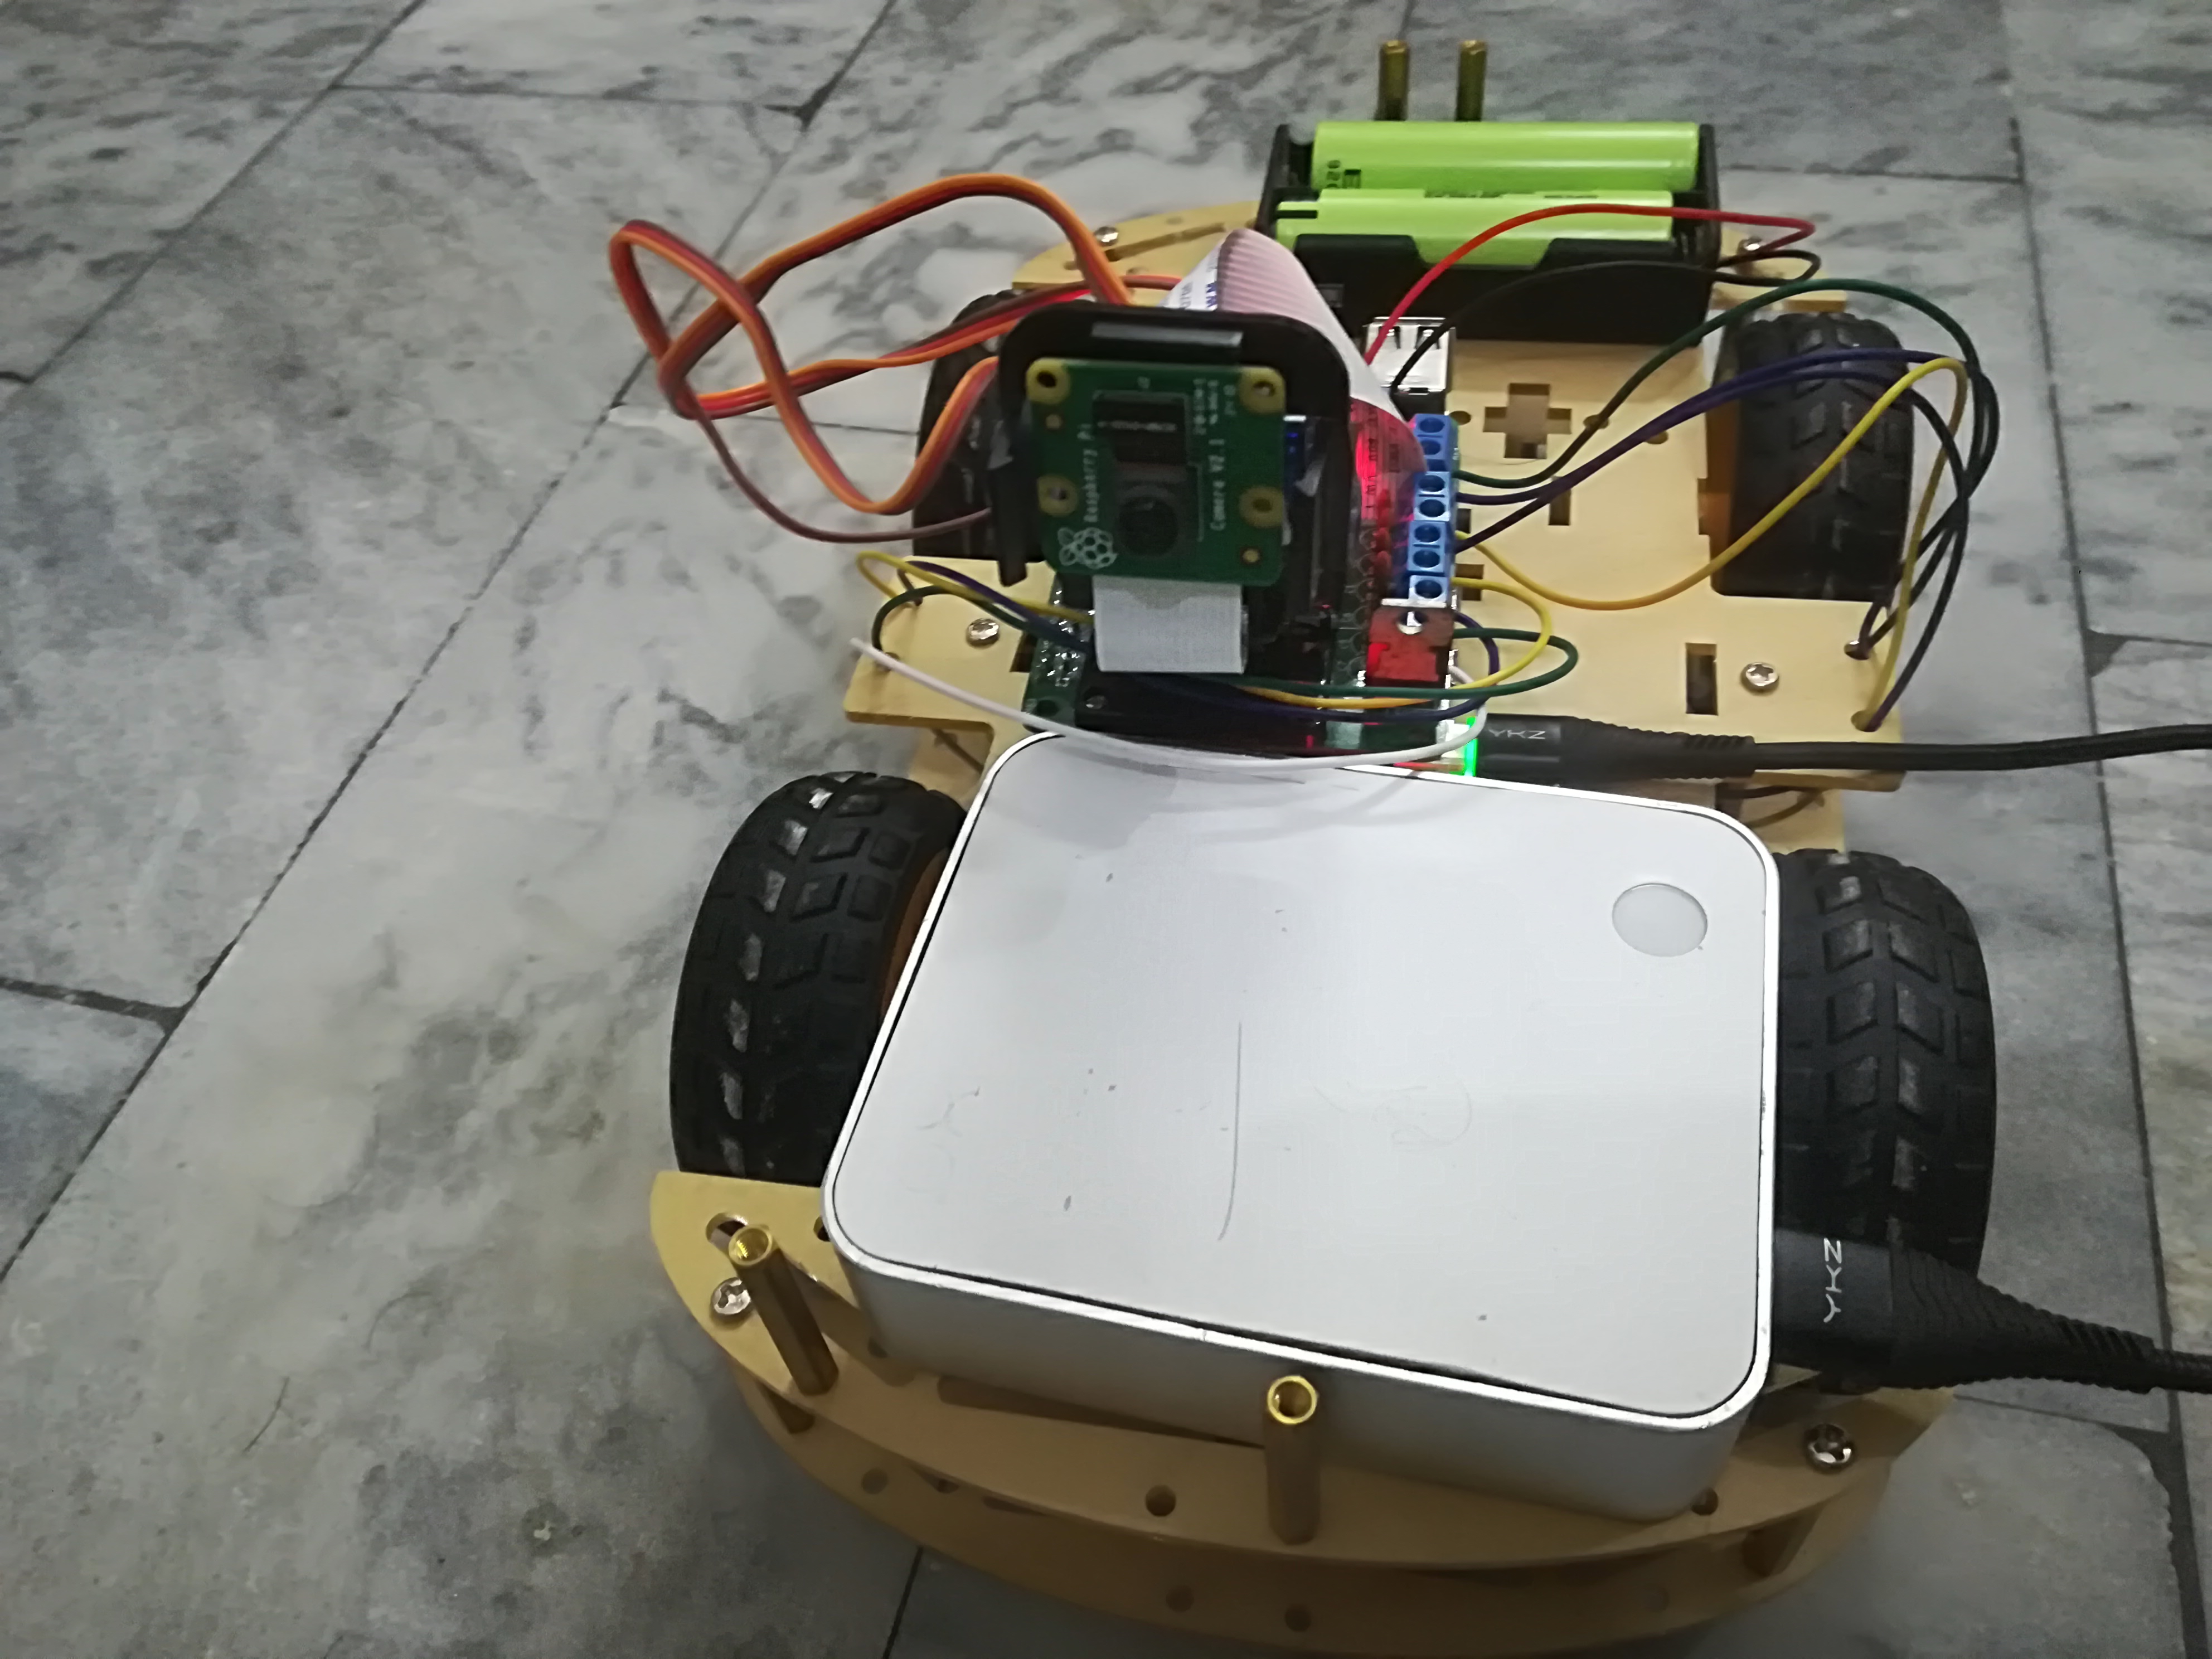
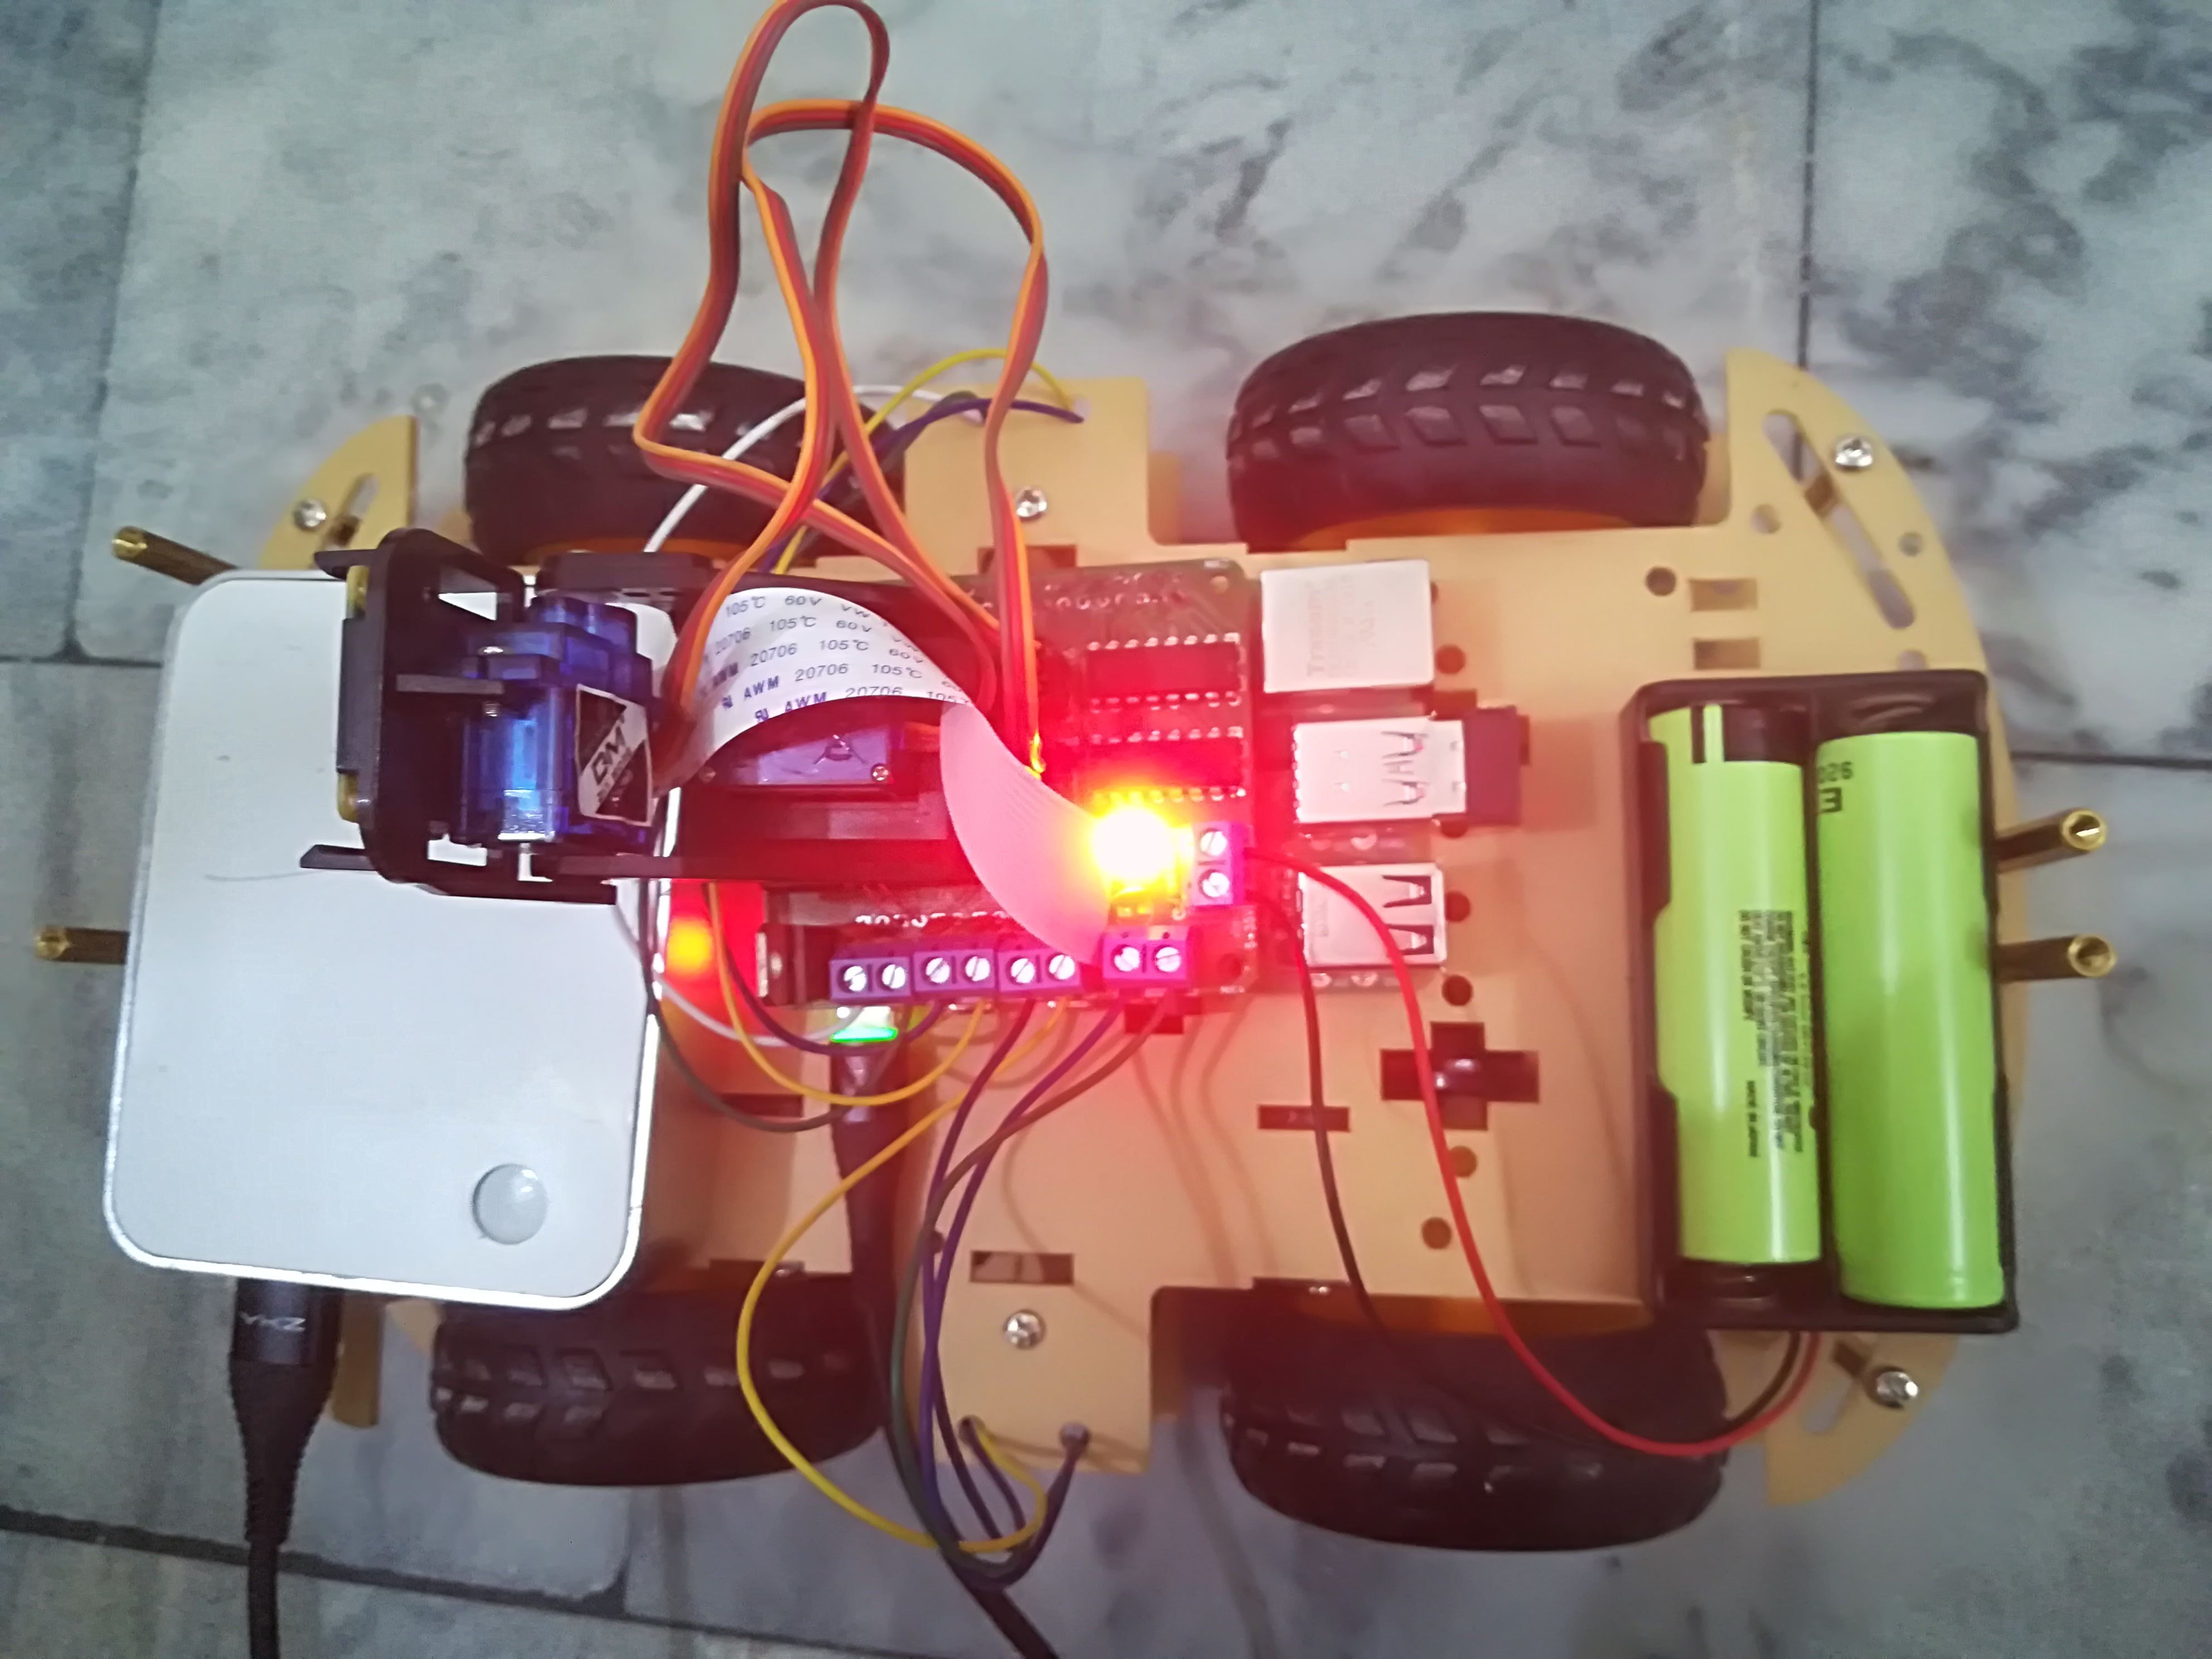
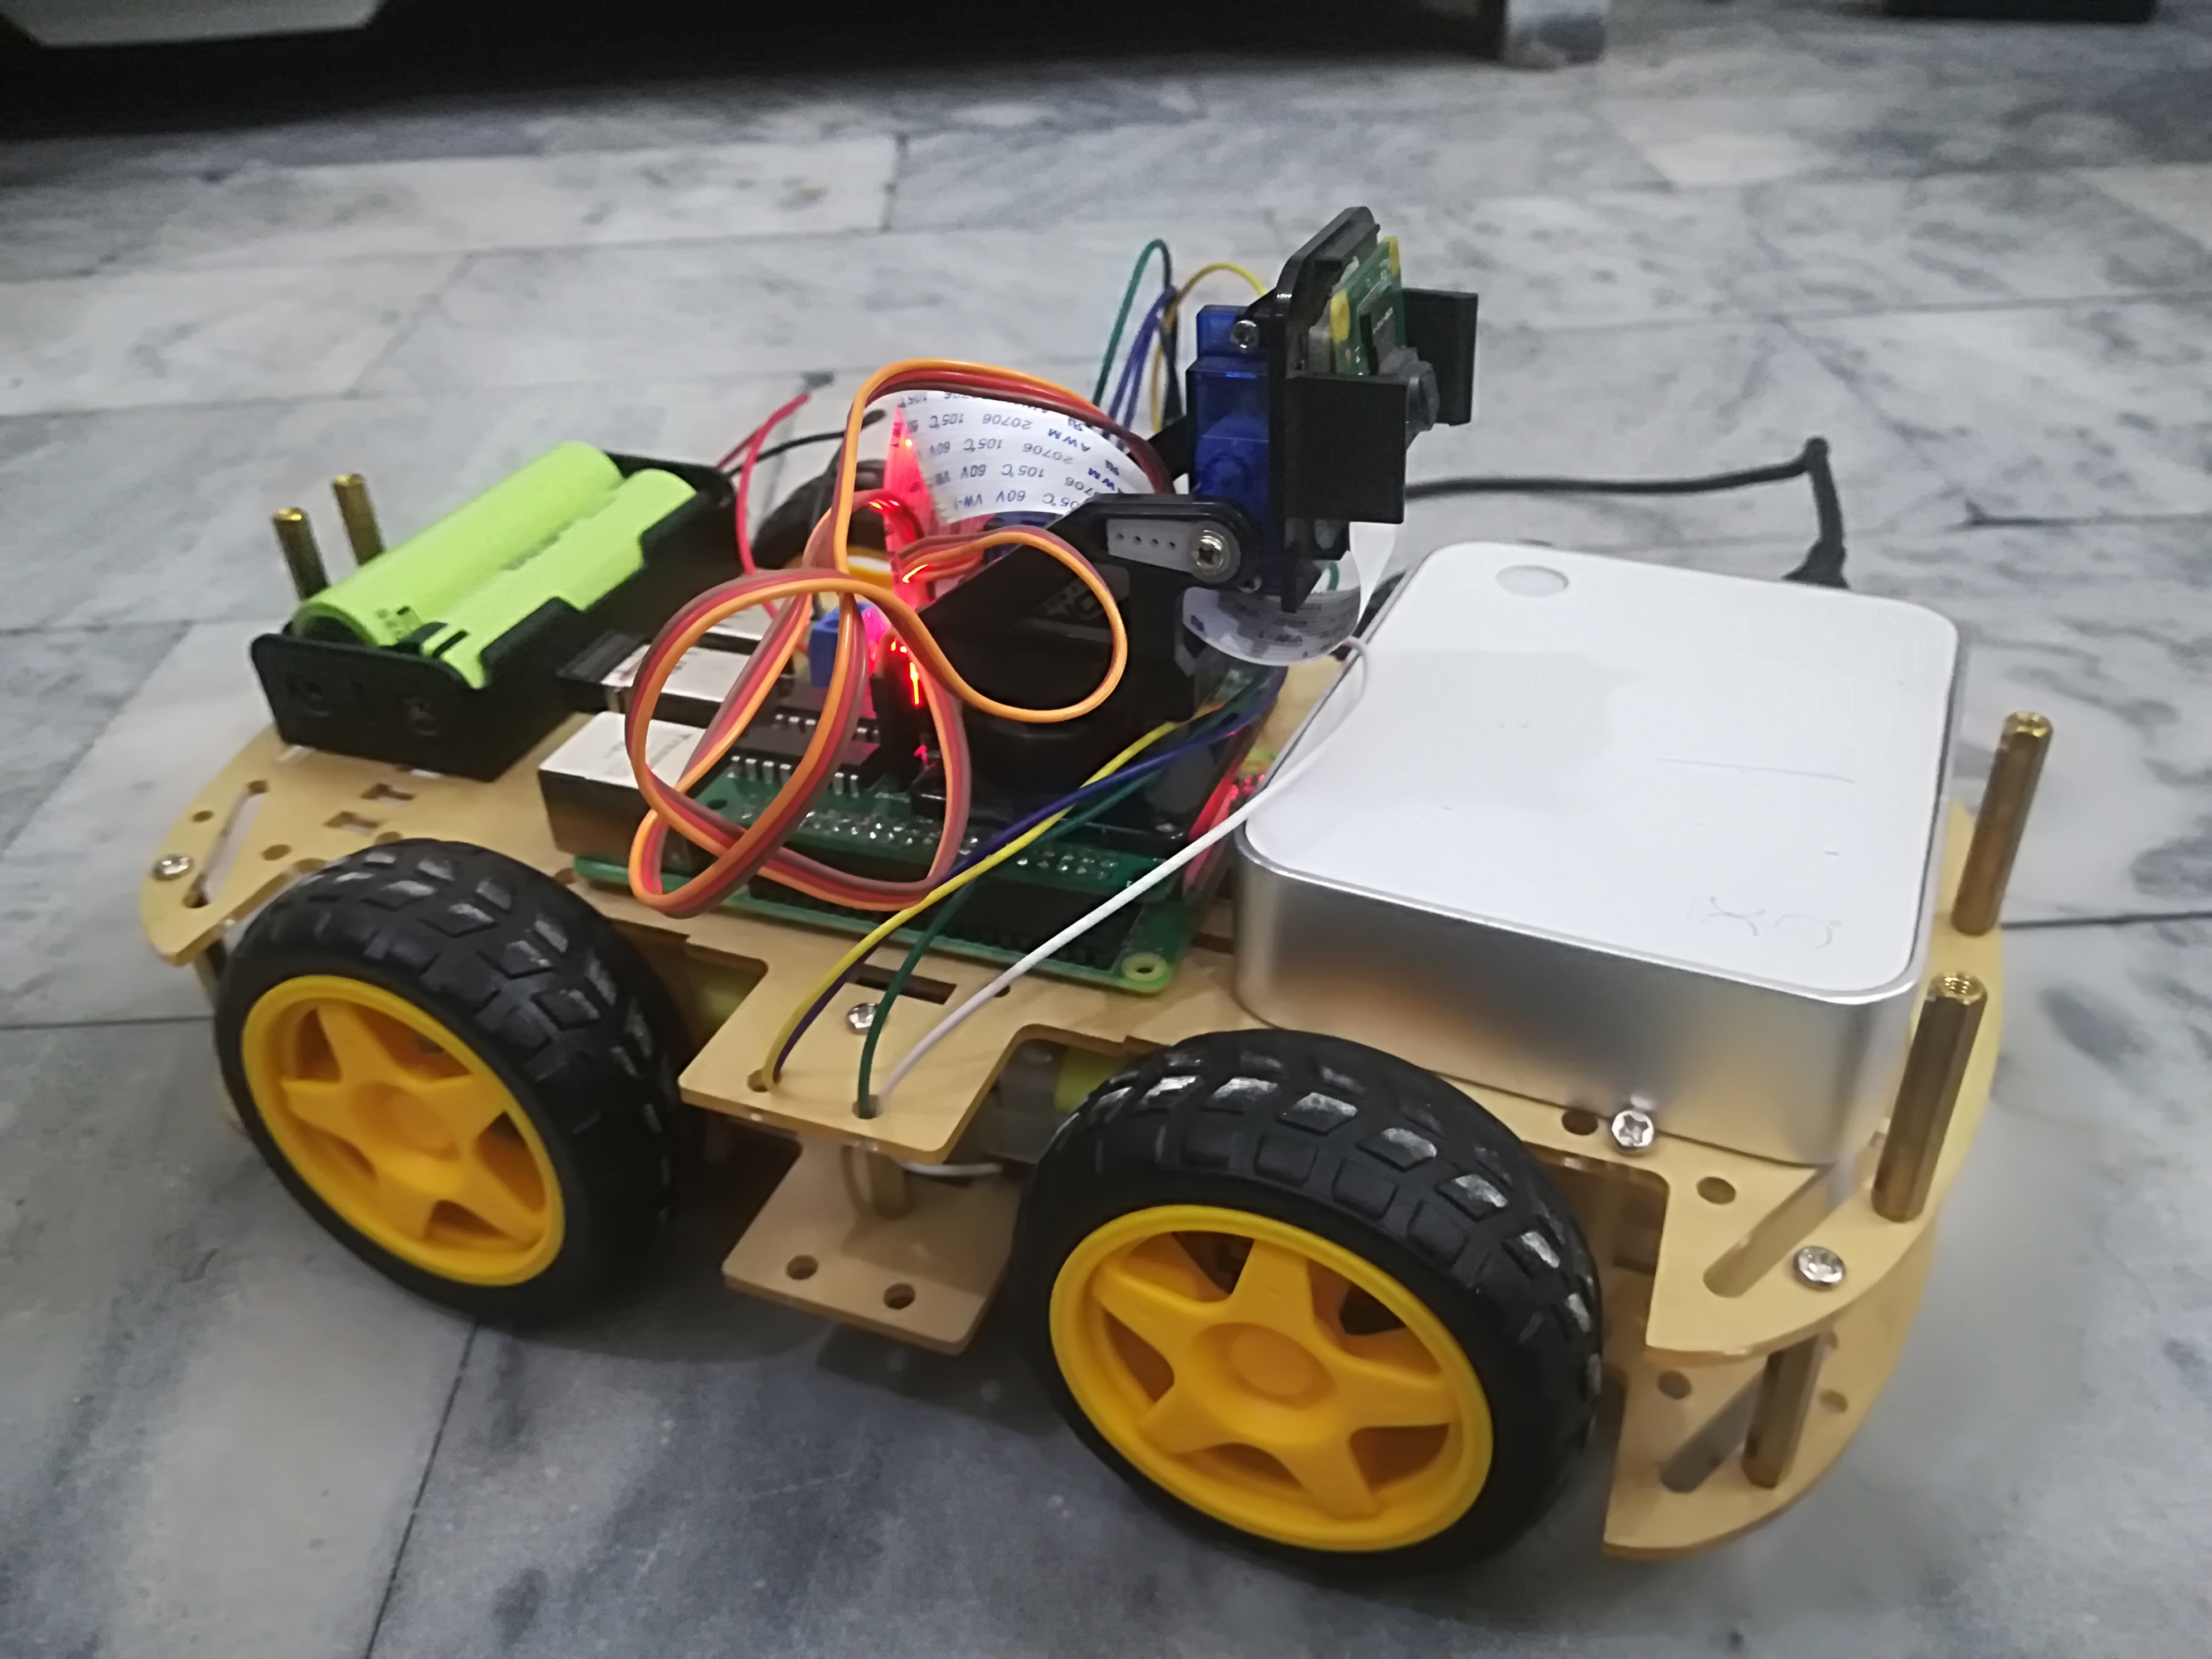
My PCBs took 2 days to get manufactured and arrived within a week using DHL delivery option. PCBs were well packed and the quality was really good.
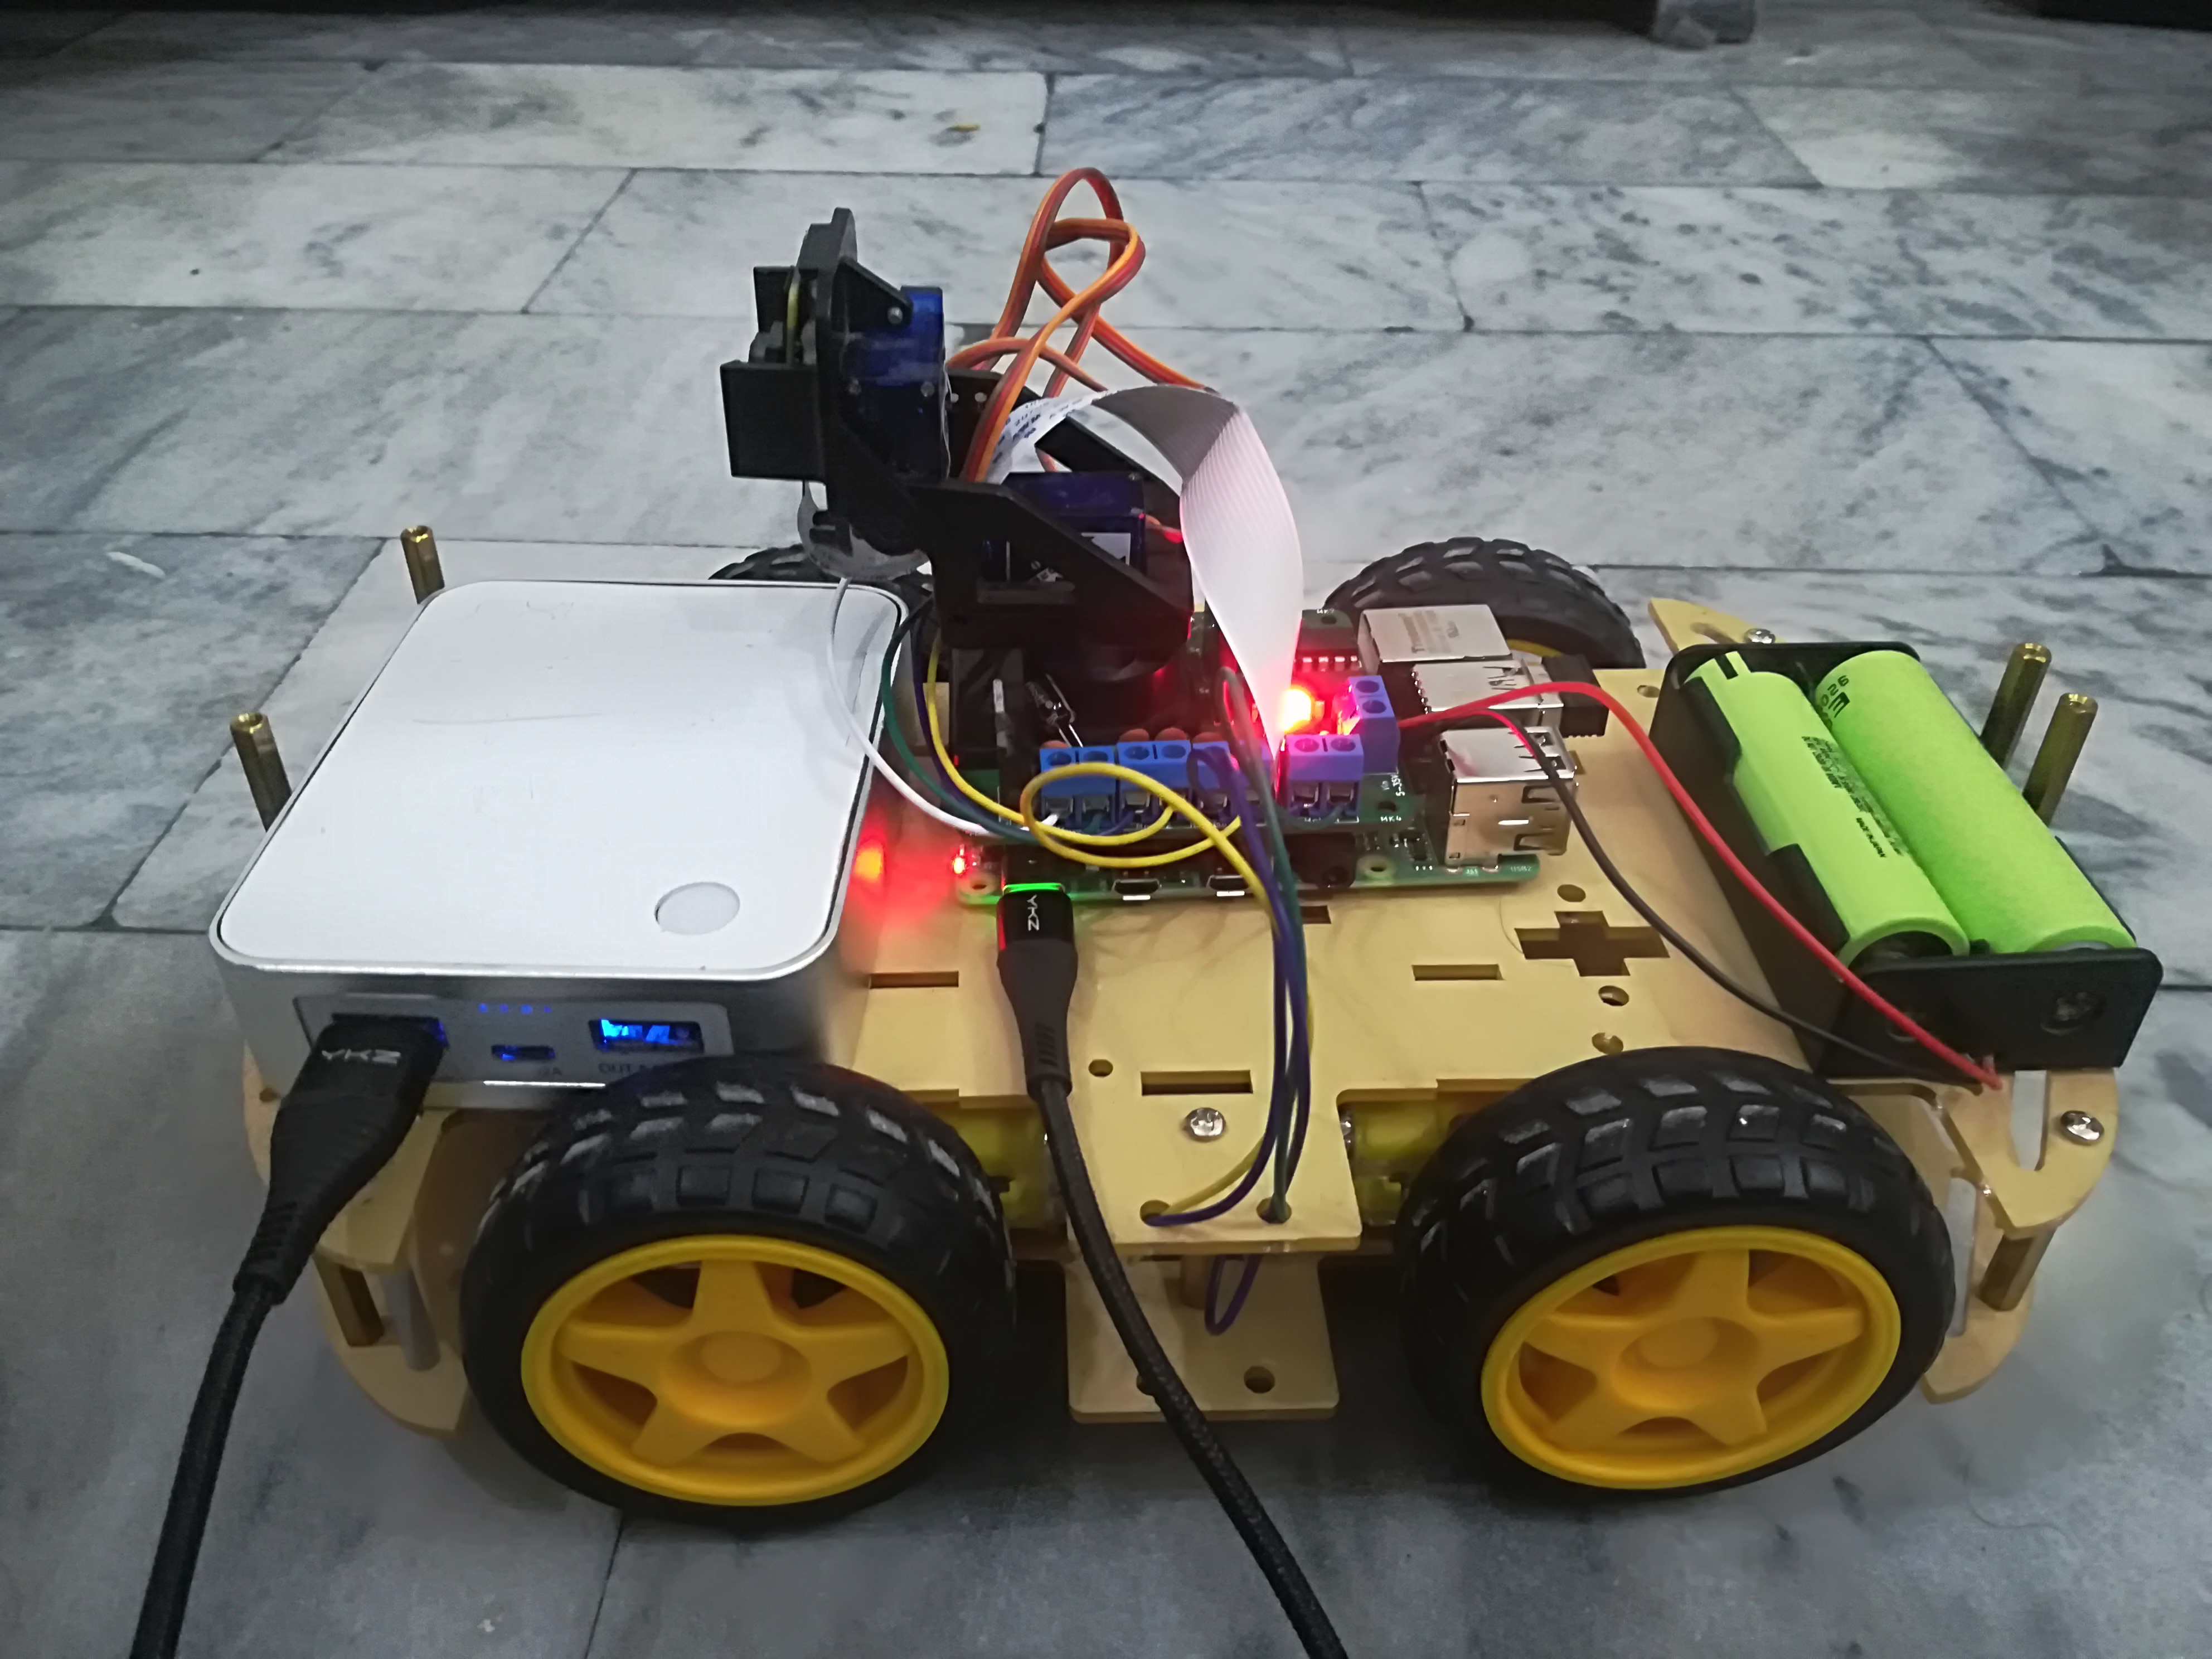
Here is how it looks like after assembling everything.
If you have any questions, feel free to ask in comment section.