Make in minutes a battery powered WiFi temperature sensor with GUI dashboard in Node-RED on Raspberry Pi!
In this project we show how to build battery powered WiFi sensors (i.e. temperature), buttons or any other IOT end nodes with Cricket and integrate them, without writing any code or programming to Node-RED. We use Raspberry Pi to host Node-RED in our local network.
This project can be realised by makers at all skill levels. It may require some basic soldering however it doesn't require any coding or programming. In the end of this project you will get a solid idea how you can easily build your own system and quickly extend by adding your own IOT end nodes to the system.
Our system is going to be based on MQTT communication protocol, which is hugely adopted in most home automation systems. We use Mosquitto MQTT broker and if you do not have it yet we recommend to follow our simple RPi + MQTT project showing how to set it up first.
What is Node-RED?
It is a very easy, event-driven tool for setting up your own automation system.
You may also find more formal and precise Node-RED definition on their website: "Node-RED is a programming tool for wiring together hardware devices, APIs and online services in new and interesting ways. It provides a browser-based editor that makes it easy to wire together flows using the wide range of nodes in the palette that can be deployed to its runtime in a single-click." (ref. nodered.org)
The best way to learn about it, is obviously by doing it by ourselves. There are plenty of resources available on the internet. However this project is sufficient to provide you a basic introduction how get started and integrate your devices built with WiFi Cricket module to your system.
Installing Node-RED on RaspberryPi
You can find the most up-to-date official instructions how to install Node-RED on RPi here: https://nodered.org/docs/getting-started/raspberrypi
However, at the time of doing this project it is as simple as executing this single command line on RPi:
pi@raspberrypi:~ $ bash <(curl -sL https://raw.githubusercontent.com/node-red/linux-installers/master/deb/update-nodejs-and-nodered)
After successful installation we should get the following output:
All done.
  You can now start Node-RED with the command  node-red-start
  or using the icon under   Menu / Programming / Node-RED
  Then point your browser to localhost:1880 or http://{your_pi_ip-address}:1880
For our convenience we would like Node-RED to be running permanently as a service in the background. So whenever we restart RPi the Node-RED system will be automatically started at boot time. All we need is to execute the following commands:
pi@raspberrypi:~ $ node-red-start

// Press Ctrl-C (it doesn't stop Node-RED it keeps running as a service in a background)

pi@raspberrypi:~ $ sudo systemctl enable nodered.service
This is it! Node-RED is up and running in the background. Now we can open the Node-RED editor from any computer / phone which are in the same network as the RPi. In order to do that we need IP of the RPi and we can obtain it with this command:
pi@raspberrypi:~ $ hostname -I
192.168.1.126 <- our RPi IP address, yours will be different
Now we can open its editor from a web browser using in our case the following address: http://192.168.1.126:1880
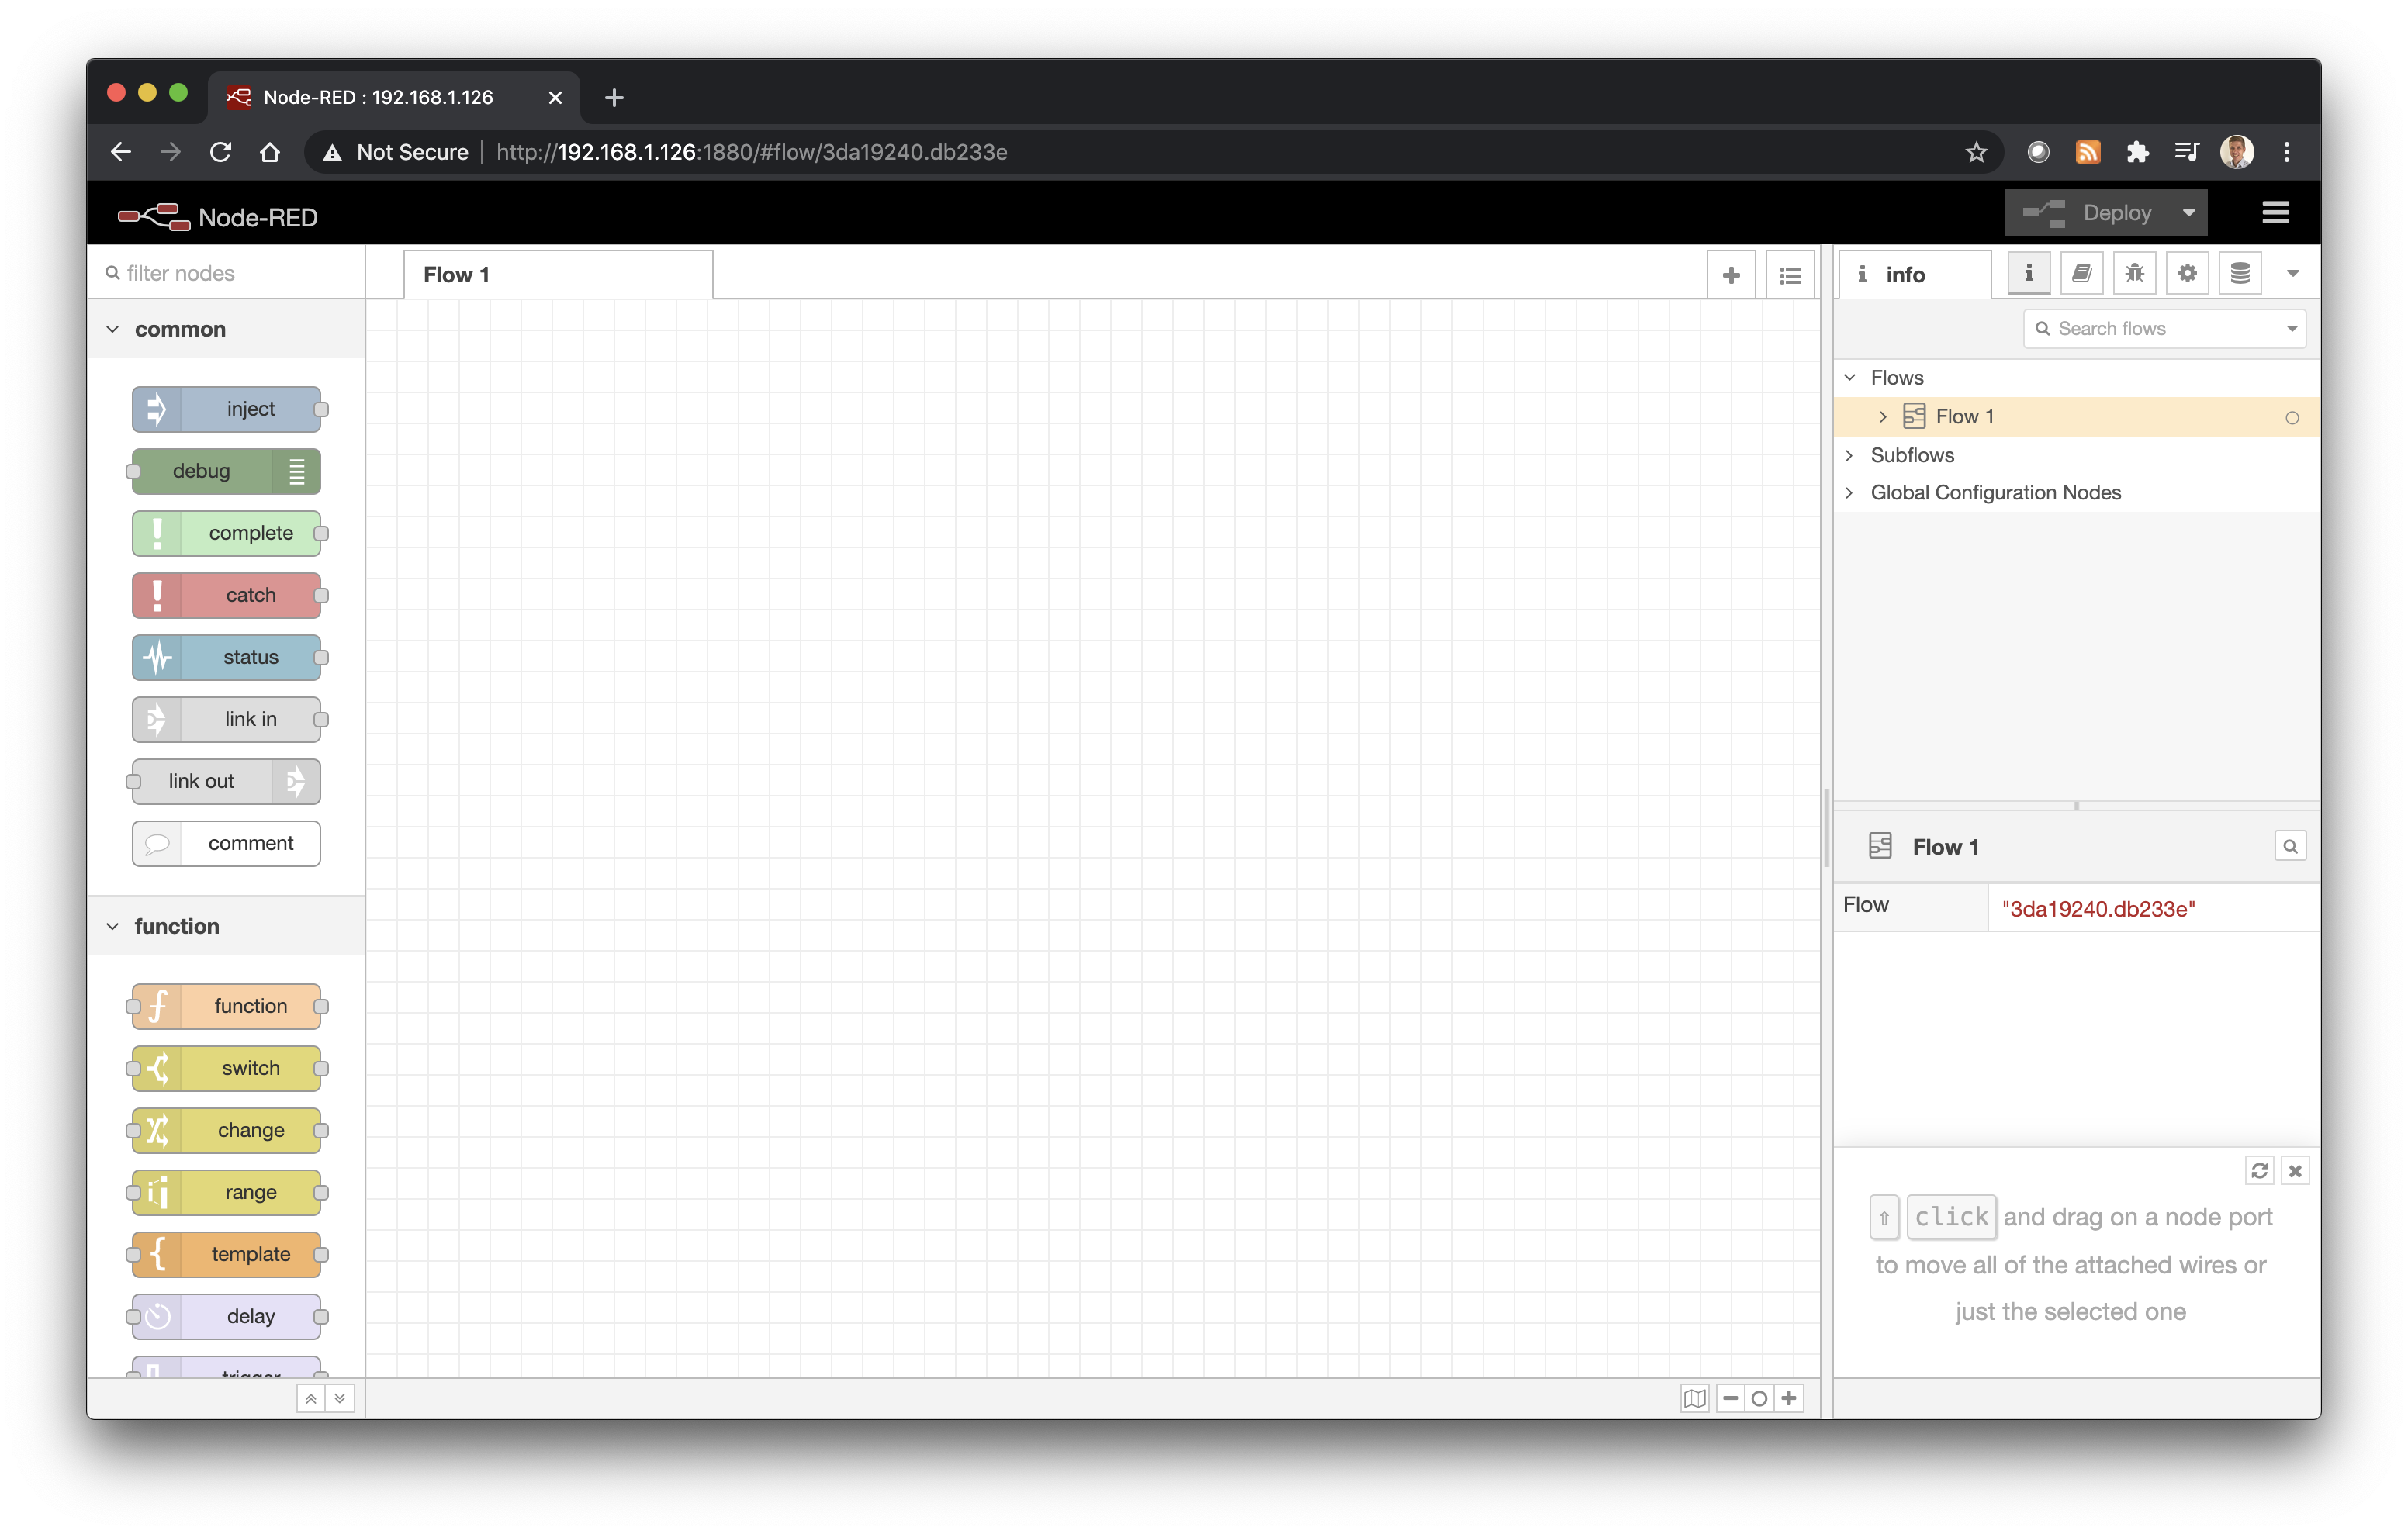
Great we have got the Node-RED up and running.
Receiving MQTT messages in Node-RED
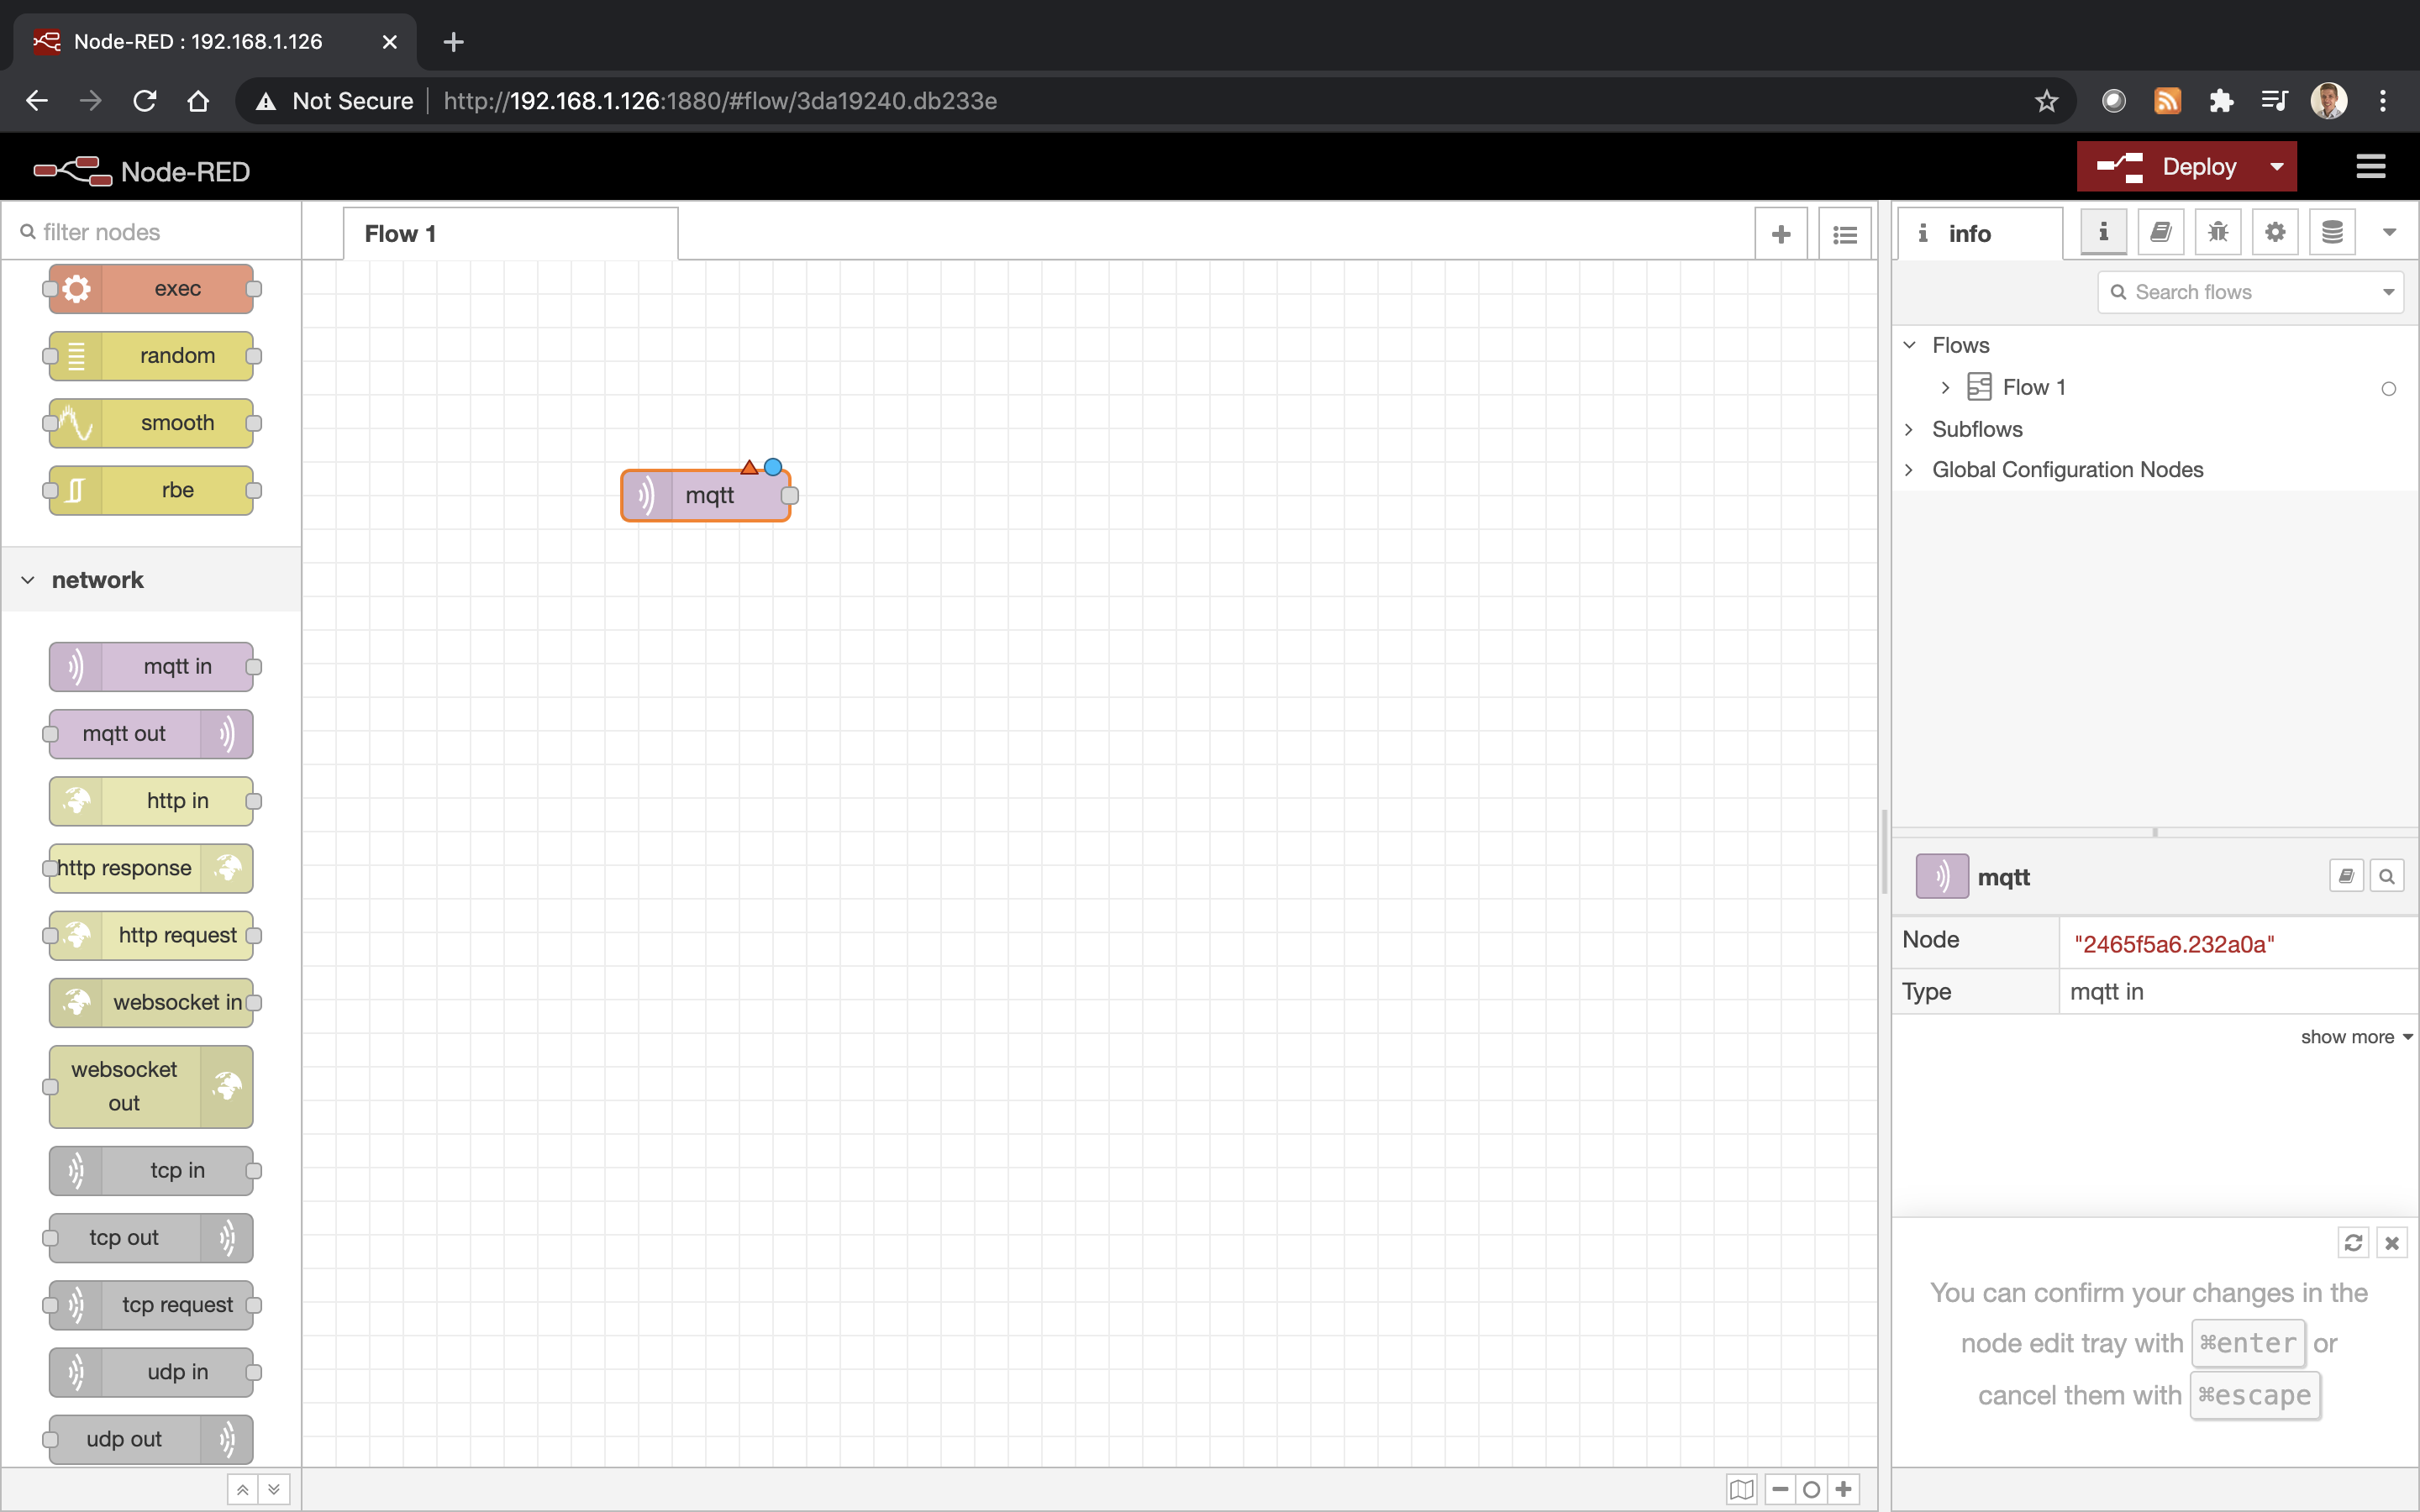
It is a very simple and straight forward way to start receive MQTT data in Node-RED. All we have to do is to create a "mqtt in" node:
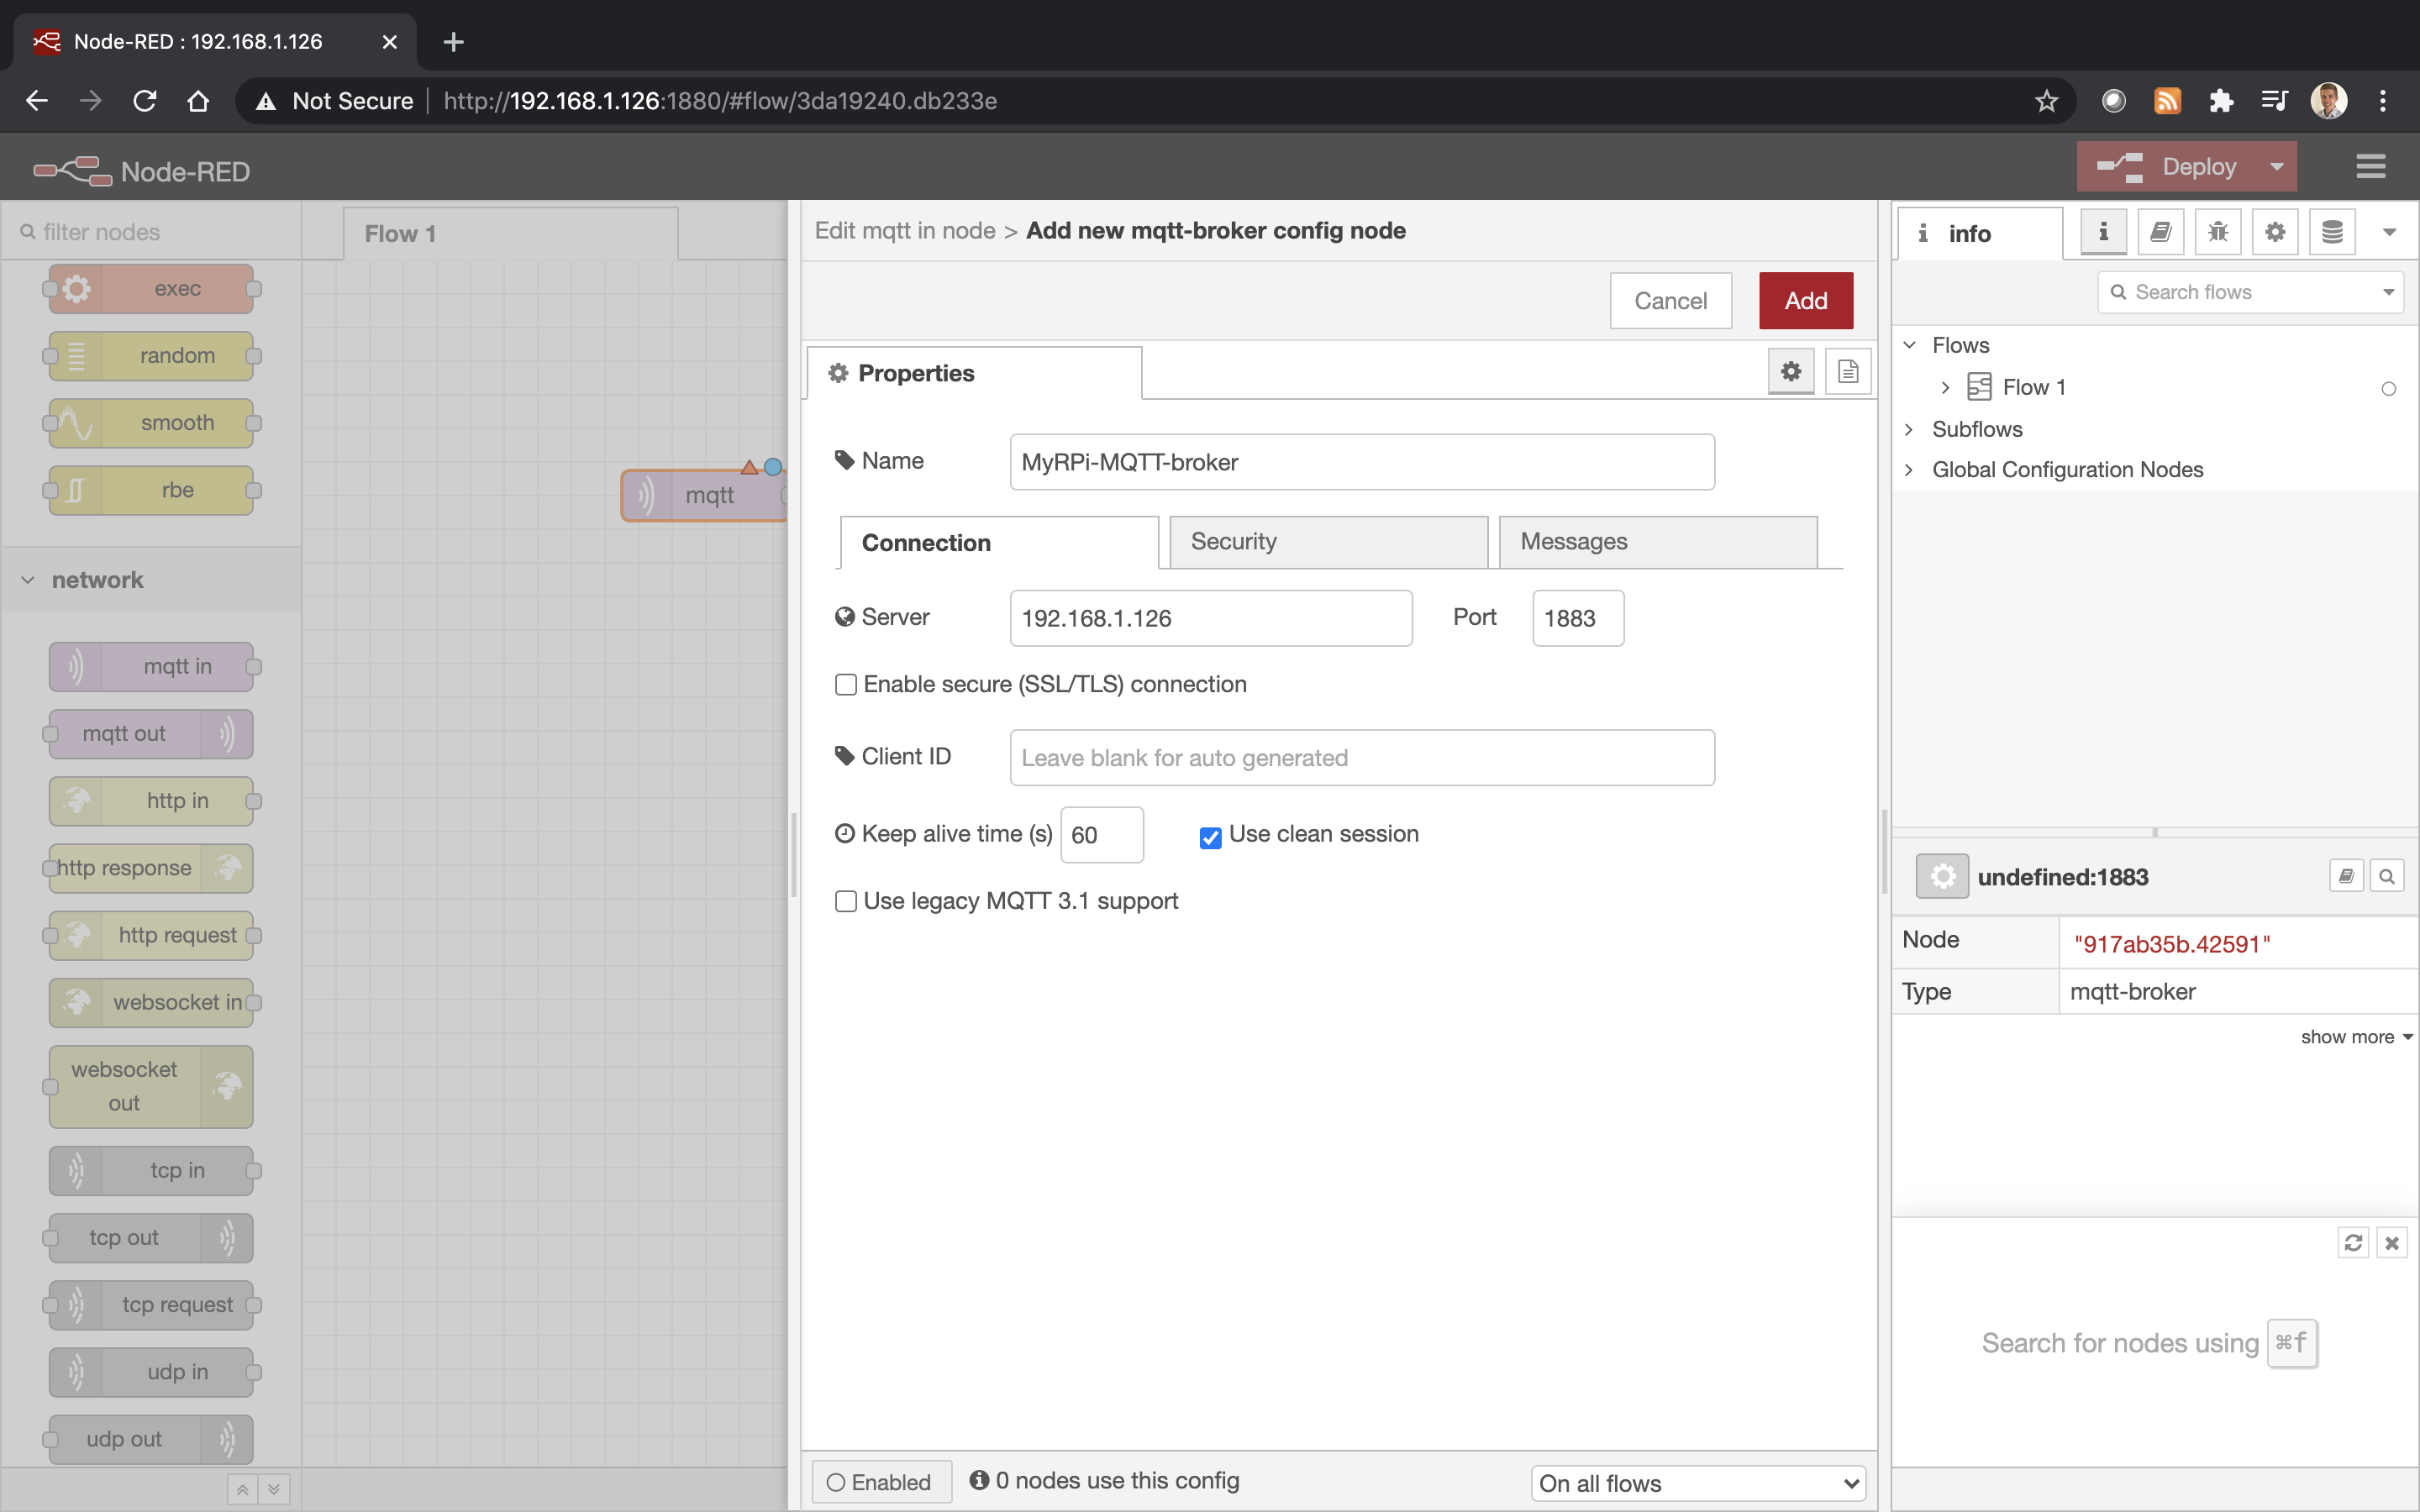
Then we need to configure the mqtt node by double clicking on it and setting up IP and Port. Note you can use any MQTT broker, however for this project we are using our MQTT broker installed on the the same RPi as Node-RED. (see RPi + MQTT project ).
In our case it is:
Server: 192.168.1.126 (alternatively you can type localhost)
Port: 1883
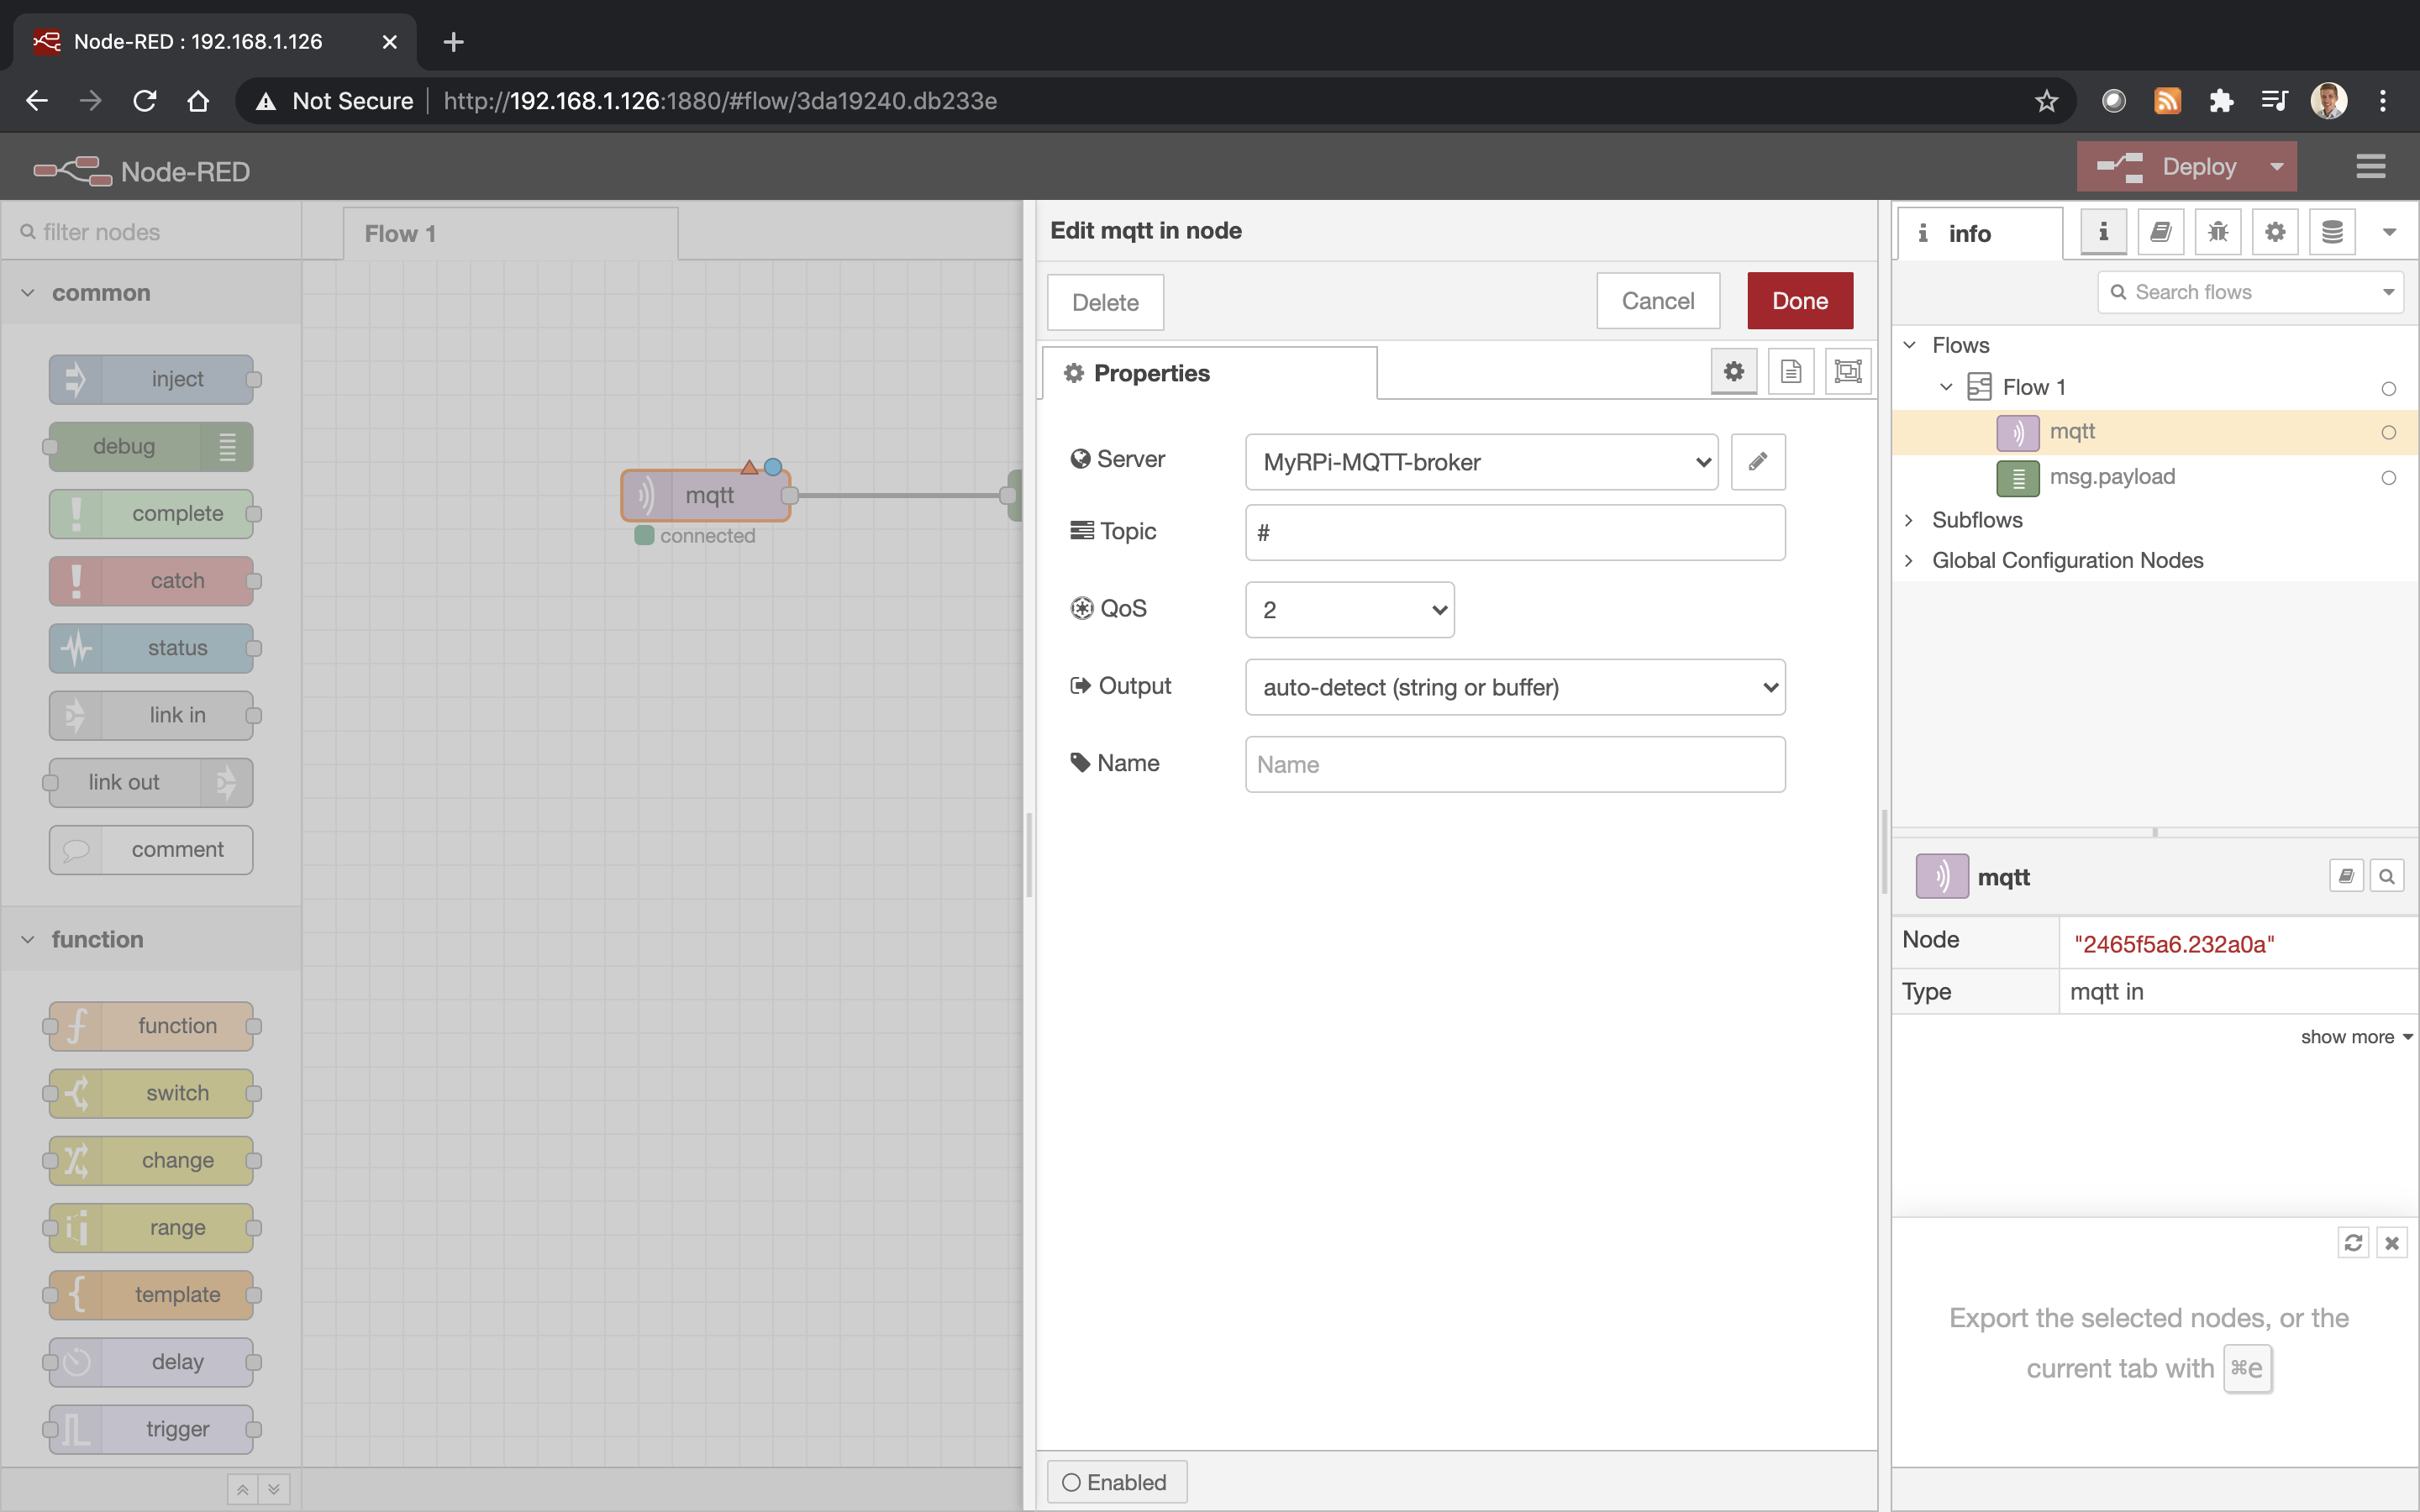
Temporarily we are going to receive all messages from our MQTT broker by setting up topic as: #
(Later we will change it to specific topics once we know what device we want to receive data from.)
Our MQTT receiver is configured. Now we can attach "debug" node to print out all the messages coming from the MQTT broker. Press the "Deploy" button.
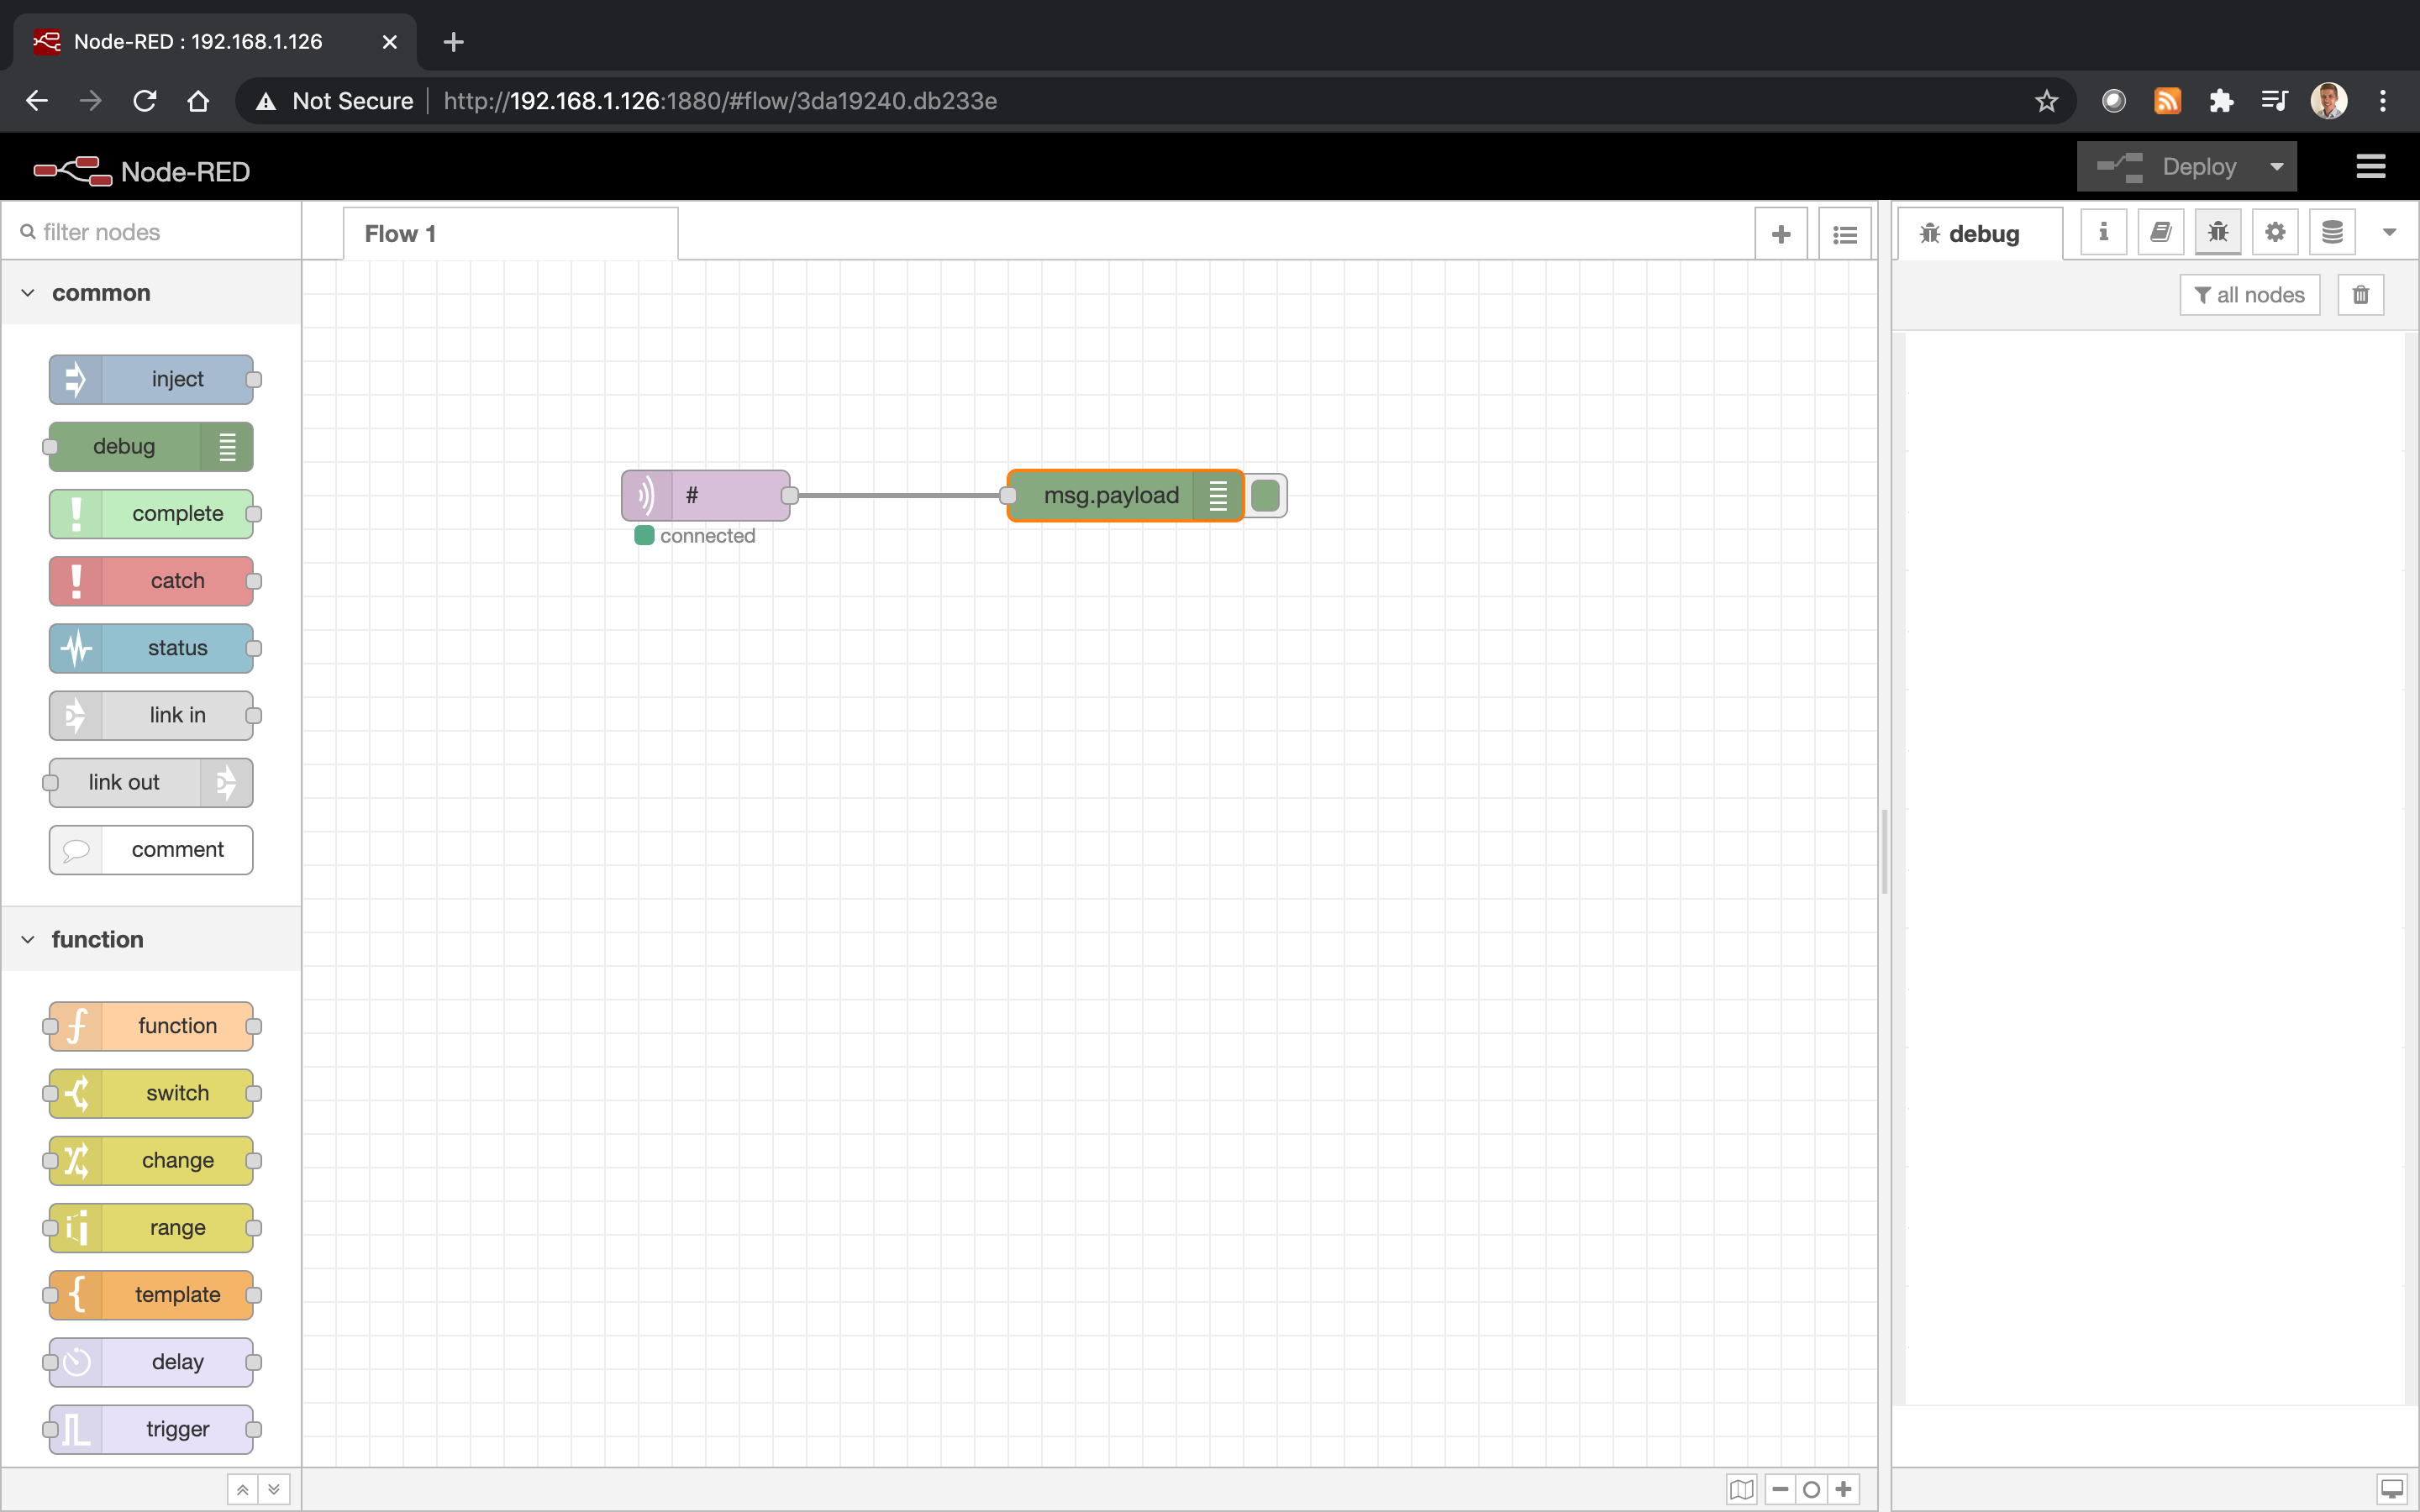
In the debug tab we should see incoming messages from the broker. However it is empty now because we do not have any device sending messages. Let's go and make a simple temperature sensor with Cricket to send data here.
Make WiFi sensor and send data via MQTT
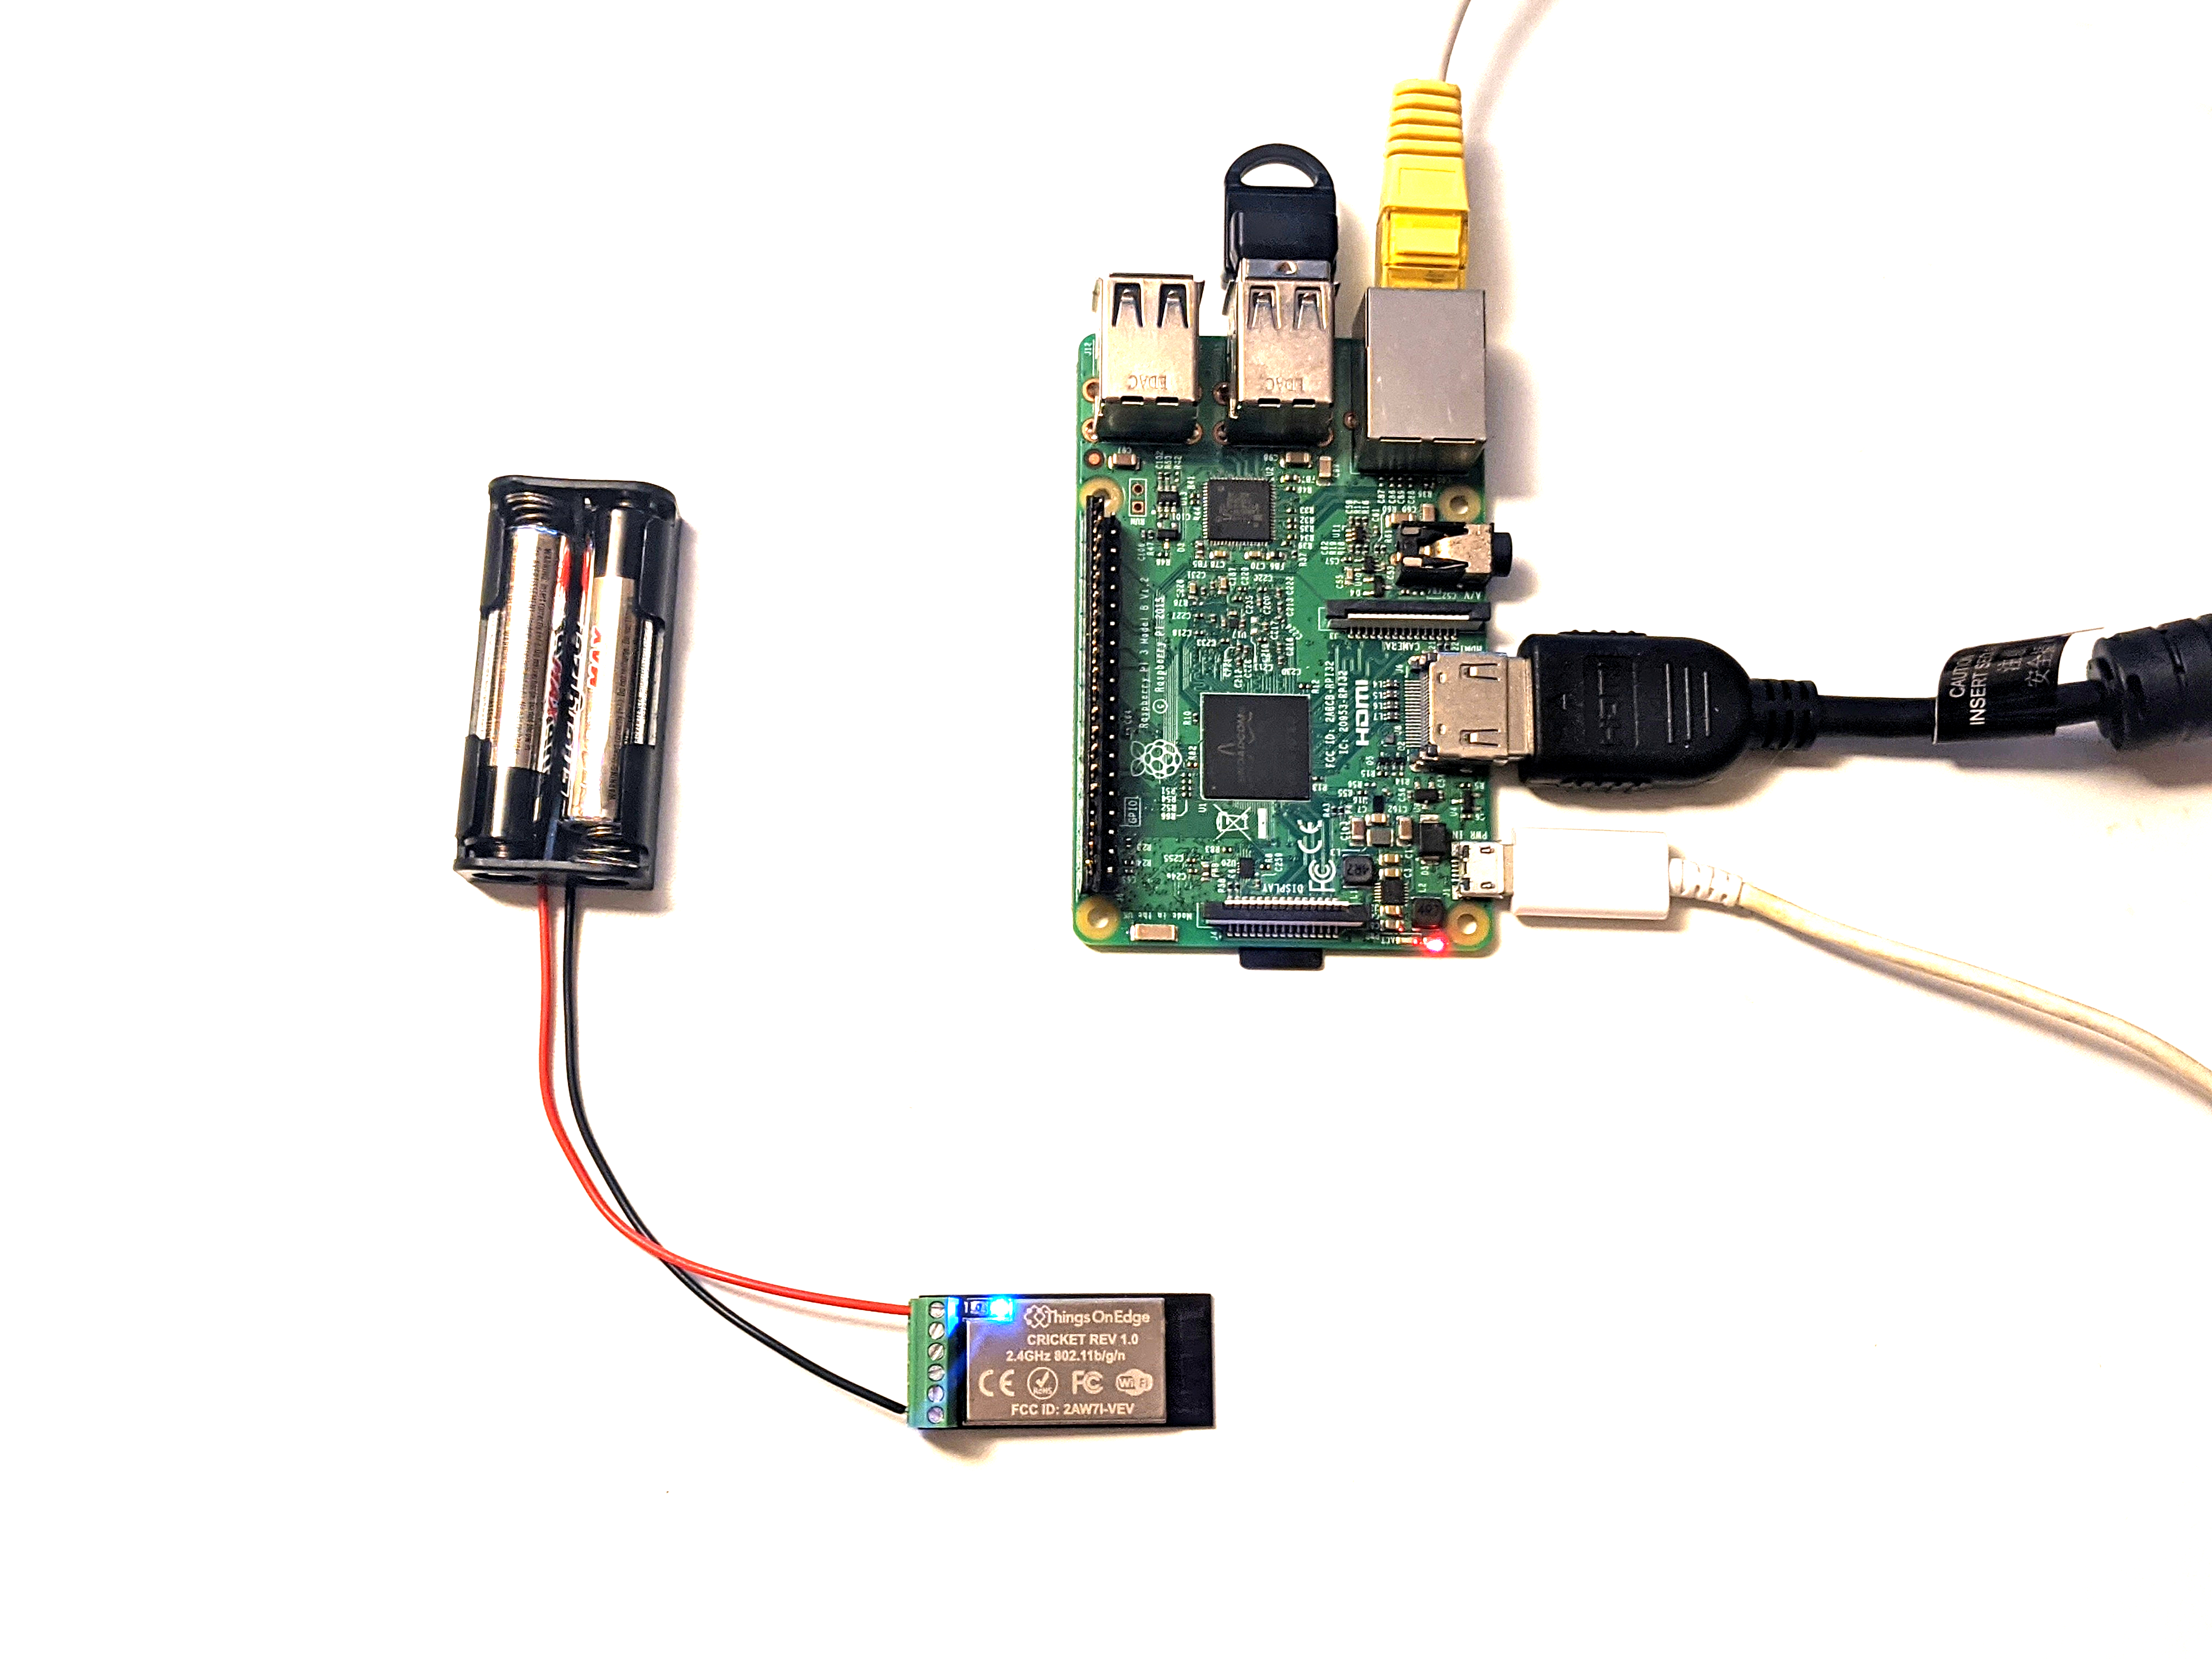
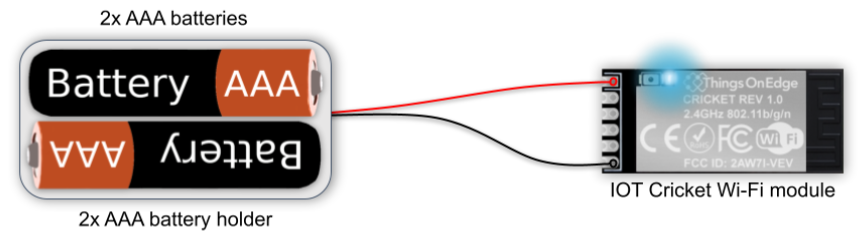
We use IOT Cricket WiFi module to make a sensor which will be sending a temperature value every 30 seconds to our system. It will run on a battery so we can stick it anywhere at home or a garden. Later you can also use Cricket to build various battery powered sensors, alarms, buttons, switches and connect them easily by using the same approach to Node-RED.
In the first step let's attach batteries to Cricket.
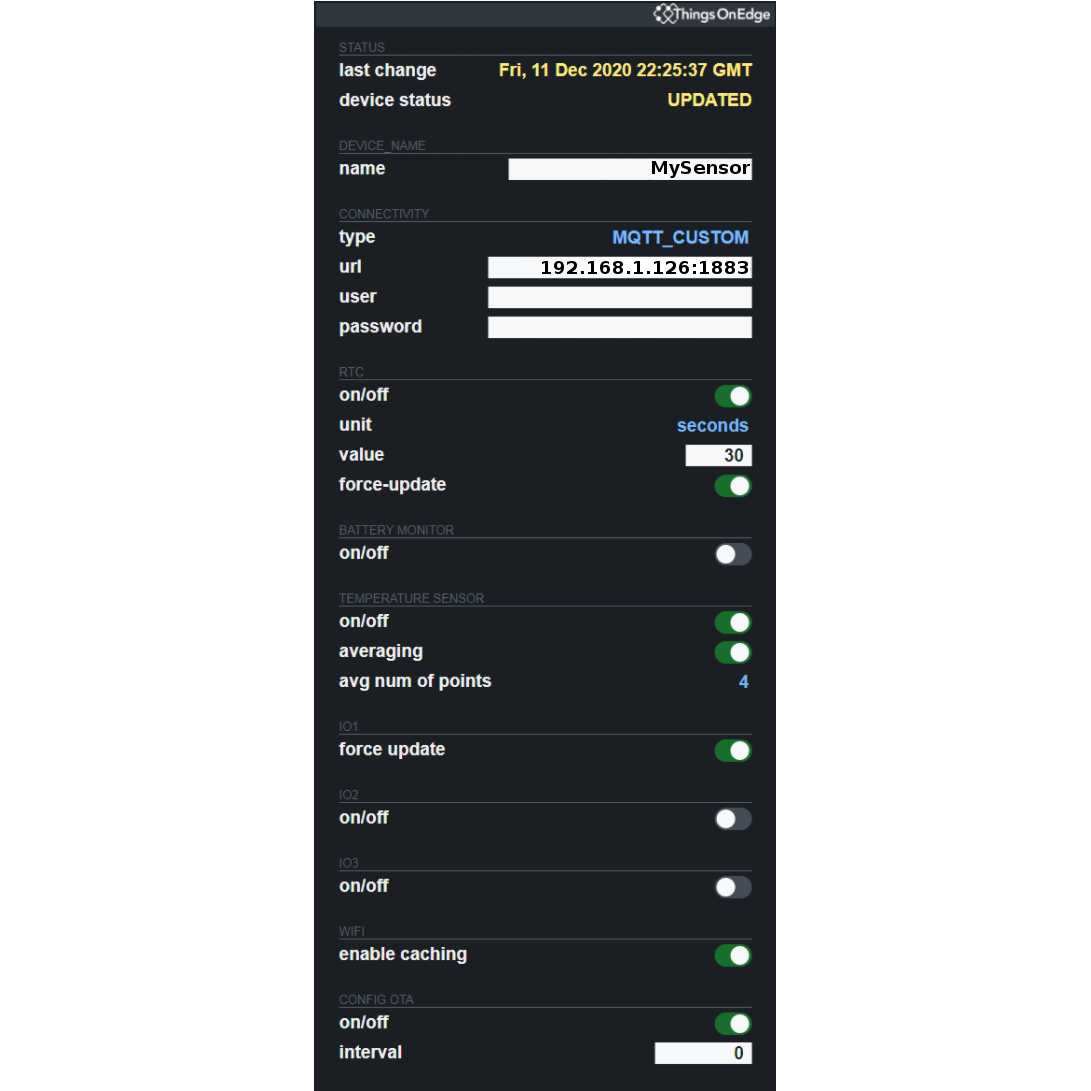
Cricket comes with a built-in temperature sensor (if you wish you can attach external temp sensor to IO2 pin). We just need to configure it to send temperature value to our MQTT broker by setting the RPi IP address.
In order to do that open Cricket's configuration panel (see the full steps here):
- press the Cricket button for 5 seconds
- connect to "toe_device" hot spot from any device with browser capabilities
- set the following settings (as shown on the image below, please adjust IP address in "url" box to your RPi)
NOTE: we set it to wake up every 30 seconds, the frequency is good for playing around with data and setting up this project. However once you are done with this project, please change it to make it more sense for example set it to 1 hour or so - it will save the battery a lot.
Now we can exit from the configuration mode.
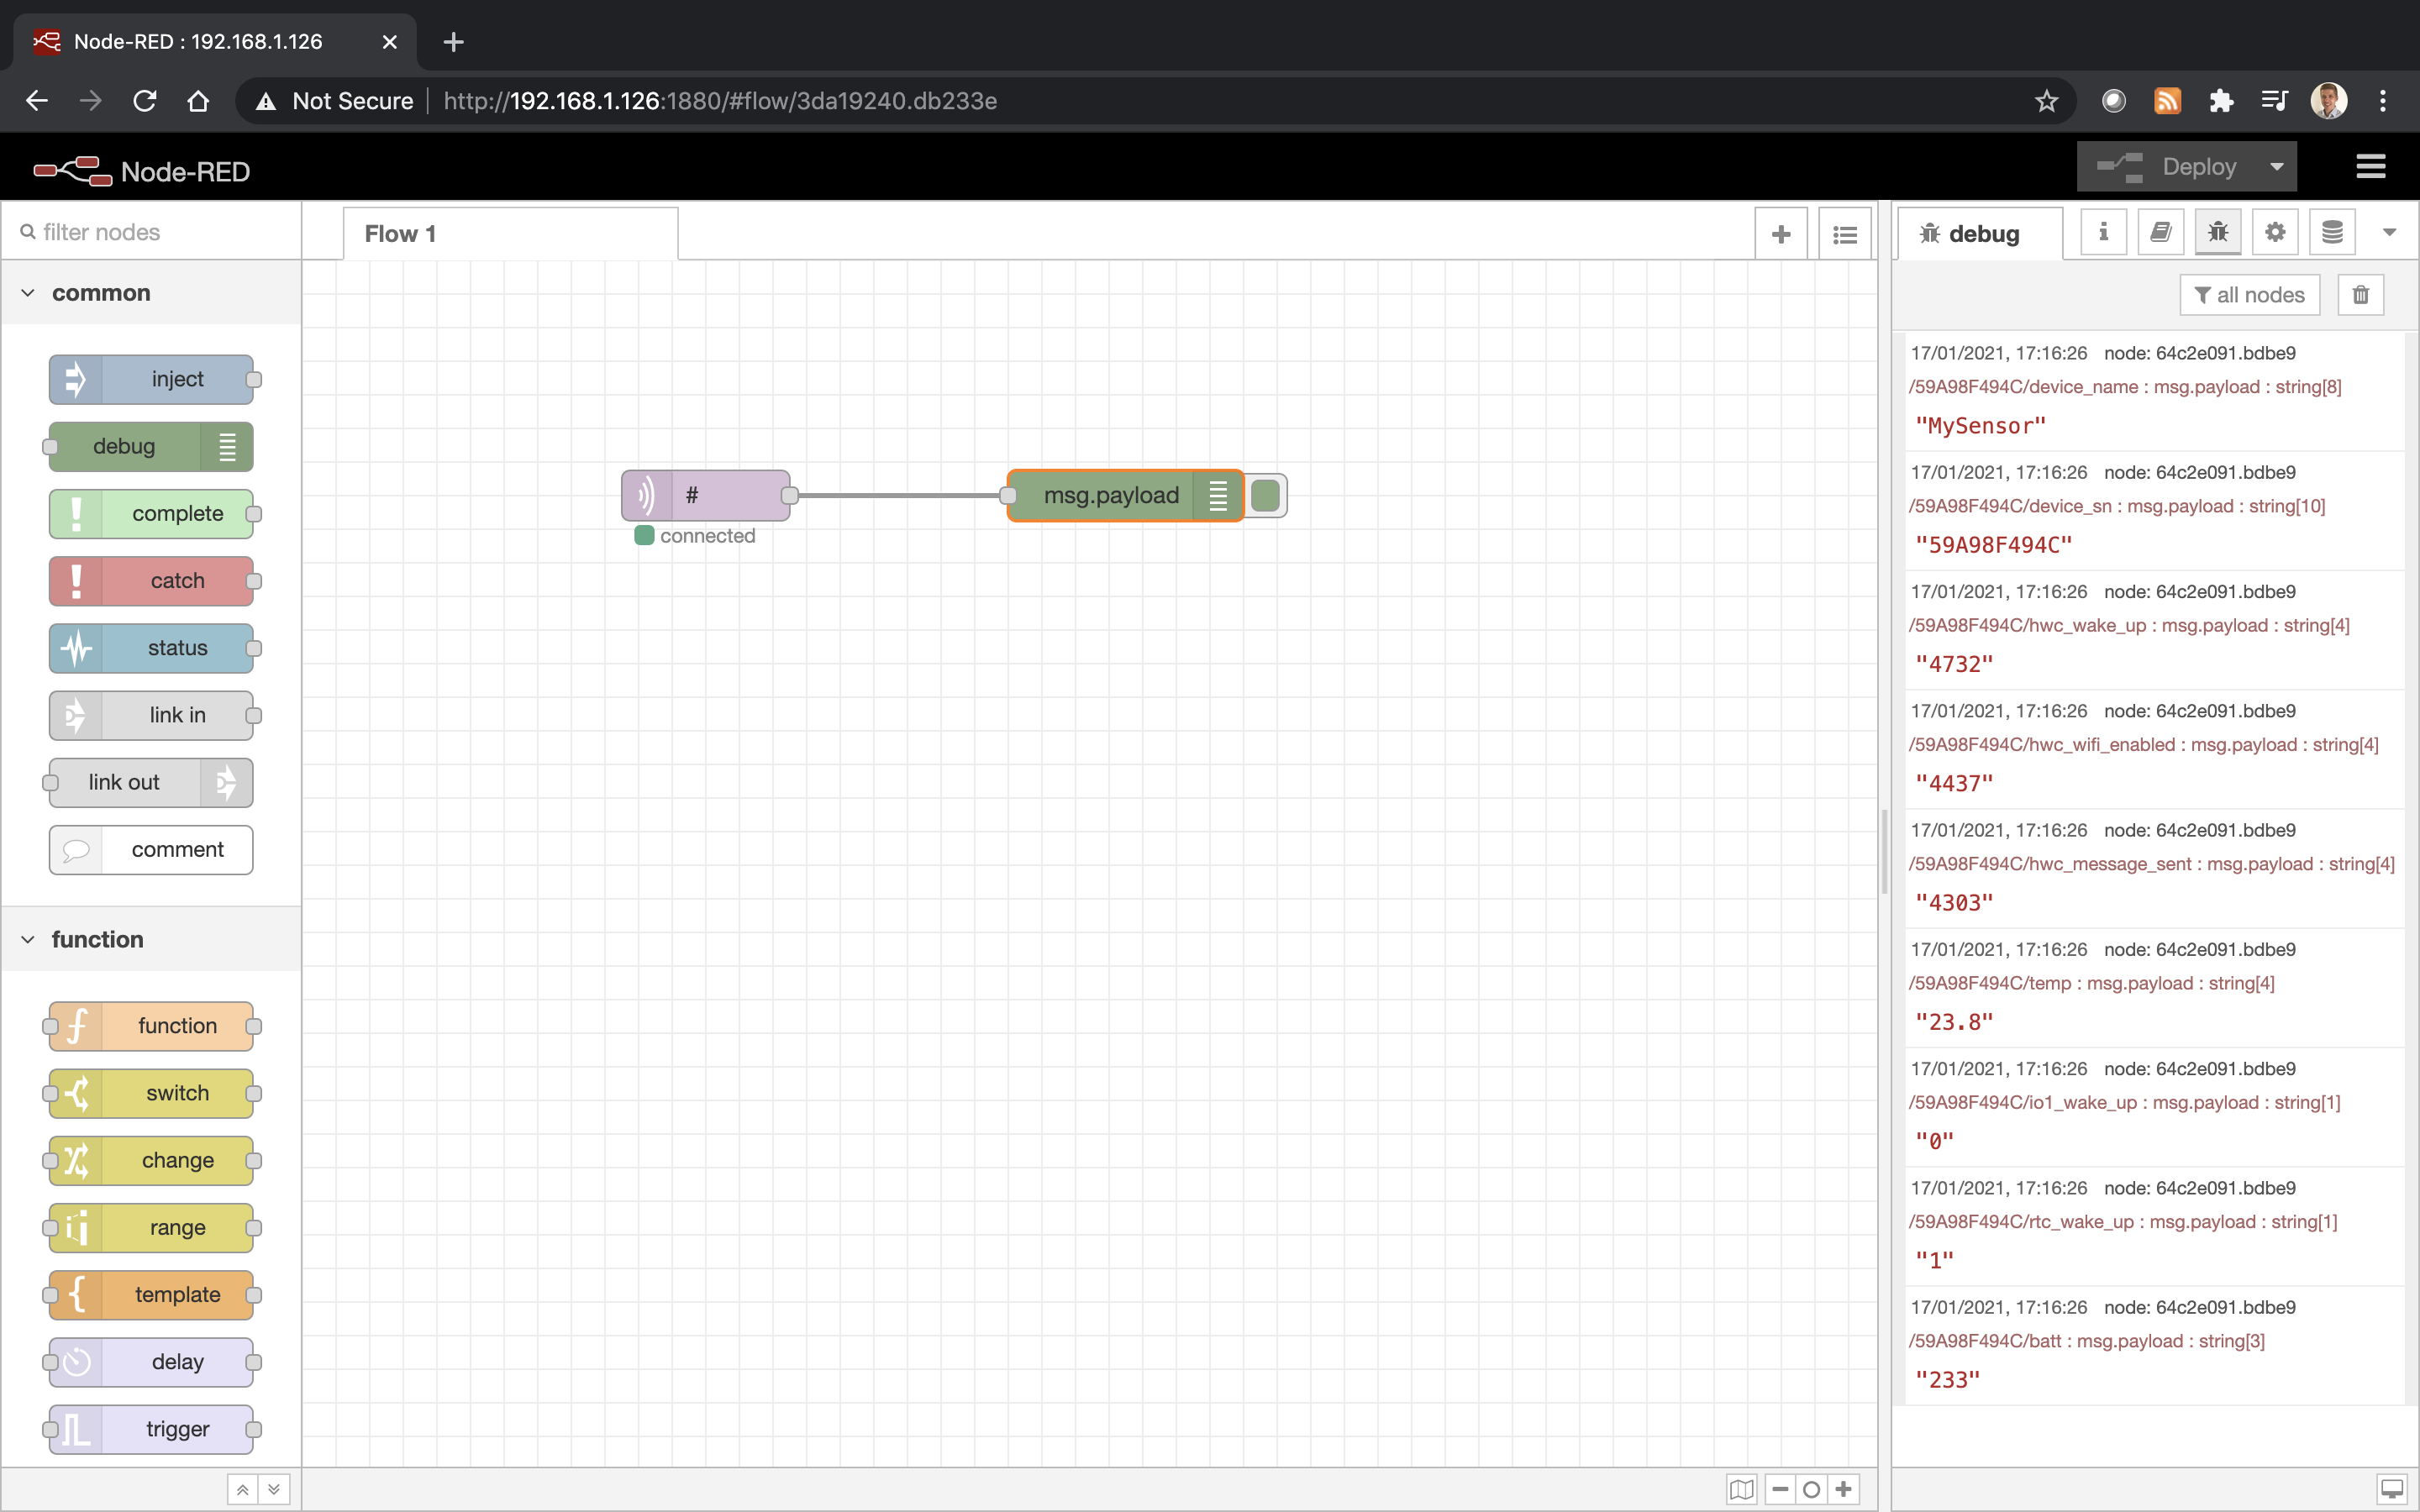
The device is ready! Cricket is sending data to our MQTT broker every 30 seconds and also our Node-RED system is receiving these messages. We can inspect them in the debug tab as shown on the image below:
Creating a dashboard in Node-RED
It would be nice to have a nice UI instead of raw print out, wouldn't it? The good news is Node-RED allows to build a decent UI and we will use it to build a basic dashboard for our device to plot a temperature data and show the battery status.
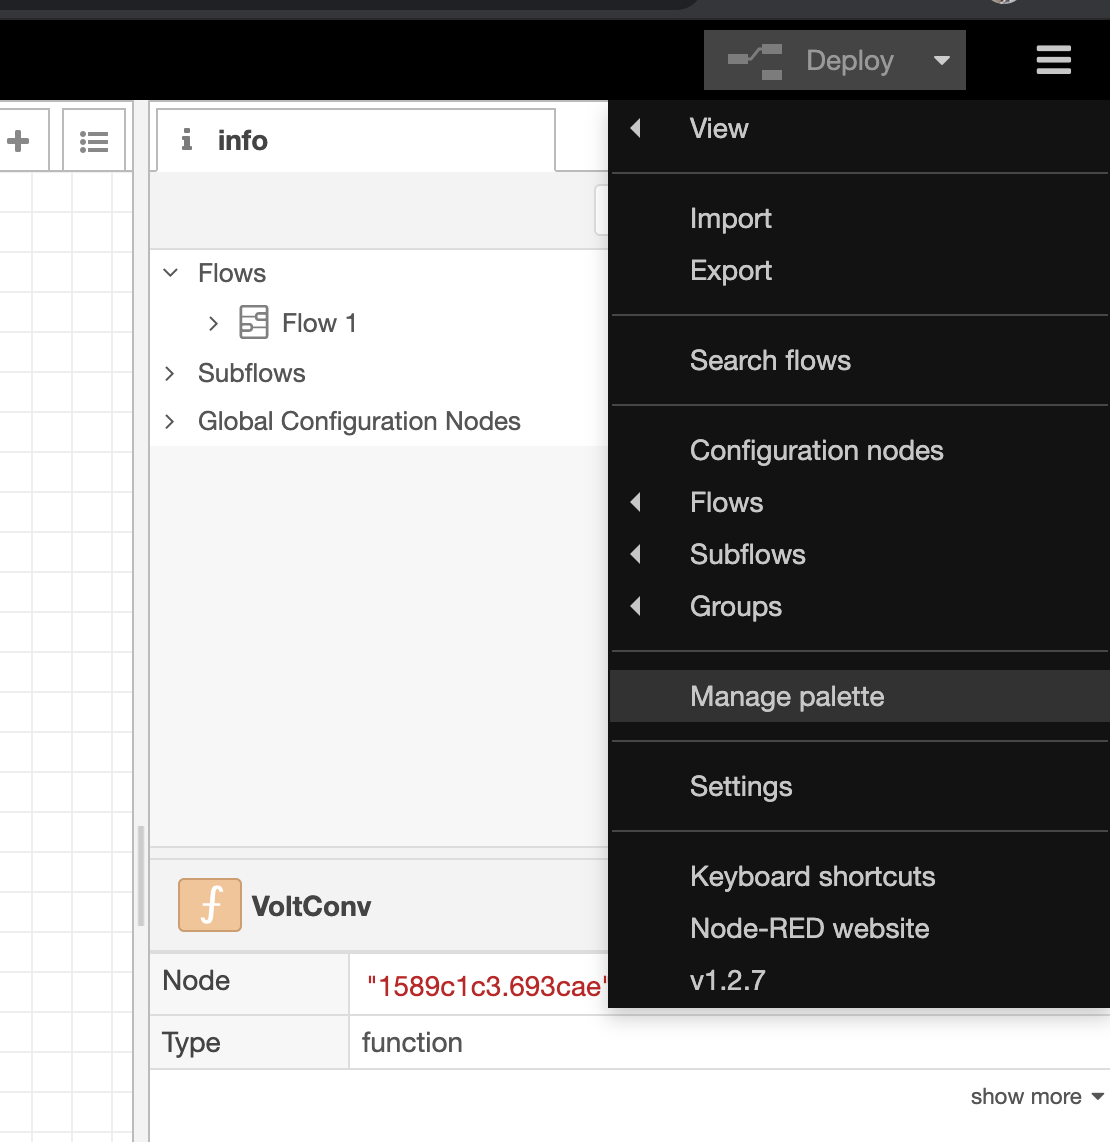
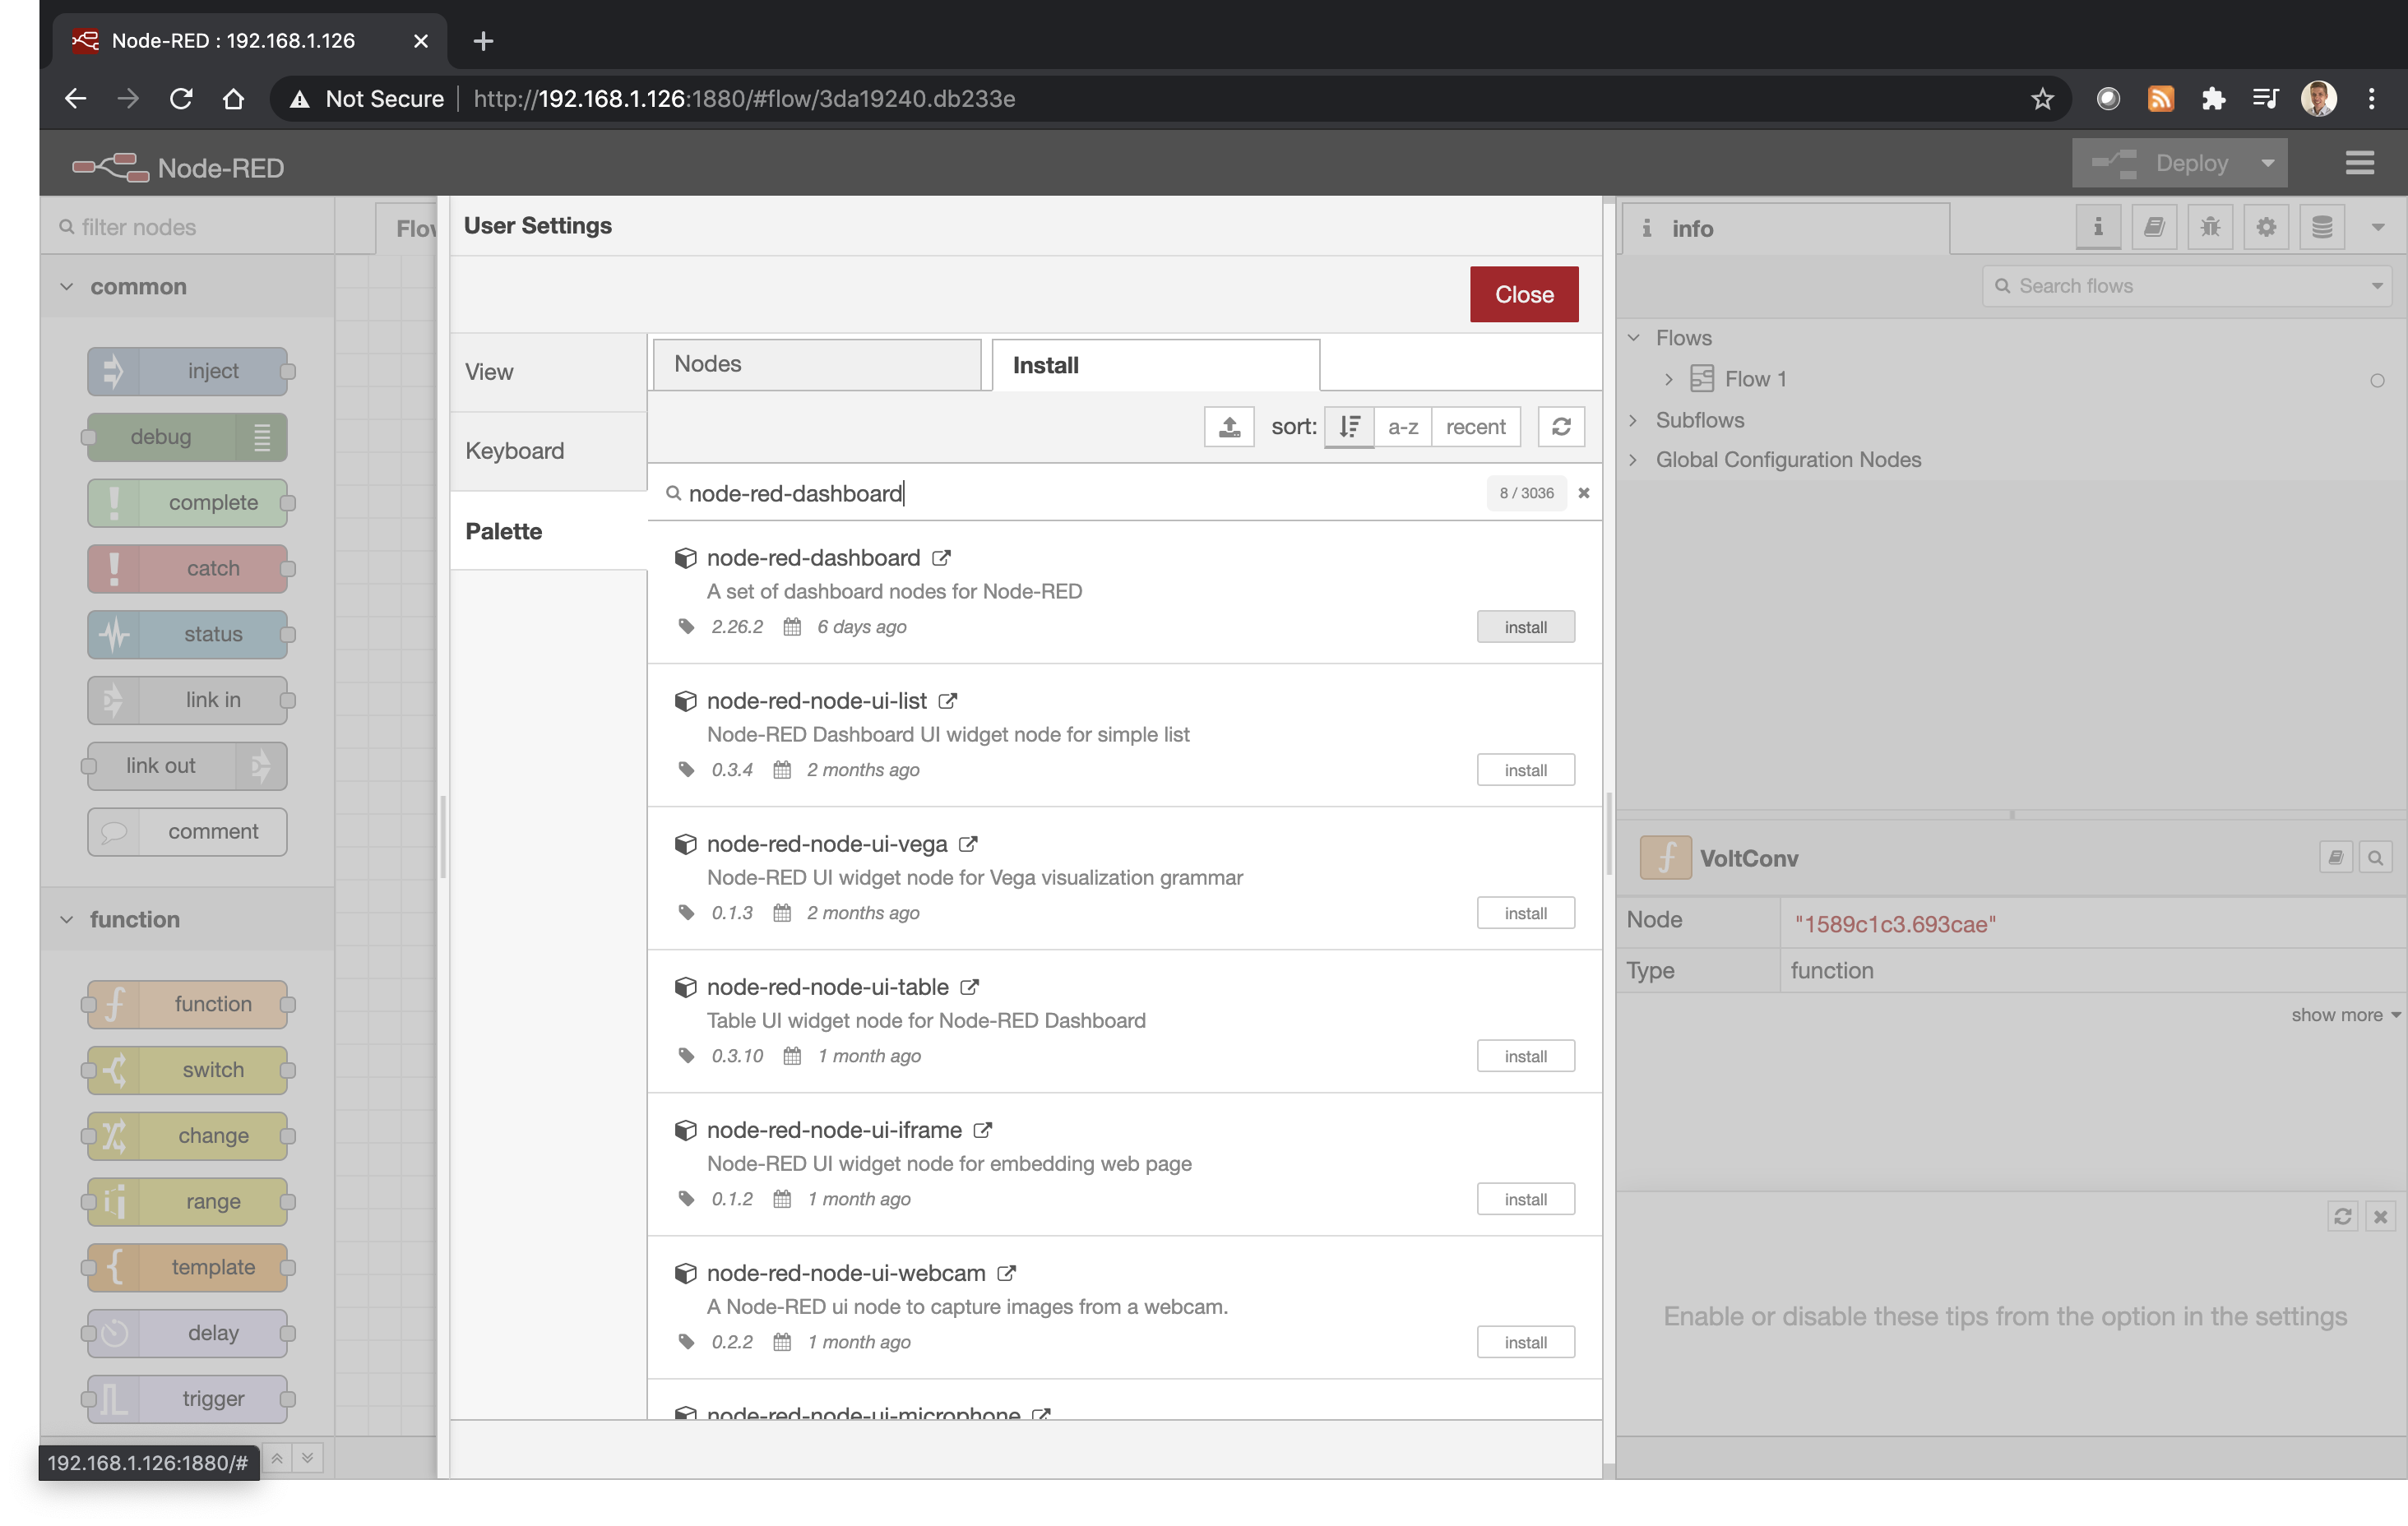
However there is one extra component called "node-red-dashboard", which we have to add to Node-RED. In order to do that, click on the account icon and select "Manage palette" as shown on the image below:
Then go to Install tab, type "node-red-dashboard" and press the install button.
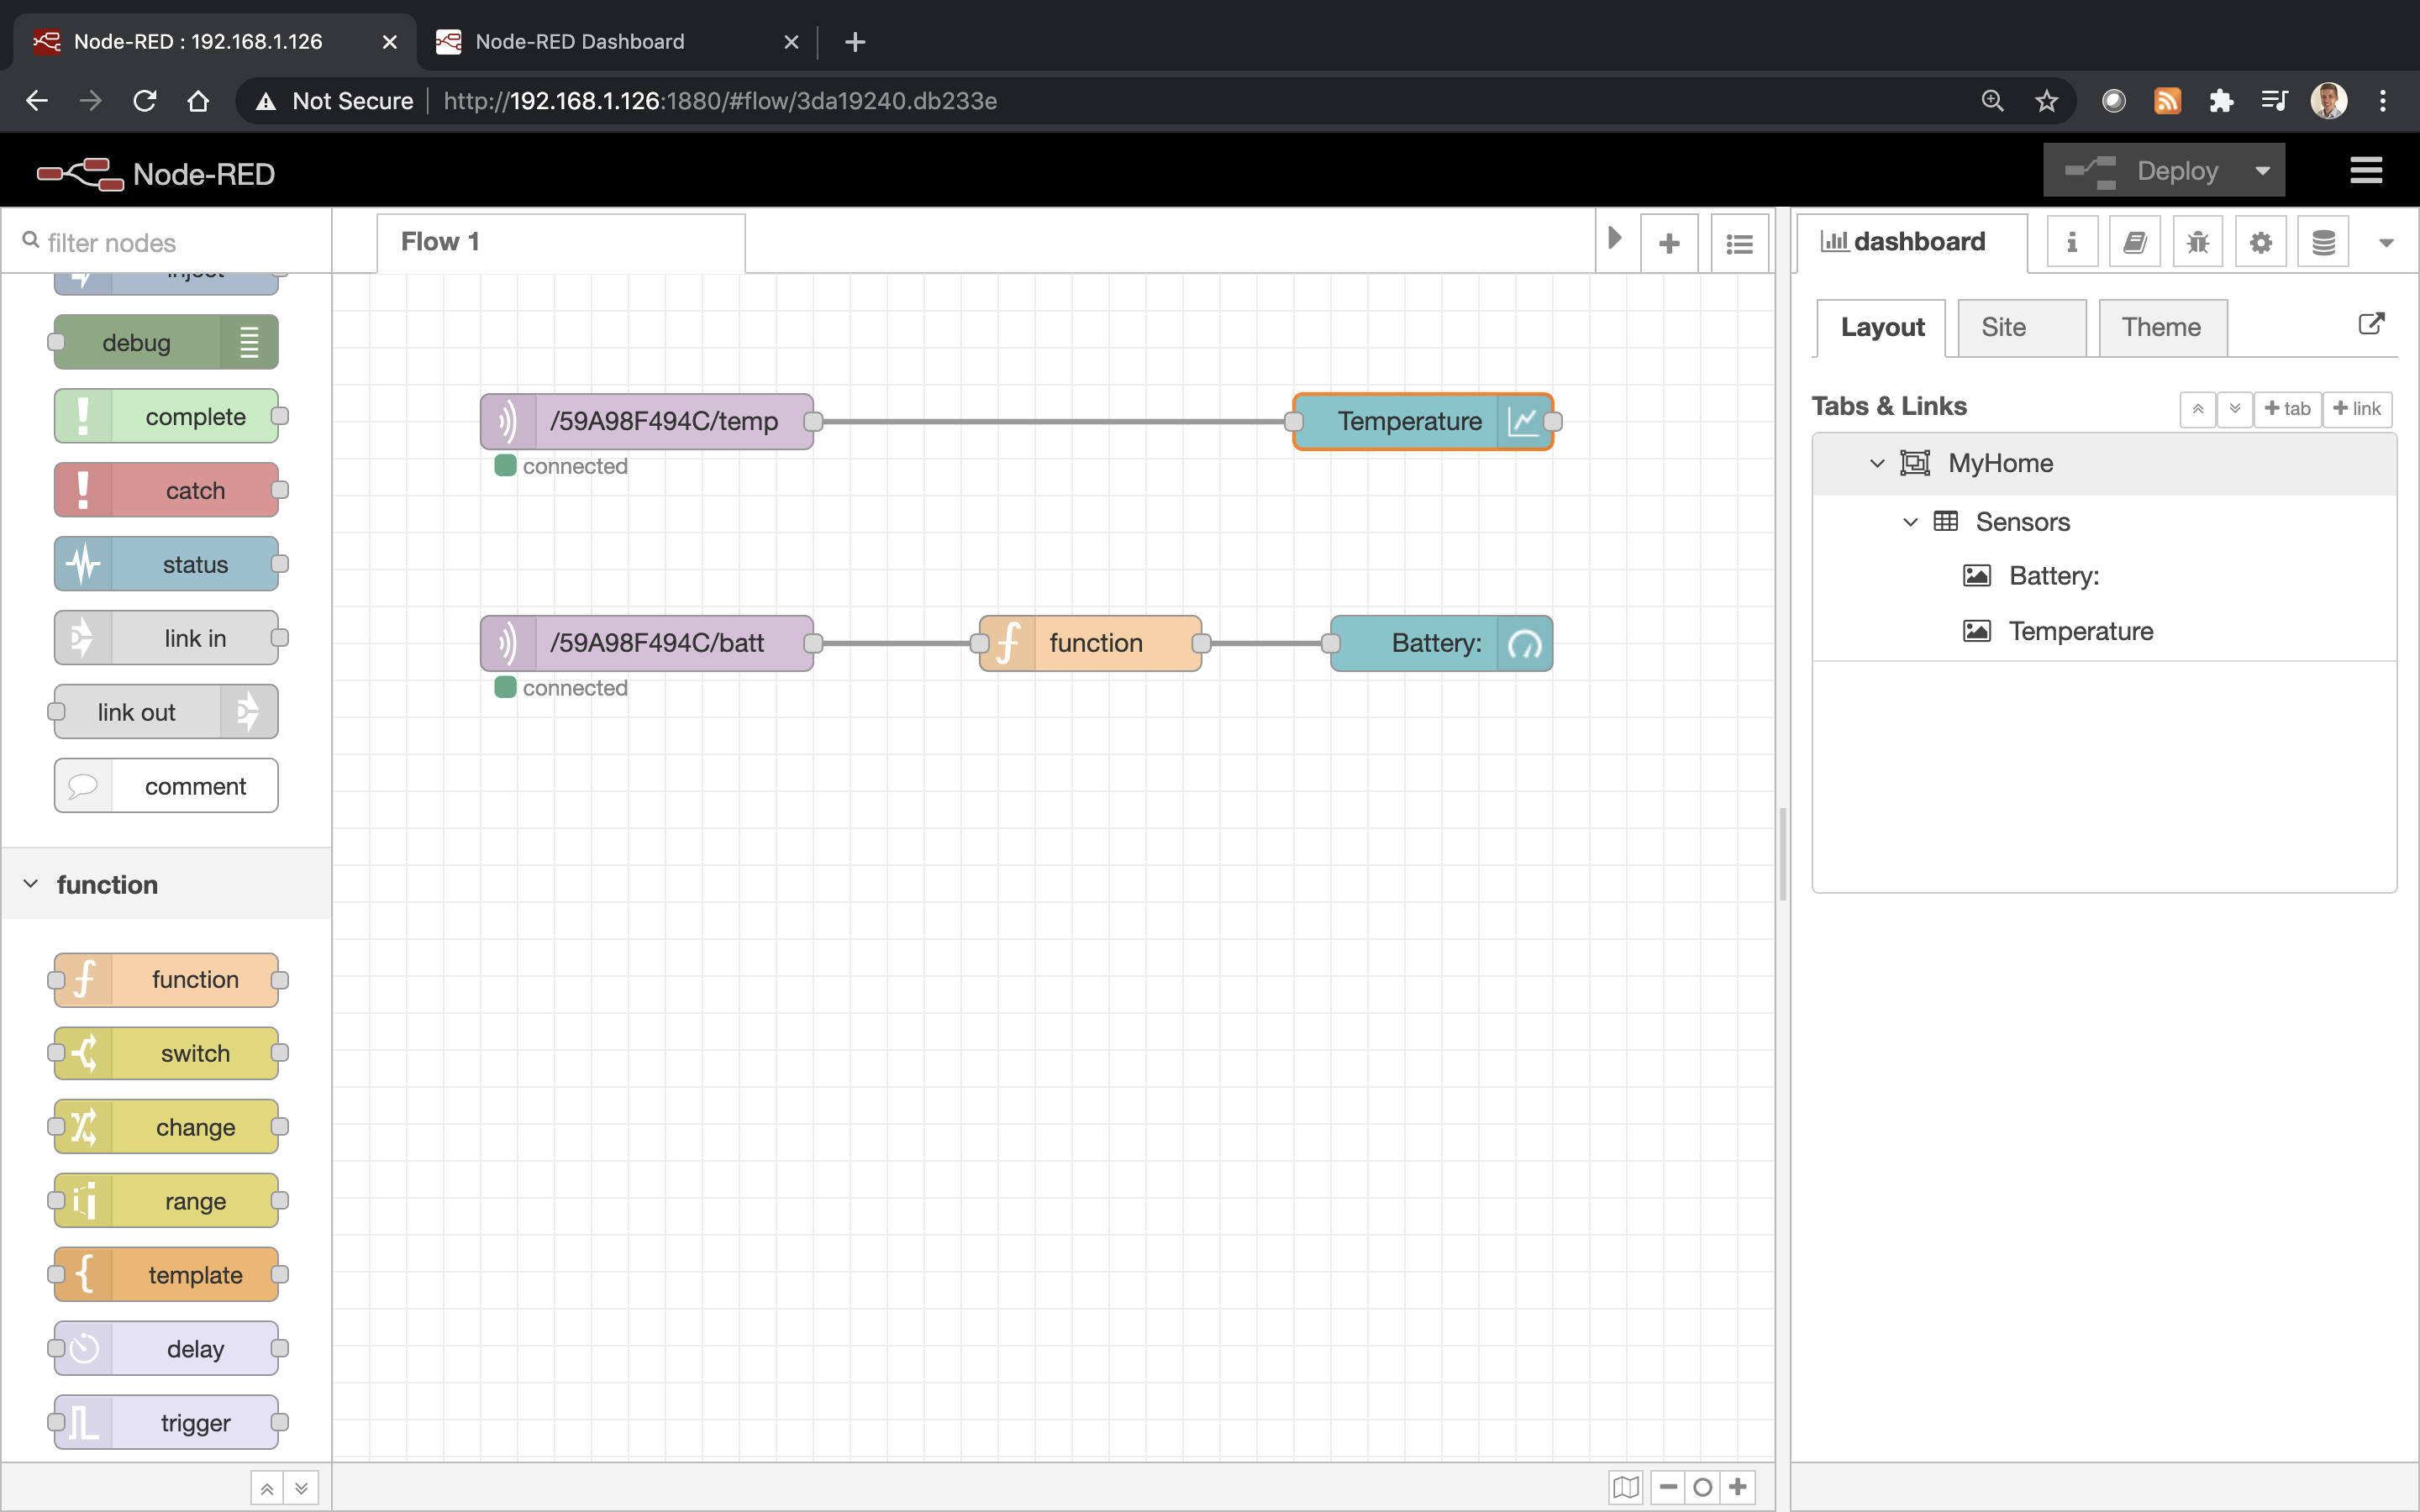
Now we are ready to create a dashboard. We already know our device and the exact topics it is sending out. We can precisely set topics for data which we are interested in. In our case the device is reporting temperature and battery on the following topics:
/59A98F494C/temp
/59A98F494C/batt
So let's create the whole diagram from scratch:
- create two "mqtt in" and assign with the above topics
- create a chart (for Temperature) item and connect it with the temp mqtt input
- create a gauge (for Battery) item and connect with the batt mqtt input
- create a function between the batt mqtt input and the gague item to calculate % of the battery
- create Tab (e.g. MyHome) and Group (e.g. Sensors) - you need to assign group to the chart and gauge items
as shown below:
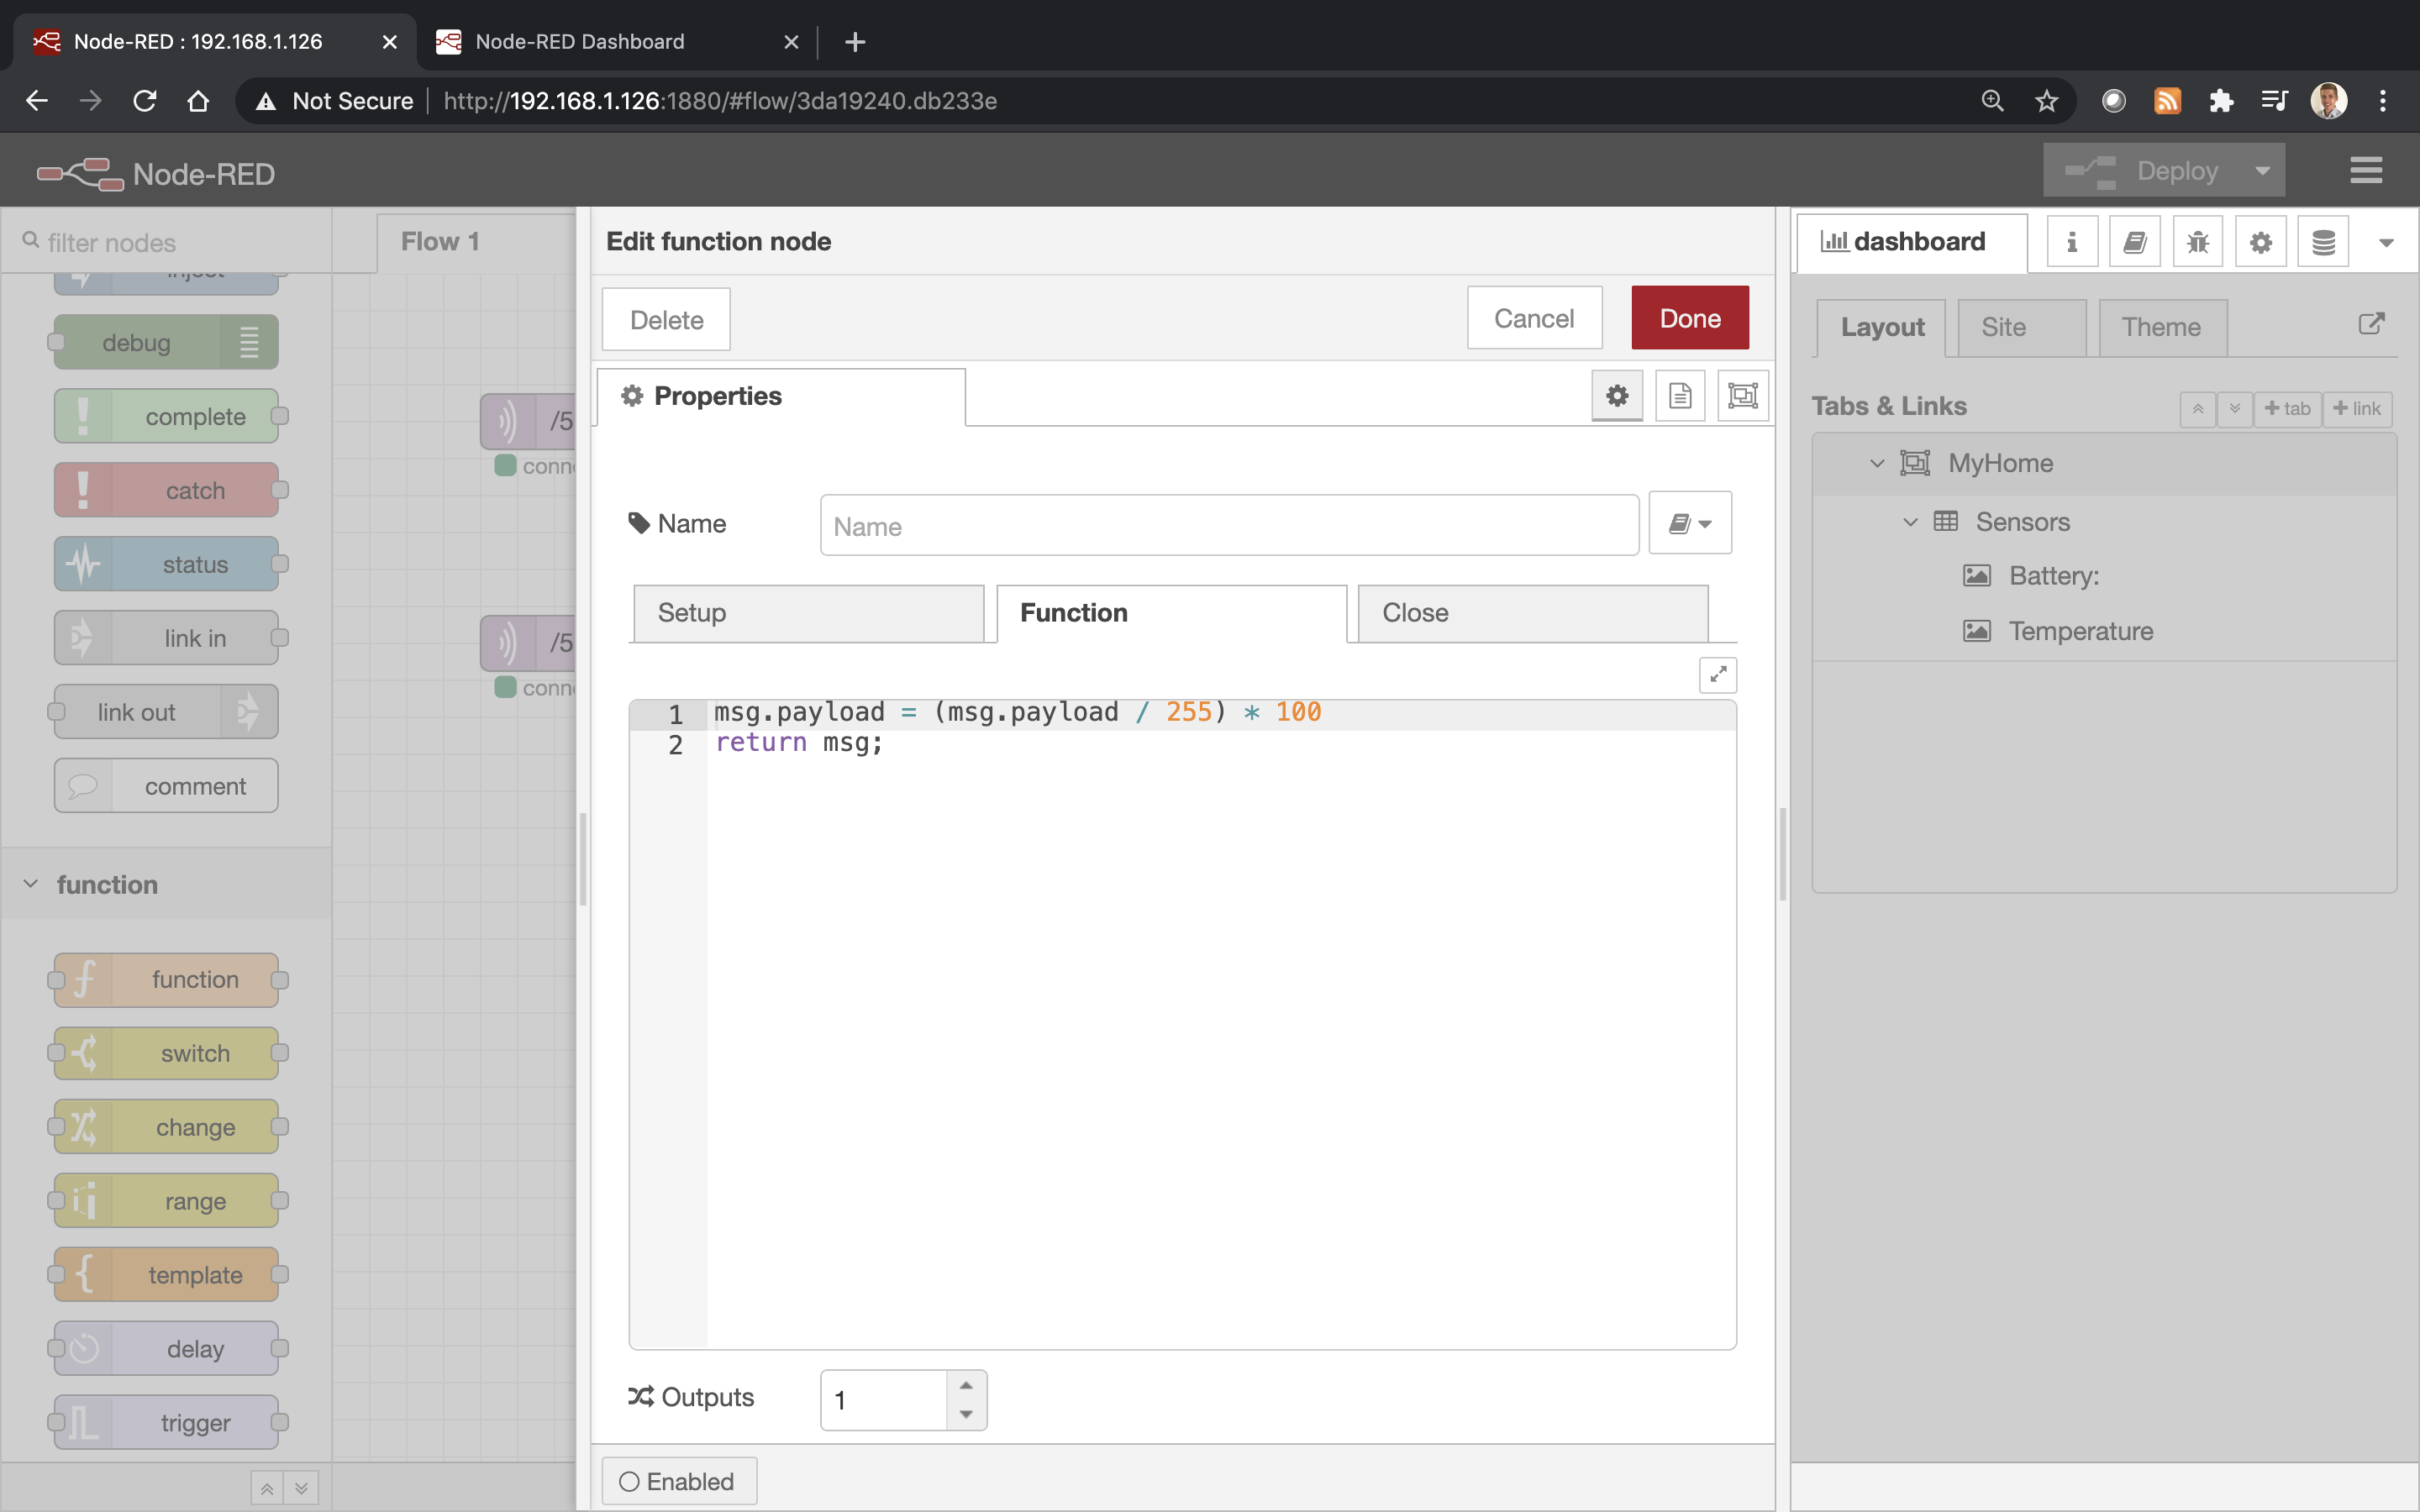
The function converts the battery value, reported by Cricket, to a percentage. The complete function body is shown below:
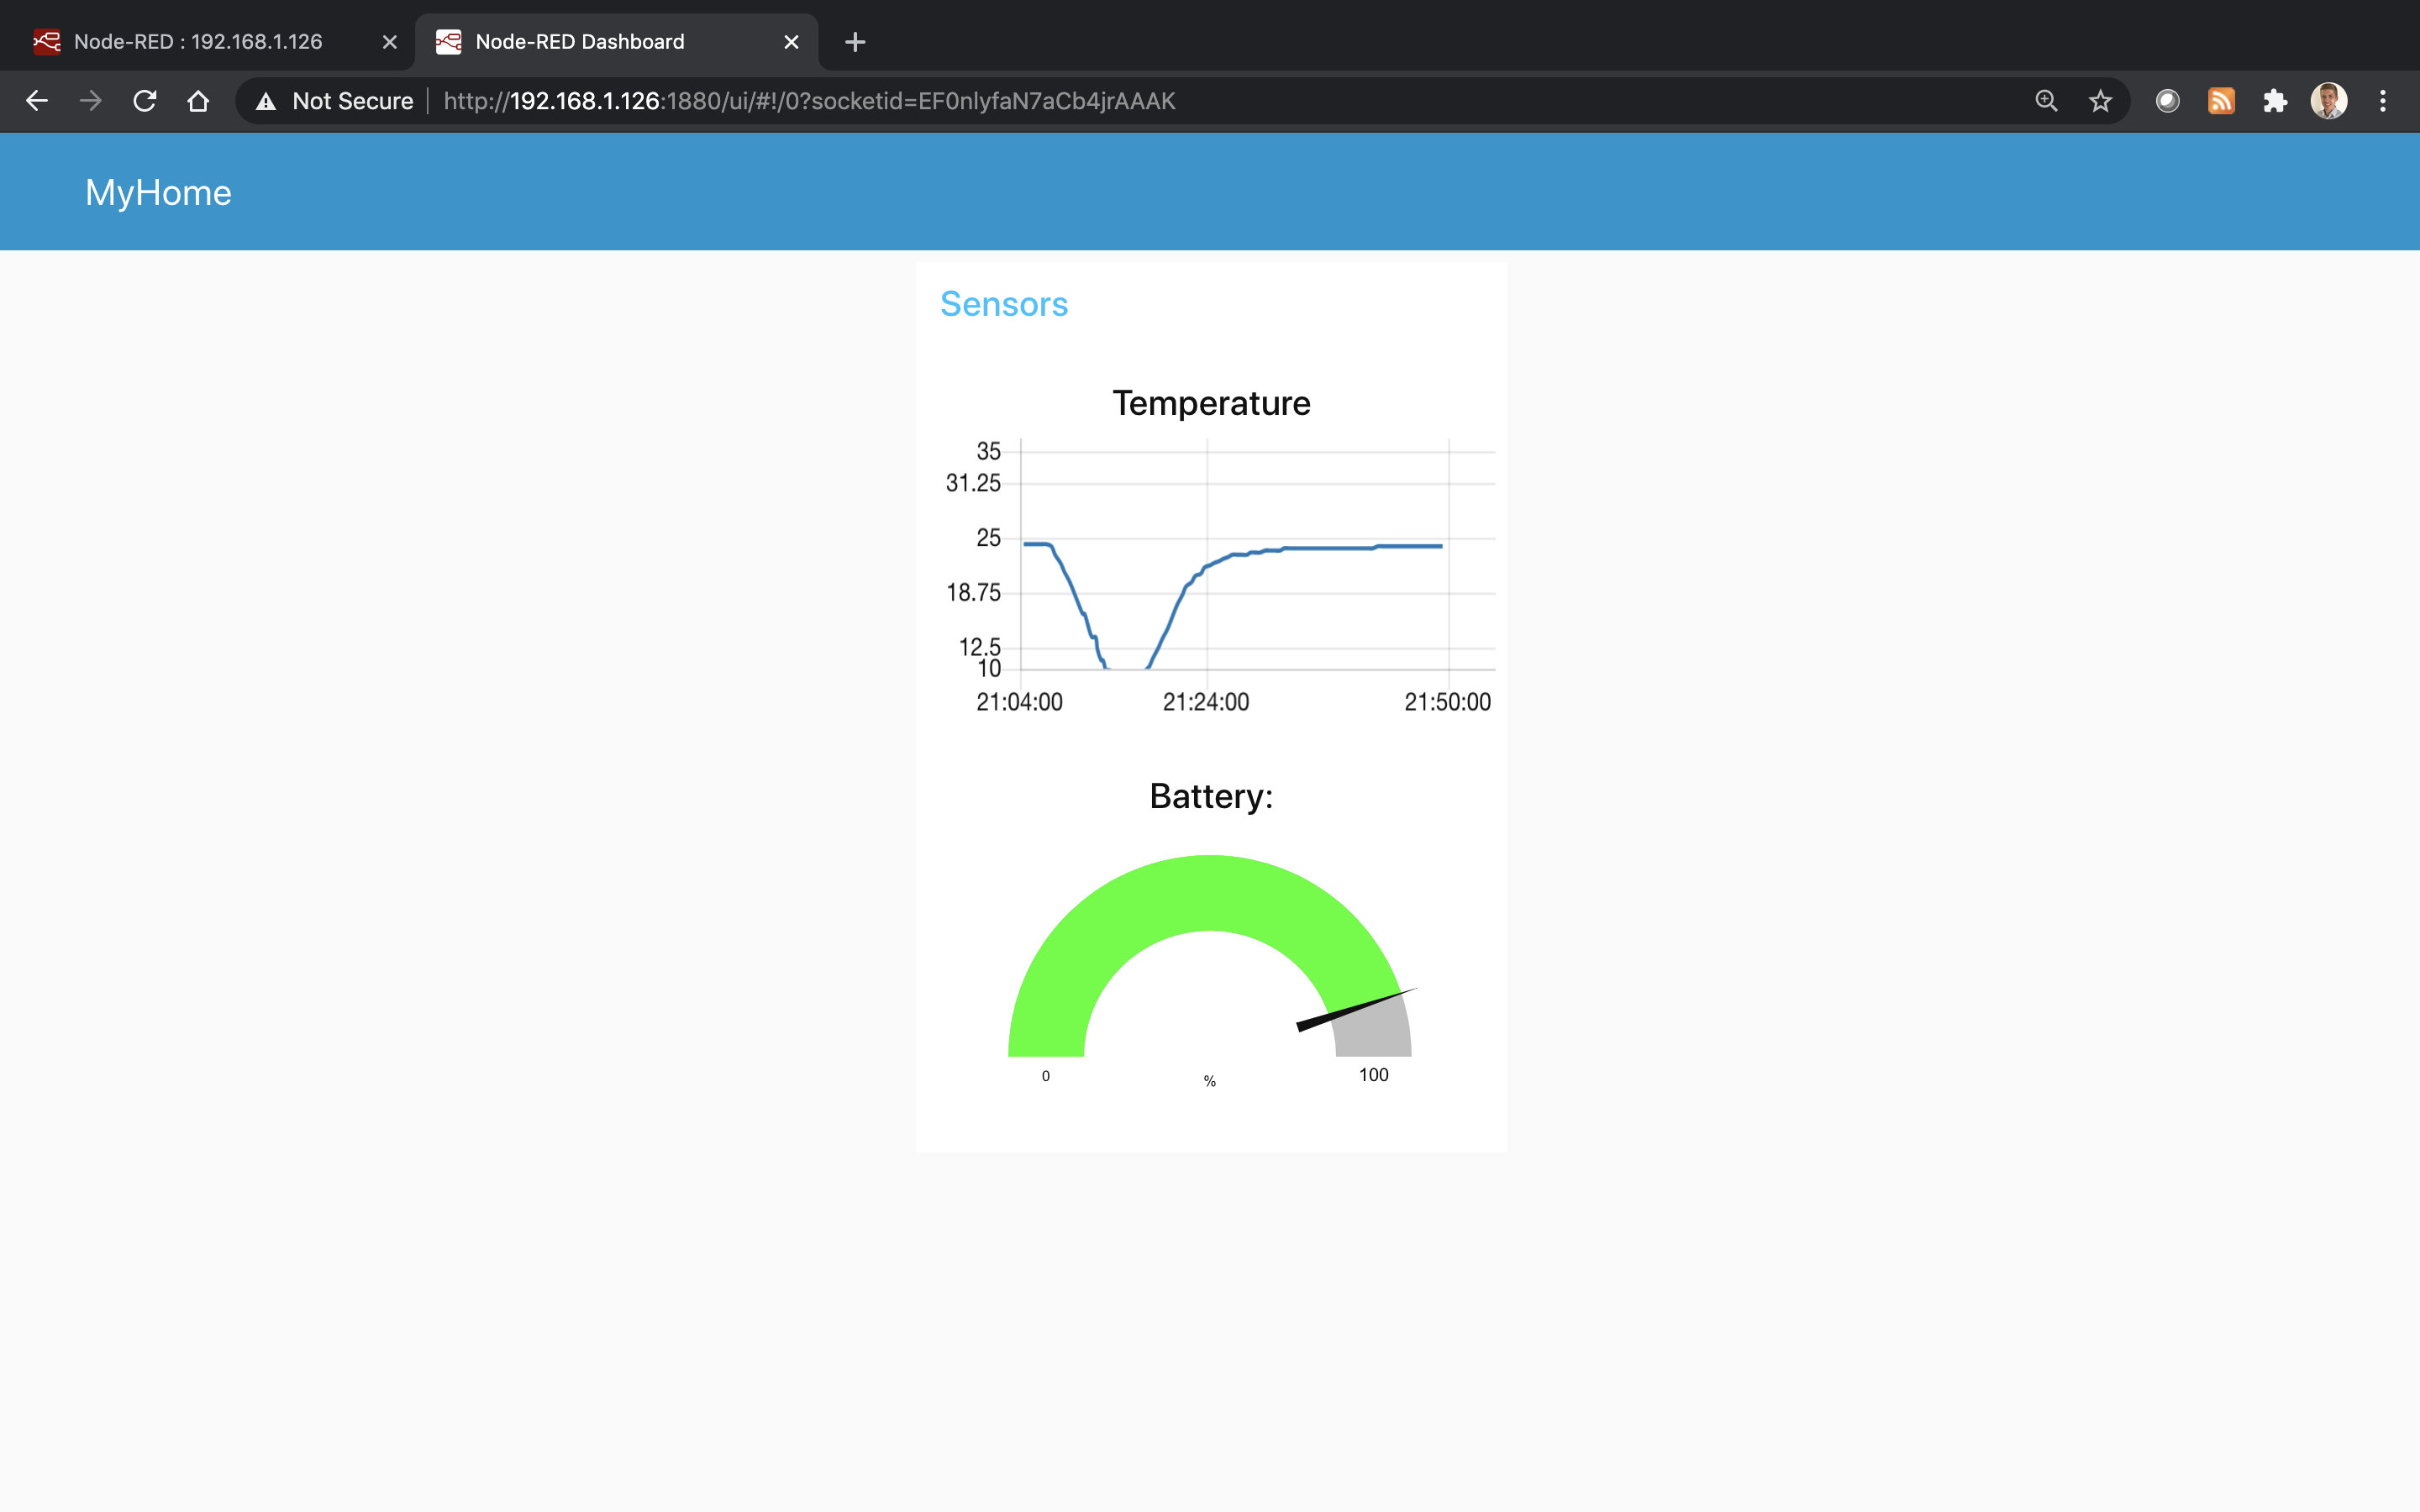
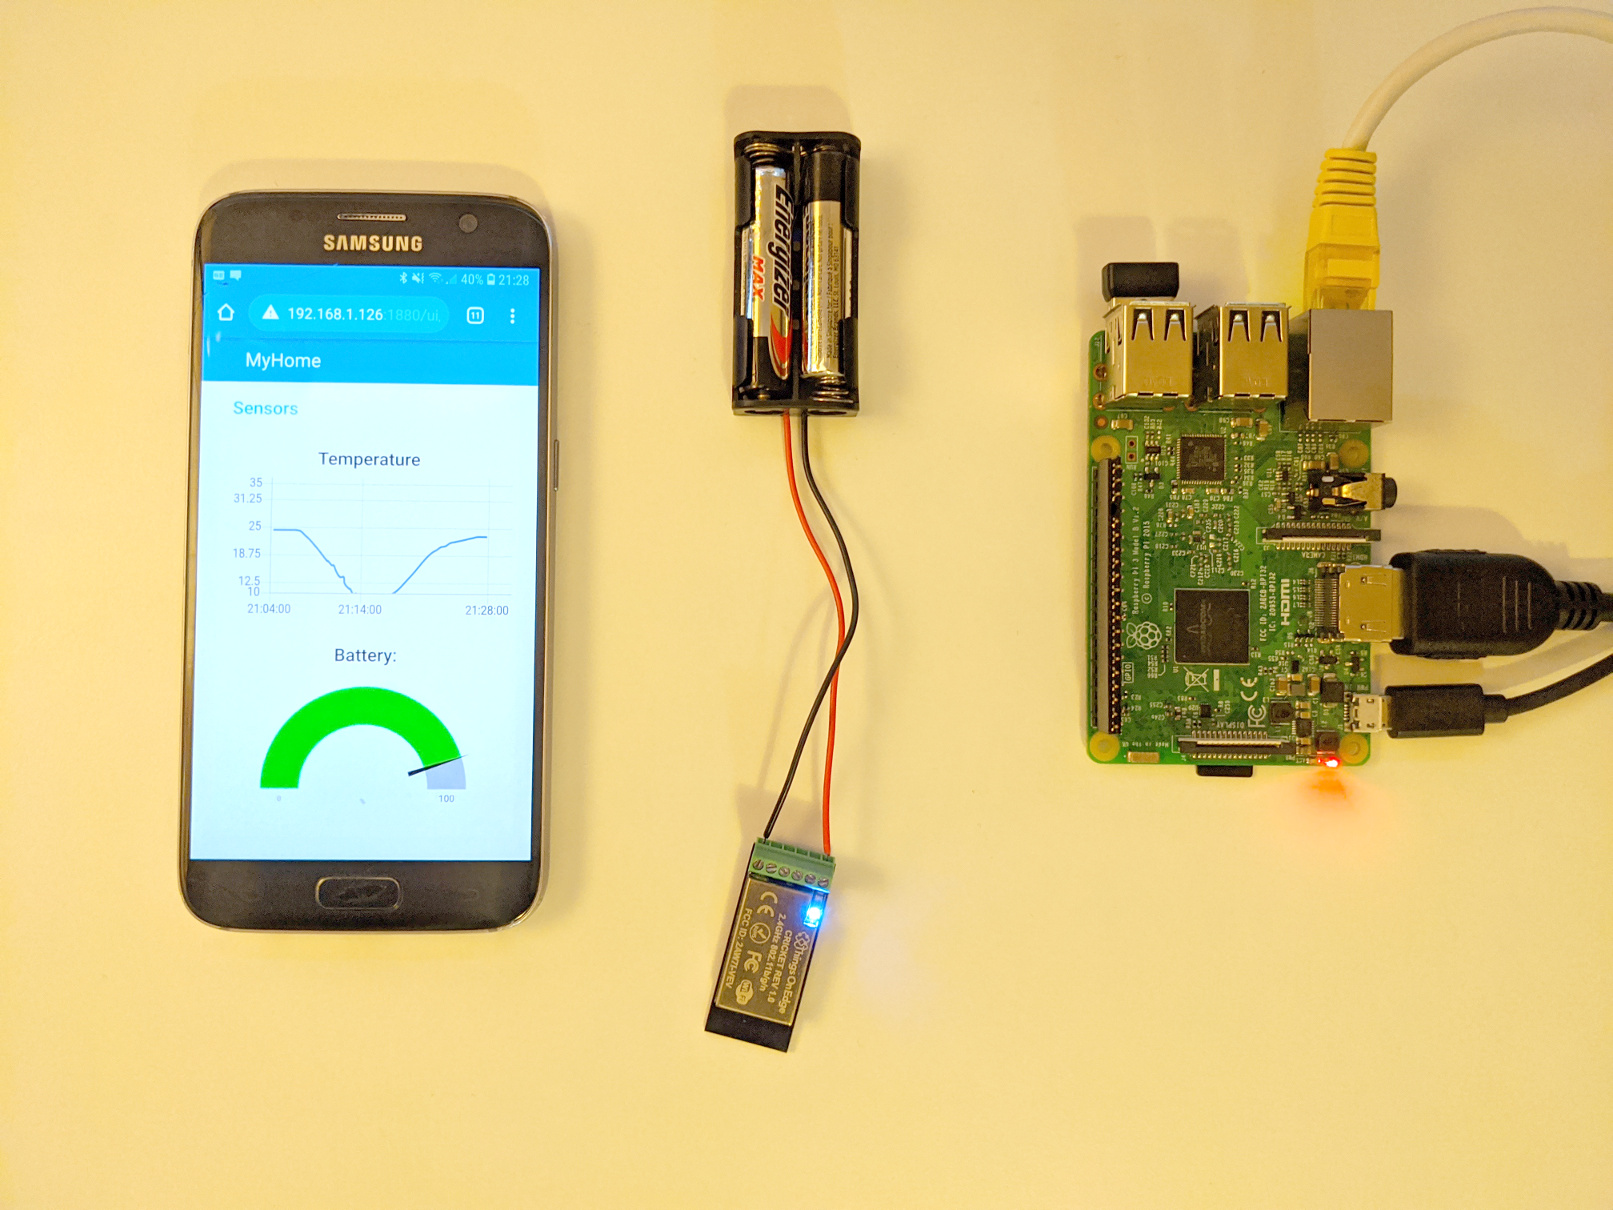
Now we are ready to deploy and open our dashboard by using the same link address as we used to open Node-RED editor. We only need to add "/ui" suffix at the end of the address. In our case the link looks as follow: http://192.168.1.126:1880/ui
Summary
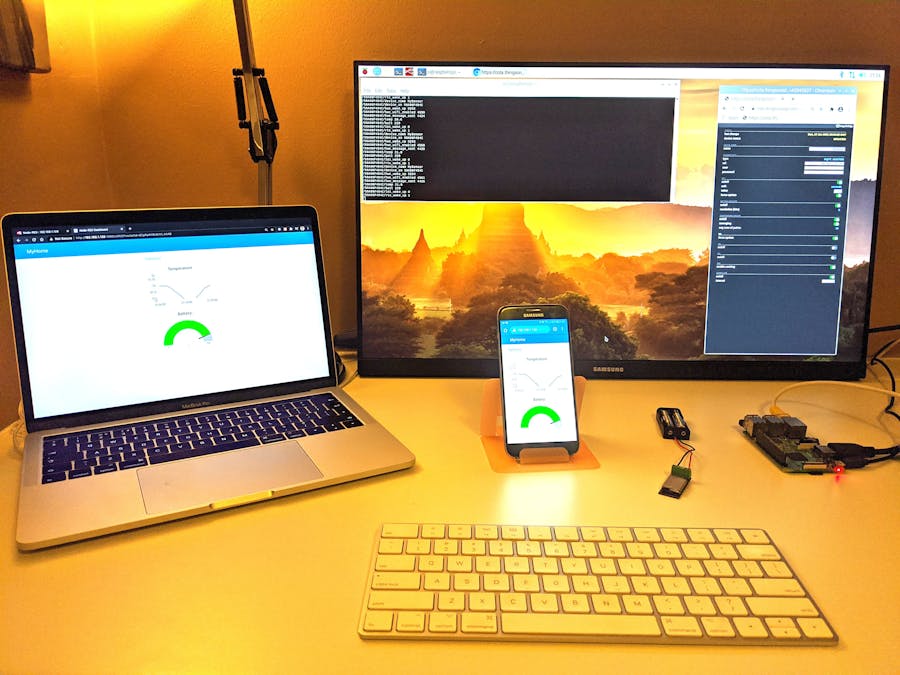
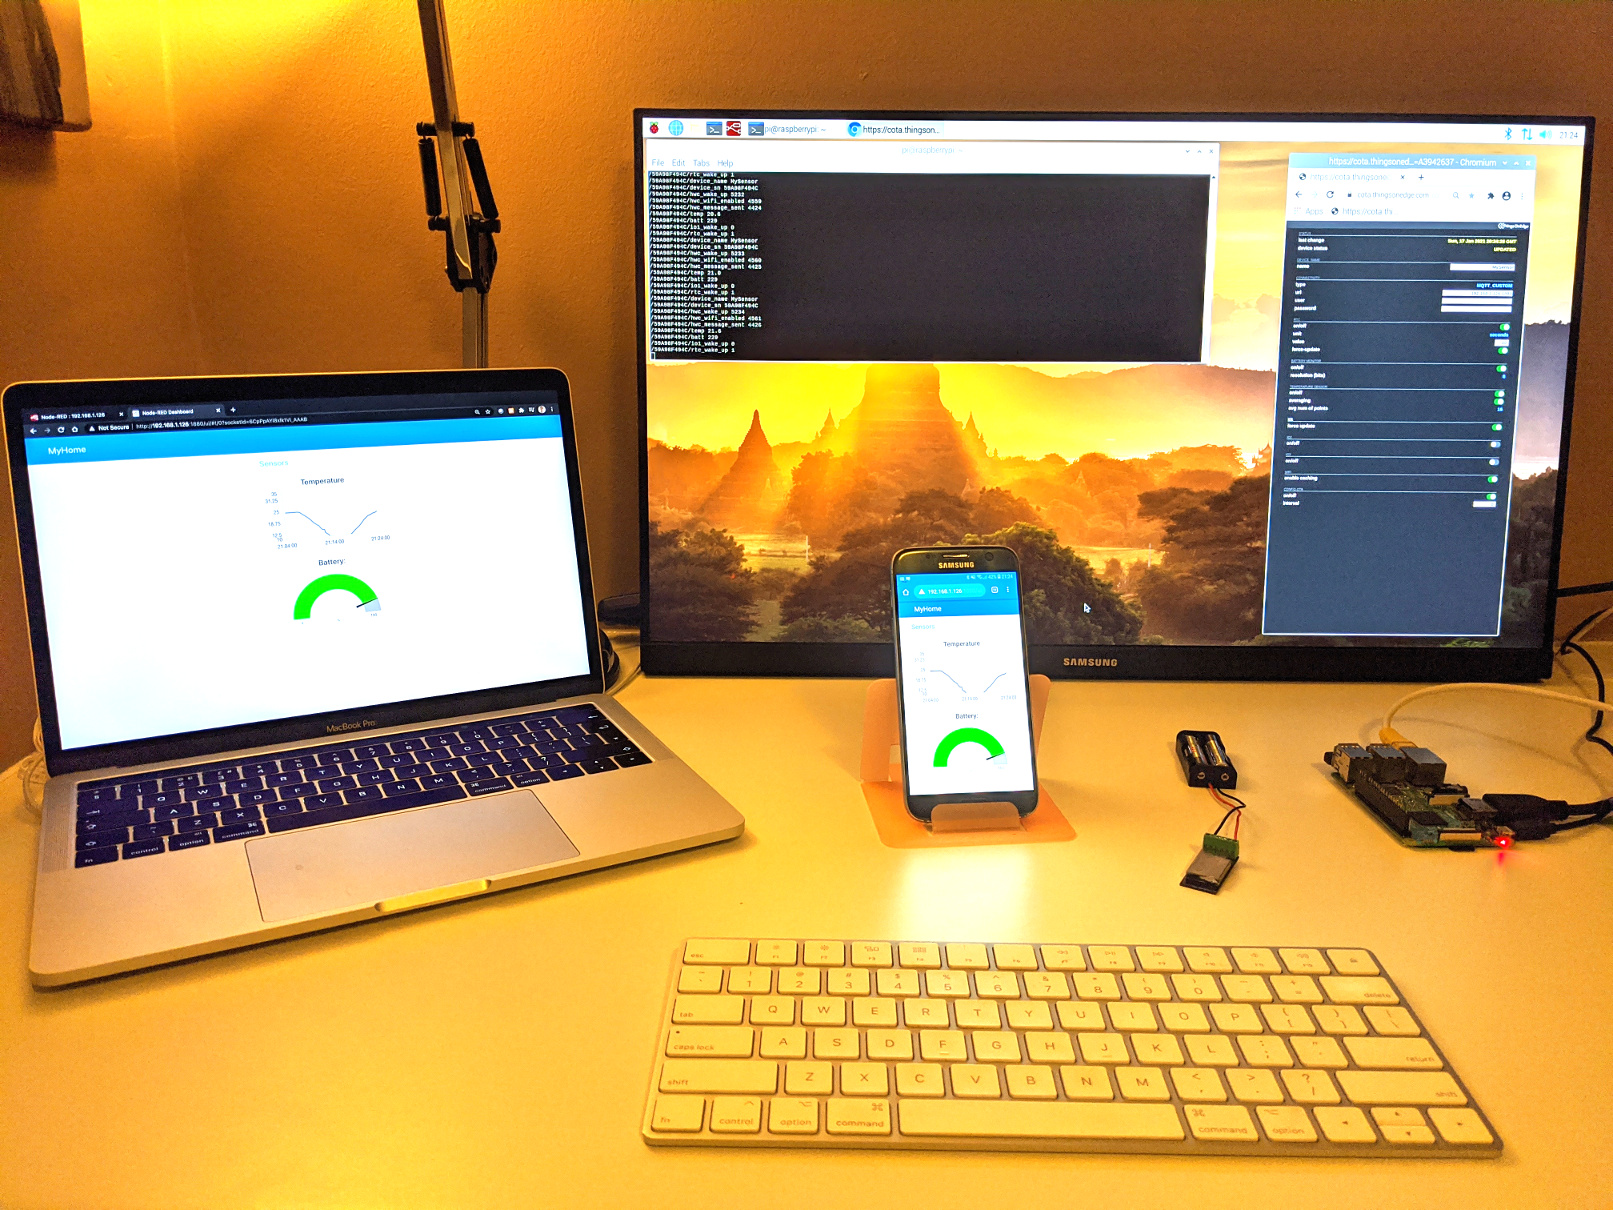
We can now enjoy our own live dashboard of our WiFi automation system on any computer or phone. Of course it's been a very basic project of putting together a temperature sensor and the basis of how to come up with a simple dashboard. But that's the foundation of what you need to build upon for more advanced systems and rich experiences.
In this project we have shown an essential hardware and software needed to start building low power, energy efficient, automation systems. Node-RED and Cricket allow us to build advanced systems without writing any code. This results in a rapid deployment of various IOT solutions and automation.
Now as we have this foundation infrastructure in place, the sky is our limit of what other WiFi devices we can build using Cricket and integrate with Node-RED system.
Thanks for getting up to here. We hope you enjoyed this tutorial!
Sylwester Bala