A Python script monitors CPU temperature and controls the fan using On-Off control with temperature hysteresis.
A Python script monitors CPU temperature and controls the fan using On-Off control with temperature hysteresis.
Brief overview
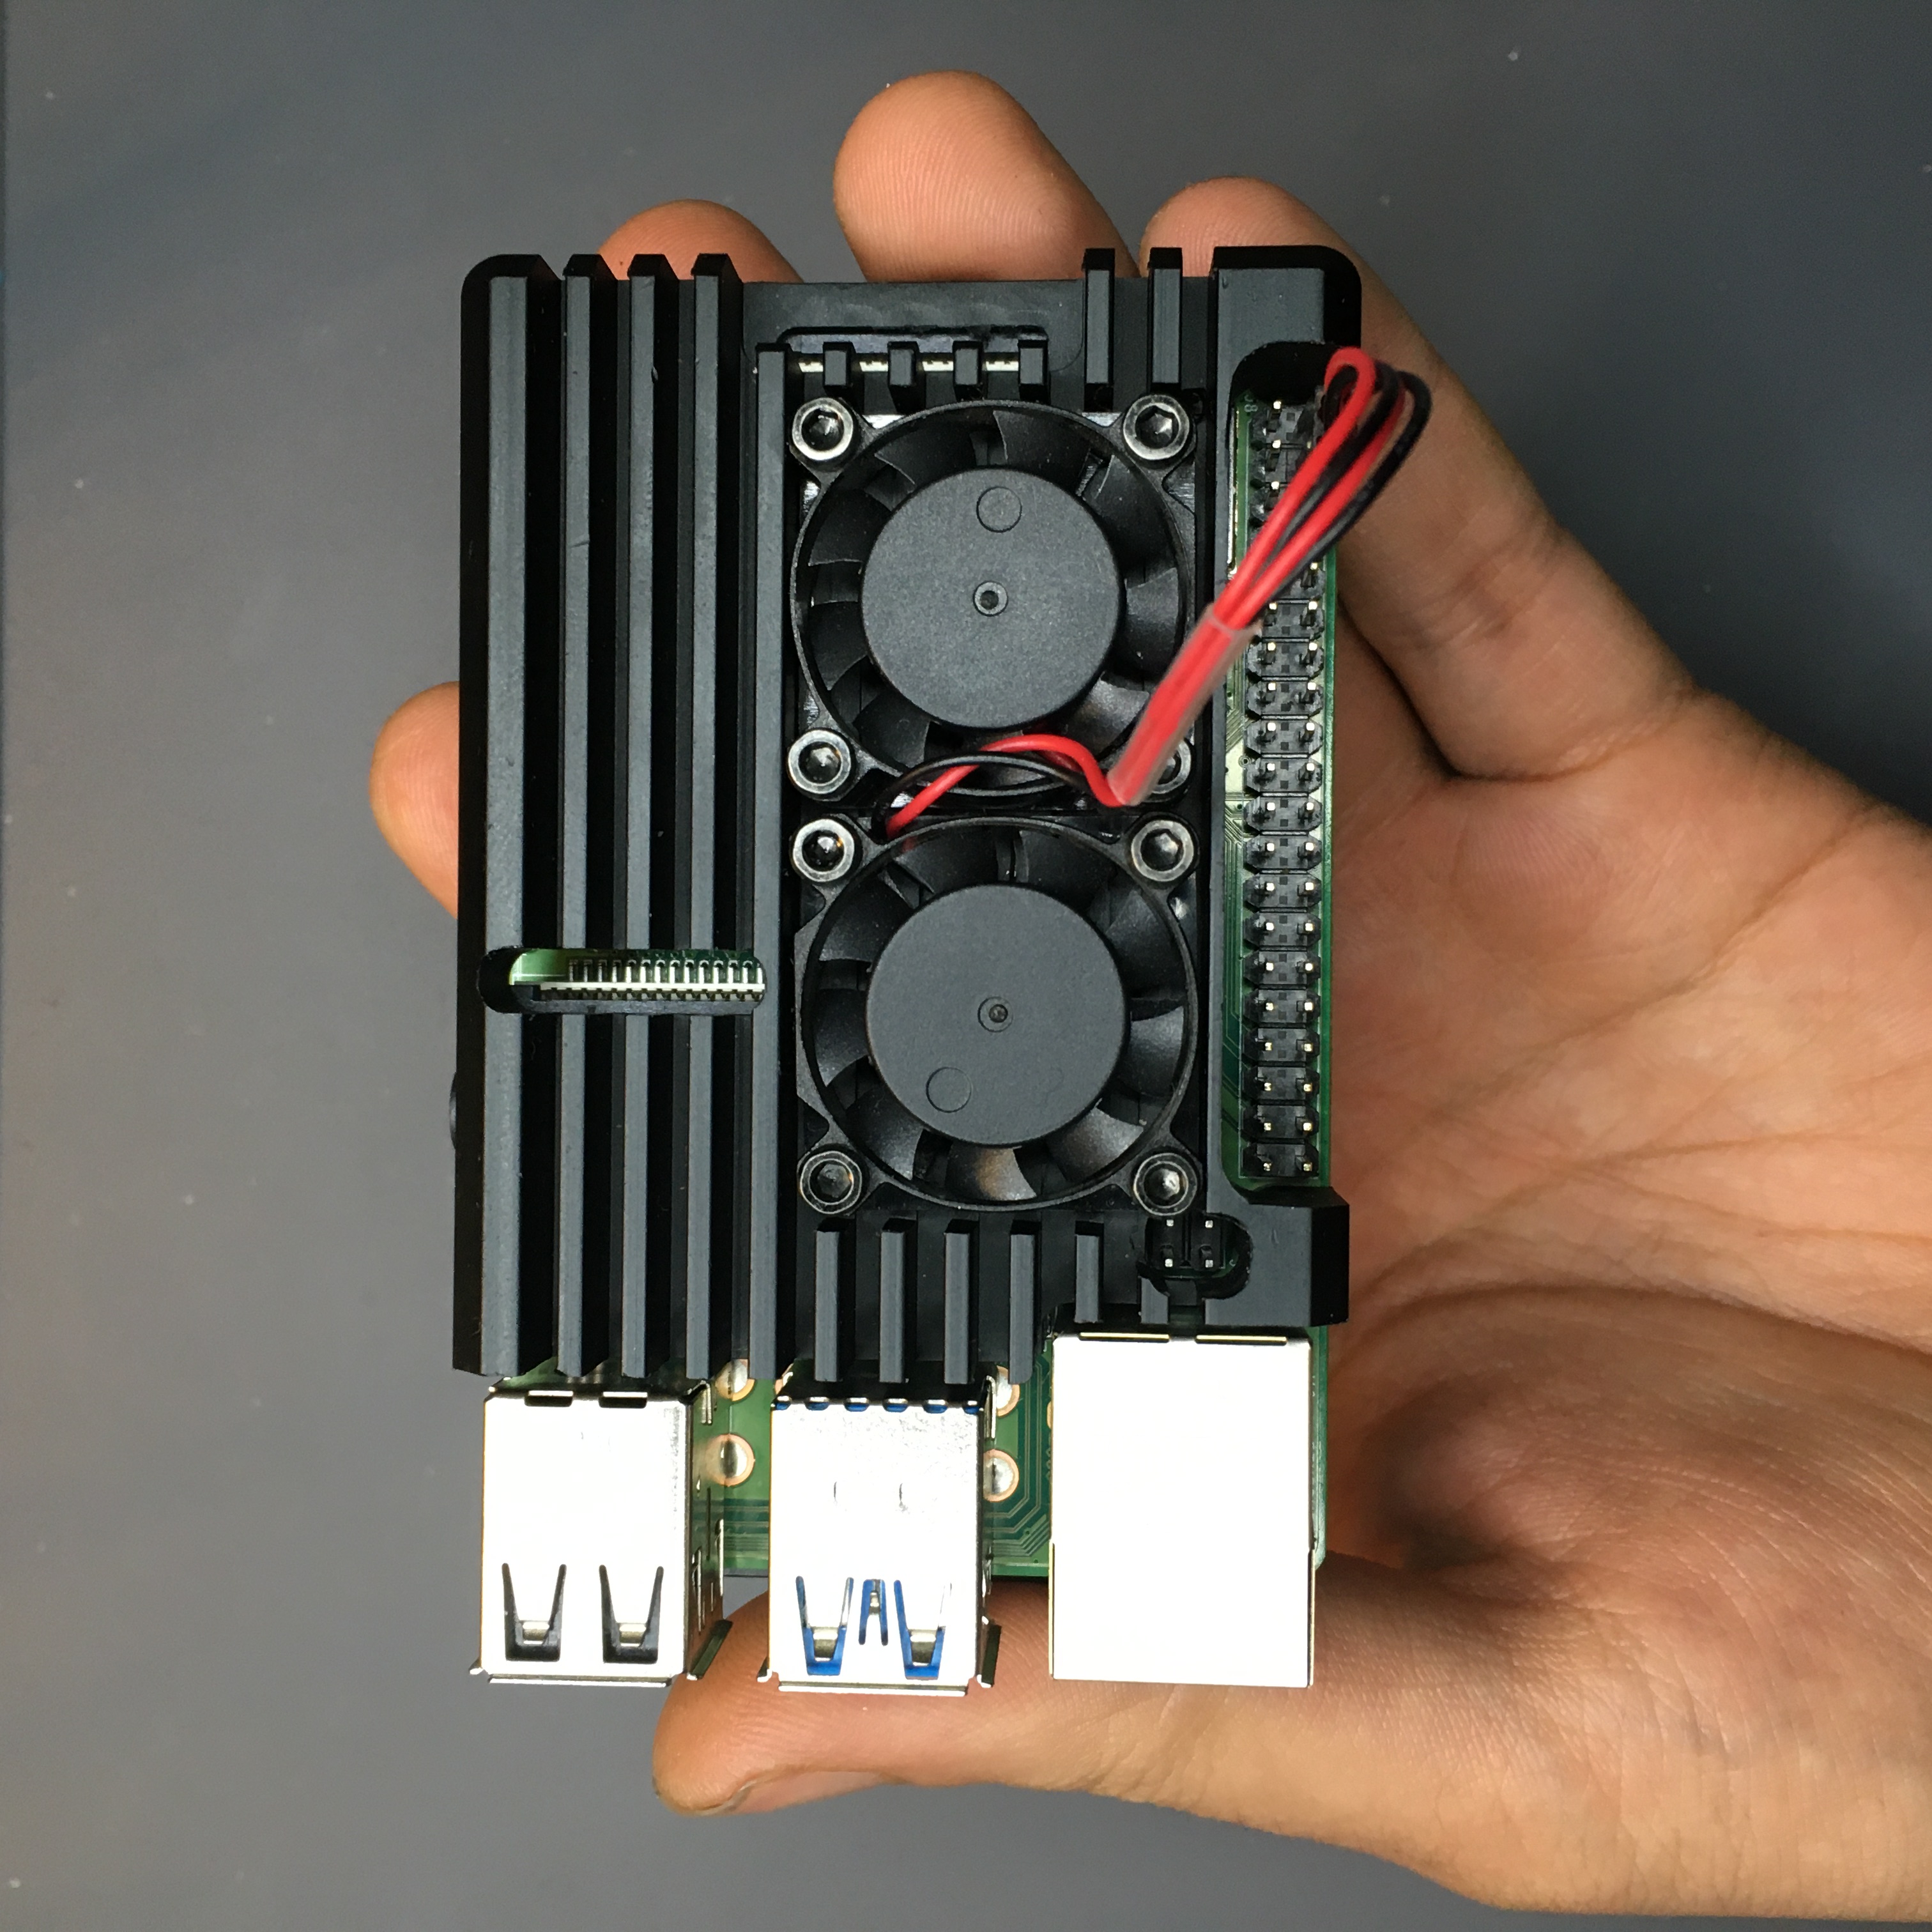
By default, the fan is directly connected to the GPIO - this implies its constant operation. Despite the relative quiet operation of the fan, its continuous operation is not an effective use of an active cooling system. At the same time, the constant operation of a fan can just be annoying. Also, if Raspberry Pi is turned off, the fan will still work if the power is connected.
This article will show how, using simple and not complicated manipulations, turn an existing cooling system into a smart one, which will only be turned on when the processor really needs it. The fan would be turned on only when there is heavy usage, thus reducing fan power consumption and noise. Also extending fan life by keeping it off when not needed.
Building the circuit
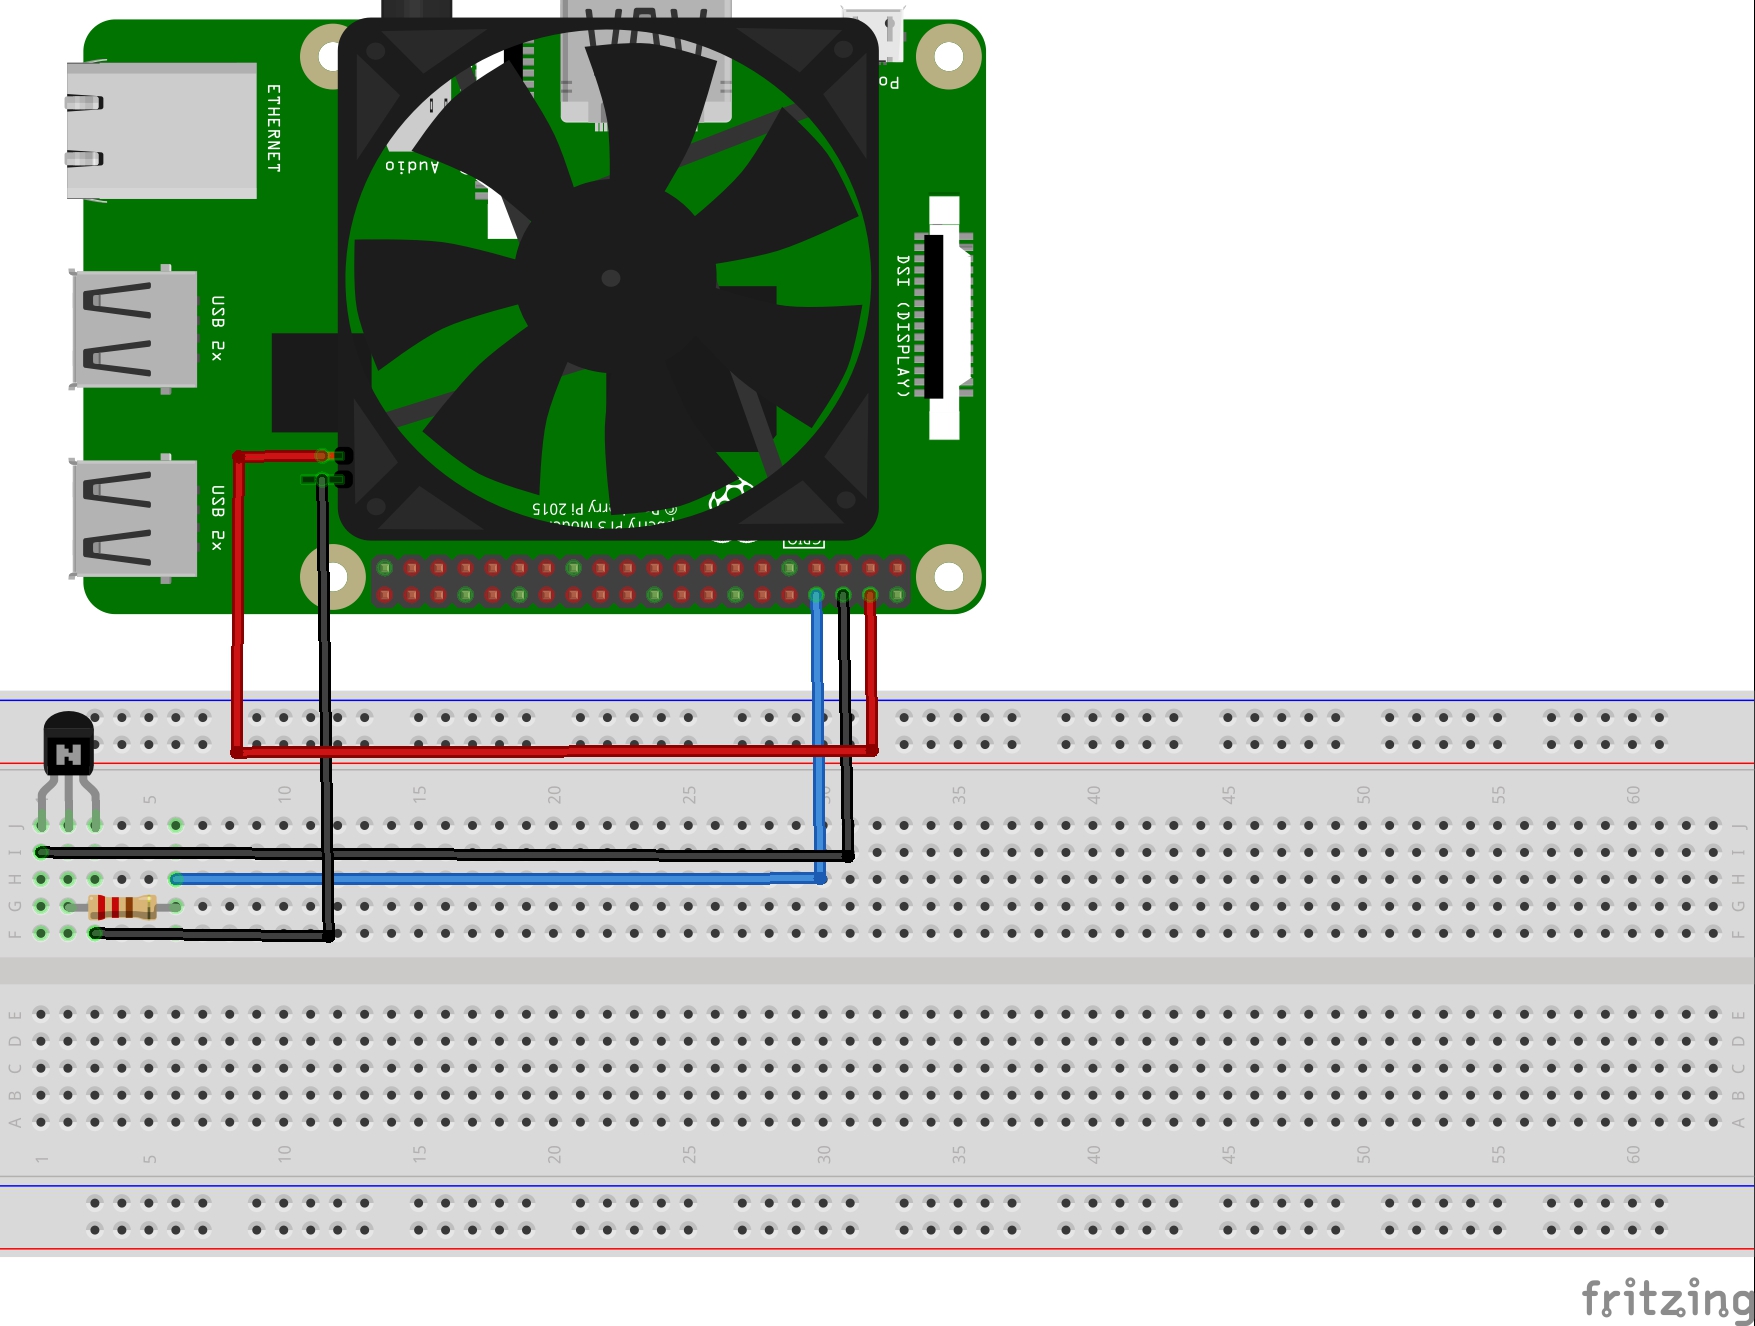
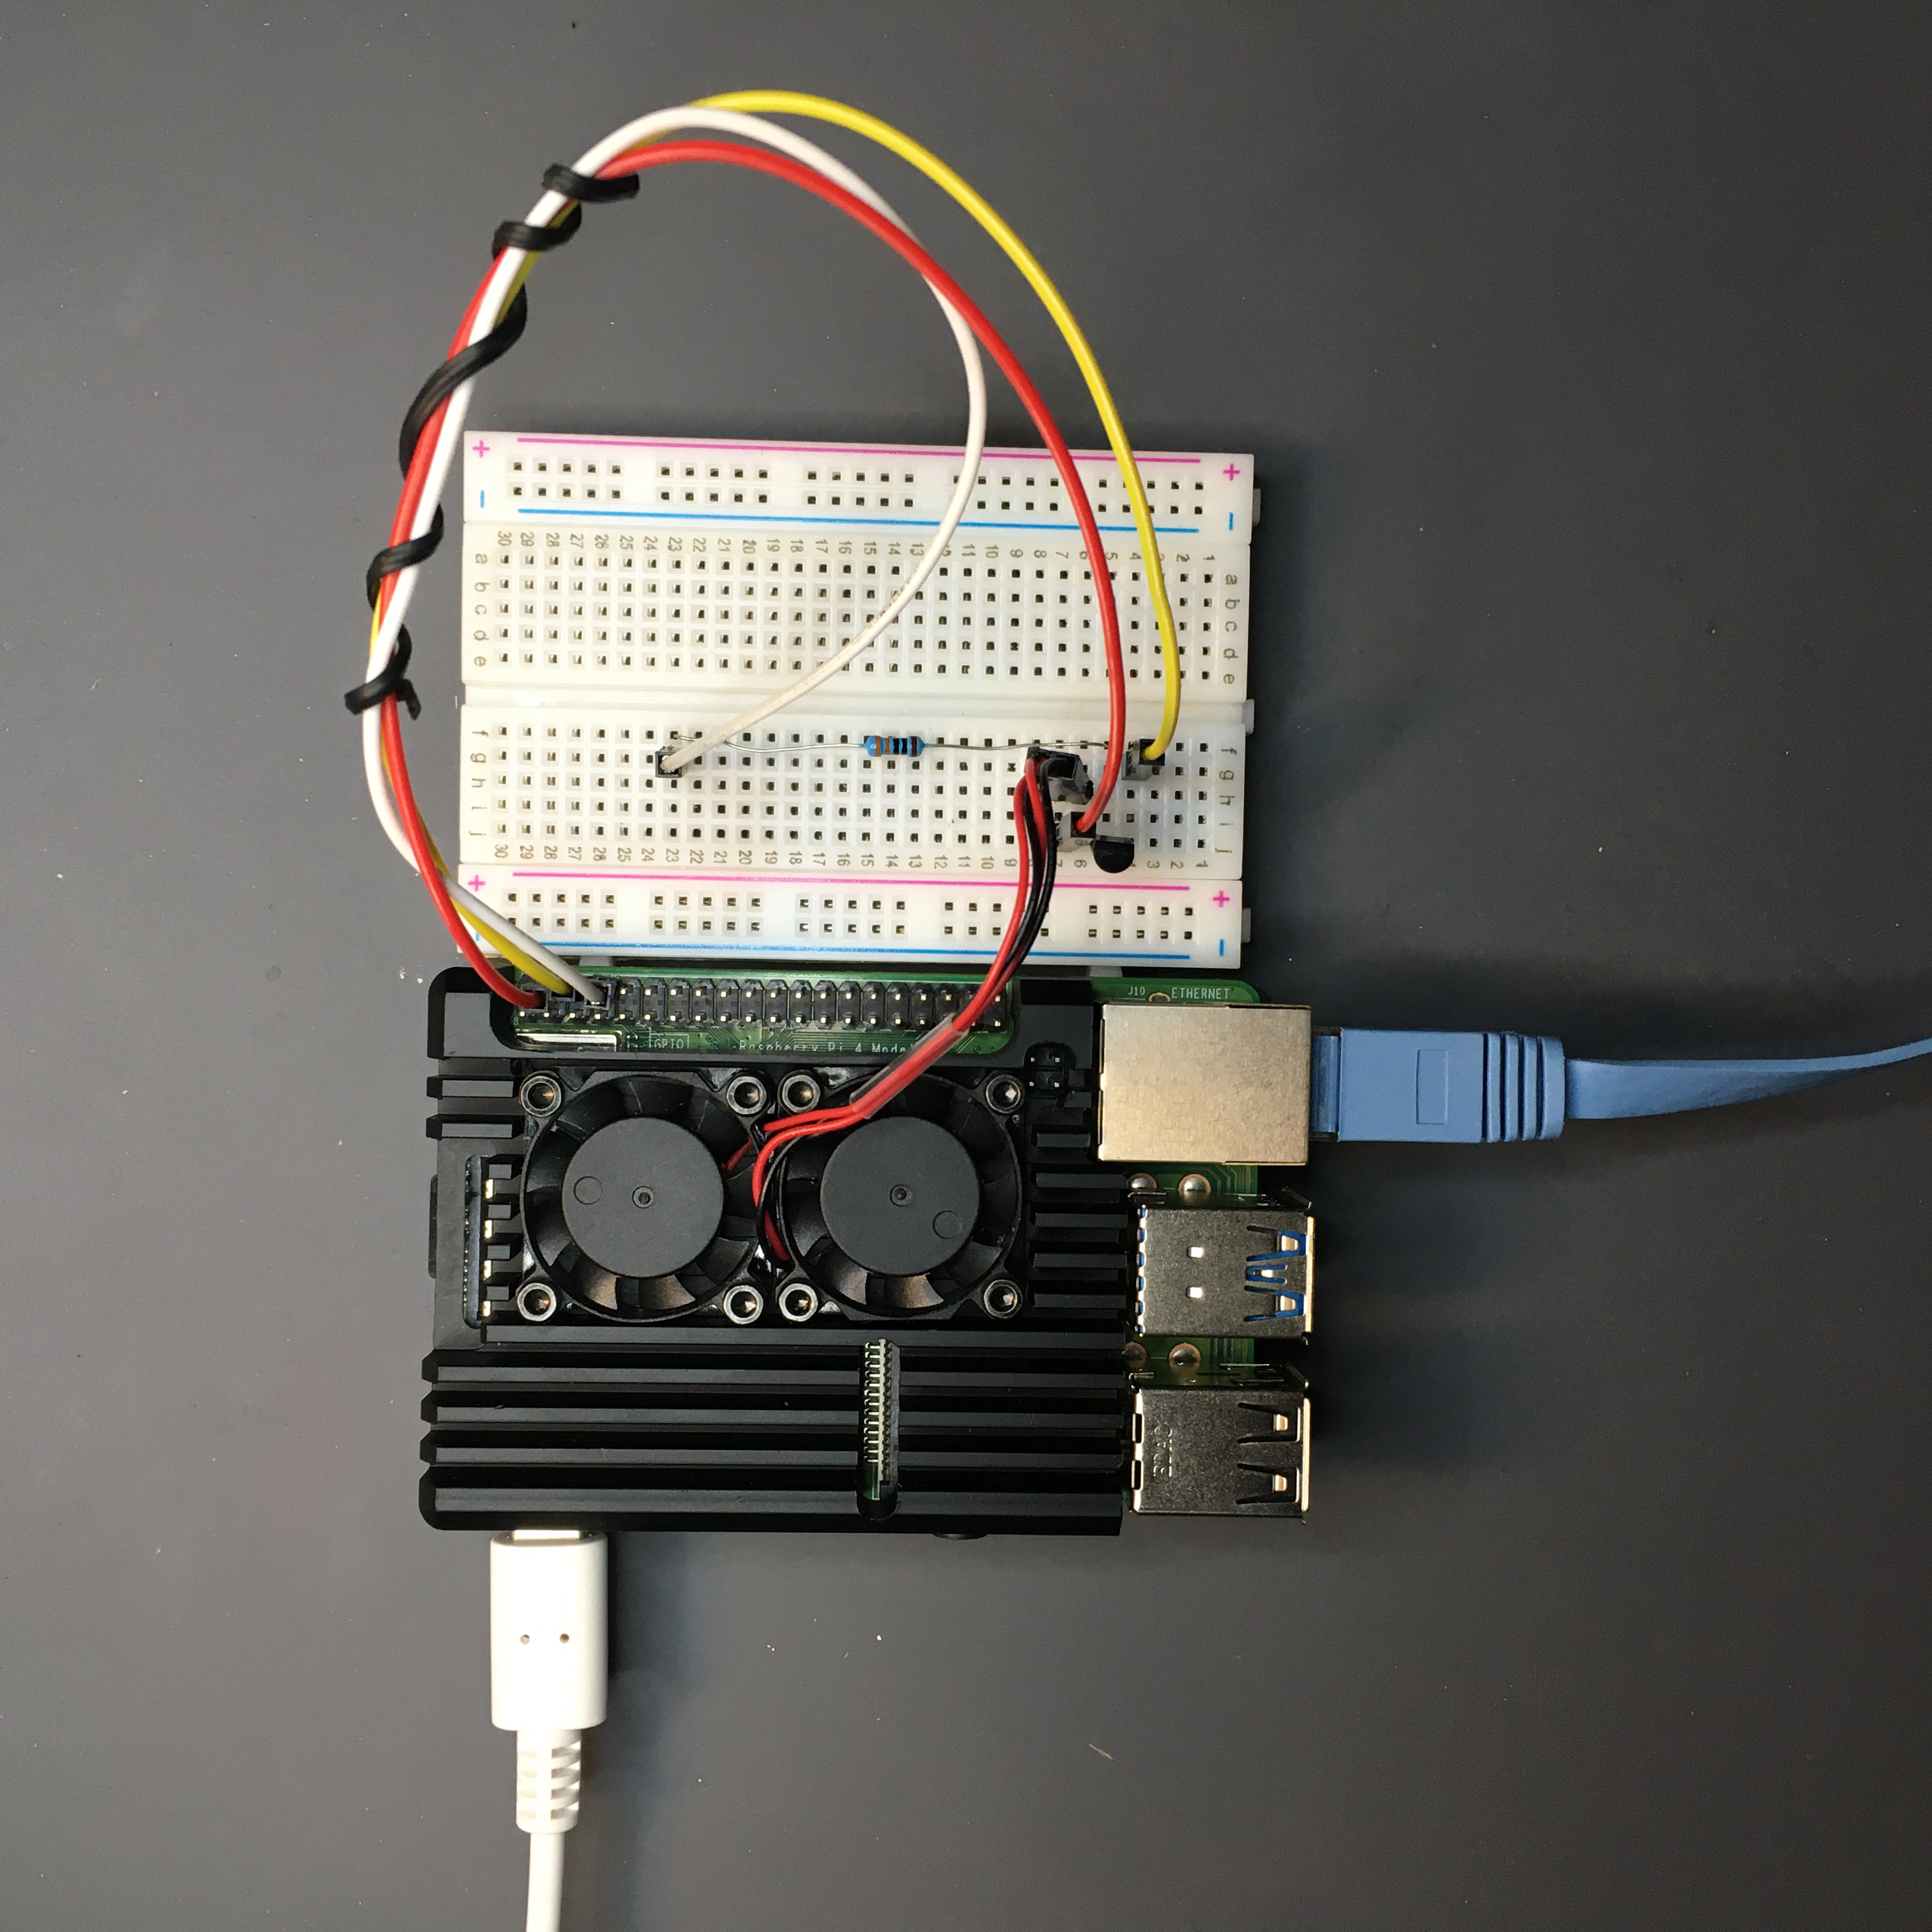
The circuit is pretty simple. The power to the fan is cut off using NPN transistor. In this configuration, the transistor is acting as a low-side switch. Resistor is only required to limit the current through GPIO. The Raspberry Pi’s GPIO has a maximum current output of 16mA. I used 330 ohms which gives us a base current of about (5-0.7)/330 = 13mA. I selected a NPN transistor S8050, so switching a 400mA load from both fans is no problem.
Perform connections as shown in the following schematic diagram above.
Log CPU temperature with ThingSpeak
ThingSpeak is a platform for projects based on the Internet of Things concept. This platform allows you to build applications based on data collected from sensors. The main features of ThingSpeak include: real-time data collection, data processing and visualization. ThingSpeak API not only allows you to send, store and access data, but also provides various statistical methods for processing them.
ThingSpeak can integrate popular devices and services such as:
- Arduino
- Raspberry pi
- ioBridge / RealTime.io
- Electric imp
- Mobile and Web applications
- Social networks
- Data Analysis in MATLAB
Before we start, you need an account at ThingSpeak.
- Go to the following link and sign up to ThingSpeak.
- After your account activation, sign in.
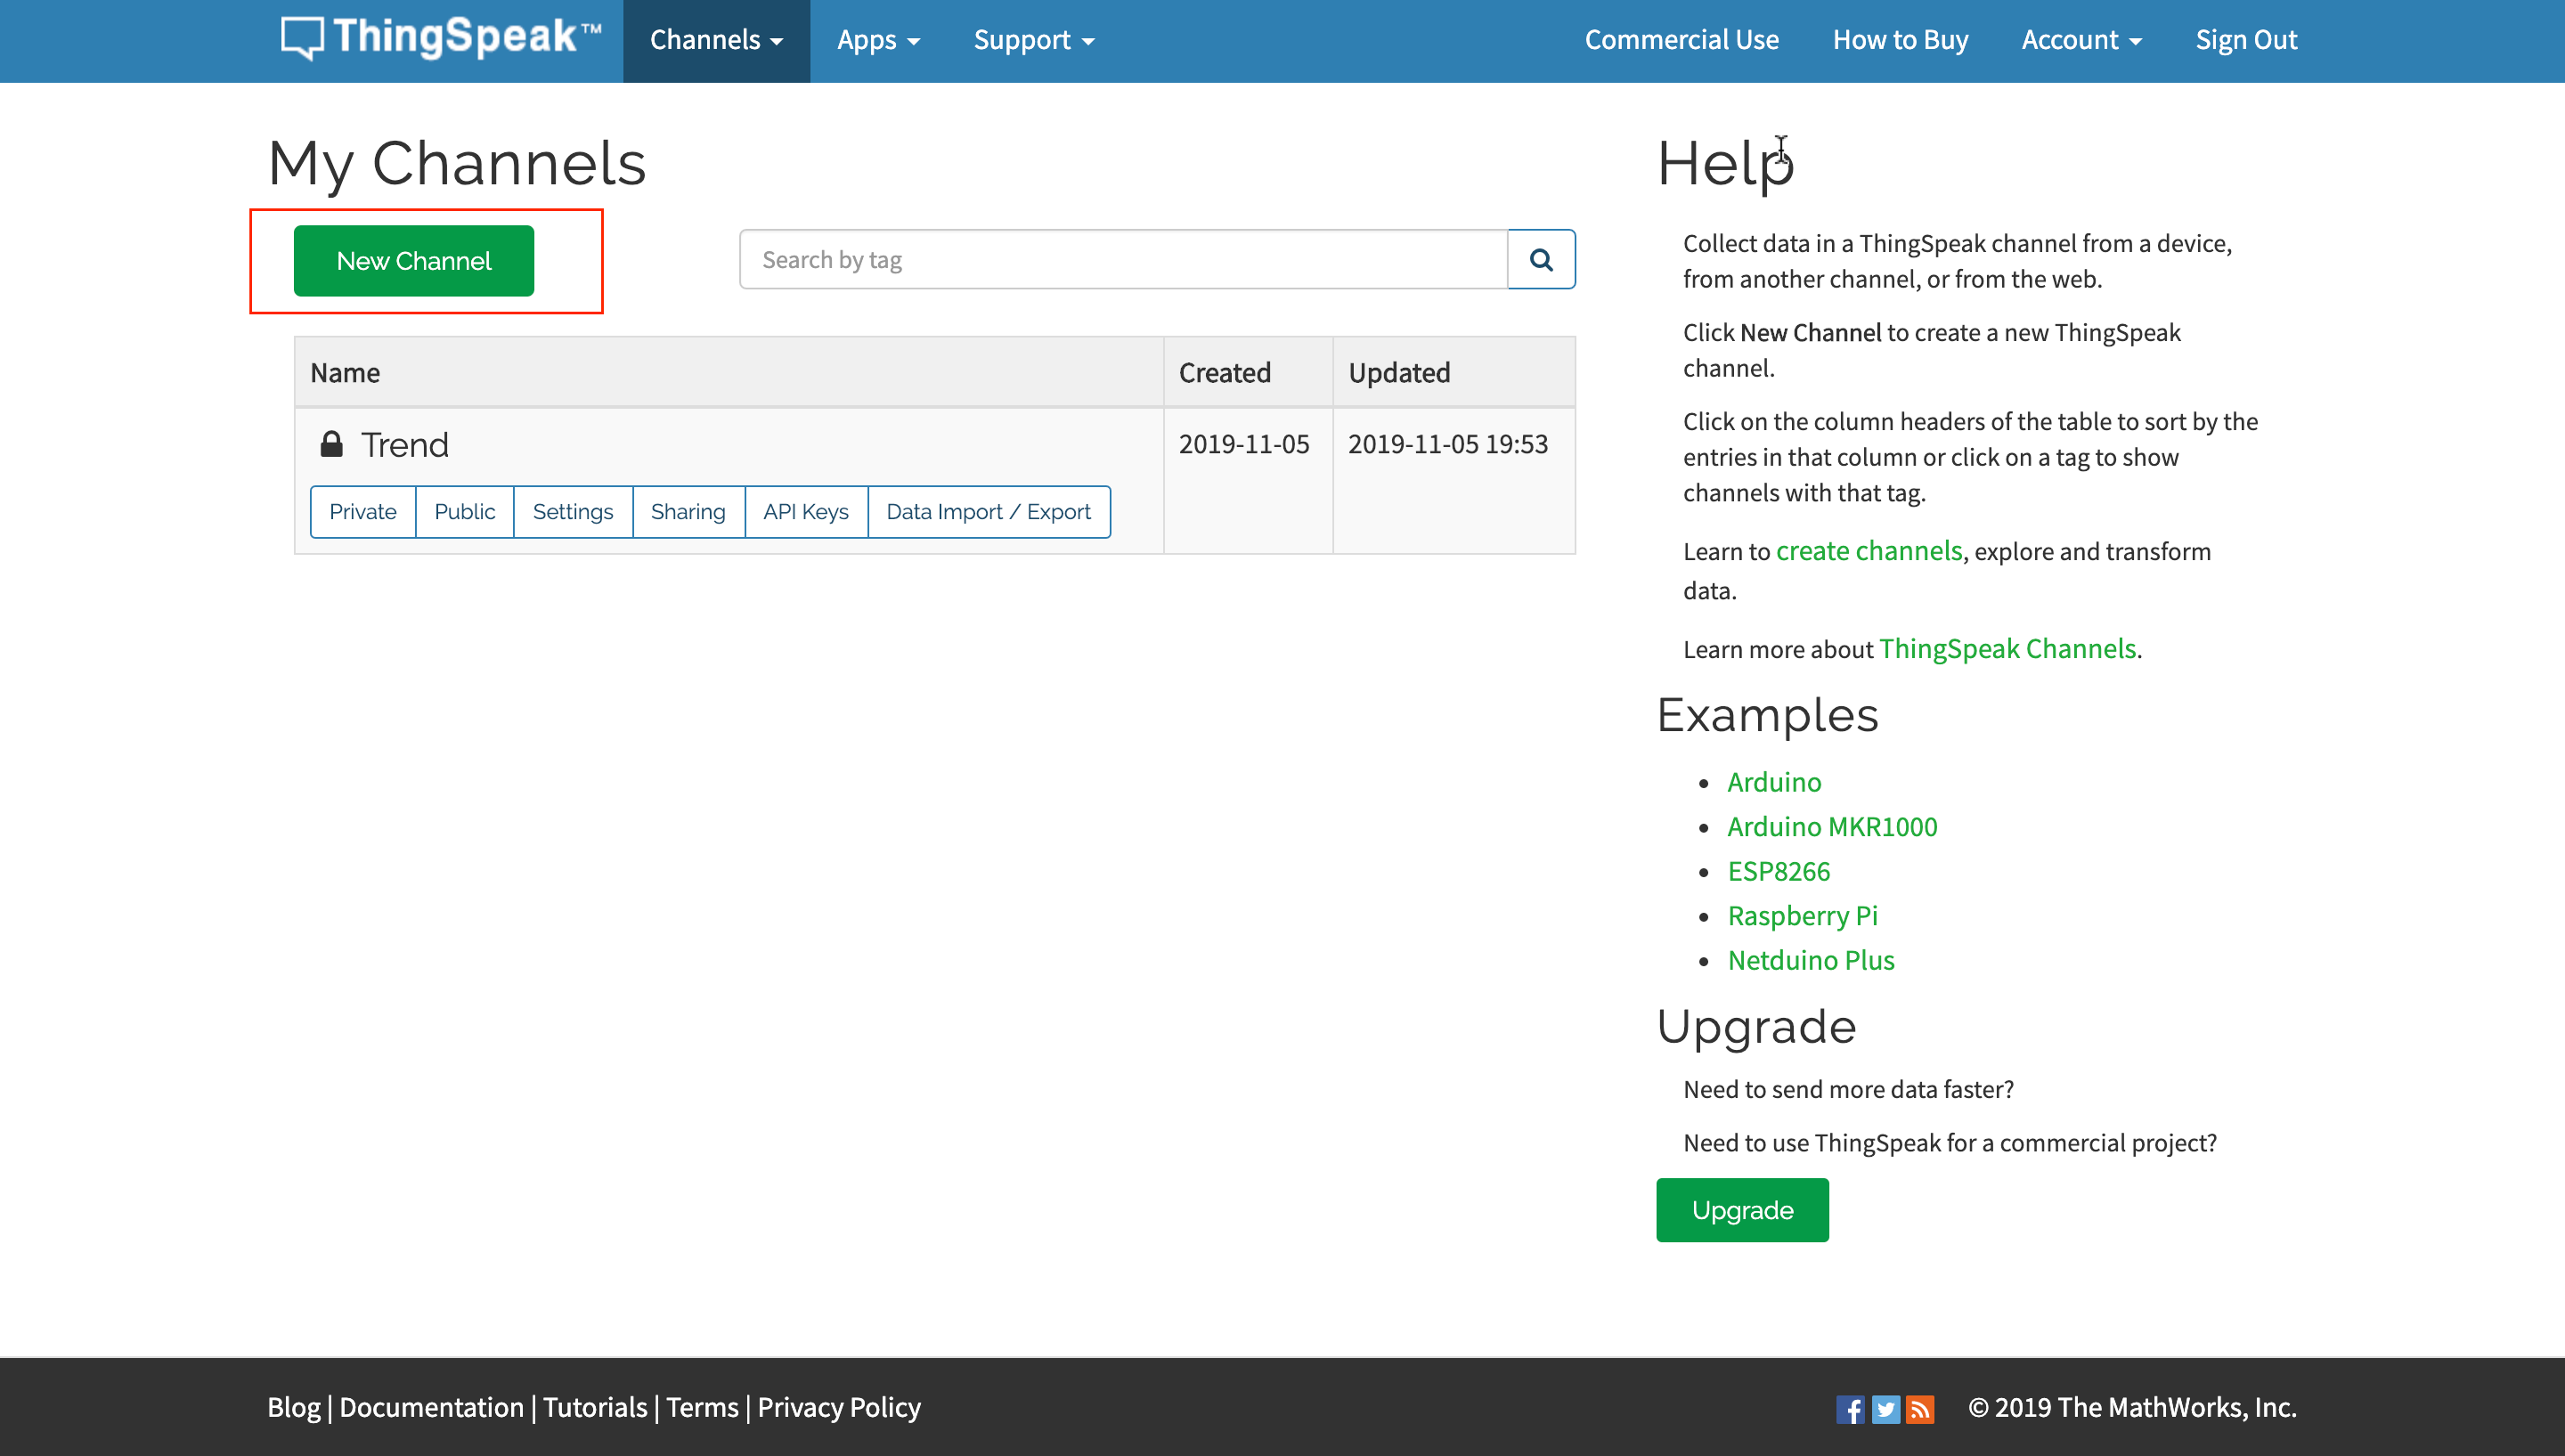
- Go to Channels -> My Channels
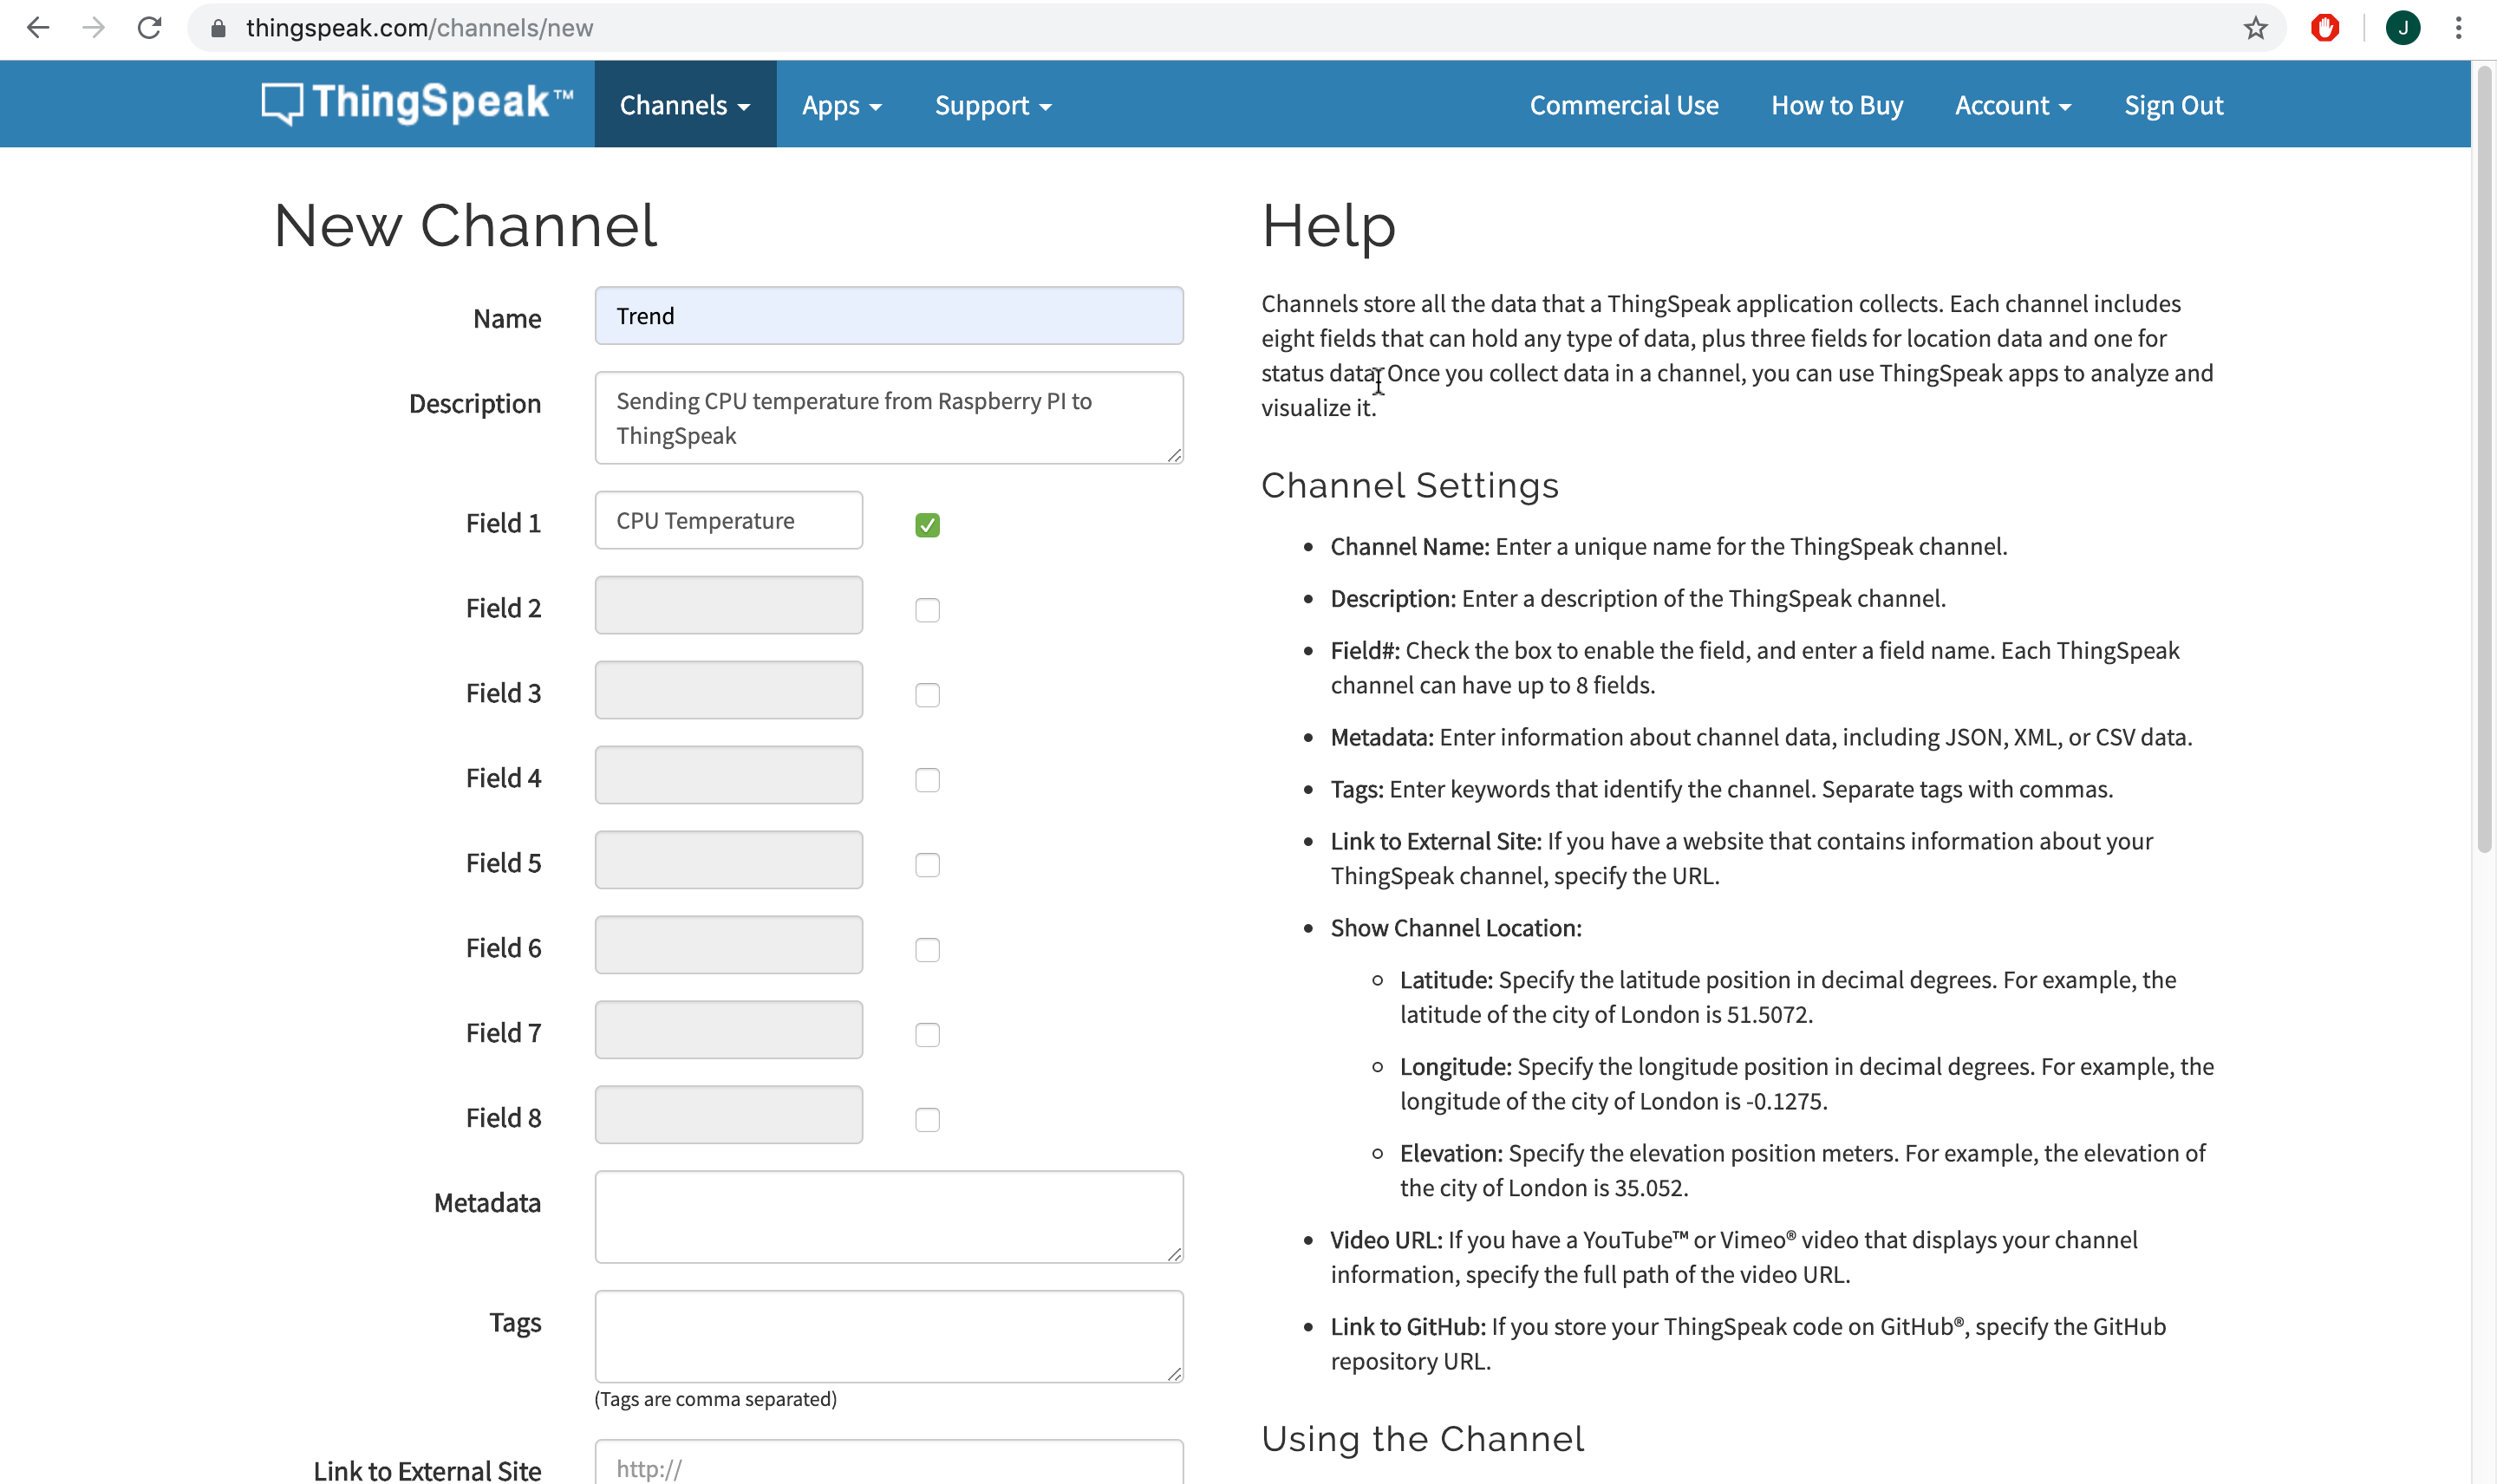
Click on New Channel button.
Enter the name, description and fields of the data you want to upload
Click on Save Channel button to save all of your settings.
We need an API key, which we will later add to python code in order to upload our CPU temperature to Thingspeak cloud.
Click on API Keys tab to get the Write API Key.
Once you have the Write API Key, we are almost ready to upload our data.
Getting the CPU temperature from a Raspberry Pi using Python
The script is based on a retrieving the processor temperature, which occurs every second. It can be obtained from the terminal by running the vcgencmd command with the measure_temp parameter.
Subprocess.check_output() library was used to execute the command and then using regular expression to extract the actual value from the returned string.
from subprocess import check_output
from re import findall
def get_temp():
    temp = check_output(["vcgencmd","measure_temp"]).decode()
    temp = float(findall('\d+\.\d+', temp)[0])
    return(temp)

print(get_temp())
After the temperature value is fetched, data needs to be sent to ThingSpeak cloud. Use your Write API Key to change the myApi variable in the below Python code.
Controlling the Fan Based on Temperature
Python script shown below implements logic that turns on the fan when the temperature rises above the tempOn and off only when the temperature drops down below the threshold. This way, the fan won’t turn on and off rapidly.
Final Python code
The main python code can be found on my GitHub account in the following link. Remember to put your own Write API Key.
- Log into your Raspberry PI board
- Run the following command on terminal
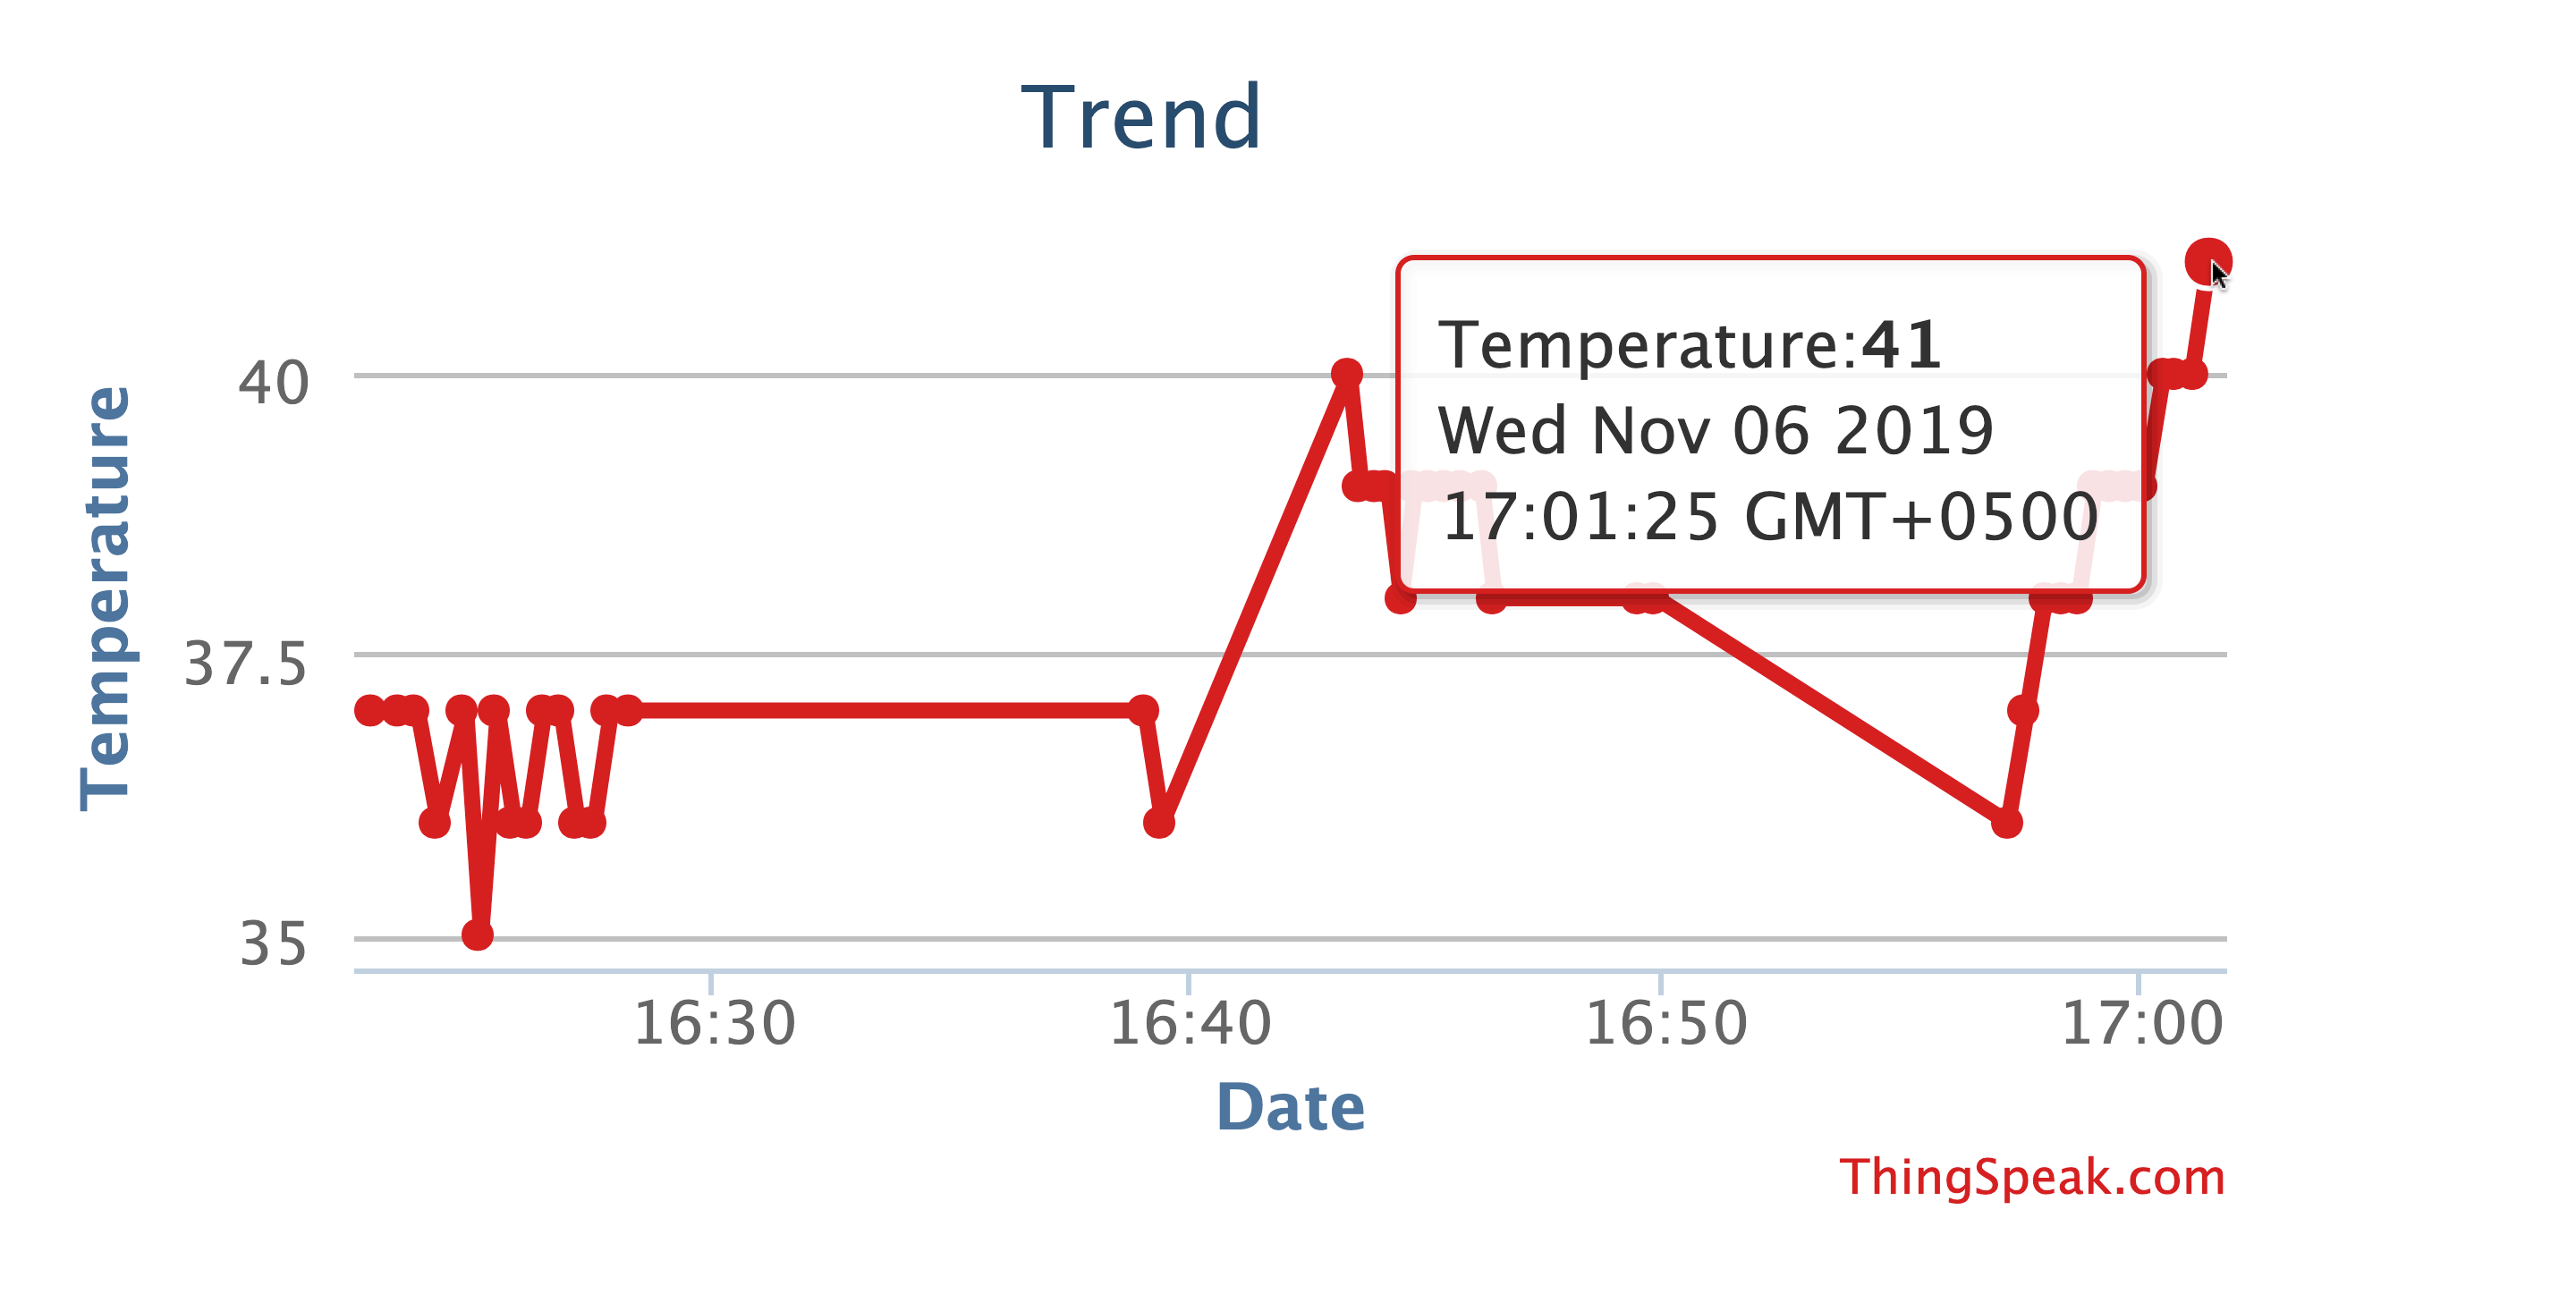
After a while, open your channel on ThingSpeak and you should see the temperature uploading into Thingspeak cloud in a real-time.
Run the Python script at Startup
To do this, at the end of the /etc/rc.local file:
You need to place the script start command in front of the line exit 0:
sudo python /home/pi/cpu.py &
The presence of the & symbol at the end of the command is mandatory, since it is a flag to start the process in the background.
After the reboot, the script will automatically run and the fan will turn on when the specified conditions are met.
