In this article, learn how you can use a Raspberry Pi to make a three-on-one timer using a MAX7219 LED dot matrix!
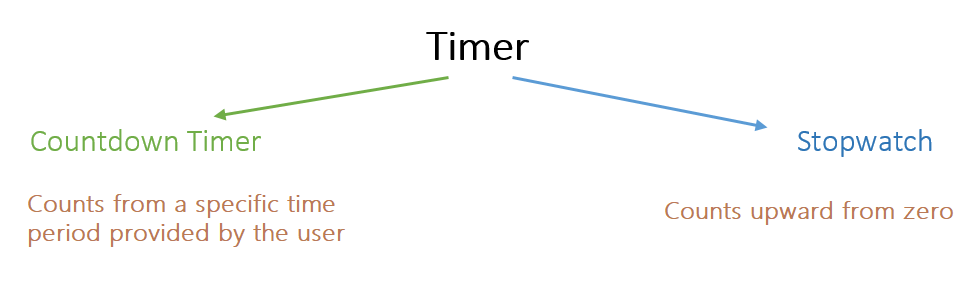
In this project, I am going to show you how to build a three-in-one timer using a Raspberry Pi. The timer includes:
- A real-time clock. The default function of this device is a clock.
- An easily customizable event countdown timer that can be used in special events and parties.
- A stopwatch that allows you to measure and track time intervals.
Once you gather the right components, this simple project takes only a couple of hours to create.
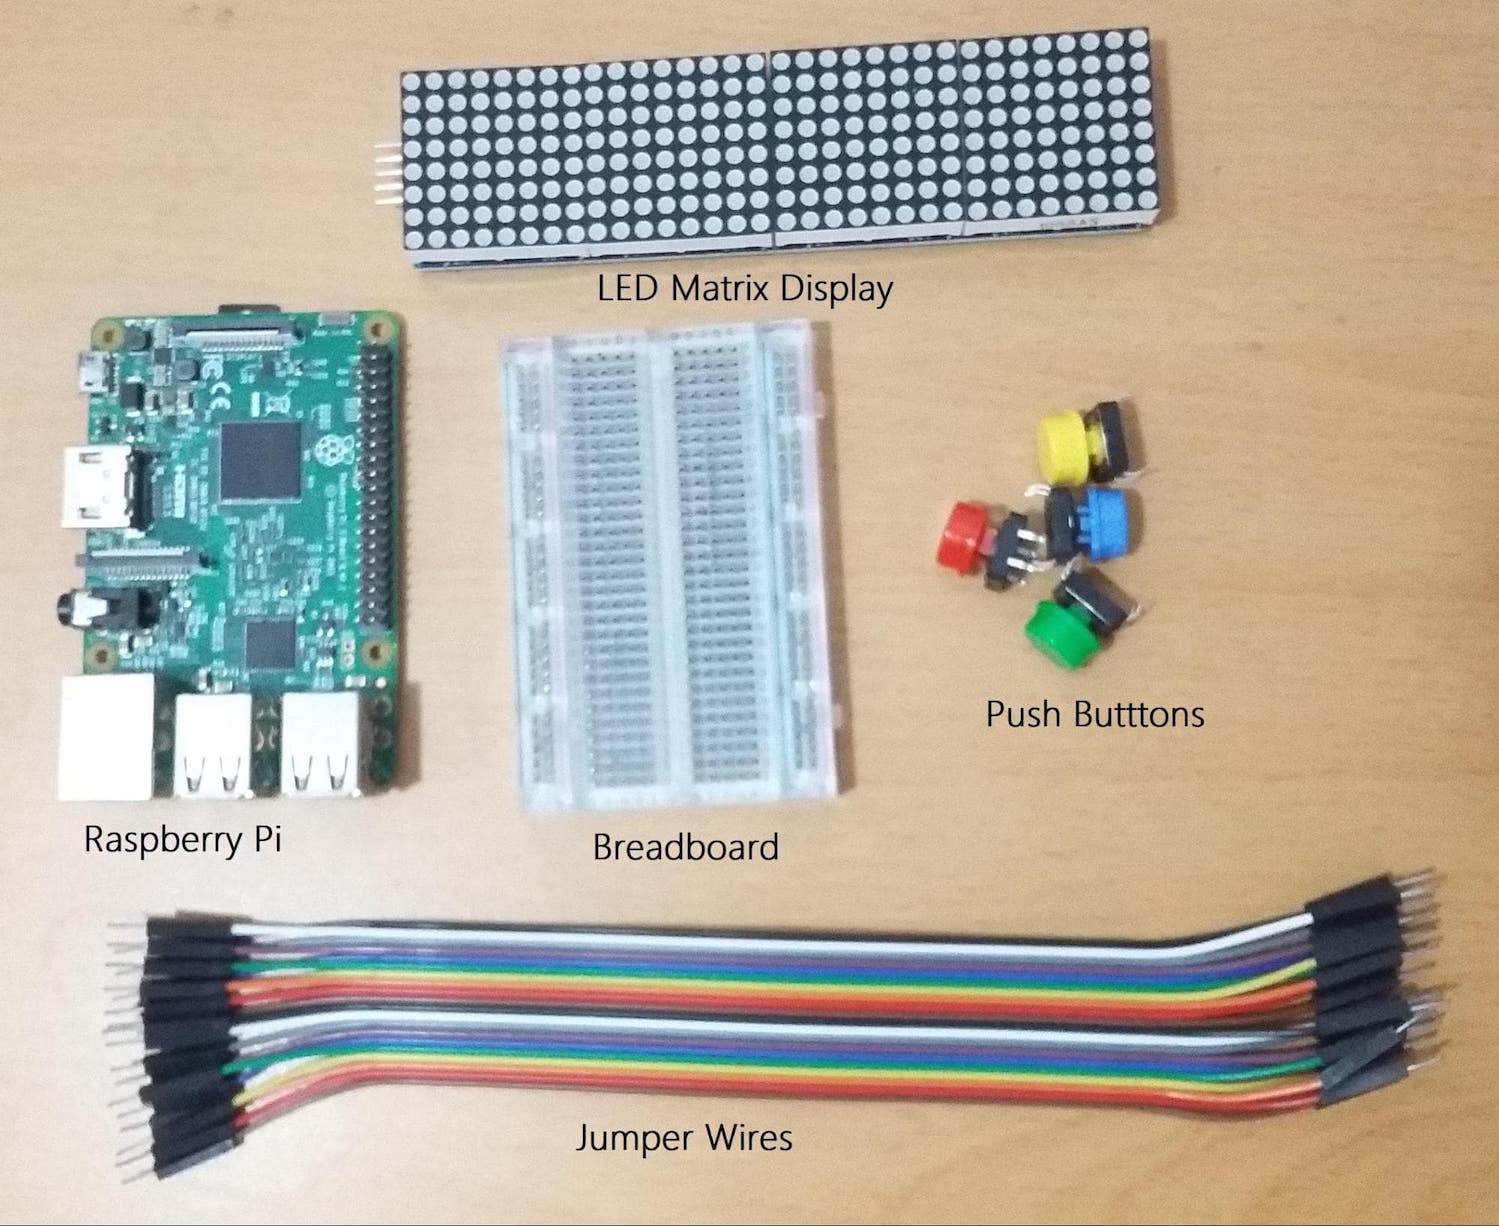
Required Hardware
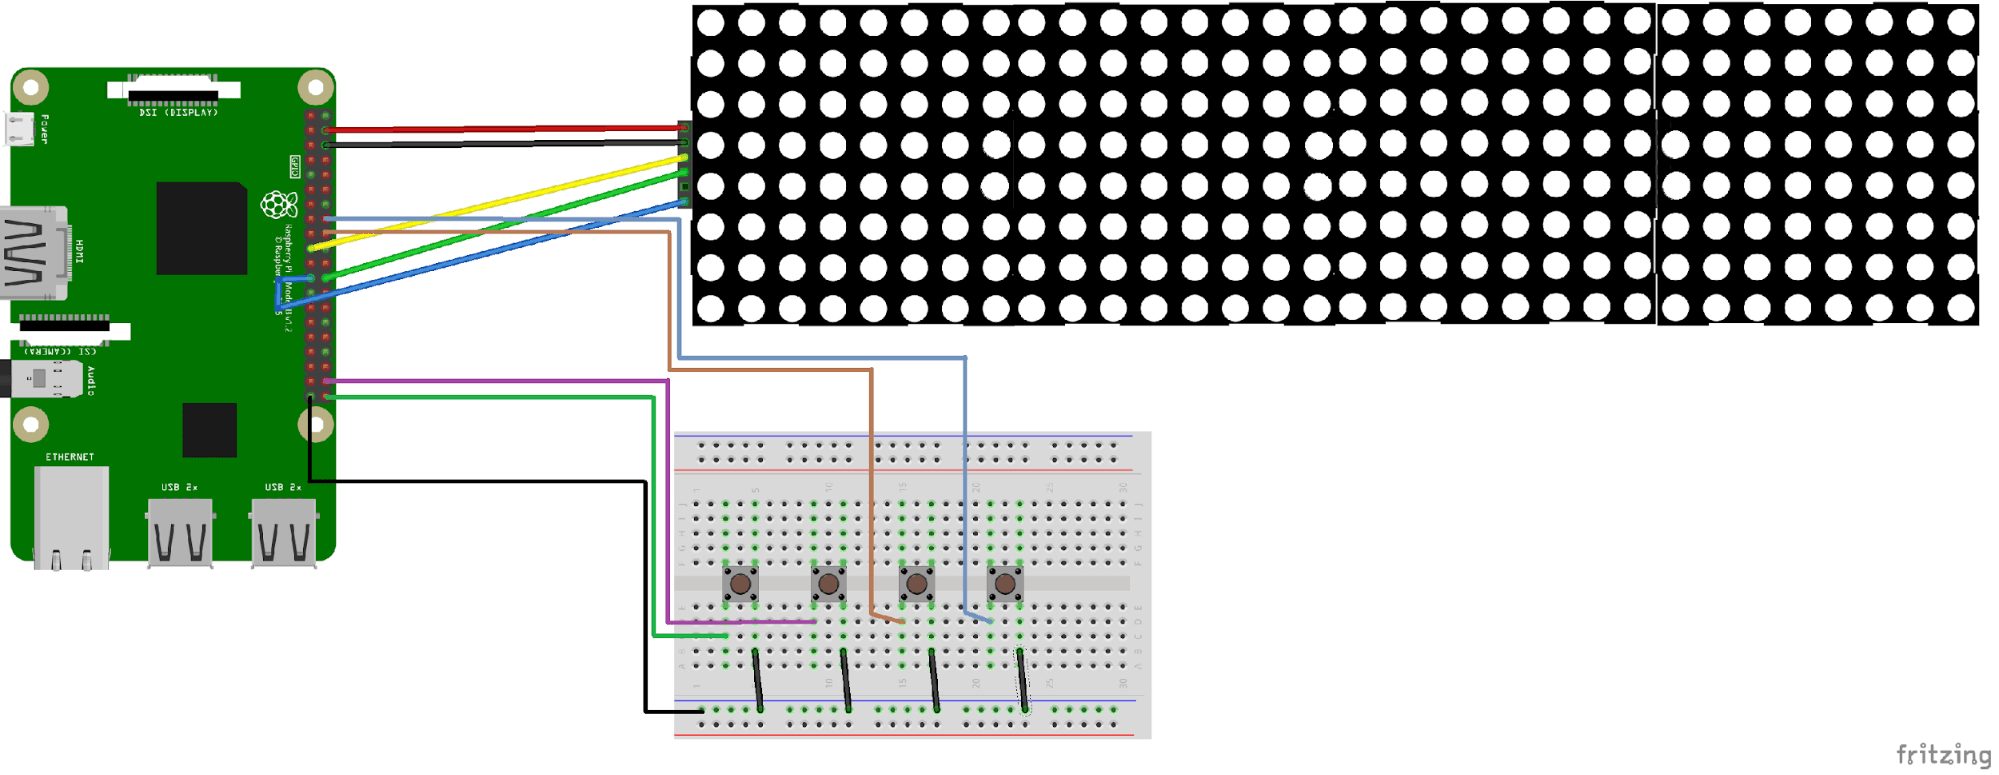
Wiring the Hardware
Follow the Fritzing diagram below to connect the hardware.
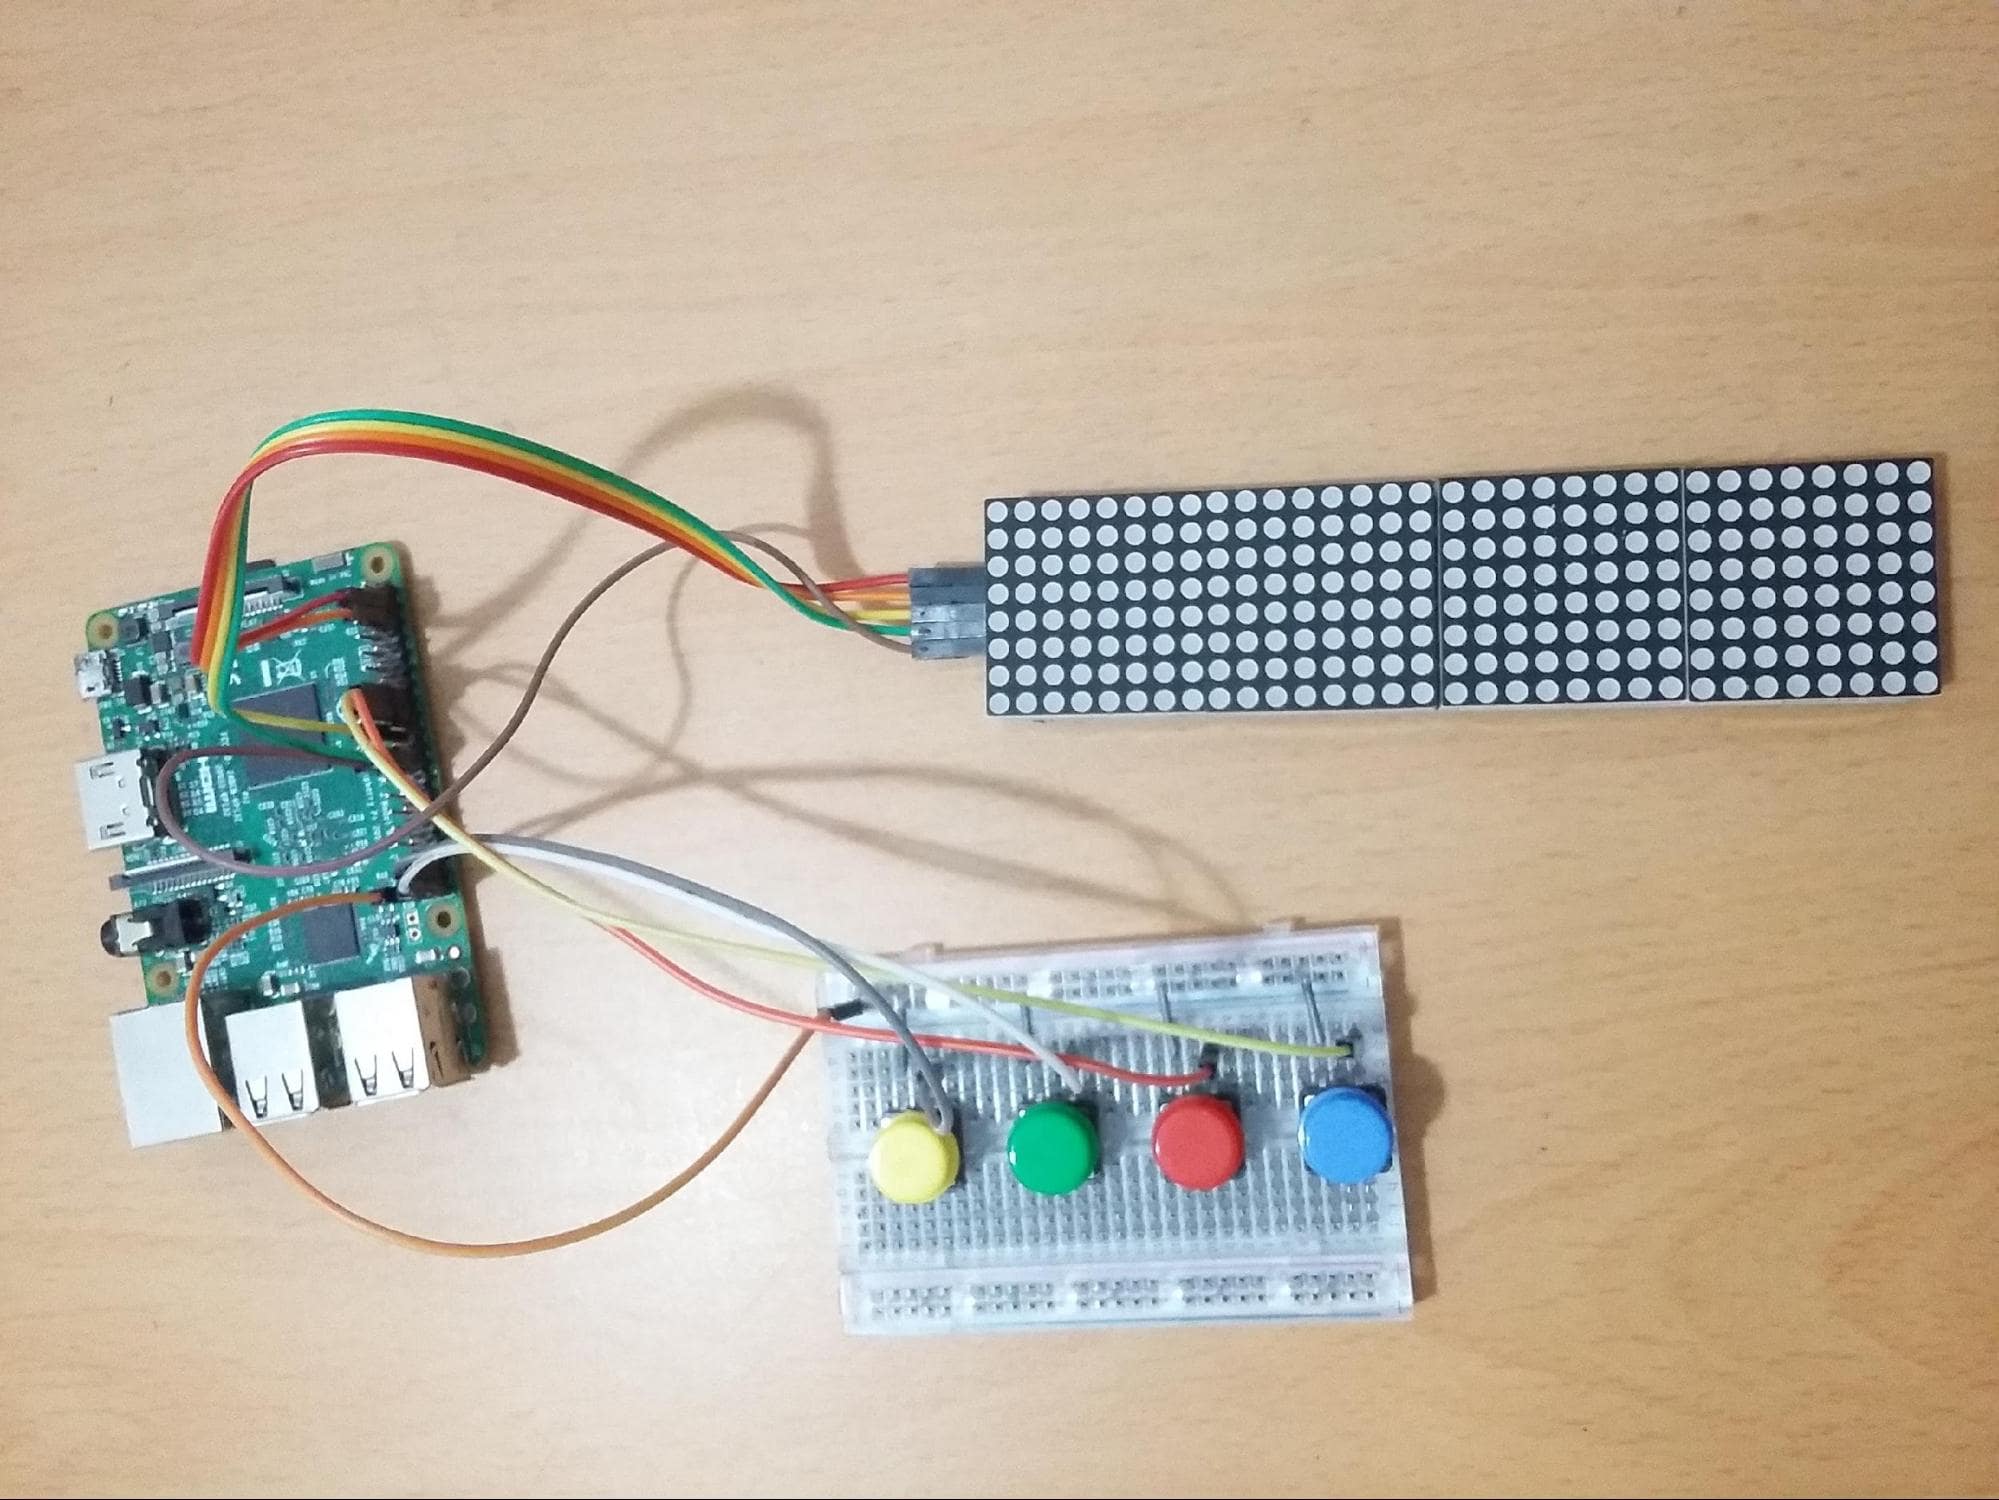
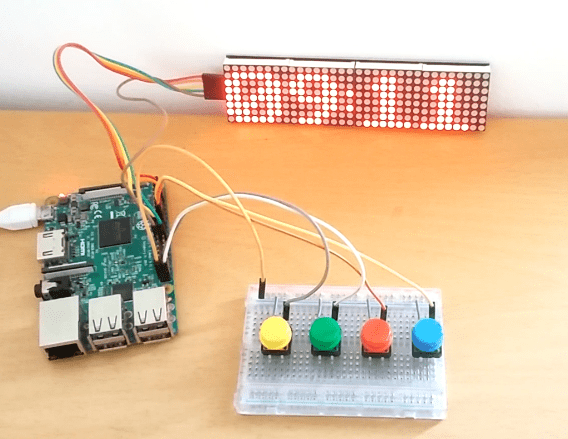
Here’s how the build looks with everything connected:
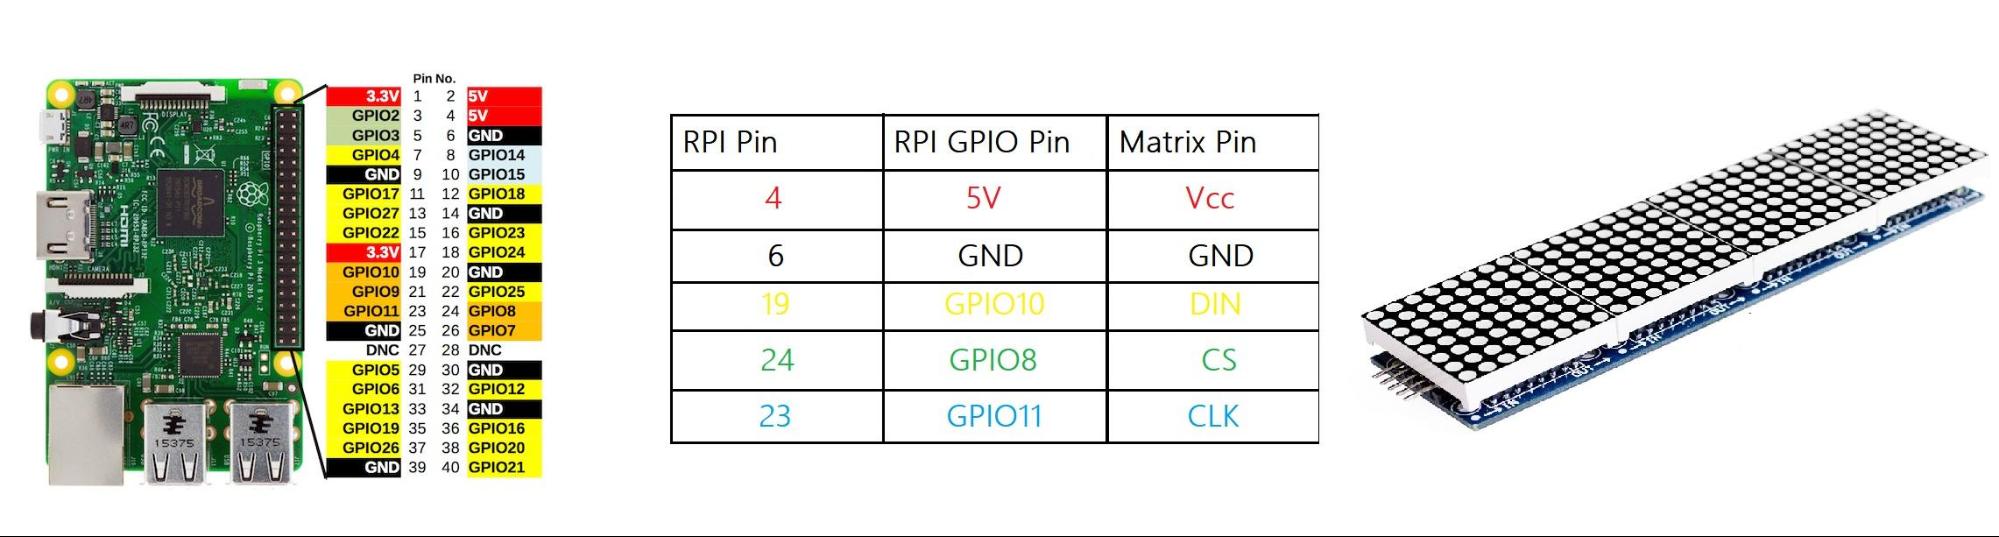
Interfacing the LED Matrix
Interface LED matrix display by referring to the diagram below.
In order to interface all the LEDs with the Raspberry Pi, the display has built-in MAX7219 display drivers. Take a look at the display carefully, a single matrix has 64 (8x8) LEDs and this 8x32 matrix display has 256 LEDs.
If we try to use these displays without a driver, we will probably end up with a lot of wiring. But integrating matrices with the MAX7219 driver allows us to access individual digits (LEDs) using only four wires. So without wiring the entire display, we can access individual LEDs to update its status. The display communicates with the Raspberry Pi through SPI communication.
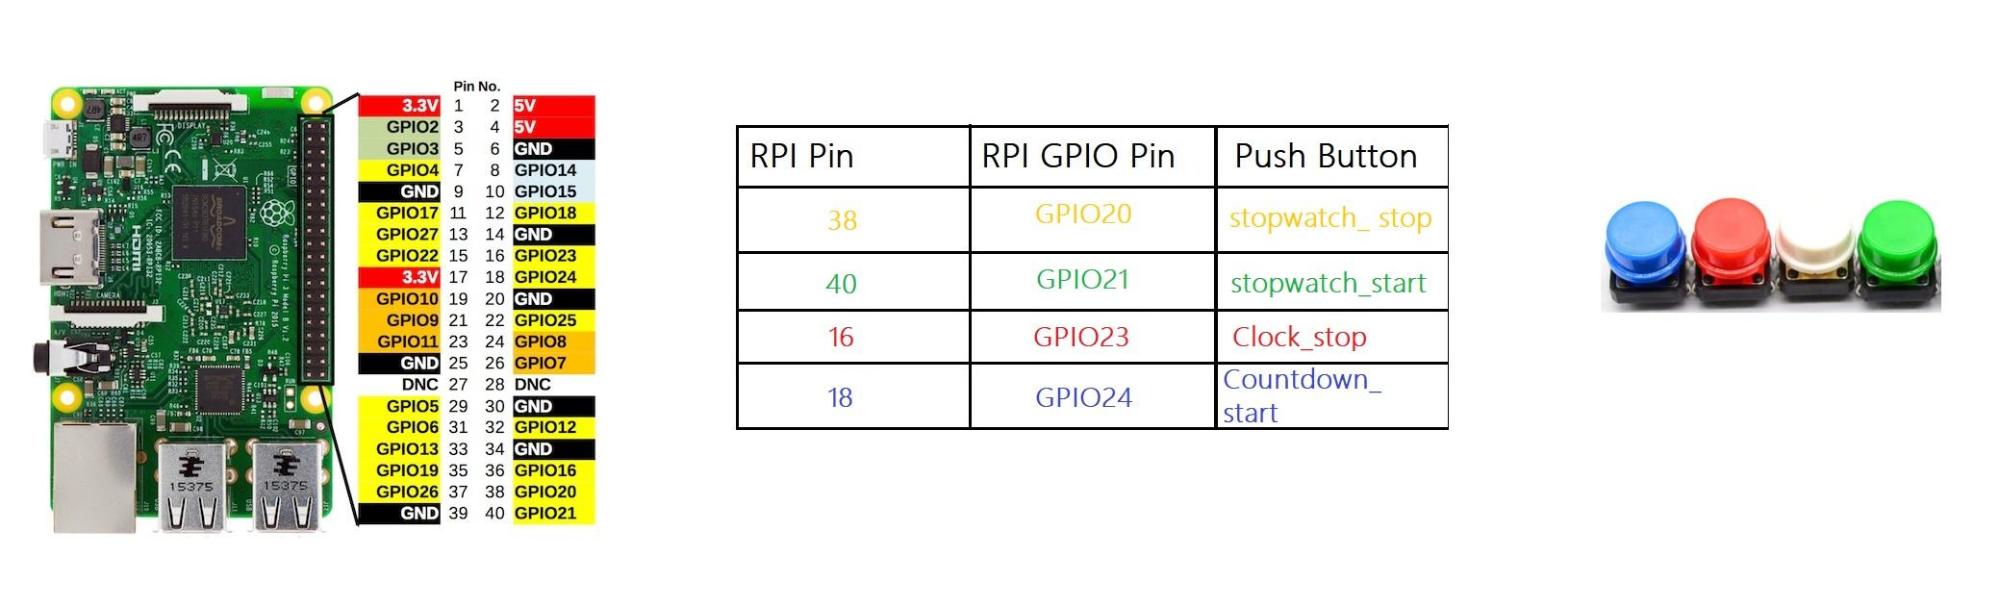
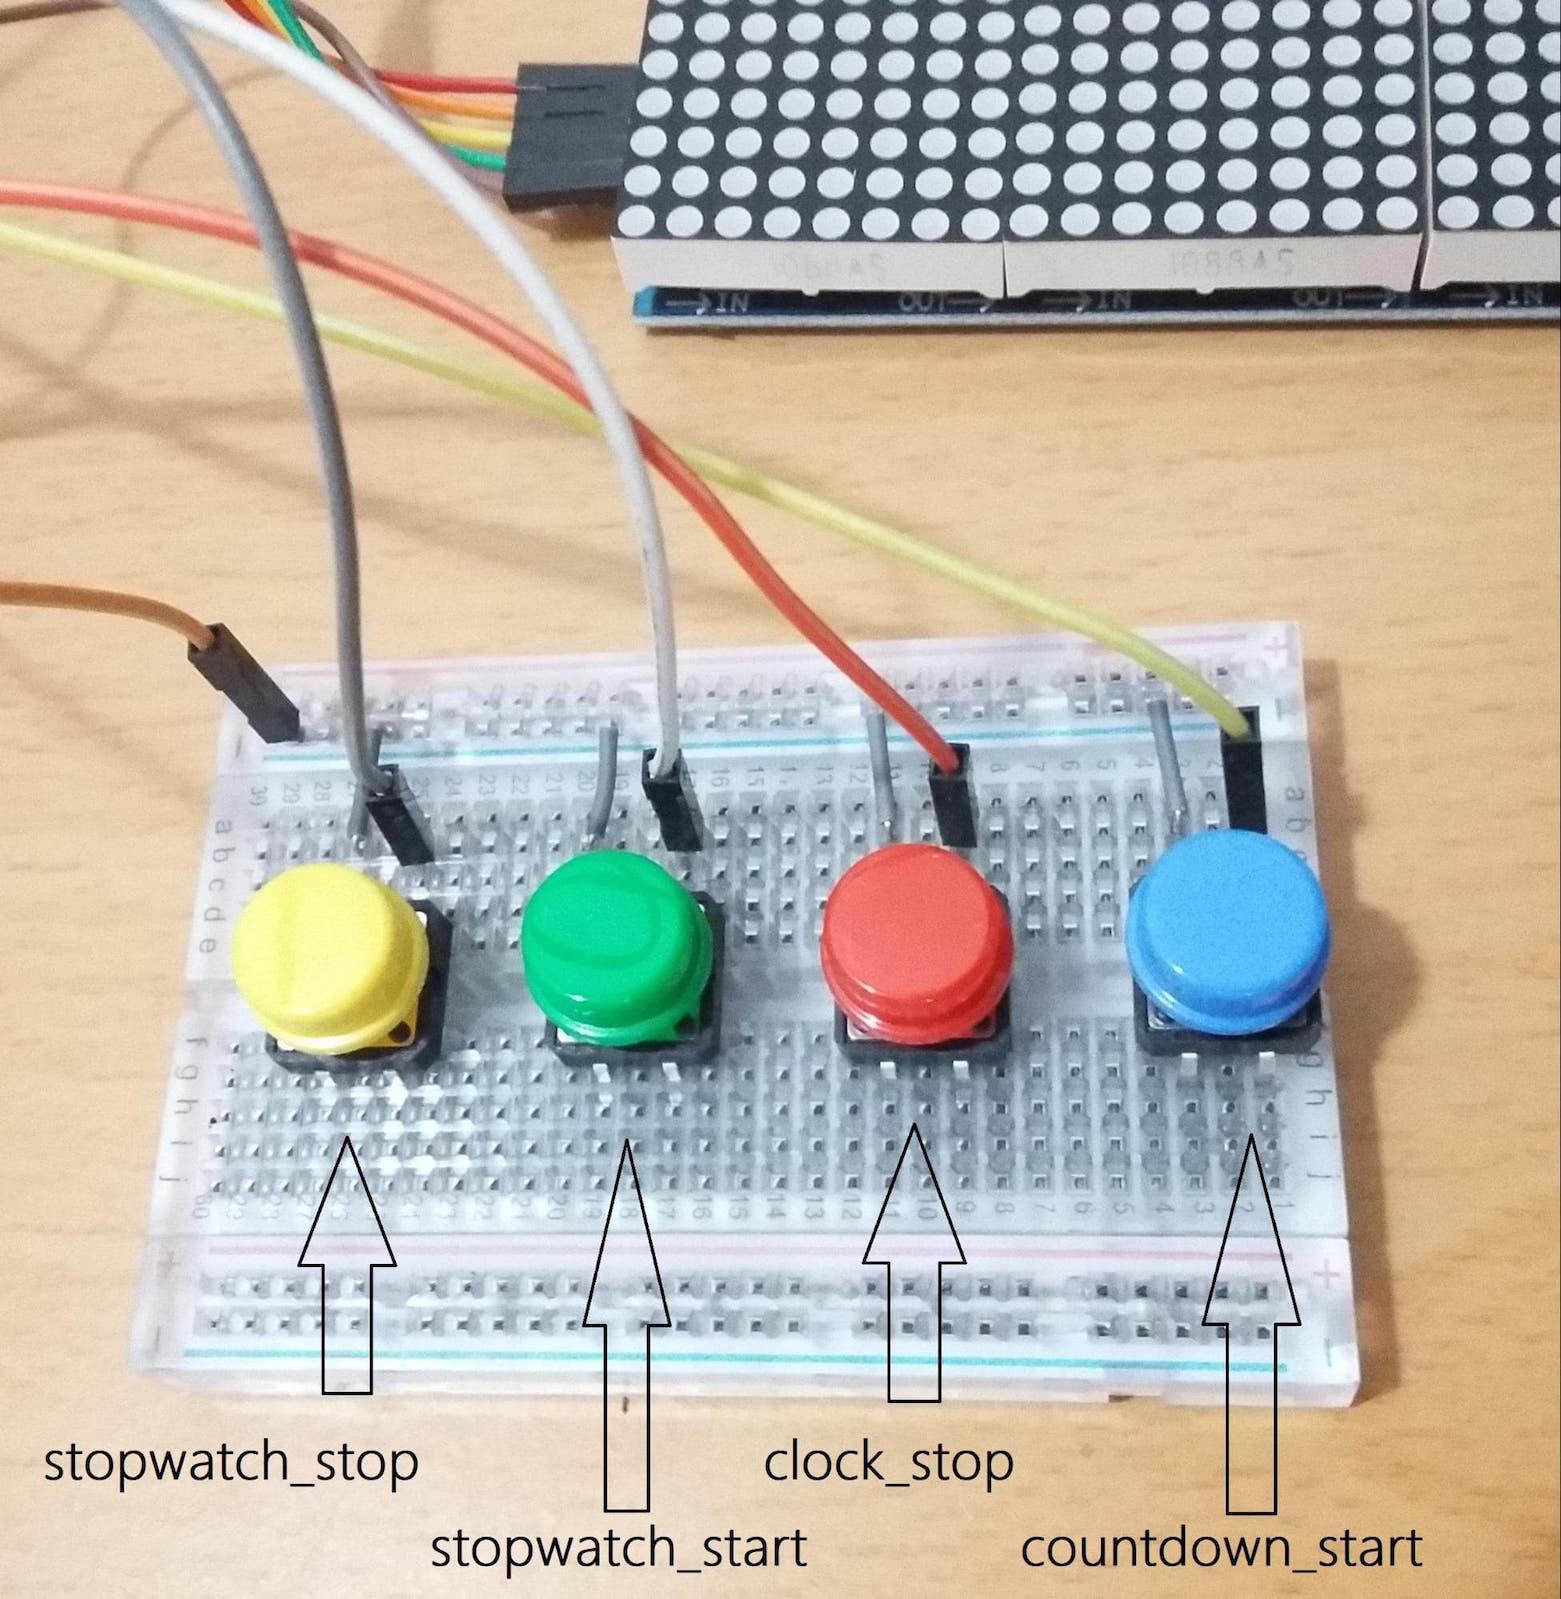
Wiring the Pushbuttons
Next, wire the four pushbuttons referring to the diagram below.
You don’t have to worry about pull-down resistors. Each GPIO pin of the Raspberry Pi has software configurable pull-up and pull-down resistors. We can set it up with the Python script.
Setting Up the Software
Before you start setting up the software, make sure that you have the latest version of Raspbian on your Raspberry Pi. To check this, go to the Pi’s terminal and execute the following commands:
sudo apt-get update
sudo apt-get upgrade
Install “pip” for Python 3.
sudo apt-get install python3-dev python3-pip
Next, install the Raspberry Pi GPIO Python module which allows us to access the GPIO port directly from Python.
sudo apt-get install python-rpi.gpio python3-rpi.gpio
Then install the “Luma.LED__Matrix” library to drive the LED matrix display.
git clone https://github.com/rm-hull/max7219.git
cd max7219
sudo pip3 install -e
sudo pip3 install spidev
sudo python3 setup.py install
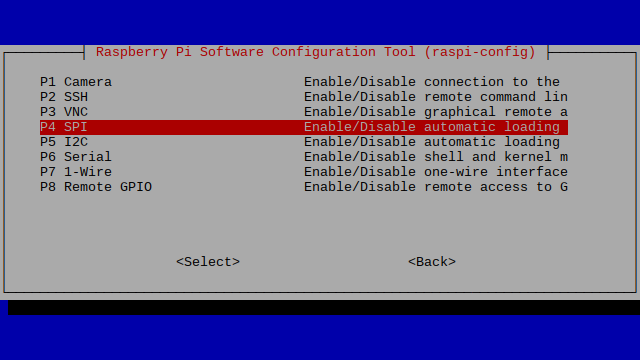
Enable SPI to communicate with the matrix display since SPI kernel drive is not enabled on the Raspbian image by default.
sudo raspi-config
(Navigate to interfacing options and click “SPI -> YES”)
Python Script
You can find the full code in a zipped file. The code has six functions including the main function. Three of them are for the clock, countdown timer, and stopwatch. The other two functions take responsibility for the animation.
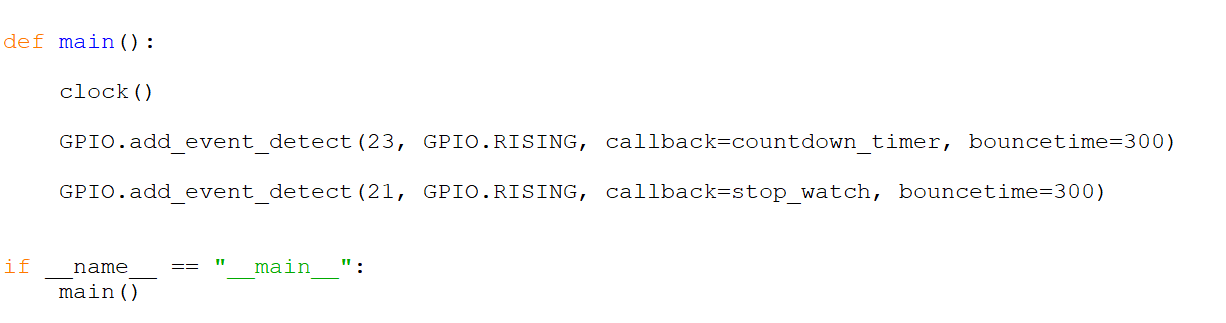
At the beginning of the main function, the “Clock” function is called. So the default operation of the device is the clock. You can actuate timers using pushbuttons.
The biggest issue I faced when using a pushbutton is its response time. Since I ended up with a long code, sometimes pressing the button doesn’t do the required task at all. The best solution for this issue is the use of interrupts. Then the code will be able to respond immediately to a button press.
As you can see above, the countdown timer function and stopwatch function is associated with the push-button event. When you press a push-button, the program will stop the current execution and start the countdown timer or stopwatch. This event detection task (interrupts) is running constantly in another thread. So we can say that this program has three different threads to perform clock, countdown timer, and stopwatch functions accurately.
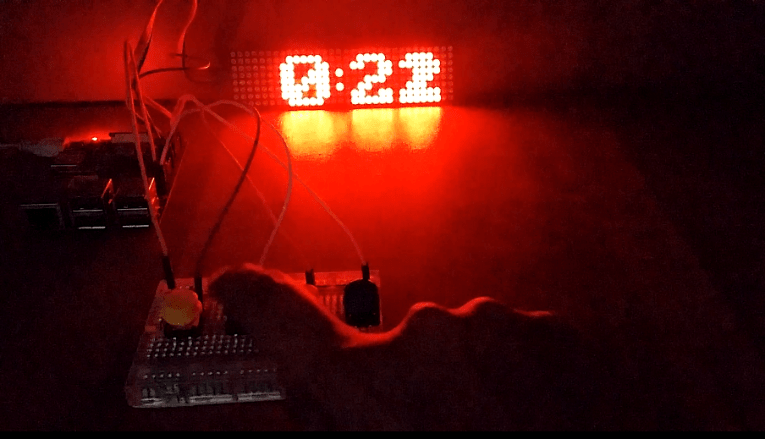
Demonstration of the Three-in-one Timer
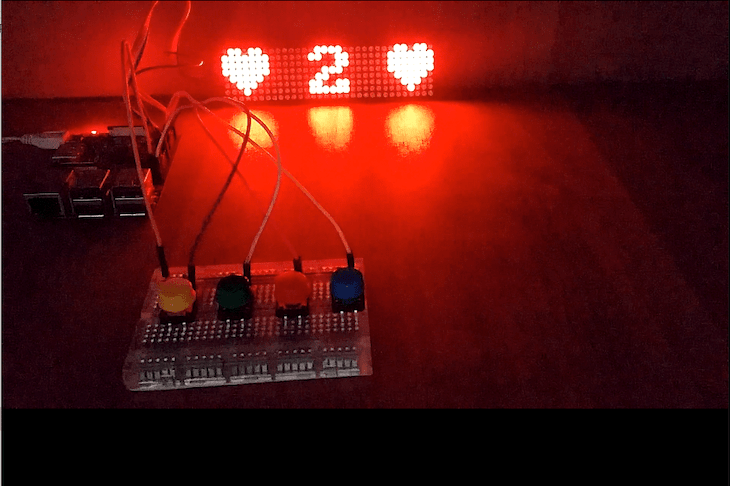
The display has a bright LED light if we use it in the dark. We can always change the contrast, orientation, and animations using the Python script. This device can be used in any special ceremony or occasion by changing the message. Here I put “Happy New Year” for a new year
The push-button process of the countdown timer and stopwatch performed smoothly because of the interrupts.
Additionally, I have used two pushbuttons to stop the clock and stopwatch. We can create this timer as a compact portable device. A wooden or plastic frame will give it a stunning look.
Full Project Code