Utilizes Raspberry Pi, Azure, Twilio, and AWS APIs to monitor for motion and use face recognition to send customized MMS
Remotely monitor your office for intruders using azure, AWS and twilio. Train a group of trusted faces, and check motion triggered photos against them. If the face is known a text with their name and photo will be sent to you. If the face is unknown all photos of the incident are uploaded and the last one is sent to you along with a warning of intruders.
Raspberry Pi Camera Installation
Install the camera module by plugging the camera wire into the port labelled camera, which is next to the hdmi port on the raspberry pi. Once installed update and upgrade as seen below.
sudo apt-get update
sudo apt-get upgrade
Next you must enable the camera, this can be done by going into the "Applications Menu", and under "Preferences" select "Raspberry Pi Configuration". Under the "Interfaces" tab press the "Enable" radio button for Camera.
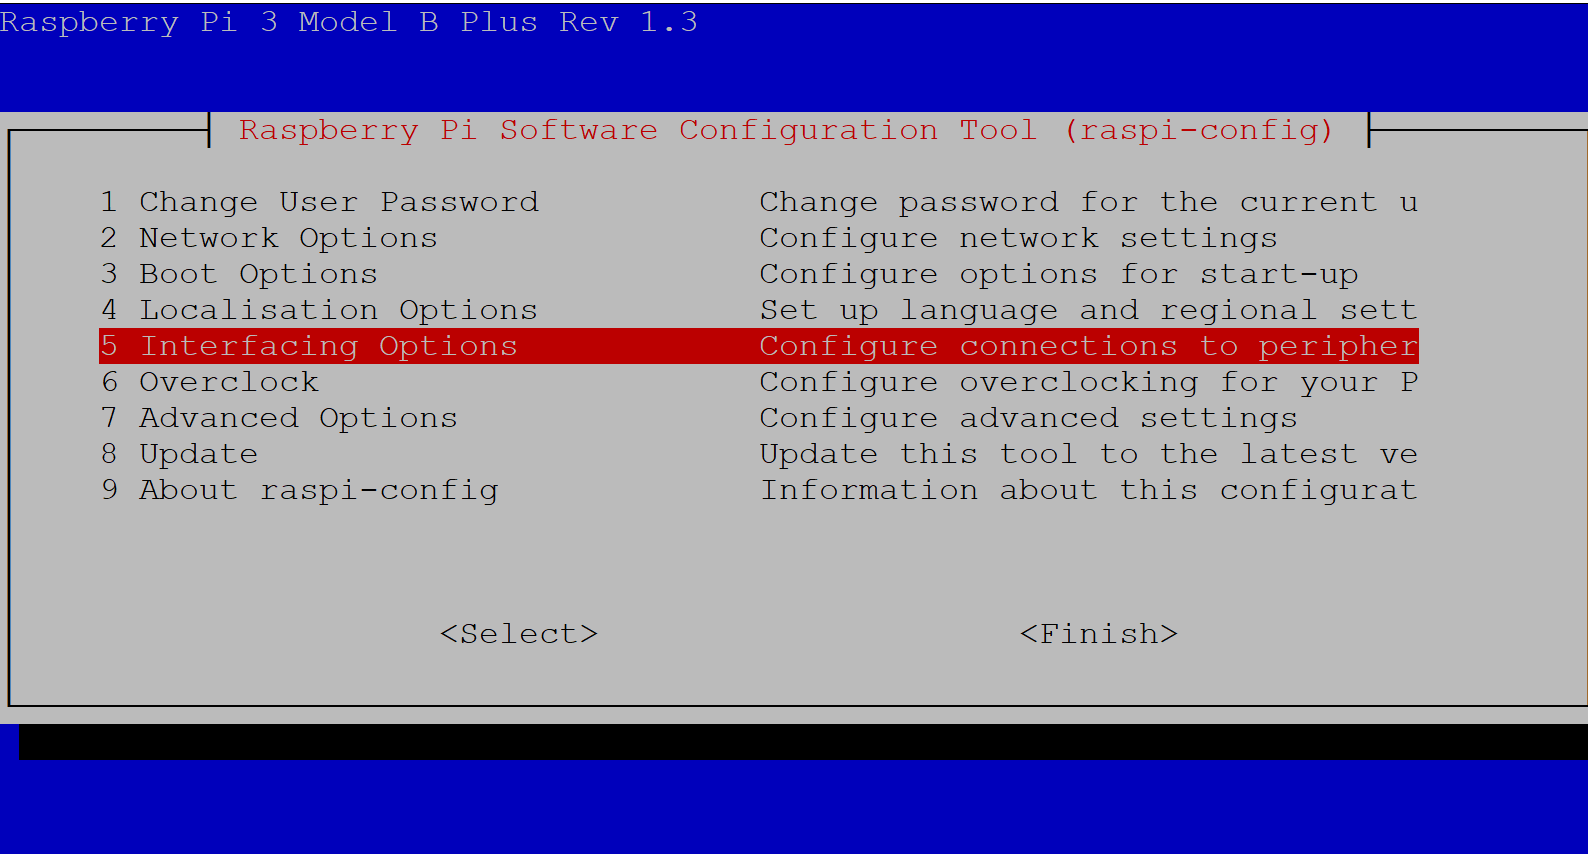
Remotely this can be done using "sudo raspi-config", and in "Interfacing Options" enable the camera
To test that your camera is installed correctly use:
If installed correctly a photo called pic.jpg should be saved to your current directory. If the photo is upside down, that is okay, we will fix that later.
Microsoft Azure API Sign Up
If you don't have an azure account you can sign up for a free trial here. Once signed in, click the green plus from the side menu to create new resource.
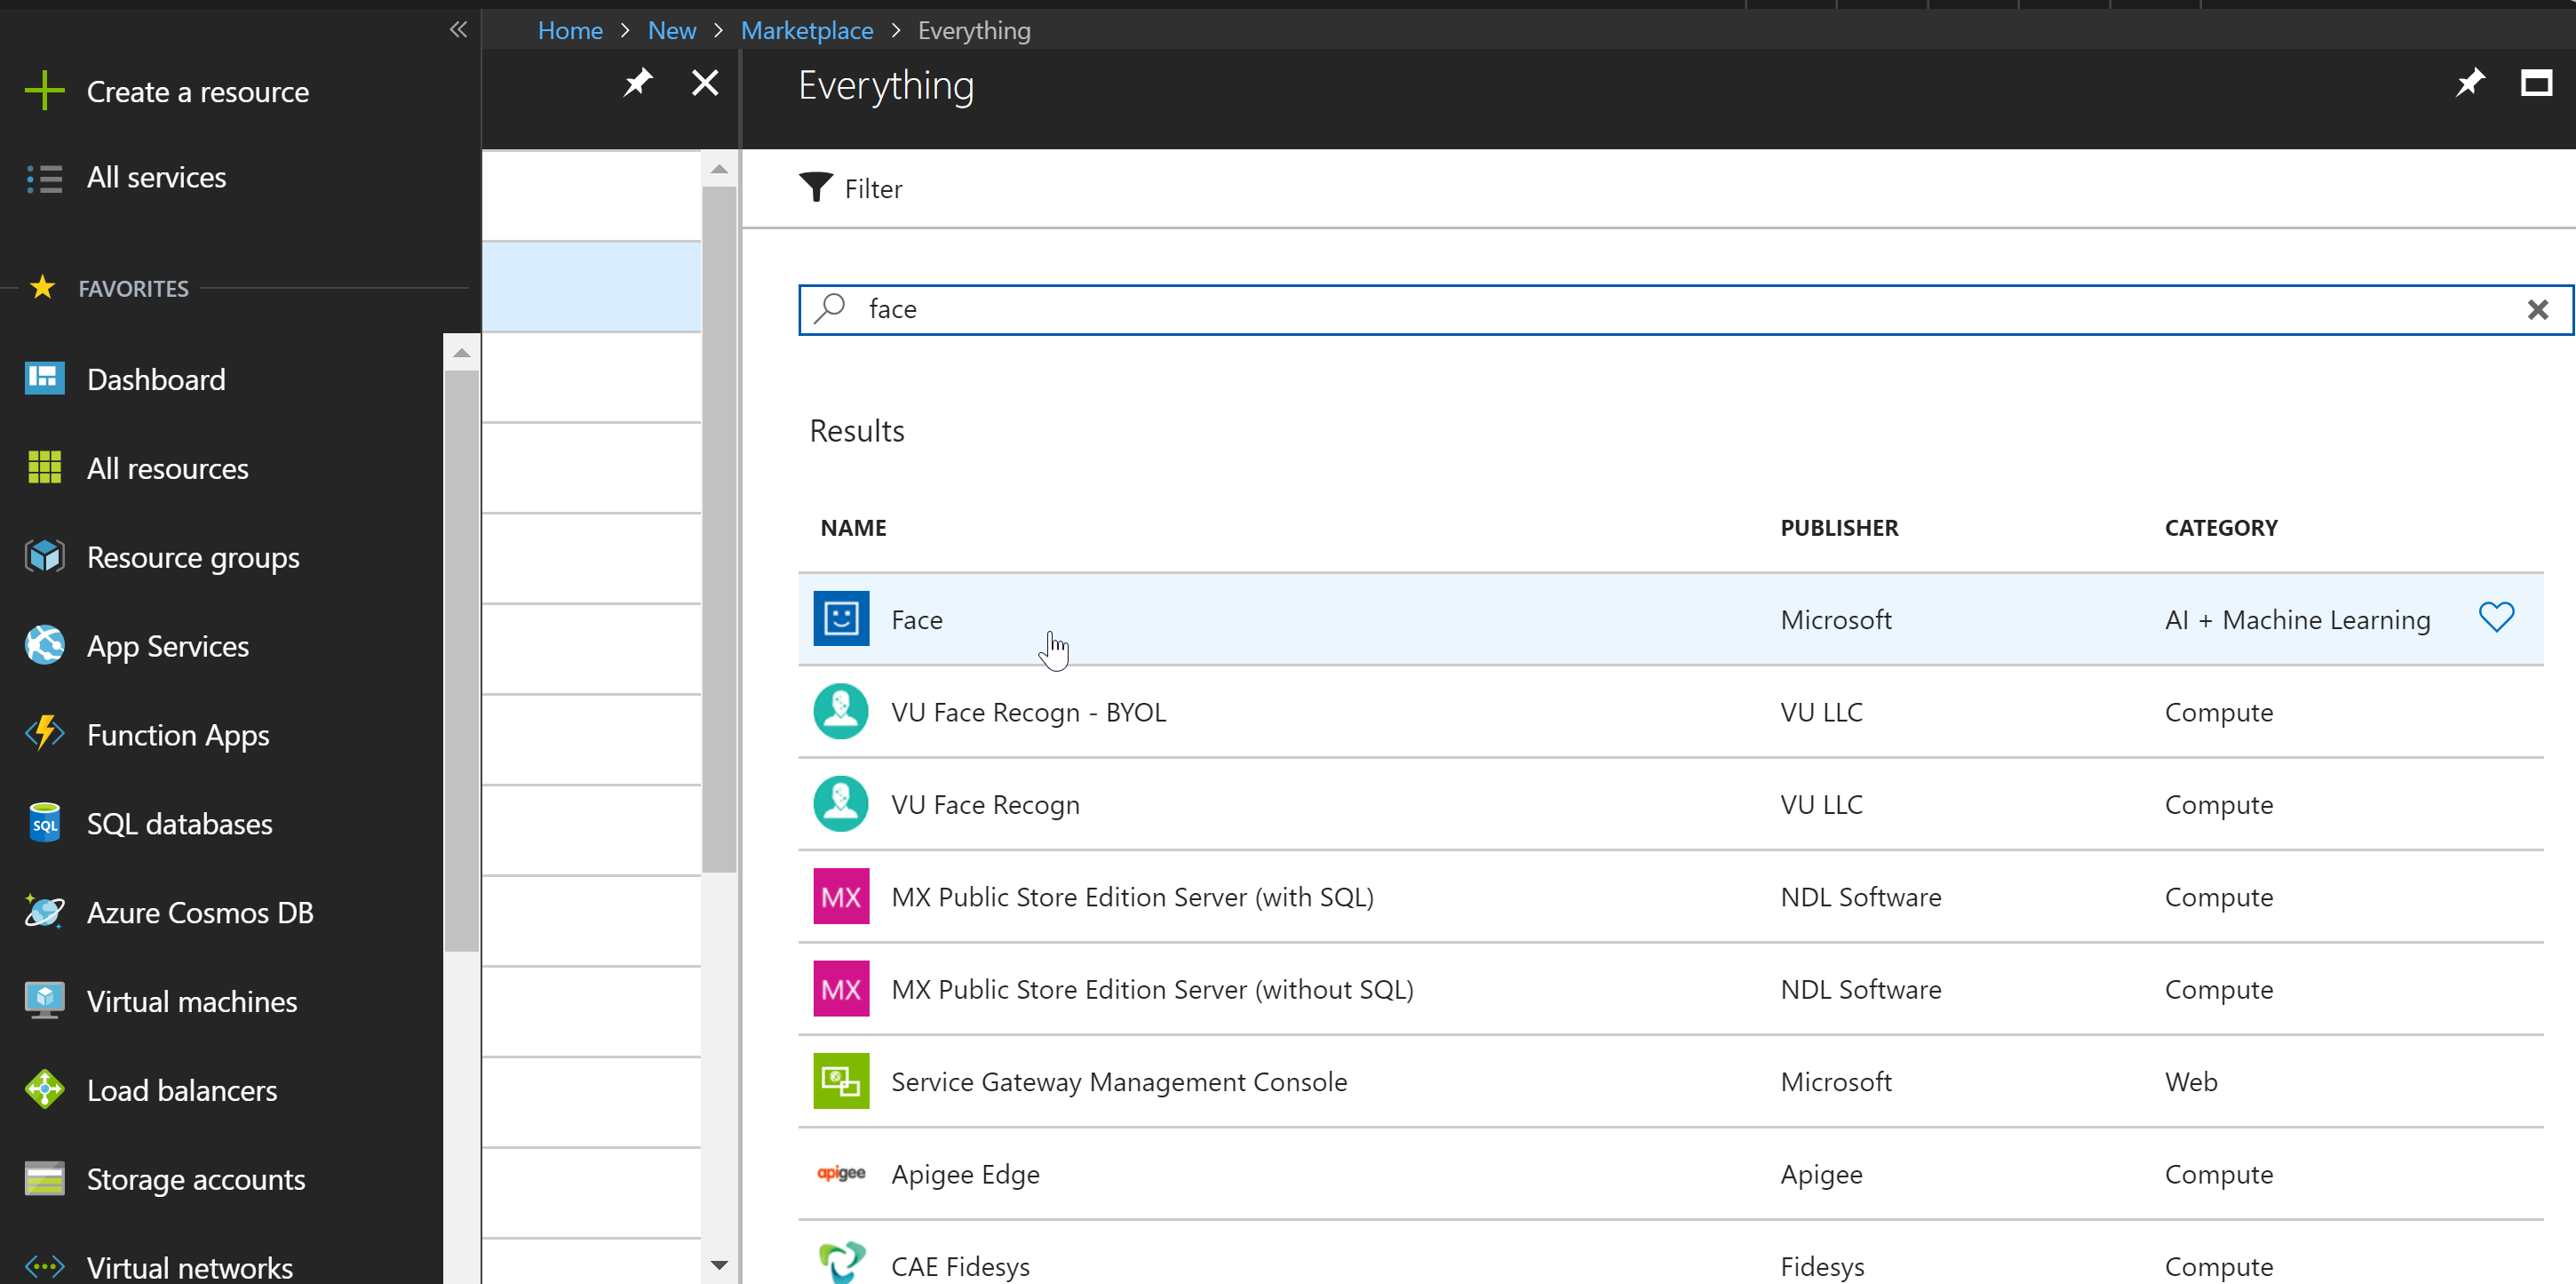
After clicking on "create a resource" you'll be prompted to the search window above. Search for "Face" and click on it, and then hit create. Name your project as you please, keep the free pricing subscription, select the "S0" pricing tier, and create a new resource group.
Once the resource is created and deployed if you click on it and select "overview", you should see something similar to this:
From here you copy your endpoint and click "Show access keys..." to get your key. You'll need a key and your endpoint later.
Detect - Azure
To make sure that your azure account is working properly, create a new file "faceDetect.py" and save it in "/home/pi/Projects". This file will take a local image's path, using azure's "detect" endpoint, identify if there are any faces in the photo, and draw a blue rectangle around the faces. 'faceDetect.py" can be found below. To display the image I had to install imagemagick first, using:
sudo apt-get update
sudo apt-get upgrade
sudo apt-get install imagemagick
#*****faceDetect.py*****#
import urllib, httplib, base64
import requests
from PIL import Image, ImageDraw
import sys
import json

KEY = 'Put Your Key Here'
pic = 'File Path Here'
def recogn():
    headers = {'Content-Type': 'application/octet-stream', 'Ocp-Apim-Subscription-Key': KEY}
    body = open(pic ,'rb')
    params = urllib.urlencode({'returnFaceId': 'true'})
    conn = httplib.HTTPSConnection('eastus2.api.cognitive.microsoft.com')# this should be taken from your endpoint
    conn.request("POST", '/face/v1.0/detect?%s' % params, body, headers) # this is the specific endpoint
    response = conn.getresponse()
    photo_data = json.loads(response.read())

    def getRectangle(faceDictionary):
        rect = faceDictionary['faceRectangle']
        left = rect['left']
        top = rect['top']
        bottom = left + rect['height']
        right = top + rect['width']
        return ((left, top), (bottom, right))

    img = Image.open(pic) # open image system argument
    draw = ImageDraw.Draw(img)
    for face in photo_data: # for the faces identified
        draw.rectangle(getRectangle(face), outline='blue') # outline faces in blue due to coordinates in json
    img.show() # display drawn upon image


recogn()
Details from Microsoft about this step can be found here. At the bottom there is a python example which the code above is based on.
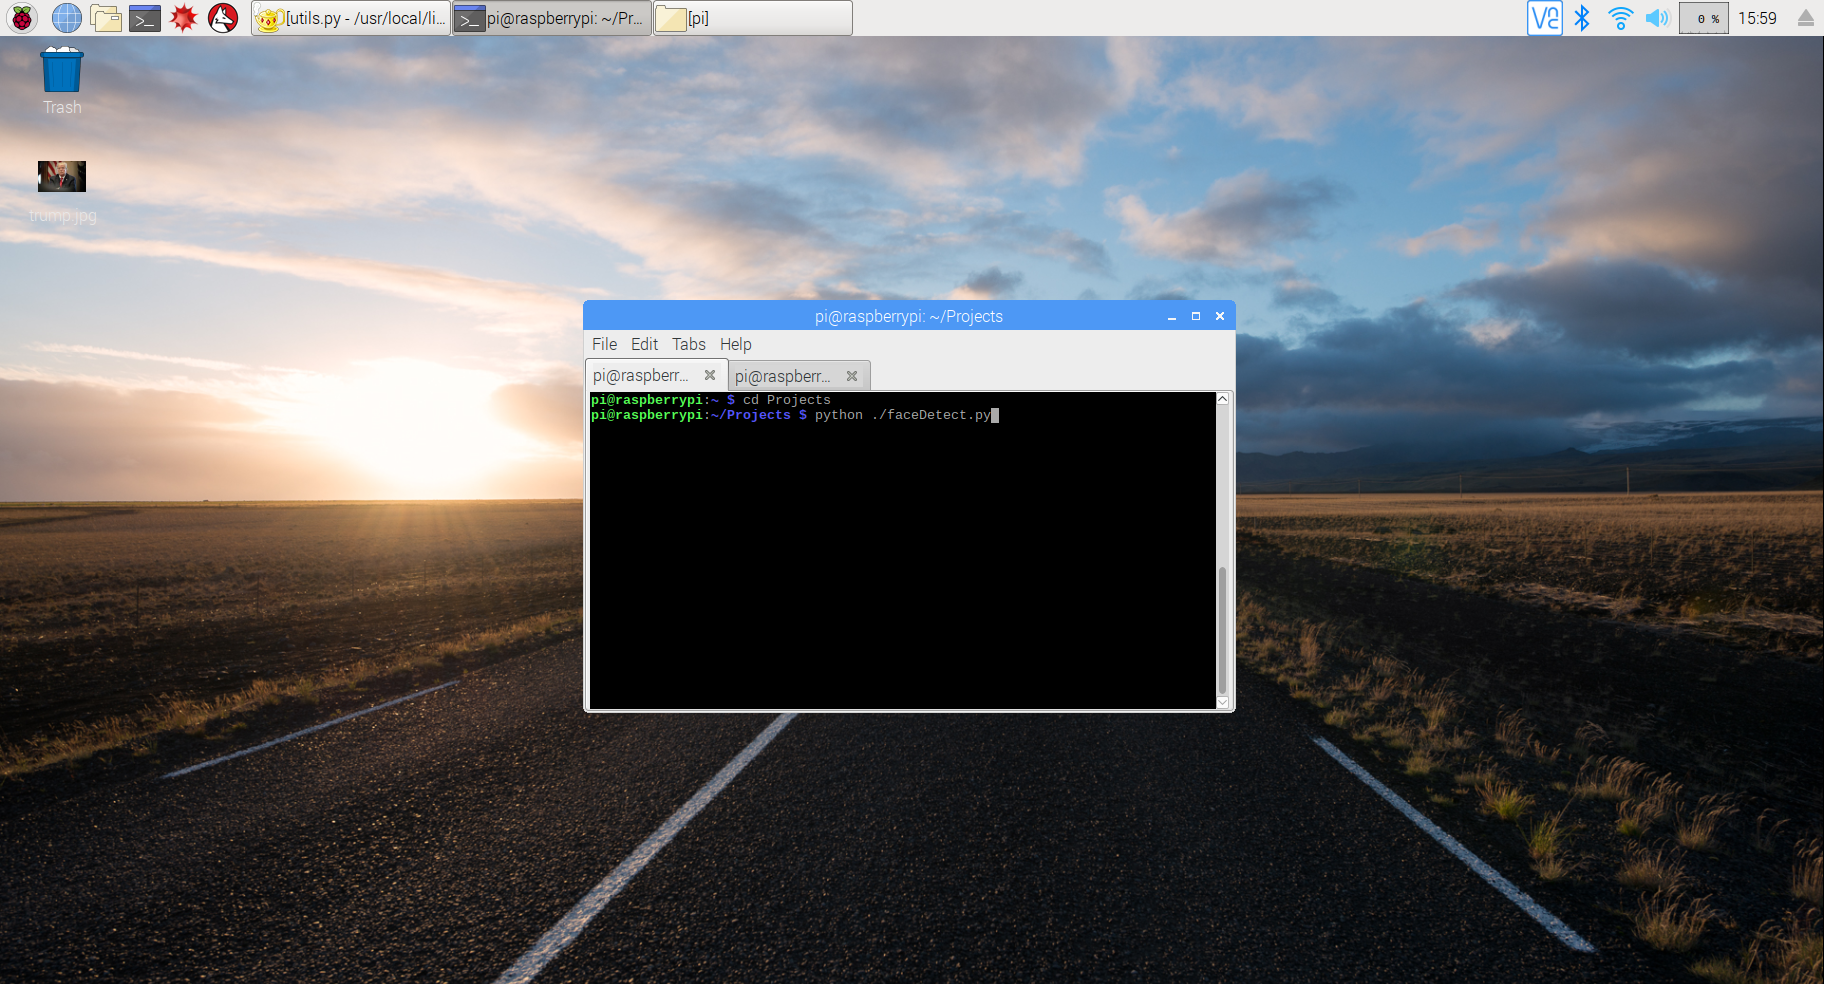
Run "faceDetect.py" by navigating to it's directory, in my case "Projects", and running it in python.
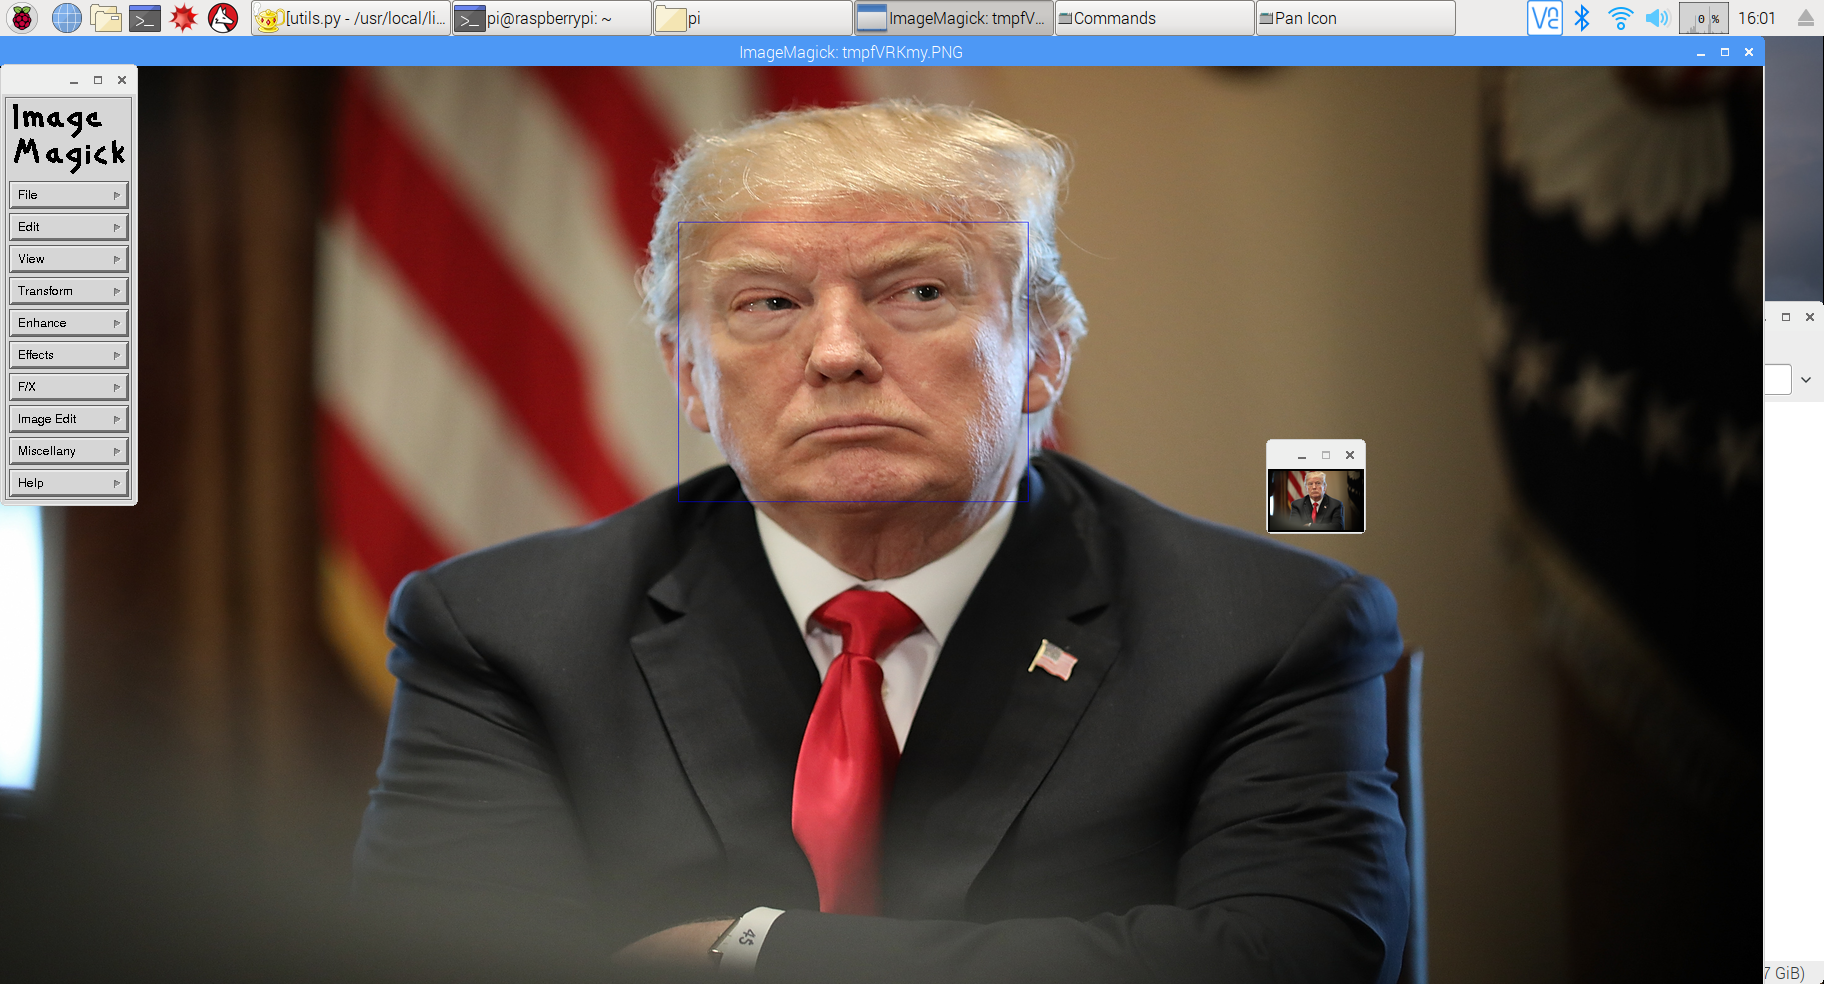
After pressing enter you should get something like this, depending on the photo you chose.
Create PersonGroup - Azure
Now that azure is working, we can create a PersonGroup for our project. A PersonGroup in this case is a group of trusted faces, associated with names under a group ID. This PersonGroup is "trained" to allow for the use of azure's Identify later on. Here is the PersonGroup documentation.
Create a file in the same directory called "addPersonGroup.py". I created this for my office so the person group was named "employees".
#*****addPersonGroup.py*****#
import requests
import urllib, httplib, base64

KEY = 'your access key goes here'

group_id = 'employees'
body = '{"name": "Employees"}'
params = urllib.urlencode({'personGroupId': group_id})
headers = {'Content-Type': 'application/json', 'Ocp-Apim-Subscription-Key': KEY}

conn = httplib.HTTPSConnection('eastus2.api.cognitive.microsoft.com')
conn.request("PUT", "/face/v1.0/persongroups/{personGroupId}?%s" % params, body, headers)
response = conn.getresponse()
data = response.read()
print(data)
conn.close()
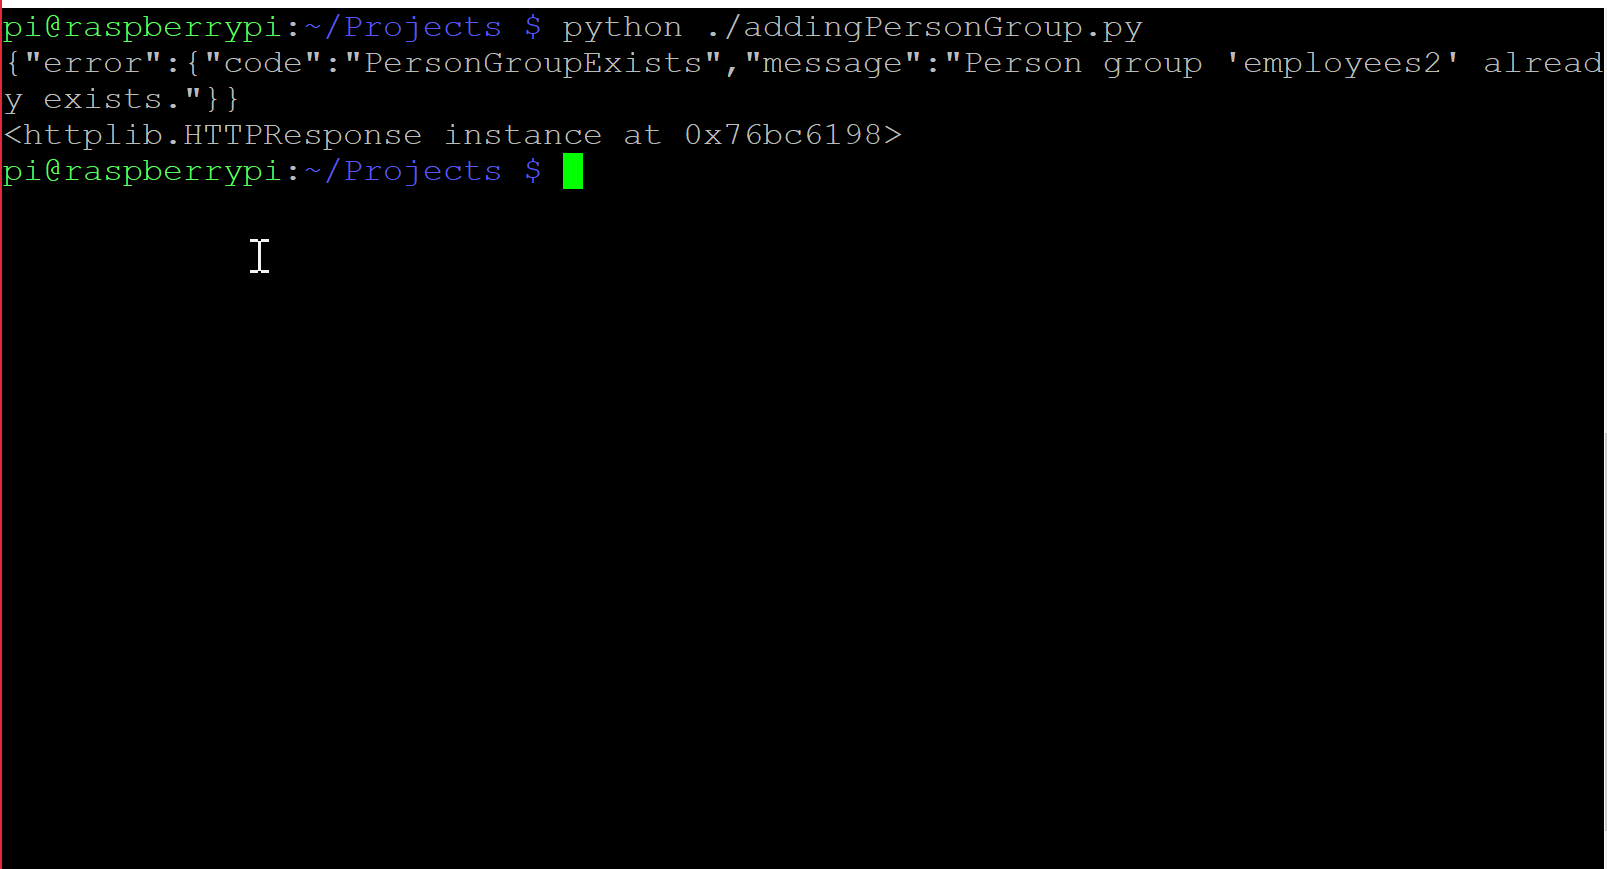
python ./addPersonGroup.py
if the group was created successfully, data should be empty. Another way to check would be to run it again, and if you get an error like the one below than it was successful.
PersonGroup Create Person - Azure
Now that we have a PersonGroup, you have to populate it with people. That can be done using azure's PersonGroup Person Create. Once a Person is created, you then have to add faces to them.
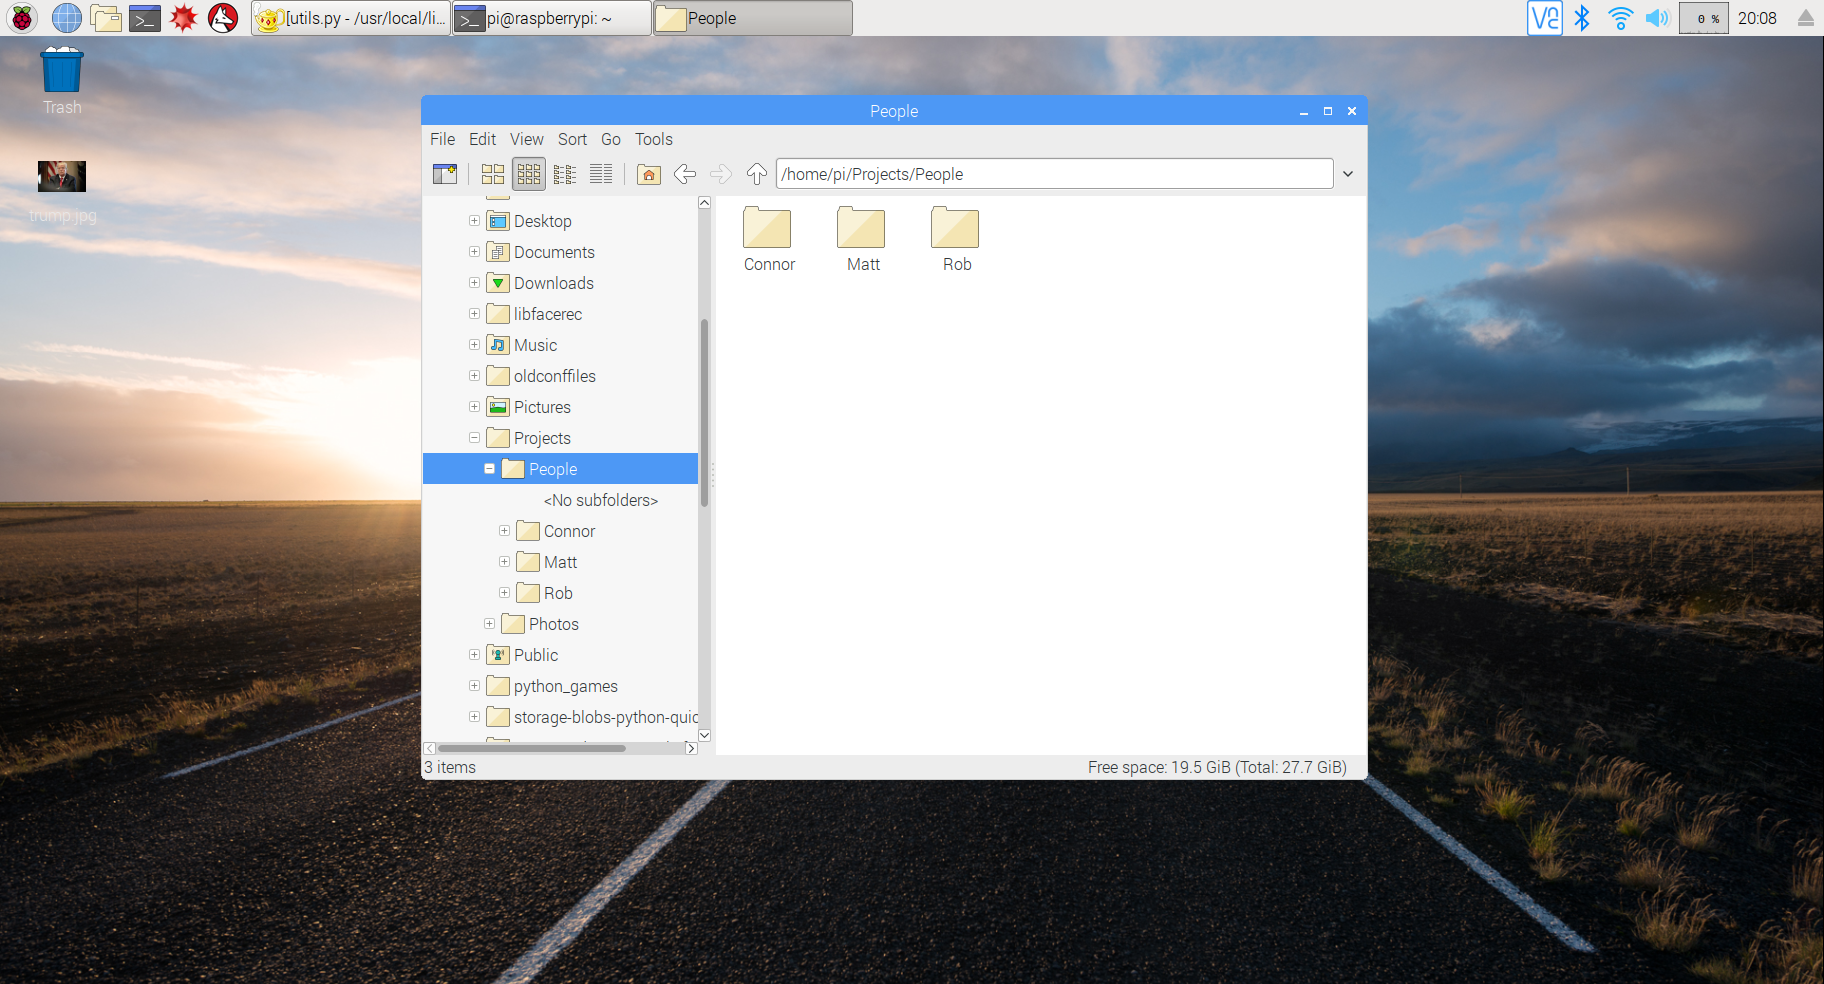
First create a directory full of sub-directories named after each of the people you would like to add.
Once you have done that, fill each person's folder with solo, head on photos of them. The more photos you have, and in a variety of facial expressions the more accurate identification will be. Information about file format, size and number of photos per person can be found here. Don't forget you can use "Raspistill -o filename.jpg" to take photos as well, but remember that the api does not recognize upside down faces (at least not in my use).
Now that the individual's files are populated, use the code below, insert your list of names, and adjust the directory in "addFaceToPerson(list)" as needed.
#*****addPeople.py*****#
import urllib, httplib, base64, json
import sys
import os

people = ['list of names goes here']
nameAndID = [] # empty list for persons' name and personId
group_id = 'employees'
KEY = 'your access key goes here'

# creates people in personGroup of specified group_Id
def addPeople():
    headers = {'Content-Type': 'application/json', 'Ocp-Apim-Subscription-Key': KEY}
    params = urllib.urlencode({'personGroupId': group_id})
    conn = httplib.HTTPSConnection('eastus2.api.cognitive.microsoft.com')
    for name in people:
        body = "{'name':'"+name+"'}"
        conn.request("POST", "/face/v1.0/persongroups/{employees}/persons?%s" % params, body, headers)
        response = conn.getresponse()
        data = json.loads(response.read()) # turns response into index-able dictionary
        out = name+"'s ID: " +data['personId']
        print(out)
        nameAndID.append((name, data['personId'])) # fills list with tuples of name and personId
    conn.close()
    return nameAndID

# adds faces to the created people in PersonGroup
def addFaceToPerson(list):
    headers = {'Content-Type': 'application/octet-stream', 'Ocp-Apim-Subscription-Key':KEY}
    conn = httplib.HTTPSConnection('eastus2.api.cognitive.microsoft.com')
    for item in list:
        params = urllib.urlencode({'personGroupId': group_id, 'personId': item[1]}) # item[1] is the personId created from addPeople()
        directory = '/home/pi/Projects/People/'+item[0] # item[0] is peron's name, each person should have a directory named after them filled with photos of them
        for filename in os.listdir(directory):
            if filename.endswith('.jpg'): # adjust this depending on the file type of your photos
                filePath = os.path.join(directory, filename) # creates full file path
                body = open(filePath,'rb')
                conn.request("POST", "/face/v1.0/persongroups/{employees}/persons/"+item[1]+"/persistedFaces?%s" % params, body, headers)
                response = conn.getresponse()
                data = json.loads(response.read()) # successful run will print persistedFaceId
                print(data)
    conn.close()

addFaceToPerson(addPeople())
A successful execution will print persistedFaceIds for each photo uploaded. If you run into an error like 'invalid personId: 'u'1234personId', the 'u' is a unicode character that got picked up somewhere. The way to fix this would be to type cast personId to a string like this:
# from:
nameAndID.append((name, data['personId']))
# to:
nameAndID.append((name, str(data['personId'])))
This will work for any errors you encounter because of those unicode characters.
PersonGroup Train - Azure
Now that we have a PersonGroup, filled with People with faces, its time to train the PersonGroup so that Identify can be used. Reference for Train can be found here.
#*****trainPersonGroup.py*****#
import urllib, httplib, base64, json

group_id = 'employees'
KEY = 'you access key goes here'

params = urllib.urlencode({'personGroupId': group_id})
headers = {'Ocp-Apim-Subscription-Key': KEY}

conn = httplib.HTTPSConnection('eastus2.api.cognitive.microsoft.com')
conn.request("POST", "/face/v1.0/persongroups/employees/train?%s" % params, "{body}", headers)
response = conn.getresponse()
data = json.loads(response.read())
print(data) # if successful prints empty json body
To train your PersonGroup run the code above. A successful Train will print an empty json body. You can also check the training status of your person group using this, which the code below is based off of.
#*****checkTrainingStatus.py*****#
import urllib, httplib, base64, json

group_id = 'employees'
KEY = 'your access key goes here'

headers = {'Ocp-Apim-Subscription-Key': KEY}
params = urllib.urlencode({'personGroupId': group_id})
conn = httplib.HTTPSConnection('eastus2.api.cognitive.microsoft.com')
conn.request("GET", "/face/v1.0/persongroups/"+group_id+"/training?%s" % params, "{body}", headers)
response = conn.getresponse()
data = json.loads(response.read())
print(data)
conn.close()
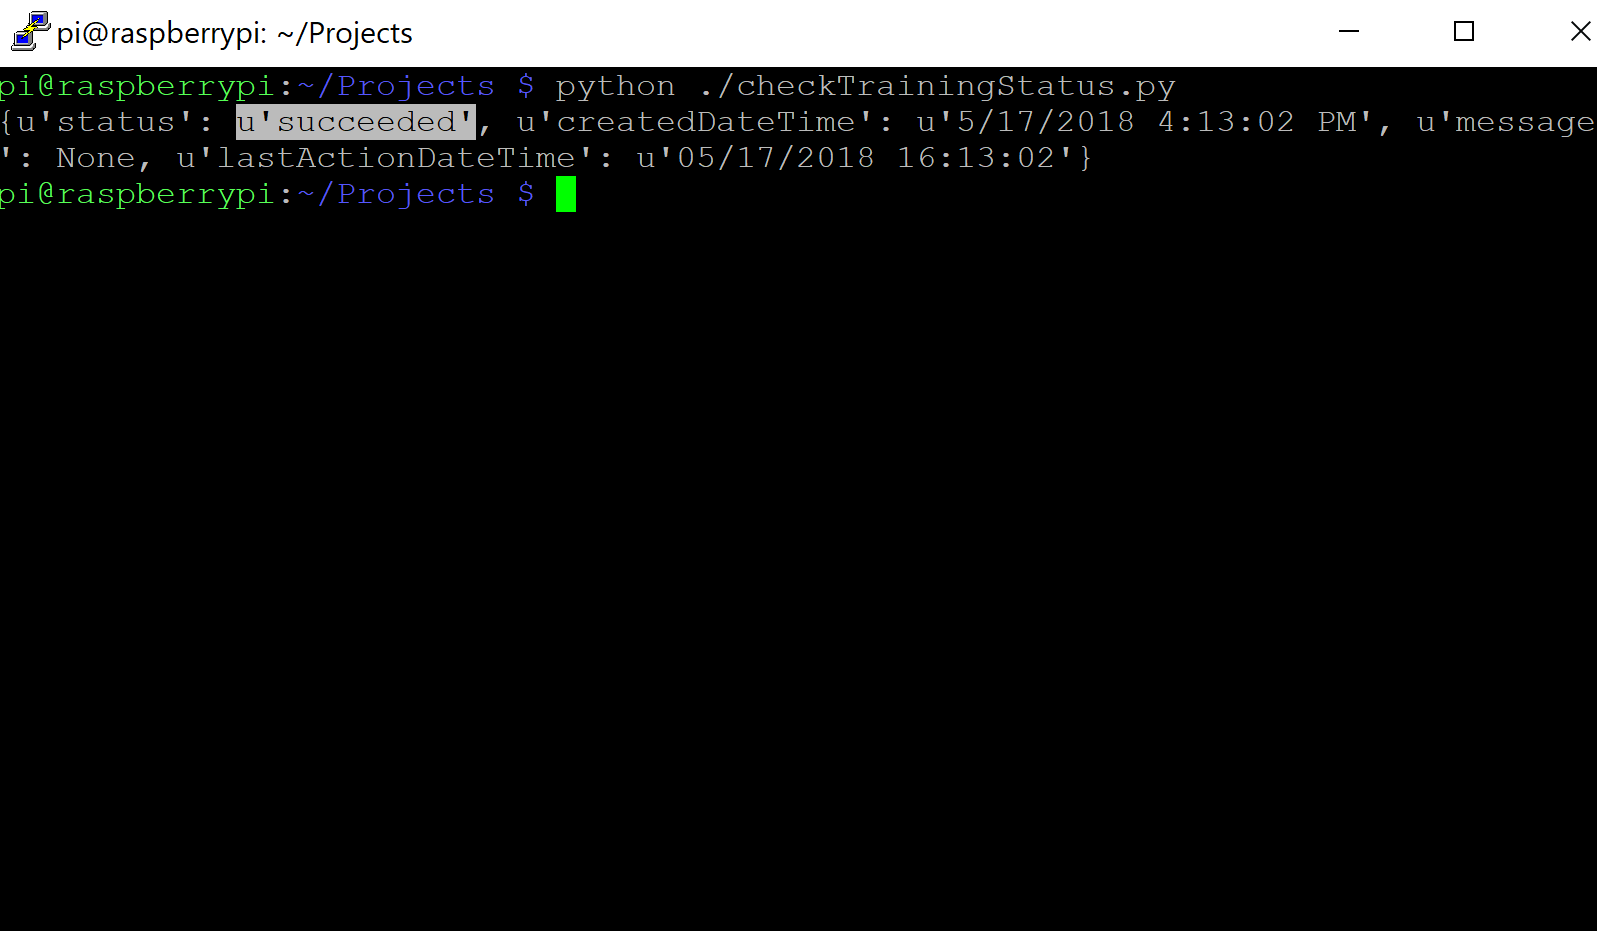
If training was successful your output should look something like this.
As mentioned above, the u's are just unicode characters and don't need to be worried about in this step. If training was successful we can now move on to Identify.
PersonGroup Identify - Azure
Now that our project knows some trusted faces, it's time to have it identify and provide some names to the user. Identify documentation can be found here. It takes in a list of faceIds from detectFace, and returns possible matches' personId and a confidence value. We will use the returned personId to retrieve the persons name and the confidence value as a measure of acceptability. You will see the 'identify(ids)' and 'getName(p_Id)' in the final code.
Amazon Web Services - Sign up
As we want to use twilio to send us photos upon movement, we need to host the photos somewhere other than locally so we can access them through a link. Azure offers a file storage service but I wasn't able to get it working on the raspberry pi, I kept running into problems with the installation of azure and azure-storage, if someone manages to get this working please comment how they did so below.
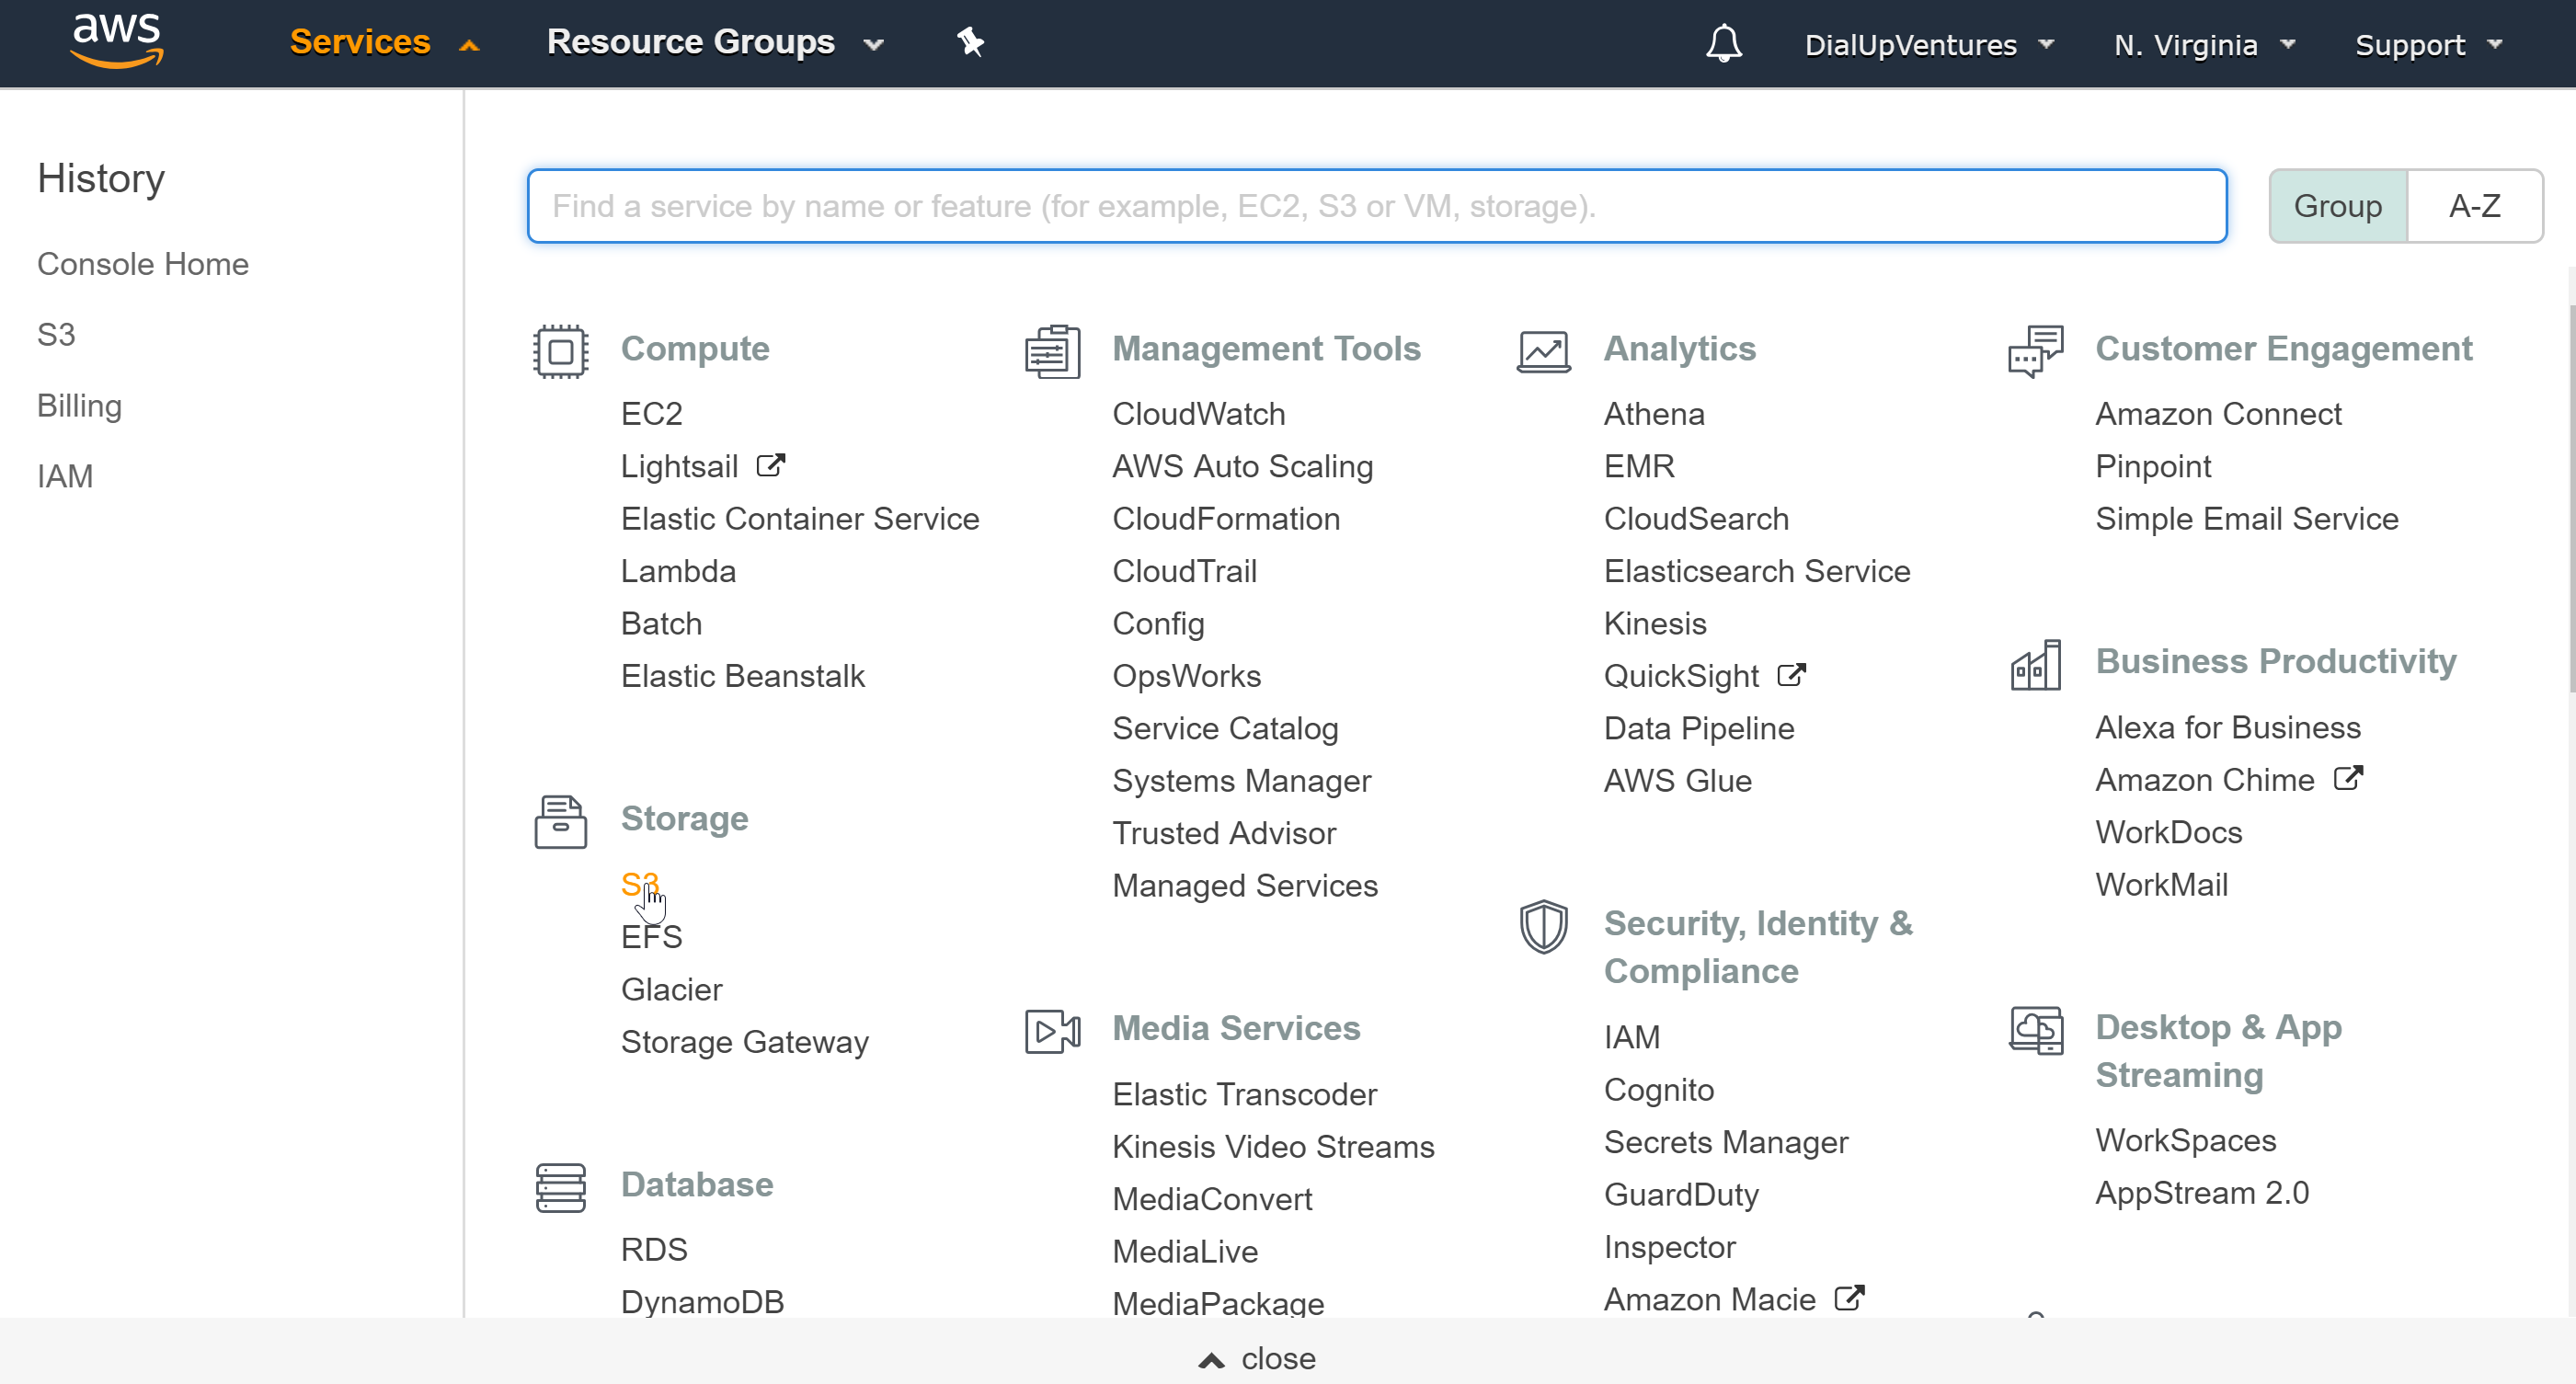
Because I couldn't get azure working I decided to try AWS S3. You can create a free aws account here. Once you have an account, go to 'Services' and under 'Storage' click ''S3'.
This should direct you to a page with a big blue "+ Create bucket" button, click on it. Now name you bucket, and I just clicked 'next' through the rest of the tabs until I clicked 'create bucket'.
Install Boto 3 - AWS
Boto3 is aws's SDK for Python. Installing it on the Raspberry Pi turned out to be a little tricky, but this is what finally worked for me:
sudo apt-get update
sudo apt-get upgrade
sudo pip install --upgrade --user boto3
Now to retrieve your aws credentials, go to you account drop down and click 'My Security Credentials'.
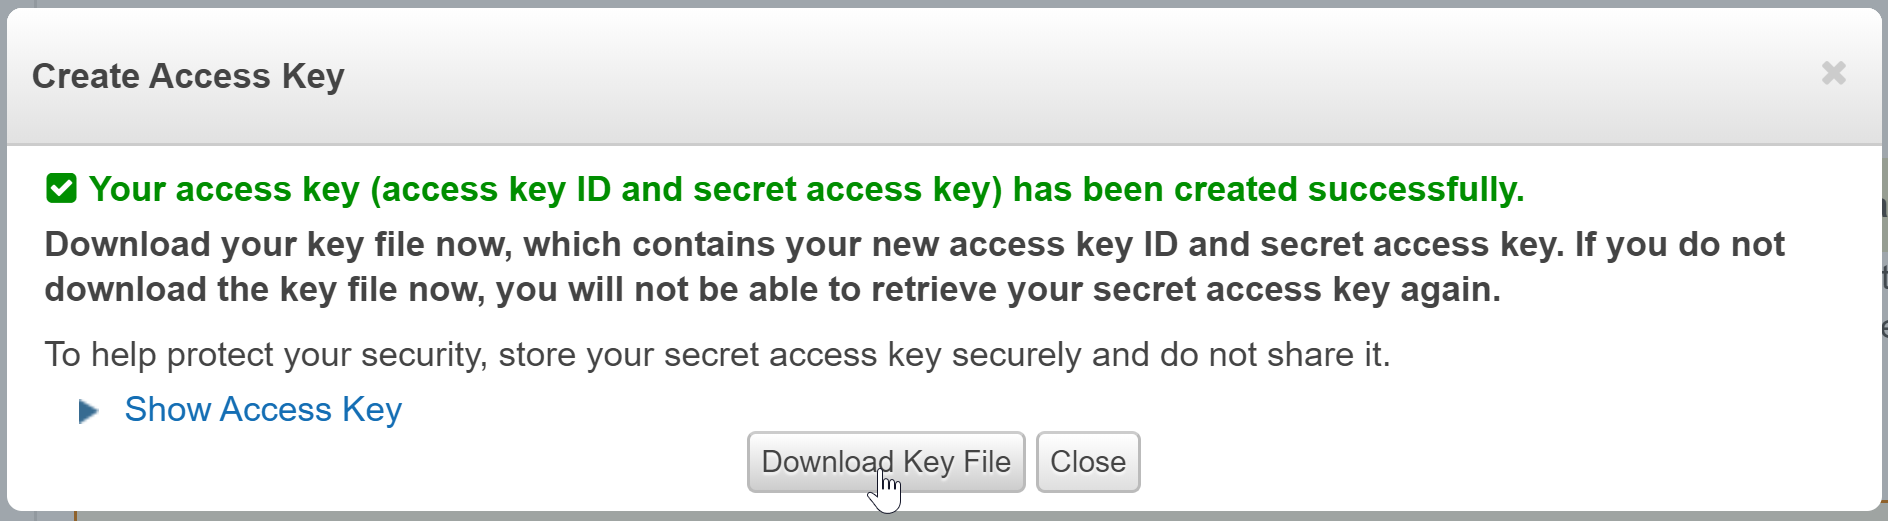
Then click 'Access keys', and 'Create New Access Key'. You should be prompted by a window like this:
Download the key file as you need the secret access key, and that's the only way to get it. Now create a folder in your '/home/pi' directory called '.aws' (don't forget the period). In '.aws' create a text file called 'credentials'. Format your text file like this:
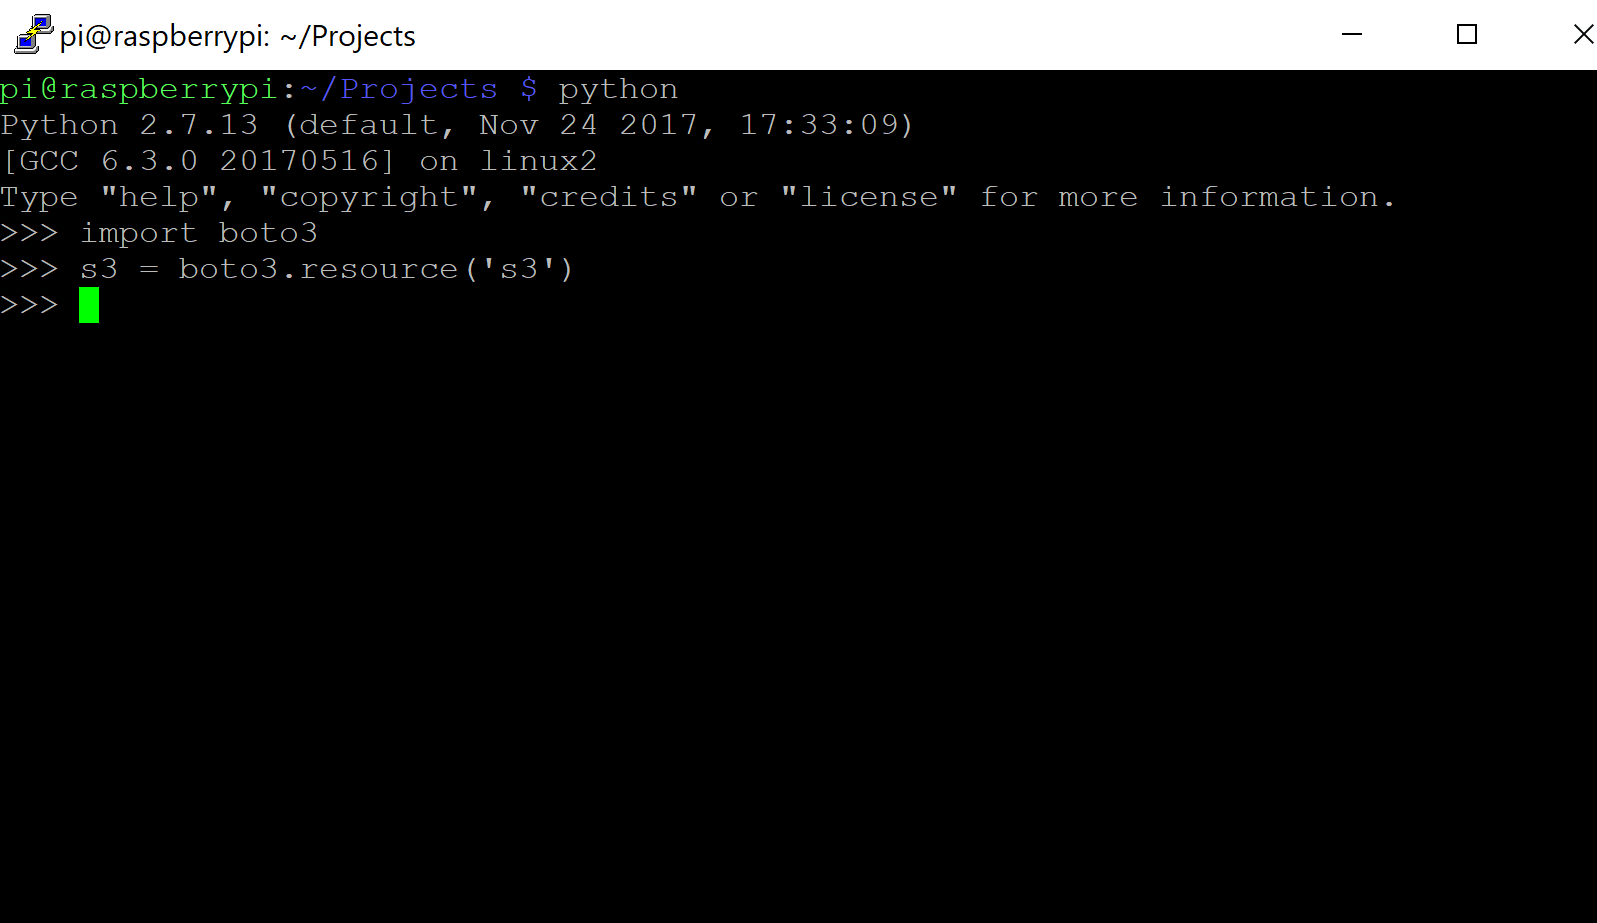
To check if Boto3 is installed properly open a command prompt and if you recreate the photo below and don't receive an error like "No module named boto" then you are good to go.
Upload Photo to S3 Bucket - AWS
Now that we have S3 and boto 3 set up, we can upload files to our bucket. As a test we are going to upload a photo called pic.jpg located on the Desktop, to our newly created bucket.
#*****uploadFile.py*****#
import boto3
import os

bucketName = 'your bucket name'

s3=boto3.resource('s3')
directory = '/home/pi/Desktop/'
fileName = 'pic.jpg'
filePath = os.path.join(directory,fileName)
data = open(filePath, 'rb')
s3.Bucket(bucketName).put_object(Key=fileName, Body=data, ContentType='image/jpeg')
object_acl = s3.ObjectAcl(bucketName, fileName)
response = object_acl.put(ACL='public-read') # makes link public

link = 'https://s3.amazonaws.com/'+bucketName+'/'+fileName # links in s3 follow this pattern
print(link)
Copy the printed link and put it into your browser, if the picture you uploaded appears then on to the next step we go.
MMS Messages using Twilio
Now that we have a public image to send, its time to sign up for Twilio, which has an api for sending text messages. You can sign up for free here.
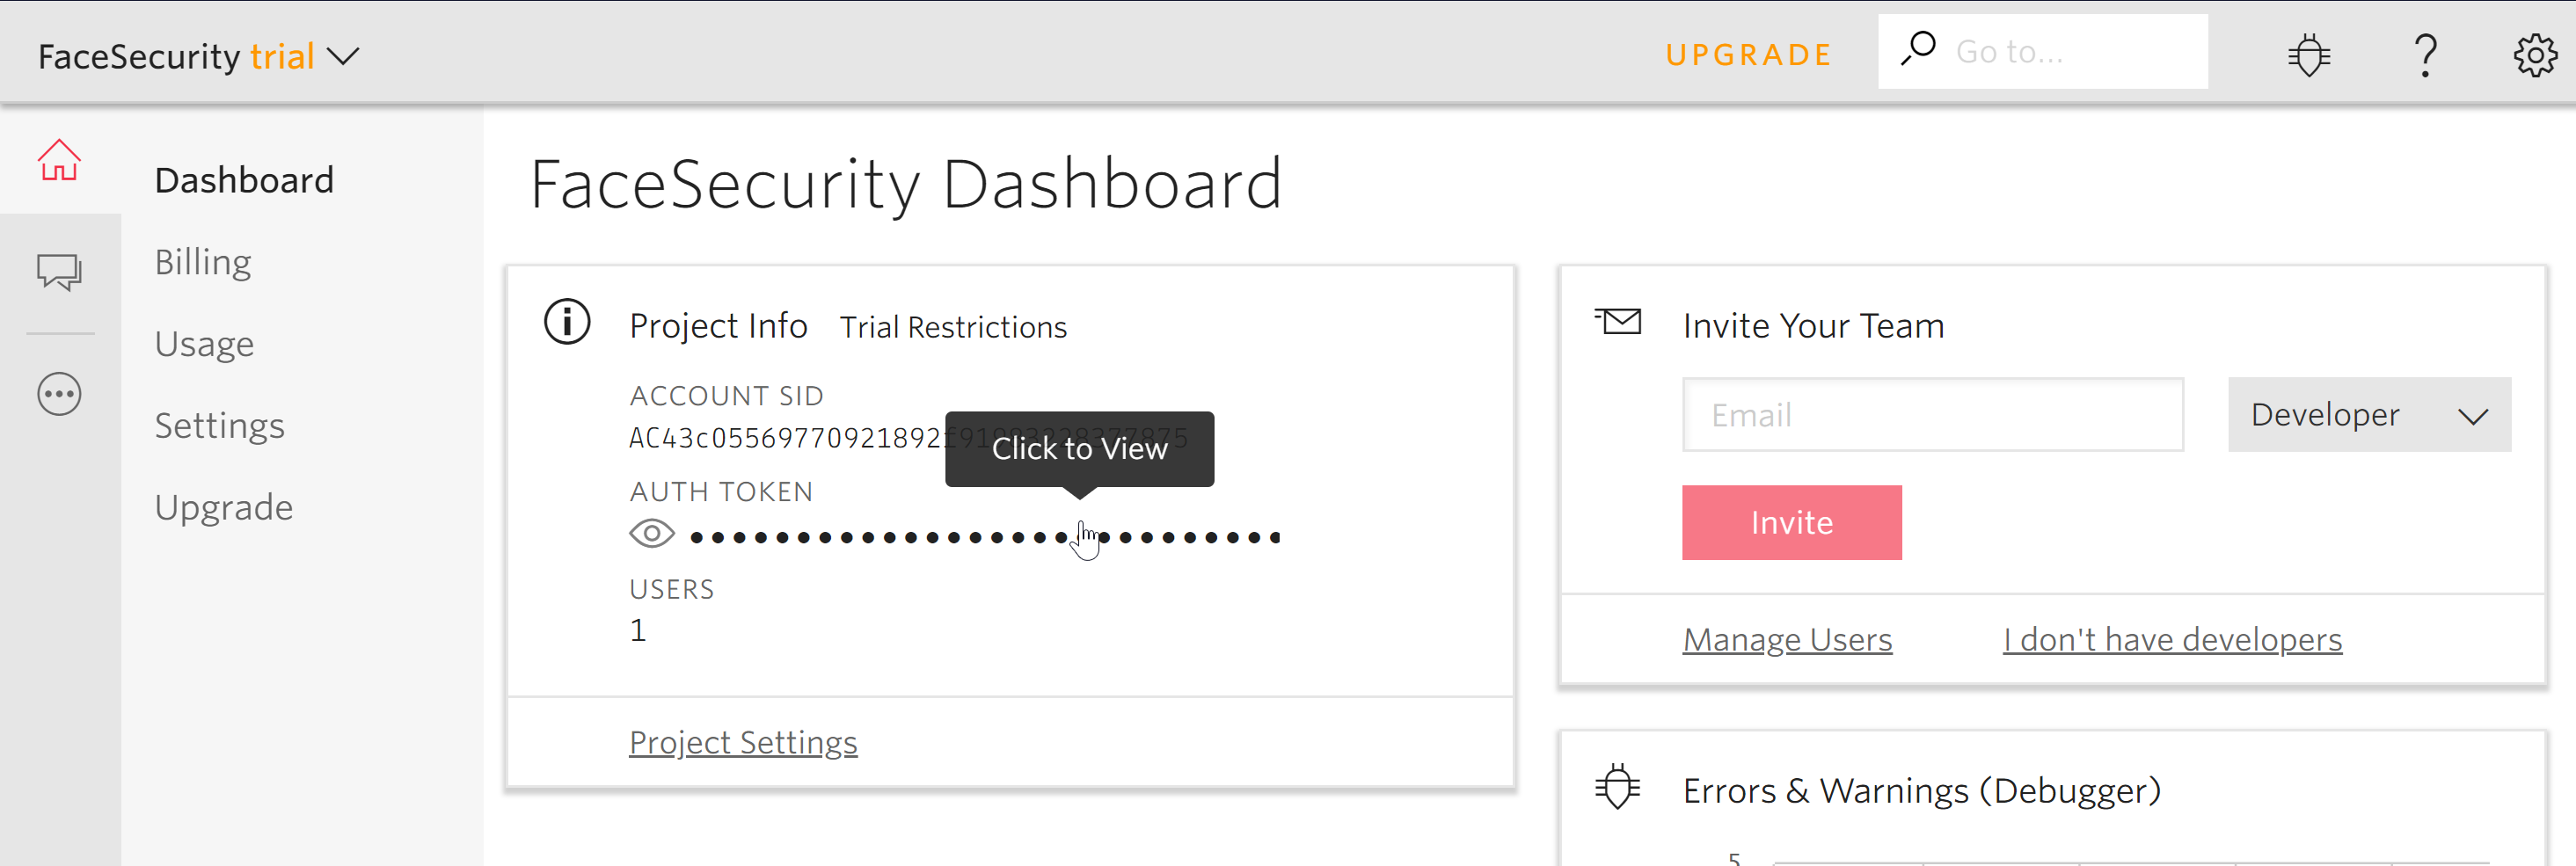
Once you've signed up you get some free credit to buy a phone number, and then you can create a project. Once you have done that, from the 'Dashboard' menu you can access your 'account SID', and your 'auth token'. You'll need both of these to use the rest api.
I just used twilio's python sample code, and went from there.
#*****twilioTest.py*****#
from twilio.rest import Client

account_sid = 'your sid'
auth_token = 'you auth token'

client = Client(account_sid, auth_token)
message = client.messages.create(to='your phone number',
                                 from_='your twilio number',
                                 body = "hello",
                                 media_url="your pic.jpg url")
print(message.sid)
When you run it you should receive a text message to your desired number if not immediately then in the next couple minutes. You can check twilio online for errors as well, under 'Usage', 'Summary', 'Go to SMS Logs'.
Motion Detection Using PIR Sensor
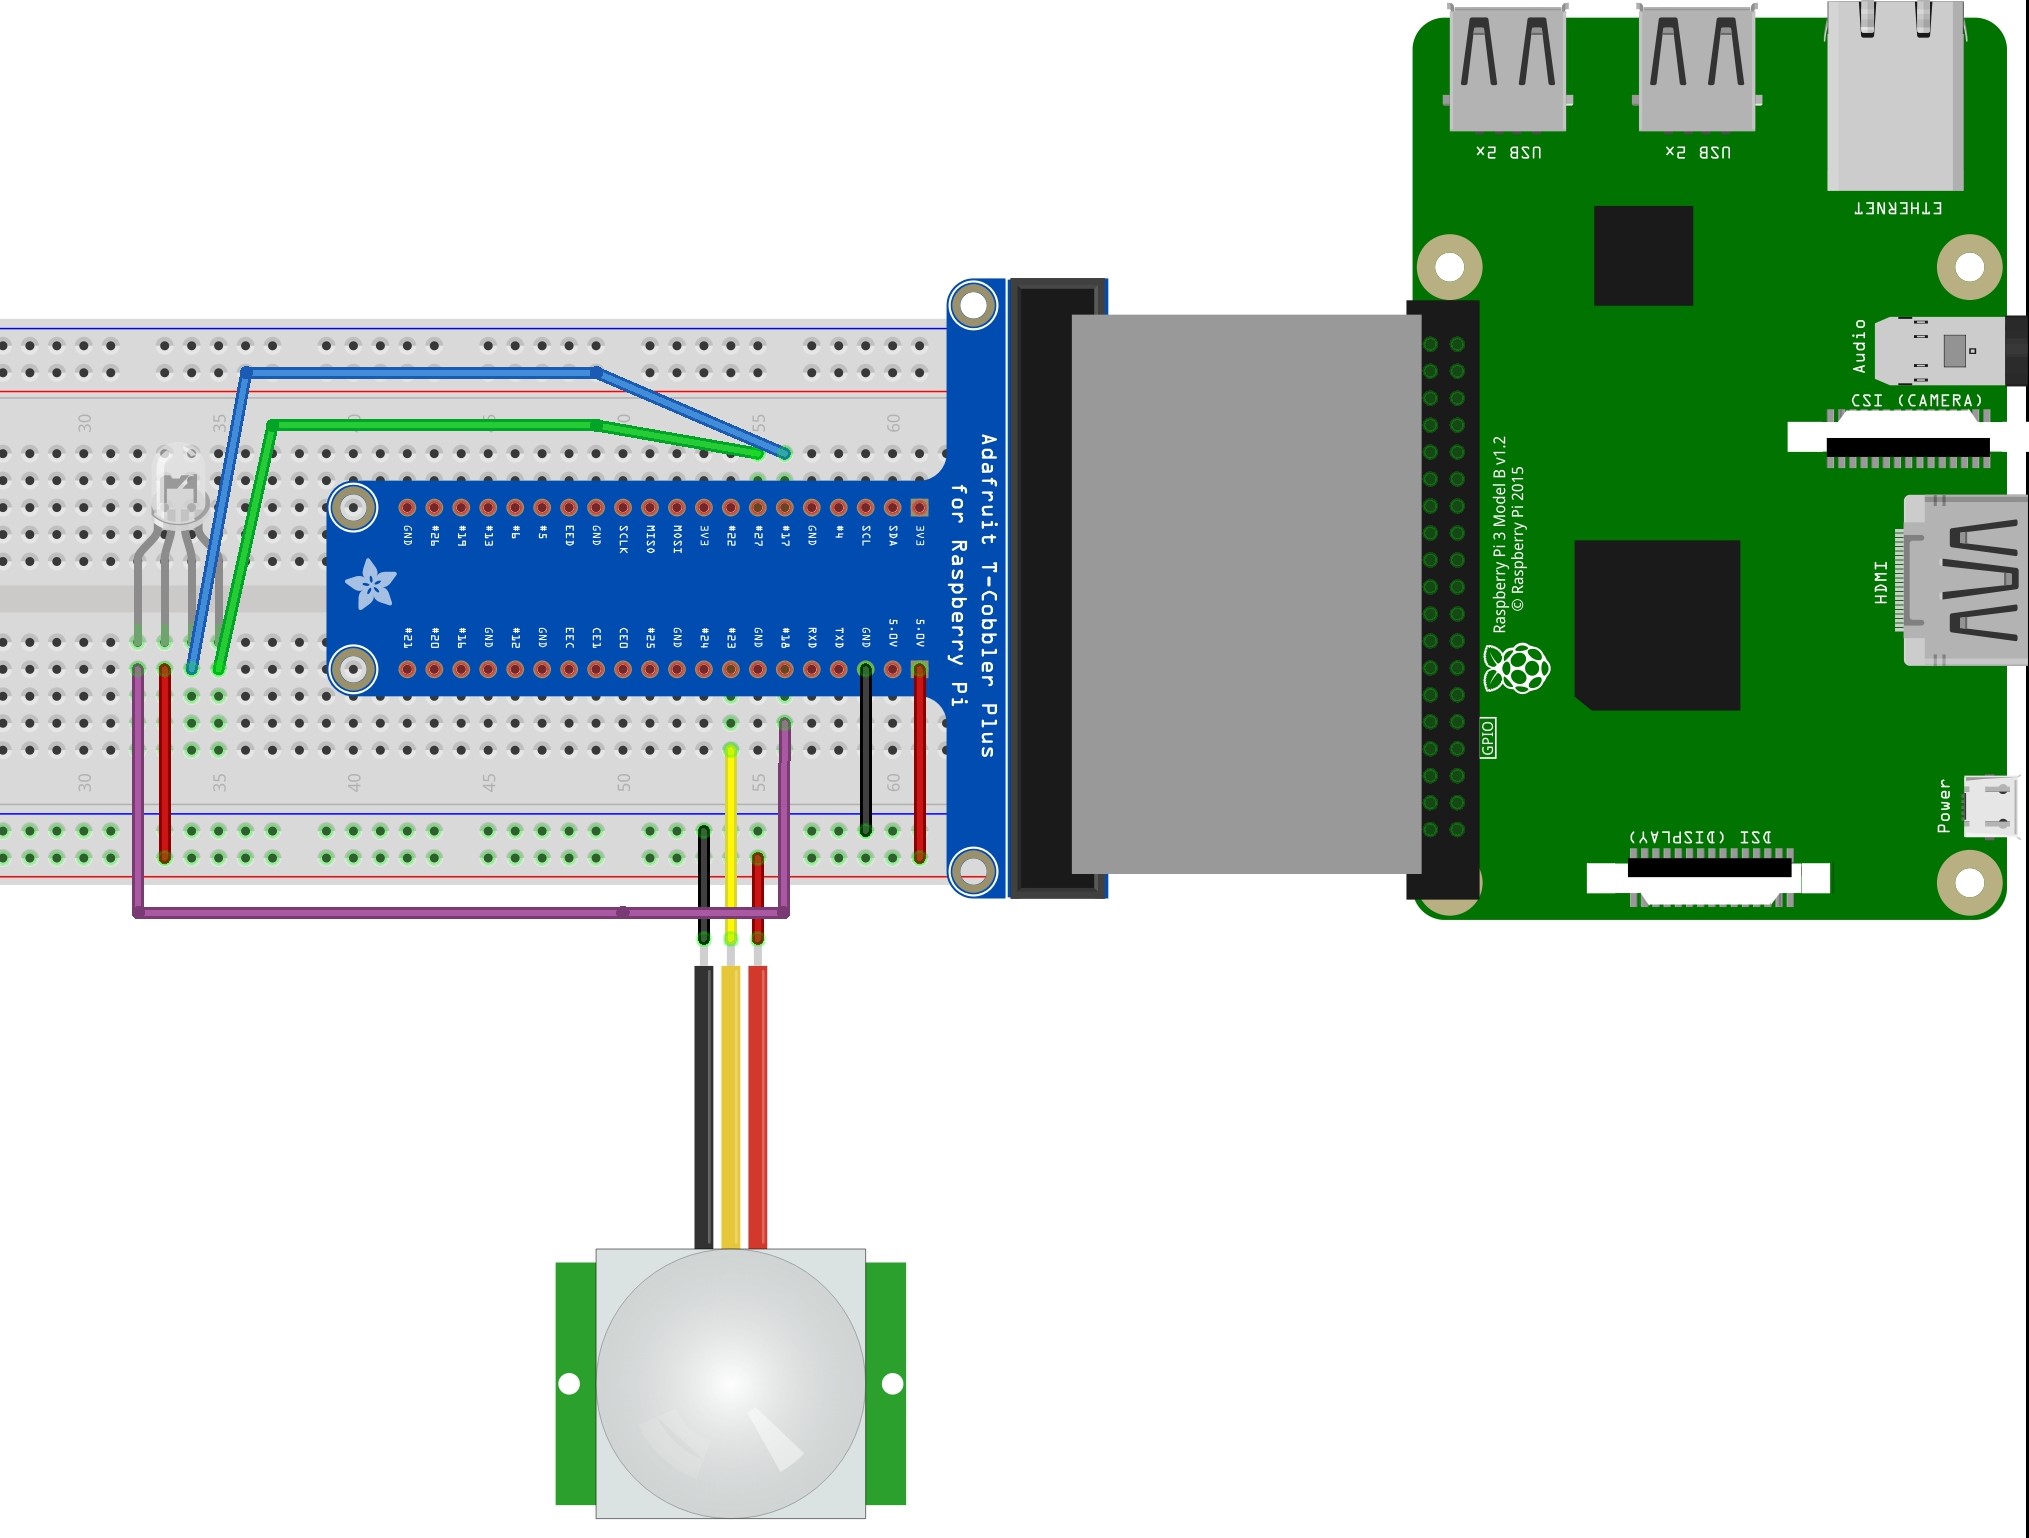
For the motion detection part my setup was pretty simple, all I used was a PIR motion sensor, an RGB LED, a breadboard and a GPIO Extension Board. Here's the wiring diagram:
In the diagram, as usual, black wires go to ground, and red goes to VCC, 5V in this case. Yellow(PIR Signal) is GPIO 23 (pin 16), and the LED pins; Blue: GPIO 17 (pin 11), Red(Purple wire): GPIO 18 (pin 12), Green: GPIO 27 (pin 13).
I used this as reference for the code, which I adapted into this:
#*****motionDetector.py*****#
import RPi.GPIO as GPIO
import time

Blue = 11
Red = 12
Green = 13
Pir= 16

# pin setup
GPIO.setmode(GPIO.BOARD)
GPIO.setup(Blue, GPIO.OUT)
GPIO.setup(Red, GPIO.OUT)
GPIO.setup(Green, GPIO.OUT)
GPIO.setup(Pir, GPIO.IN)

def lightOff():
    GPIO.output(Red, 1)
    GPIO.output(Green, 1)
    GPIO.output(Blue, 1)
    time.sleep(.3)

def lightOn():
    GPIO.output(Red, 0)
    GPIO.output(Green, 0)
    GPIO.output(Blue, 0)
    time.sleep(.3)


while True:
    i = GPIO.input(Pir) # read pir value
    if i==0:
        print("No Intruders")
        lightOff()
    elif i==1:
        print("Intruder Detected")
        lightOn()
Make sure to know which pin numbers you are using, BCM or BOARD, these are explained here.
Putting it All Together
Now that we have all the sub-components working, its finally time to put it all together. The way that I designed the final code is that when it senses motion, it takes three photos. If it recognizes the face with a confidence value of greater than .7 then it sends the photo with the highest confidence with a message saying they are in the the office and it will stop detecting for 10 minutes. If there are no faces, or the face hasn't been trained in the PersonGroup then all three photos are uploaded and a message is sent saying 'motion detected' and the incident number (count) which will also be the name of the directory where the photos are stored. In this case it will stop detecting for 30 seconds before looping again.
#*****securityFaceId.py*****#

import requests
from operator import itemgetter
from twilio.rest import Client
from picamera import PiCamera
import sys
import json
import os
import urllib, httplib, base64, json
import boto3
import datetime
import time

import RPi.GPIO as GPIO
import time
BaseDirectory = '/home/pi/Projects/Photos/' # directory where picamera photos are stored
KEY = '_____' # authorization key for azure
account_sid = '_____' # twilio sid
auth_token = '_____' # twilio authorization token
group_id = 'employees' # name of personGroup
bucketName = '_____' # aws s3 bucket name

#*****Raspberry Pi pin setup*****#
Blue = 11
Red = 12
Green = 13
Pir= 16

GPIO.setwarnings(False)
GPIO.setmode(GPIO.BOARD)
GPIO.setup(Blue, GPIO.OUT)
GPIO.setup(Red, GPIO.OUT)
GPIO.setup(Green, GPIO.OUT)
GPIO.setup(Pir, GPIO.IN)

#*****Camera Setup*****#
camera = PiCamera() # initiate camera
camera.rotation = 180 # Used to correct orientation of camera

#*****FUNCTIONS*****#

# LED on off functions
def lightOff():
    GPIO.output(Red, 1)
    GPIO.output(Green, 1)
    GPIO.output(Blue, 1)
    time.sleep(.3)

def lightOn():
    GPIO.output(Red, 0)
    GPIO.output(Green, 0)
    GPIO.output(Blue, 0)
    time.sleep(.3)

# iterates through specified directory, detecting faces in .jpg files
def iter():
    for fileName in os.listdir(directory):
        if fileName.endswith('.jpg'):
            filePath = os.path.join(directory, fileName) # joins directory path with filename to create file's full path
            fileList.append(filePath)
            detect(filePath)

# detects faces in images from previously stated directory using azure post request
def detect(img_url):
    headers = {'Content-Type': 'application/octet-stream', 'Ocp-Apim-Subscription-Key': KEY}
    body = open(img_url,'rb')

    params = urllib.urlencode({'returnFaceId': 'true'})
    conn = httplib.HTTPSConnection('eastus2.api.cognitive.microsoft.com')
    conn.request("POST", '/face/v1.0/detect?%s' % params, body, headers)
    response = conn.getresponse()
    photo_data = json.loads(response.read())

    if not photo_data: # if post is empty (meaning no face found)
        print('No face identified')
    else: # if face is found
        for face in photo_data: # for the faces identified in each photo
            faceIdList.append(str(face['faceId'])) # get faceId for use in identify

# Takes in list of faceIds and uses azure post request to match face to known faces
def identify(ids):
    if not faceIdList: # if list is empty, no faces found in photos
        result = [('n', .0), 'n'] # create result with 0 confidence
        return result # return result for use in main
    else: # else there is potential for a match
        headers = {'Content-Type': 'application/json', 'Ocp-Apim-Subscription-Key': KEY}
        params = urllib.urlencode({'personGroupId': group_id})
        body = "{'personGroupId':'employees', 'faceIds':"+str(ids)+", 'confidenceThreshold': '.5'}"
        conn = httplib.HTTPSConnection('eastus2.api.cognitive.microsoft.com')
        conn.request("POST", "/face/v1.0/identify?%s" % params, body, headers)
        response = conn.getresponse()

        data = json.loads(response.read()) # turns response into index-able dictionary

        for resp in data:
            candidates = resp['candidates']
            for candidate in candidates: # for each candidate in the response
                confidence = candidate['confidence'] # retrieve confidence
                personId = str(candidate['personId']) # and personId
                confidenceList.append((personId, confidence))
        conn.close()
        SortedconfidenceList = zip(confidenceList, fileList) # merge fileList and confidence list
        sortedConfidence = sorted(SortedconfidenceList, key=itemgetter(1)) # sort confidence list by confidence
        return sortedConfidence[-1] # returns tuple with highest confidence value (sorted from smallest to biggest)


# takes in person_id and retrieves known person's name with azure GET request
def getName(person_Id):
    headers = {'Ocp-Apim-Subscription-Key': KEY}
    params = urllib.urlencode({'personGroupId': group_id, 'personId': person_Id})

    conn = httplib.HTTPSConnection('eastus2.api.cognitive.microsoft.com')
    conn.request("GET", "/face/v1.0/persongroups/{"+group_id+"}/persons/"+person_Id+"?%s" % params, "{body}", headers)
    response = conn.getresponse()
    data = json.loads(response.read())
    name = data['name']
    conn.close()
    return name

# uses twilio rest api to send mms message, takes in message as body of text, and url of image
def twilio(message, imageLink):
    client = Client(account_sid, auth_token)

    message = client.messages.create(to='<destination phone number>', from_='<Your twilio phone number>', body = message, media_url=imageLink)

    print(message.sid)

# uses aws s3 to upload photos
def uploadPhoto(fName):
    s3=boto3.resource('s3')
    data = open(fName, 'rb')
    s3.Bucket(bucketName).put_object(Key=fName, Body=data, ContentType = 'image/jpeg')

    # makes uploaded image link public
    object_acl = s3.ObjectAcl(bucketName, fName)
    response = object_acl.put(ACL='public-read')

    link = 'https://s3.amazonaws.com/'+bucketName+'/'+fName
    return link

#*****Main*****#
count = 0
while True:
    # lists are refreshed for every incident of motion
    fileList = [] # list of filePaths that were passed through as images
    faceIdList = [] # list for face id's generated using api - detect
    confidenceList = [] # list of confidence values derived from api - identify
    i = GPIO.input(Pir)
    if i==0:
        print("No Intruders")
        lightOff()
    elif i==1:
        count += 1 # count allows for a new directory to be made for each set of photos
        directory = BaseDirectory+str(count)+'/'
        print("Intruder Detected")
        lightOn()
        os.mkdir(directory) # make new directory for photos to be uploaded to
        print(count)
        print(directory)
        for x in range(0,3):
            date = datetime.datetime.now().strftime('%m_%d_%Y_%M_%S_') # change file name for every photo
            camera.capture(directory + date +'.jpg')
            time.sleep(1) # take photo every second
        iter()
        result = identify(faceIdList)
        if result[0][1] > .7: # if confidence is greater than .7 get name of person
            twilio(getName(result[0][0])+' is in the Office.', uploadPhoto(result[1]))
            time.sleep(600) # if recognized stop for 10 mins
        else:
            for files in fileList:
                link = uploadPhoto(files) # upload all photos of incident for evidence
            twilio('Motion Detected in the Office. Incident:'+count, link) # send message
            time.sleep(30) # wait 30 seconds before looking for motion again
If you've made it this far, congratulations! Hope this was helpful, adjust the code as you need/want. All the code can also be found here.If you have any questions please comment below.