Learn image and video classification via machine learning with the use of TensorFlow, OpenCV, and NumPy on Raspberry Pi!
cd /home/pi/tensorflow/models/research/object_detection
In this tutorial, I’m going to show you how to set up image and video classification using the machine learning program TensorFlow on Raspberry Pi with a little help from OpenCV. We will start by performing basic object detection with images and then advance to real-time object detection.
How to Set Up Tensorflow, OpenCV, and NumPy
Before moving on, make sure you correctly install TensorFlow on your Raspberry Pi.
You will also need OpenCV to display frames on output. Type the following command in your Raspberry Pi’s terminal to install the required packages:
sudo apt install libatlas3-base libsz2 libharfbuzz0b libtiff5 libjasper1 libilmbase12 libopenexr22 libilmbase12 libgstreamer1.0-0 libavcodec57 libavformat57 libavutil55 libswscale4 libqtgui4 libqt4-test libqtcore4
Then type the following command to install OpenCV 3 for Python 3 on your Raspberry Pi. Including Pip3 in this command allows OpenCV to install for Python 3.
sudo pip3 install opencv-contrib-python libwebp6
The last library you need for this tutorial is NumPy. NumPy is a library that makes it very easy to perform array operations in Python. To install, type the following command.
Pip3 install python-numpy
Installing the Image Classifier
To install the image classifier, begin by creating a new directory where we will save the TensorFlow models.
mkdir tensorflow
 cd tensorflow
Now we can clone the TensorFlow models repository in the new directory. The git clone can be found on GitHub.
cd /home/pi/tensorflow/models/research/object_detection
From there, we need to download protobuf and extract it in the object_detection folder and place the proto.exe from the bin directory to the object_detection folder.
protoc protos/*.proto --python_out=
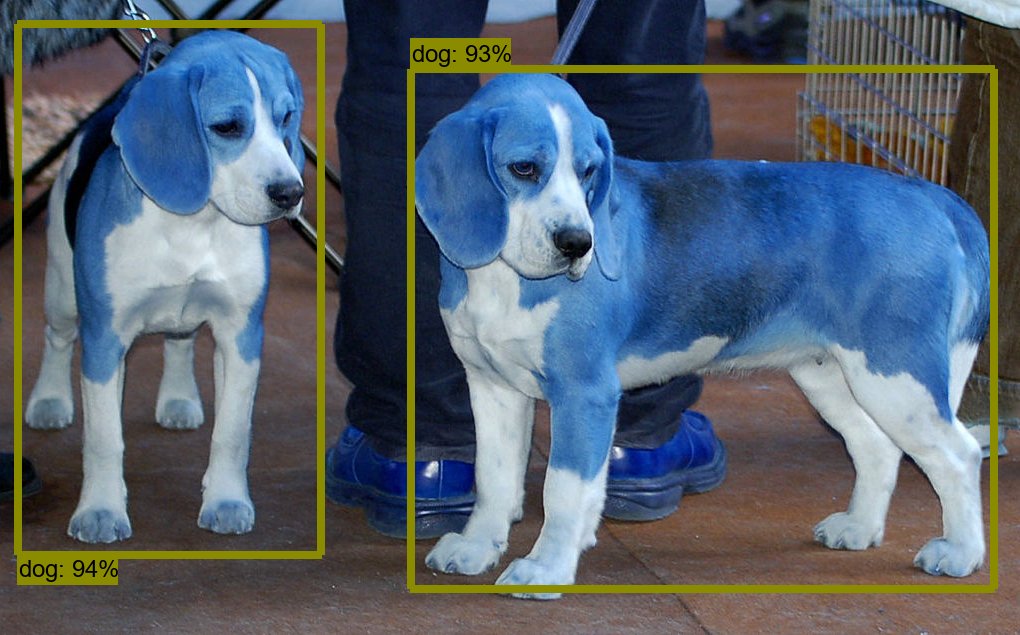
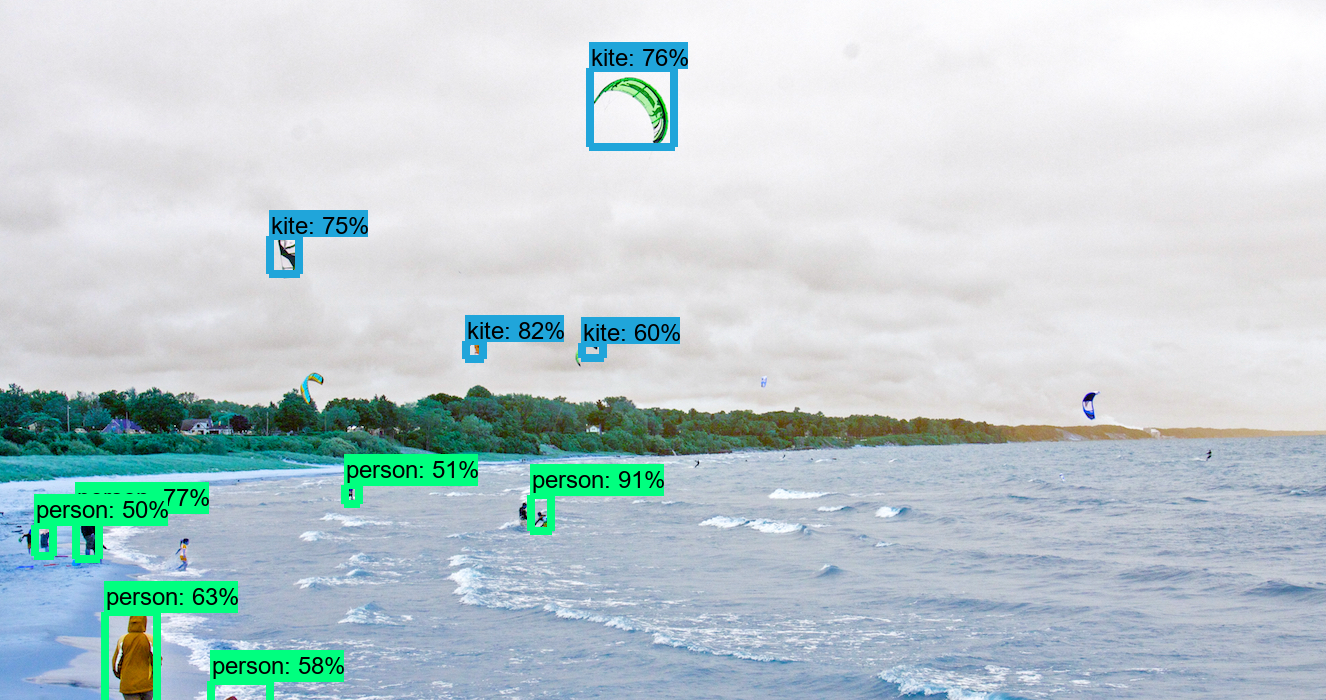
How to Detect Objects in Images
There is a Jupyter notebook present that reads images and detects objects, but I have changed this code to work with OpenCV instead on matplotlib because OpenCV is faster than matplotlib.
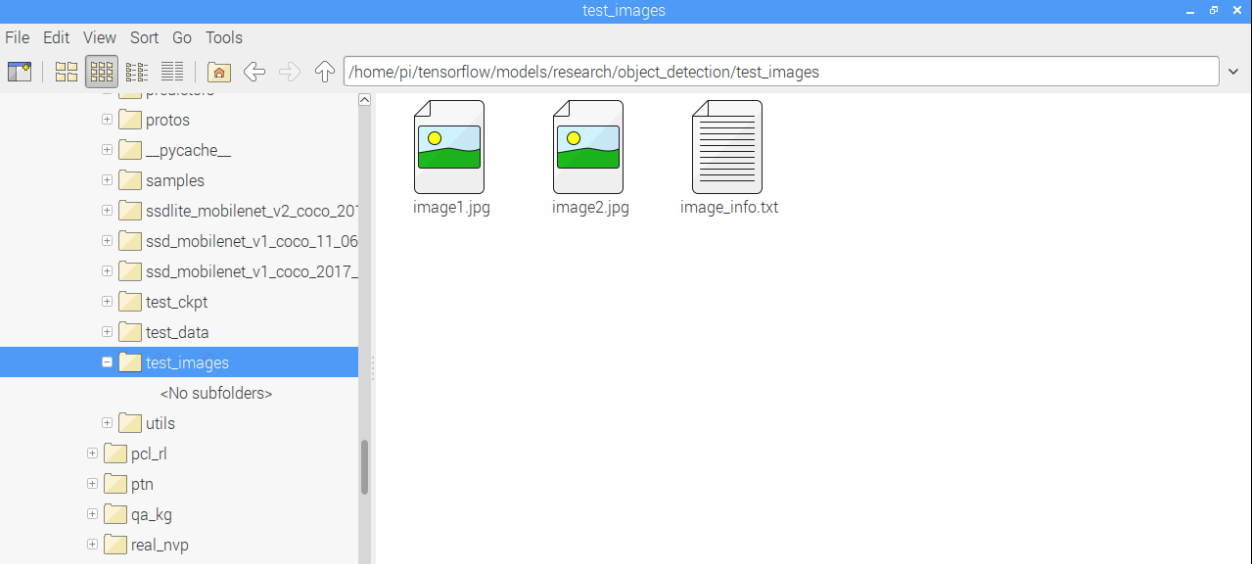
The code titled Object Detection in the zip file below will detect objects in images that are present in the object_detection/test_images folder. The notes within the code explain how everything works.
Copy that code into a file in the object_detection directory and name the file “objectDetection.py”.
To run the code, type:
python3 objectDetection.py
Add more images in the folder where you want to detect objects.
Add additional images to your object detector.
As more images are added, the image detector can make more accurate object detections!
Object Detection in Real-Time
Now let’s write the code that uses OpenCV to take frames one by one and perform object detection.
The frame rate on the Raspberry Pi will be too slow because it requires a lot of processing power and Raspberry Pi is not quite powerful enough, so the code will take too long to start.
We are going to do a few changes in the code we used in the previous example in order to make it work in real-time.
Instead of reading the images, we will add the camera object that will help us access the camera on Raspberry Pi.
cap = cv2.VideoCapture(0)
We won’t need to convert images to a NumPy array as OpenCV will take care of that for us.
while True:
ret, image_np = cap.read()
After detecting objects in the frames, we can show them on the output windows and wait for some time to get any keys pressed. If the ‘q’ key is pressed, the program closes. Otherwise, the program takes another frame and again performs object detection. The program keeps running until ‘q’ is pressed.
cv2.imshow('object detection', cv2.resize(image_np, (800,600)))
        if cv2.waitKey(1) == ord('q'):
          cv2.destroyAllWindows()
          break
The complete code for this section is also given below. Save the code in a file and name it as “objectDetection1.py”. The following command runs the code.
python3 objectDetection1.py
That’s it! Now the program is off and running with real-time object detection.