Use a Raspberry Pi camera and a solenoid lock to create a door lock that unlocks when it recognizes your face!
In this tutorial, you are going to learn how to build a facial-recognition-based door lock using a Raspberry Pi.
The project will consist of three phases:
- Face detection and data gathering
- Training recognizer
- Facial recognition
Before diving into the code, let’s connect the solenoid lock with the Raspberry Pi.
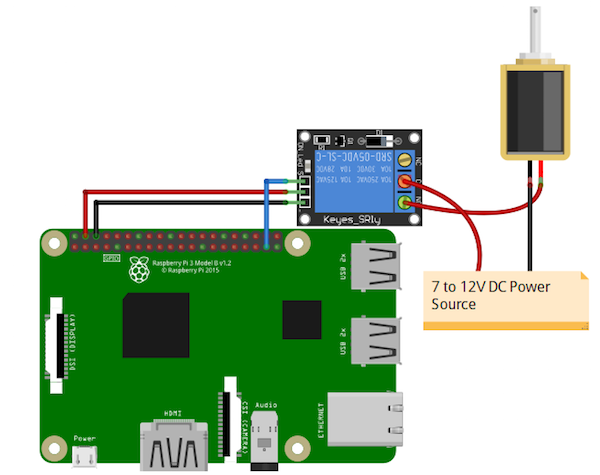
Circuit Diagram and Explanation
The GPIO pins of the Raspberry Pi can give an output of 3.3V but the solenoid lock requires 7-12V to operate. Because of this, we will need to use an external power source and relay to operate the lock.
Connect the VCC and GND of the relay module to 5V and GND of Raspberry Pi. Then connect the signal pin of the relay module to the GPIO 26 of Raspberry Pi.
On the other side of the relay module, connect the negative form DC power source to the negative of the solenoid door lock. Connect the positive from the DC power source to the common of the relay module and then connect normally open from the relay module to positive of the solenoid door lock.
The facial recognition circuit diagram.
Data Gathering for Face Detection
The first task is to gather the data for which we are going to train our classifier. We will write a python code that will take 30 faces of each person using OpenCV pre-trained classifier.
OpenCV already contains many pre-trained classifiers for face, eyes, smile, etc. The classifier we are going to use will detect faces and the cascade file is available on GitHub.
Save this file in the working directory as "haarcascade_frontalface_default.xml".
Code Walkthrough
Now let’s write the code. First, we import the required package.
import cv2
from picamera.array import PiRGBArray
from picamera import PiCamera
import numpy as np
import os
import sys
Then we initialize the camera object that will allow us to play with the Raspberry Pi camera. We set the resolution at (640, 480) and frame rate at 30 fps.
camera = PiCamera()
camera.resolution = (640, 480)
camera.framerate = 30
PiRGBArray() gives us a 3-dimensional RGB array organized(rows, columns, colors) from an unencoded RGB capture. PiRGBArray’s advantage is its ability to read the frames from Raspberry Pi camera as NumPy arrays making it compatible with OpenCV. It avoids the conversion from JPEG format to OpenCV format which would slow our process.
It takes two arguments:
- The camera object
- The resolution
rawCapture = PiRGBArray(camera, size=(640, 480))
Load a cascade file for detecting faces.
face_cascade = cv2.CascadeClassifier("haarcascade_frontalface_default.xml");
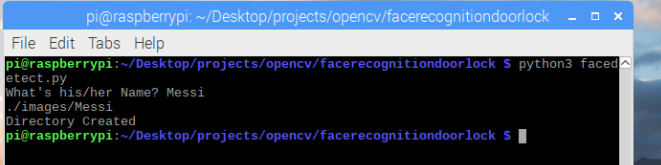
Next, we ask the user for a name. If a directory with that name is already there, it will respond with “Name already exists” and will exit the code. If a directory with this name isn’t there, it will create the directory and images will be saved with this name.
name = input("What's his/her Name? ")
dirName = "./images/" + name
print(dirName)
if not os.path.exists(dirName):
	os.makedirs(dirName)
	print("Directory Created")
else:
	print("Name already exists")
	sys.exit()
Created directories for images.
After that, we use the capture_continuous function to start reading the frames from the Raspberry Pi camera module.
The capture_continuous function takes three arguments:
- rawCapture
- The format in which we want to read each frame since OpenCV expects the image to be in the BGR format rather than the RGB so we specify the format to be BGR.
- The use_video_port boolean, making it true means that we are treating a stream as video.
for frame in camera.capture_continuous(rawCapture, format="bgr", use_video_port=True):
Once we have the frame, we can access the raw NumPy array via the .array attribute. After accessing, we convert this frame to grayscale.
frame = frame.array
gray = cv2.cvtColor(frame, cv2.COLOR_BGR2GRAY)
Then we call our classifier function to detect faces in the frame. The first argument we pass is the grayscale image. The second argument is the parameter specifying how much the image size is reduced at each image scale. The third argument is a parameter specifying how many neighbors each candidate rectangle should have to retain it. A higher number gives lower false positives.
faces = faceCascade.detectMultiScale(gray, scaleFactor = 1.5, minNeighbors = 5)
The above function gives us rectangle coordinates of the face area. We used these coordinates to extract face from the image and saved it in the directory we created at the start. After that, we showed the cropped face and created a rectangle on the original frame.
The code will collect 30 images.
for (x, y, w, h) in faces:
		roiGray = gray[y:y+h, x:x+w]
		fileName = dirName + "/" + name + str(count) + ".jpg"
		cv2.imwrite(fileName, roiGray)
		cv2.imshow("face", roiGray)
		cv2.rectangle(frame, (x, y), (x+w, y+h), (0, 255, 0), 2)
		count += 1
Then we show the original frame on the output window. cv2.waitkey() is a keyboard binding function. It waits for a specified millisecond for any keyboard event. It takes one argument and this argument is the time in milliseconds. If the key is pressed in that time then the program will continue. Passing 0 means it will wait infinitely for a key.
cv2.imshow('frame', frame)
key = cv2.waitKey(1)
Then we clear the stream in preparation for the next frame by calling truncate(0) between captures.
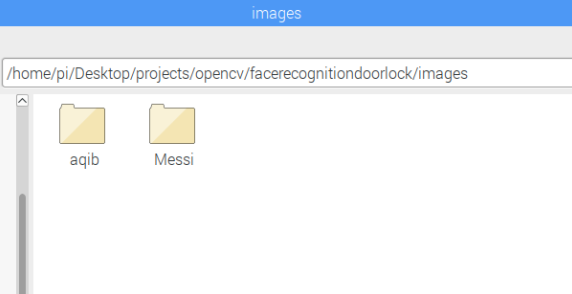
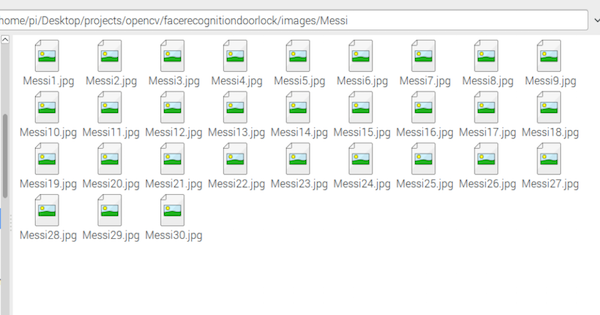
Face detection and data gathering are now complete. We should have 30 images in the newly created directory.
Our 30 images saved in the newly created directory.
Face Detection Complete Code
import cv2
from picamera.array import PiRGBArray
from picamera import PiCamera
import numpy as np
import os
import sys

camera = PiCamera()
camera.resolution = (640, 480)
camera.framerate = 30
rawCapture = PiRGBArray(camera, size=(640, 480))

faceCascade = cv2.CascadeClassifier("haarcascade_frontalface_default.xml")

name = input("What's his/her Name? ")
dirName = "./images/" + name
print(dirName)
if not os.path.exists(dirName):
	os.makedirs(dirName)
	print("Directory Created")
else:
	print("Name already exists")
	sys.exit()

count = 1
for frame in camera.capture_continuous(rawCapture, format="bgr", use_video_port=True):
	if count > 30:
		break
	frame = frame.array
	gray = cv2.cvtColor(frame, cv2.COLOR_BGR2GRAY)
	faces = faceCascade.detectMultiScale(gray, scaleFactor = 1.5, minNeighbors = 5)
	for (x, y, w, h) in faces:
		roiGray = gray[y:y+h, x:x+w]
		fileName = dirName + "/" + name + str(count) + ".jpg"
		cv2.imwrite(fileName, roiGray)
		cv2.imshow("face", roiGray)
		cv2.rectangle(frame, (x, y), (x+w, y+h), (0, 255, 0), 2)
		count += 1

	cv2.imshow('frame', frame)
	key = cv2.waitKey(1)
	rawCapture.truncate(0)

	if key == 27:
		break

cv2.destroyAllWindows()
Training the Recognizer
Now we can train the recognizer according to the data we gathered in the previous step.
We will use the LBPH (LOCAL BINARY PATTERNS HISTOGRAMS) face recognizer, included on the OpenCV package. We load it in the following line:
recognizer = cv2.face.LBPHFaceRecognizer_create()
We get the path of the current working directory and we move to the directory where the image directories are present.
baseDir = os.path.dirname(os.path.abspath(__file__))
imageDir = os.path.join(baseDir, "images")
Then we move into each image directory and look for the images. If the image is present, we convert it into the NumPy array.
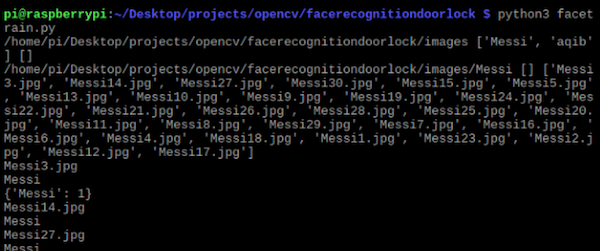
for root, dirs, files in os.walk(imageDir):
	print(root, dirs, files)
	for file in files:
		print(file)
		if file.endswith("png") or file.endswith("jpg"):
			path = os.path.join(root, file)
			label = os.path.basename(root)
			print(label)

			if not label in labelIds:
				labelIds[label] = currentId
				print(labelIds)
				currentId += 1

			id_ = labelIds[label]
			pilImage = Image.open(path).convert("L")
			imageArray = np.array(pilImage, "uint8")
After that, we perform the face detection again to make sure we have the right images and then we prepare the training data.
faces = faceCascade.detectMultiScale(imageArray, scaleFactor=1.1, minNeighbors=5)

			for (x, y, w, h) in faces:
				roi = imageArray[y:y+h, x:x+w]
				xTrain.append(roi)
				yLabels.append(id_)
Store the dictionary which contains the directory names and label IDs.
with open("labels", "wb") as f:
	pickle.dump(labelIds, f)
	f.close()
Now train the data and save the file.
recognizer.train(xTrain, np.array(yLabels))
recognizer.save("trainer.yml")
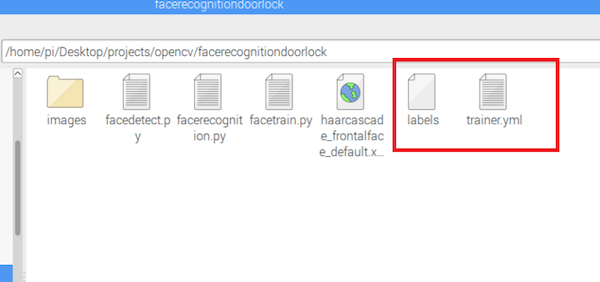
This code creates a trainer.yml and labels files that we use in the recognition code.
The trainer.yml file we use in the recognition code.
Complete Code for Training the Recognizer
import os
import numpy as np
from PIL import Image
import cv2
import pickle

faceCascade = cv2.CascadeClassifier("haarcascade_frontalface_default.xml")
recognizer = cv2.face.LBPHFaceRecognizer_create()

baseDir = os.path.dirname(os.path.abspath(__file__))
imageDir = os.path.join(baseDir, "images")

currentId = 1
labelIds = {}
yLabels = []
xTrain = []

for root, dirs, files in os.walk(imageDir):
	print(root, dirs, files)
	for file in files:
		print(file)
		if file.endswith("png") or file.endswith("jpg"):
			path = os.path.join(root, file)
			label = os.path.basename(root)
			print(label)

			if not label in labelIds:
				labelIds[label] = currentId
				print(labelIds)
				currentId += 1

			id_ = labelIds[label]
			pilImage = Image.open(path).convert("L")
			imageArray = np.array(pilImage, "uint8")
			faces = faceCascade.detectMultiScale(imageArray, scaleFactor=1.1, minNeighbors=5)

			for (x, y, w, h) in faces:
				roi = imageArray[y:y+h, x:x+w]
				xTrain.append(roi)
				yLabels.append(id_)

with open("labels", "wb") as f:
	pickle.dump(labelIds, f)
	f.close()

recognizer.train(xTrain, np.array(yLabels))
recognizer.save("trainer.yml")
print(labelIds)
Using the Recognizer for Facial Recognition
The recognizer we set up in the previous section can now be used to recognize the faces. It will give us confidence and label ID (how much confidence the recognizer is in relation to this match). If the face matches, the relay will turn on.
First we load the pickle file which contains the dictionary.
with open('labels', 'rb') as f:
	dicti = pickle.load(f)
	f.close()
Then we load the classifier that will detect the faces and the recognizer that will predict the faces and the trained data.
faceCascade = cv2.CascadeClassifier("haarcascade_frontalface_default.xml")
recognizer = cv2.face.LBPHFaceRecognizer_create()
recognizer.read("trainer.yml")
We read the frame, convert it to grayscale, and look for the faces in the image. If any faces are there, we will extract the face region and use the recognizer to recognize the image.
The recognizer will give us our label ID and confidence.
gray = cv2.cvtColor(frame, cv2.COLOR_BGR2GRAY)
	faces = faceCascade.detectMultiScale(gray, scaleFactor = 1.5, minNeighbors = 5)
	for (x, y, w, h) in faces:
		roiGray = gray[y:y+h, x:x+w]
		roiColor = frame[y:y+h, x:x+w]

		id_, conf = recognizer.predict(roiGray)
We look in the dictionary for the name assigned to this label ID.
for name, value in dict.items():
			if value == id_:
				print(name)
We then check whether we have enough confidence to open the door lock. If the confidence is less than 70, the door will open. Otherwise, it will remain closed.
if conf <= 70:
			GPIO.output(relay_pin, 1)
			cv2.rectangle(frame, (x, y), (x+w, y+h), (0, 255, 0), 2)
			cv2.putText(frame, name + str(conf), (x, y), font, 2, (0, 0 ,255), 2,cv2.LINE_AA)

		else:
			GPIO.output(relay_pin, 0)
Create a rectangle in the original image and write this name on top of the rectangle.
cv2.rectangle(frame, (x, y), (x+w, y+h), (0, 255, 0), 2)
cv2.putText(frame, name, (x, y), font, 2, (0, 0 ,255), 2,cv2.LINE_AA)
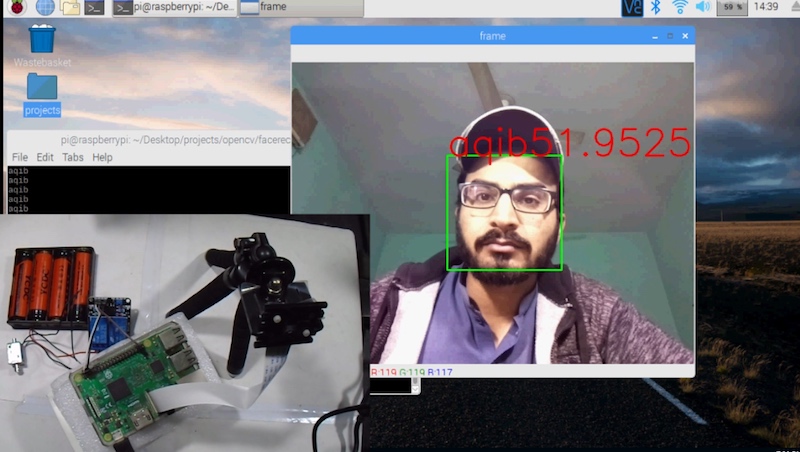
With the code complete, the set up is ready for facial recognition!
Complete Code for Training the Recognizer
import cv2
from picamera.array import PiRGBArray
from picamera import PiCamera
import numpy as np
import pickle
import RPi.GPIO as GPIO
from time import sleep

relay_pin = [26]
GPIO.setmode(GPIO.BCM)
GPIO.setup(relay_pin, GPIO.OUT)
GPIO.output(relay_pin, 0)

with open('labels', 'rb') as f:
	dicti = pickle.load(f)
	f.close()

camera = PiCamera()
camera.resolution = (640, 480)
camera.framerate = 30
rawCapture = PiRGBArray(camera, size=(640, 480))


faceCascade = cv2.CascadeClassifier("haarcascade_frontalface_default.xml")
recognizer = cv2.face.LBPHFaceRecognizer_create()
recognizer.read("trainer.yml")

font = cv2.FONT_HERSHEY_SIMPLEX

for frame in camera.capture_continuous(rawCapture, format="bgr", use_video_port=True):
	frame = frame.array
	gray = cv2.cvtColor(frame, cv2.COLOR_BGR2GRAY)
	faces = faceCascade.detectMultiScale(gray, scaleFactor = 1.5, minNeighbors = 5)
	for (x, y, w, h) in faces:
		roiGray = gray[y:y+h, x:x+w]

		id_, conf = recognizer.predict(roiGray)

		for name, value in dict.items():
			if value == id_:
				print(name)

		if conf <= 70:
			GPIO.output(relay_pin, 1)
			cv2.rectangle(frame, (x, y), (x+w, y+h), (0, 255, 0), 2)
			cv2.putText(frame, name + str(conf), (x, y), font, 2, (0, 0 ,255), 2,cv2.LINE_AA)

		else:
			GPIO.output(relay_pin, 0)

	cv2.imshow('frame', frame)
	key = cv2.waitKey(1)

	rawCapture.truncate(0)

	if key == 27:
		break

cv2.destroyAllWindows()
Final Thoughts
This face recognition system is not 100% accurate, but it works well in good light conditions. The problem is it can also detect faces from pictures — for instance, someone can unlock it by showing your picture from his mobile phone. We can improve this by training our own cascade classifier.