Access a variety of game console emulators by creating your own gaming system with the RetroPie and a Raspberry Pi.
For just $50, you can make your very own super-cool gaming system. This system can be hooked up to an HDMI cable or PAL TV port. In this guide, I will show you how you can build your own RetroPie gaming system and everything you need to do to start playing on your Raspberry Pi RetroPie.
For this project, I’m going to use the RetroPie operating system, which is an awesome software package that handles all your emulation needs.
Any Raspberry Pi can run RetroPie, but I still recommend you get the Raspberry Pi 2 or Raspberry Pi 3 because this will maximize the range of games you can play with their improved GPU, CPU, and RAM capabilities.
Why Build a RetroPie Gaming Rig?
Because we can emulate so many different emulators and access all the games running on a plethora of platforms! You can see the complete list of supported platforms here.
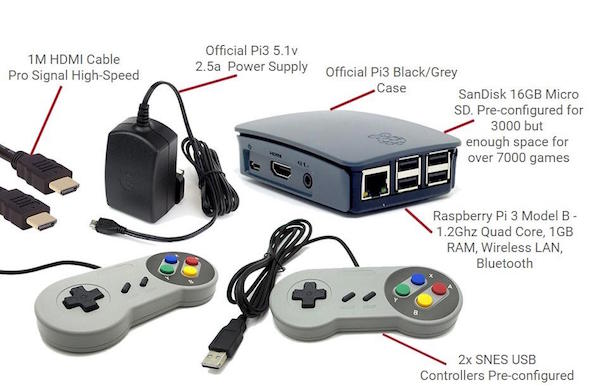
Hardware Requirements
- Raspberry Pi (Raspberry Pi 3 Model B recommended)
- MicroSD card (16Gb Recommended)
- HDMI/PAL display cable
- USB keyboard (not necessary, but can be used for Pi before setting up controllers)
- USB controllers, PSX controllers or universal gamepads (for the emulators)
- SD card reader (to burn the OS downloaded from your computer)
- Optional but recommended:
- Heat Sink
- Official Raspberry Pi case
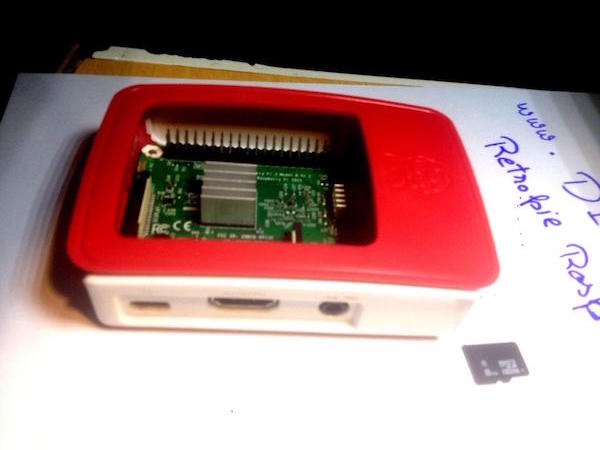
Some of the required hardware for this project.
NOTE: There are many compatible versions of Raspberry Pi that can be used in this project including:
- Raspberry Pi Zero
- Raspberry Pi Zero W
- Raspberry Pi 1 Model A+
- Raspberry Pi 1 Model B+
- Raspberry Pi 2 Model B
- Raspberry Pi 3 Model B (recommended)
For my project, I chose the Raspberry Pi 3 Model B and highly recommend you do the same.
Required Software
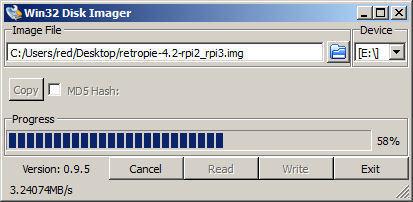
While downloading the operating system from the official RetroPie website, there are two different type of files: one for Pi 0 or 1 and one for the Pi 2 or 3, so download the right one on your microSD card.
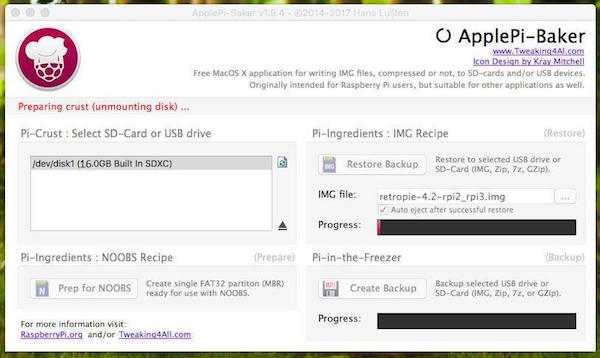
You need a PC or Mac and a microSD card slot or reader. You will also need software that can extract RetroPie image .gz file, and a tool to install the .img file found in the compressed file onto the card, so for this I am using Win32DiskImager.
If you have a MacBook, install ApplePi-Baker.
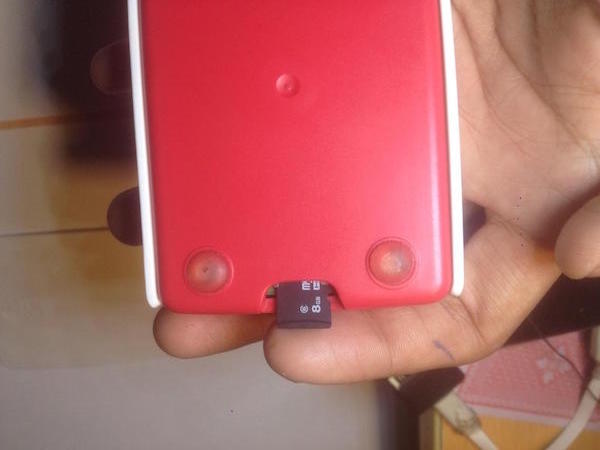
Insert microSD in Raspberry Pi 3
Insert the memory card into the Raspberry Pi and plug it into power with a 2A charger. We can use the TV or PAL video out for the output. Next, plug your keyboard or gamepad into one of the Raspberry Pi’s USB ports.
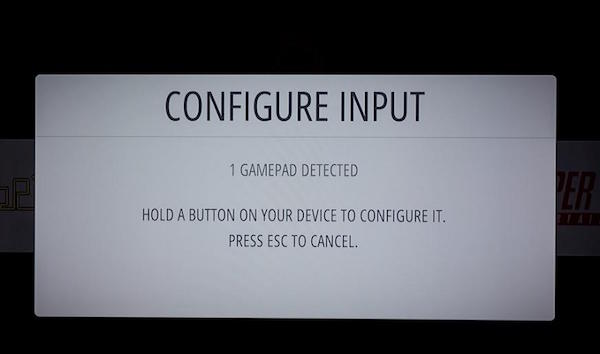
Booting up the Program and JoyPad Configuration
The very first time you switch it on, it will run the installation procedures and set itself up fully. After installation, you will see something like this:
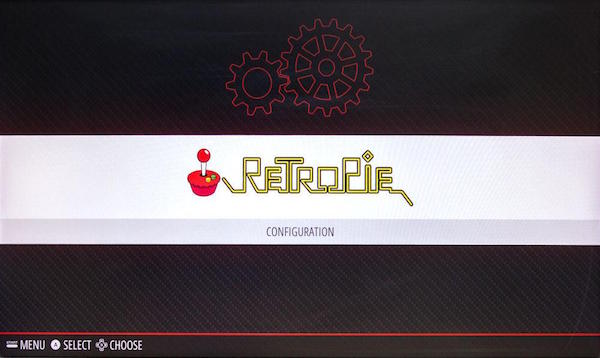
Once done, you will land on the home screen:
Set the Wi-Fi and connect to the internet.
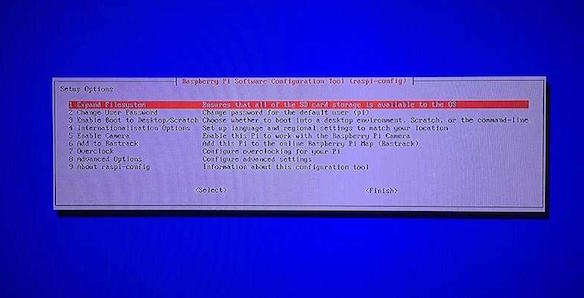
Expanding File System
If you have an SD card larger than 4GB, you have to expand it before your Pi can use the remaining space, so you'll need to launch the Raspberry Pi configuration tool (raspi-config).
You can press F4 to exit from the RetroPie UI and get back to the shell (i.e., command line). Input the following and press enter:
sudo raspi-config
After the Raspberry Pi reboots, make sure to update all packages with the following commands:
sudo apt-get update
sudo apt-get upgrade
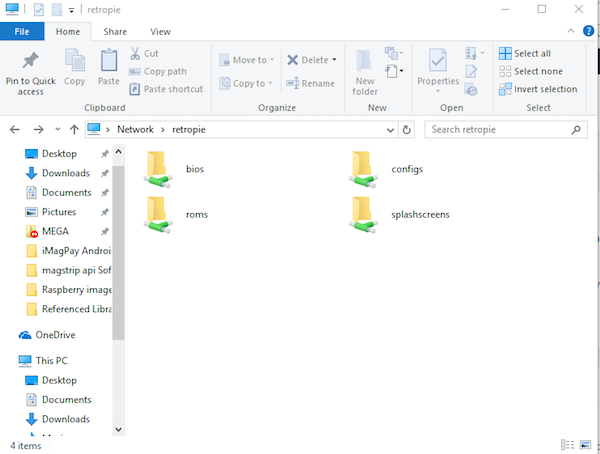
Transfer ROMs of Emulators
If if you have Windows, type \\RetroPie into the destination field. You can also replace RetroPie with your Raspberry Pi’s IP address and open “Explore” to access it.
For example: \\192.168.1.10
After transferring the ROM, reboot from the start menu, or you can enter sudo reboot in the shell terminal.
And that’s it! You can now start using your RetroPie and explore all the games you can play on it.
Cover image courtesy of RetroPie.