Get an introduction to PIC microcontrollers with an overview of features and a simple first project!
In a previous article, we looked at the different microcontrollers available on the market and how each one has their own advantages/disadvantages. This article begins our series on PIC microcontrollers by taking a closer look at the PIC microcontroller and covering how to get started.
Things You Will Need
To get started with PIC microcontrollers, you will need some hardware and software. The programmer can be expensive (for an official PICKIT3), but online resources suggest that a PK3 universal programmer (open source) will work just as well (~ £20).
- All of the software that we will be using will be free (even for commercial use), but the XC8 compiler will not optimize the code as much as the paid version can. Despite that, I use XC8 free on a daily basis and am not disappointed with it! The good thing about the programmer is that you only need one and it will do most, if not all, of your PIC projects.
- Windows 7 or later PC (ideally)
- PIC Programmer (PICKIT3 clone will suffice)
- PIC16F819
- 5.6K resistor and 680 ohm resistor
- LED
- Wires
- MPLAB X – Download Page – Download Link
- XC8 – Download Page – Download Link
Important Information About PIC Microcontrollers
PIC microcontrollers are simple devices that have great I/O capabilities and usually have many peripherals. Thanks to their programmable capability and package-friendly outlines (DIP), they are ideal devices for many hobby projects. So what do we need to know about these devices at this point?
- All PICs have power supply pins that need to be connected (VDD and VSS)
- All PICs have programming pins that need to be connected to a pin header
- Unused pins can usually be left unconnected unless the datasheet specifically says otherwise
- Many devices can be supplied with a wide voltage supply (3.3V to 5V is common)
The PIC that we will be using will be the PIC16F819. Why? Well, the PIC16F819 is arguably one of the best devices when it comes to peripherals, pin count, and price! While this chip may cost a few bucks on its own, they can be as low as $2 from distributors such as Farnell, Digi-Key, and Mouser.
Key Features of the PIC16F819
So what features can be found on the PIC16F819?
- Internal oscillator (8MHz)
- 16 I/O pins
- Analog-to-Digital Converter
- Three timers (2 8-bit / 1 16-bit)
- Capture, compare, PWM
- SSP Port (SPI and I2C)
- Wide voltage range (2V to 5V)
- Watchdog timer
These features will allow the PIC16F819 to work in many projects, but for now we will only take advantage of the I/O pins to turn an LED on and off! But once you start to get used to microcontrollers, you will quickly use all of these features to produce rich projects. So what does this chip look like and what do the pins do? The diagram below shows the PIC16F819 in its 18-pin DIP package and what each pin can do.
The Circuit
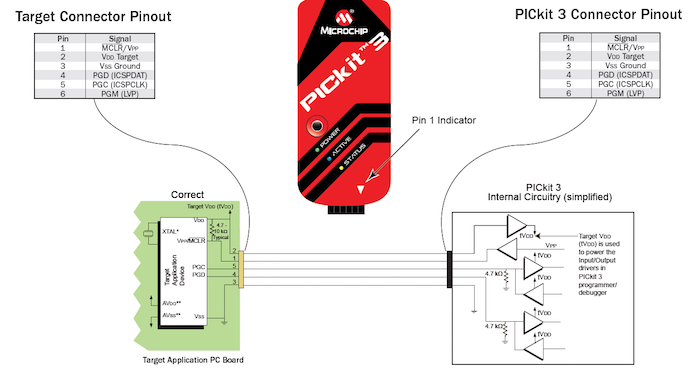
PIC devices use a very simple programming header that consists of either 5 or 6 pins. All PICs use the MCLR, VDD, VSS, PGD, and PGC pins, but older devices may not use the PGM pin. Before we look at our basic circuit let’s start by looking at the PICKIT3 itself:
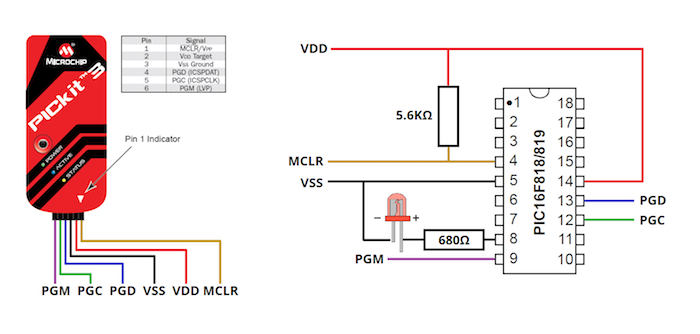
The objective of our test is to get the PIC to flash an LED. Therefore we need to connect our PIC to an LED and the PICKIT3 as well as providing all the needed passive components to make that happen!
How to Install MPLAB X and XC8
Before we can program our PIC, we need to get MPLAB X and XC8 installed.
MPLAB X is an IDE (integrated development environment) that provides all the tools needed to code a PIC project, including color-coded text editors, debugging controls, memory view, device configuration, and much more.
XC8 is the C compiler that allows us to use the C programming language to design programs for the PIC16 and PIC18 range. When XC8 is installed, MPLAB X will detect the XC compiler and allow us to create projects using XC8 without needing to set up complicated build information (this is why IDEs are very important).
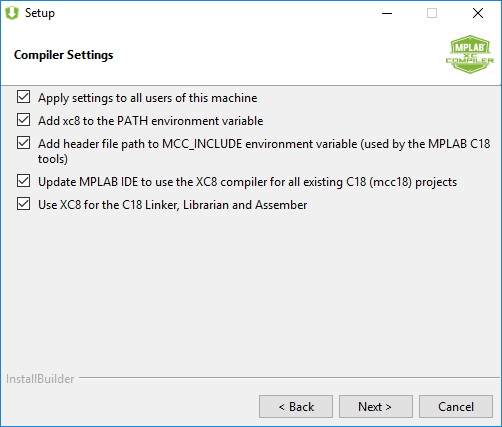
When installing XC8 and MPLAB, ensure that you tick “Add to path” boxes so that no matter where XC8 ends up, MPLAB X can still find it.
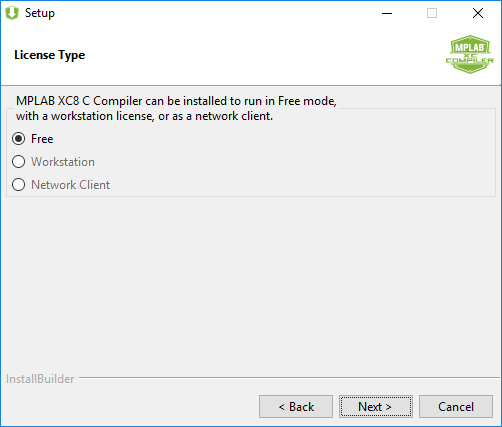
Make sure you enable the free option when installing XC8.
Enable all of these options!
Creating a PIC16 C Project
With all the software installed and the circuit made, it’s time to start by connecting the PICKIT3 to the computer via the USB port. Before proceeding, make sure that Windows recognizes the PICKIT3, because if it does not, then neither will MPLAB X. You will know that it has worked because Windows will create a bubble/pop-up that says “Device successfully installed”. With this done, start by loading MPLAB X.
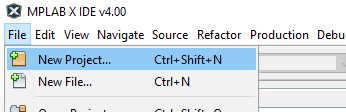
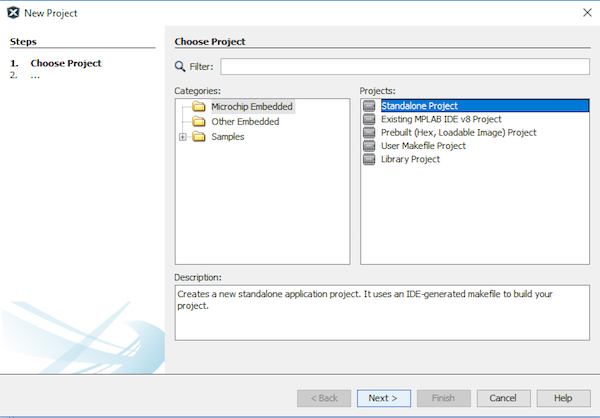
Once MPLAB X has loaded, you can create a new project by using the Wizard (recommended option). Navigate to File > New Project and in the window that pops up select “Standalone Project” before clicking “Next >”.
The next window asks for a device. Select PIC16F819 in the list and click “Next >”.
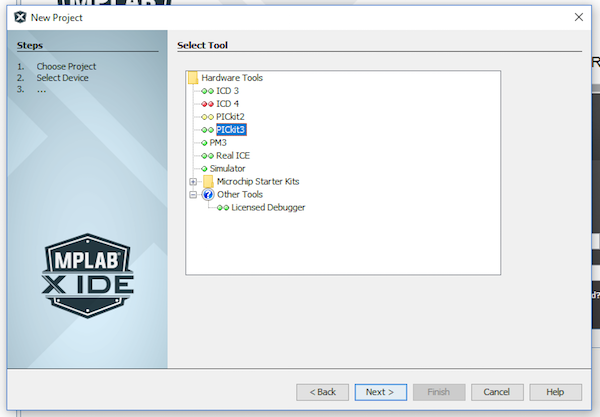
With the device selected, you will be asked which programmer tool you want to use. Choose the tool that you have, but chances are you will be using the PICKIT3 (recommended).
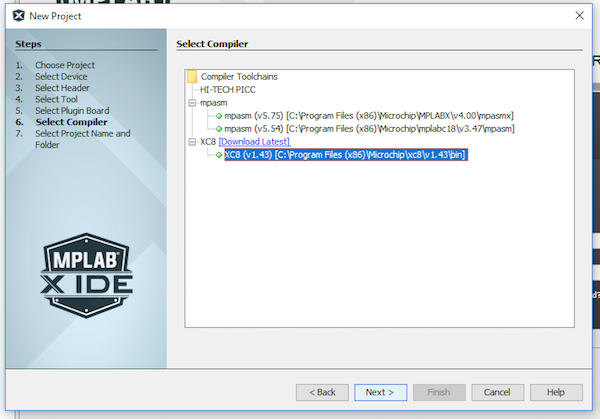
Now select the XC8 compiler as your compiler for the project.
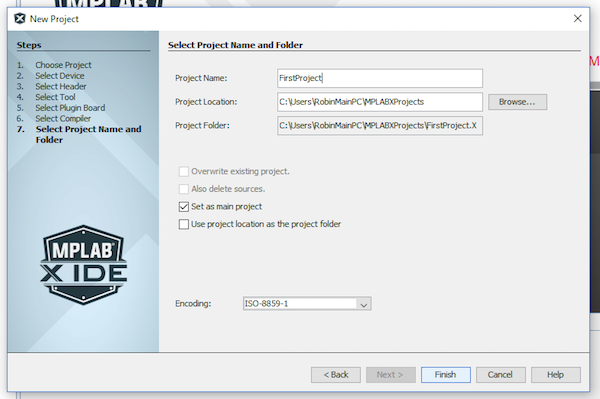
The last step is to give your project a name and choose a folder location. By default, MPLAB X puts projects in a project folder and assigns a unique folder for each project. In this tutorial we will call our project “FirstProject”.
Our project has been created and is now ready for programming. But before we start entering code to make the LED flash (demonstration purpose only), we need to tell MPLAB X to configure the PICKIT3 to output power for our circuit. If we don’t, the PICKIT3 will not be able to detect the PIC since there is no power! This is arguably the most common error for beginners! IF THERE IS NO POWER THEN THE PIC CANT WORK!
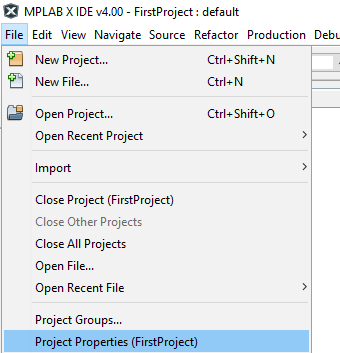
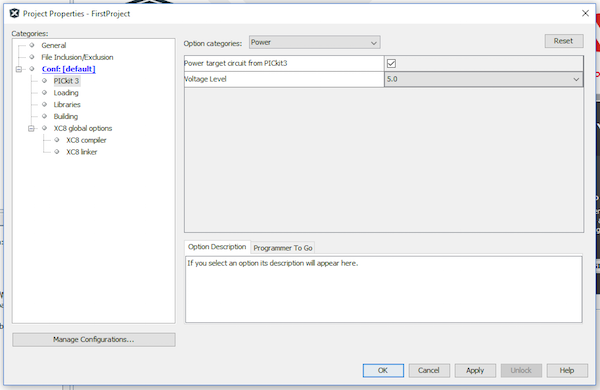
To make the PICKIT3 provide power, we first go to File > Project Properties
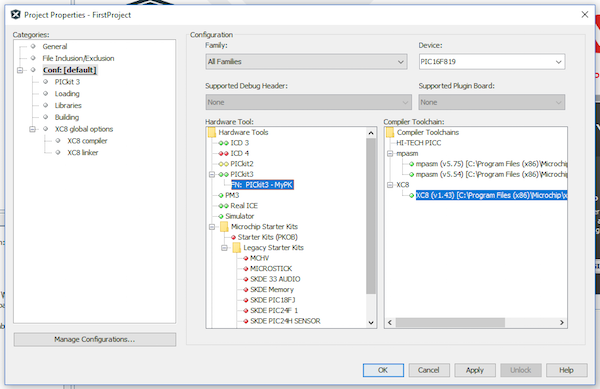
The next task is to ensure that your PICKIT3 has been properly selected. To do this, ensure that your PICKIT3 serial is selected in the list and then select PICkit 3 from the list on the left.
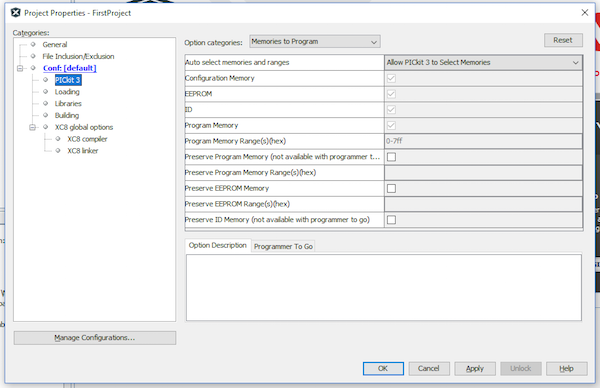
At this page, go to the “Option Categories” drop down list and select “Power”. In this window, check the tick box that says “Power target circuit from PICkit 3” and ensure that the voltage level is set to 5.0 (5V). Click apply and your PIC will now have power and if you have wired it correctly then MPLAB X will have no trouble finding and programming your device!
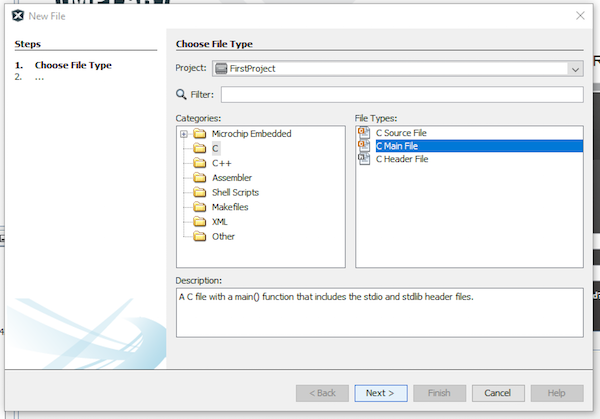
The next task is to enter the code that will make our device flash! First, go to File > New File and in the window that pops up, select C > C Main File. Once selected, select next.
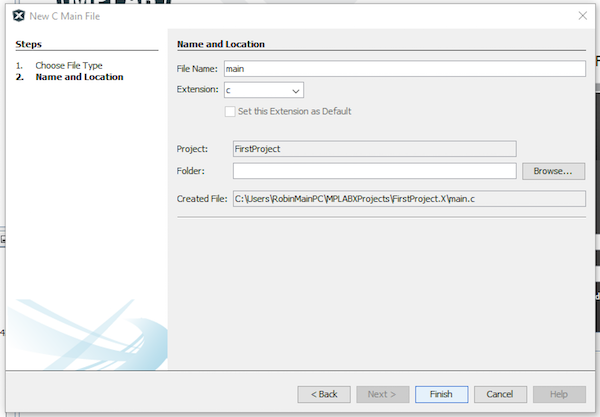
The next task is naming this file, so for now just call it main and click Finish.
MPLAB X does have its moments, and this is one of them. Despite making a new main file, MPLAB has not added it to our project, so we need to add this file for it to be compiled. Right click “Source Files” and select “Add Existing Item….”. In the dialog that opens, select the main.c file that we created and the file will now be a part of our project.
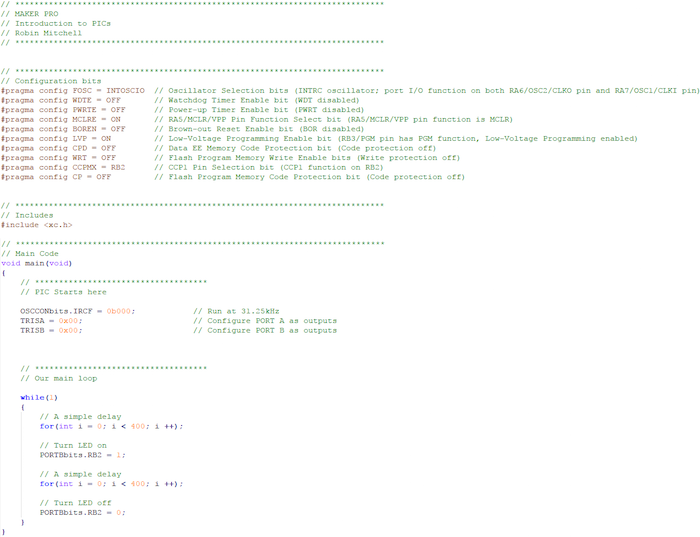
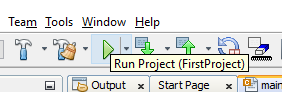
The next task in our test is to put some code into our main file that will make the LED flash. This article will not look at how C works nor will it look at specifics, as this is just an introduction, but how the code works should be somewhat self explanatory. Copy the code below into your main file (delete any content in your main file BEFORE copying this code). Save the file and then click the green arrow “Run Project”.
Assuming that there are no build errors, you should see the code compile, the programmer connect, and the LED flash on and off. That’s it! You just did your first microcontroller PIC project!