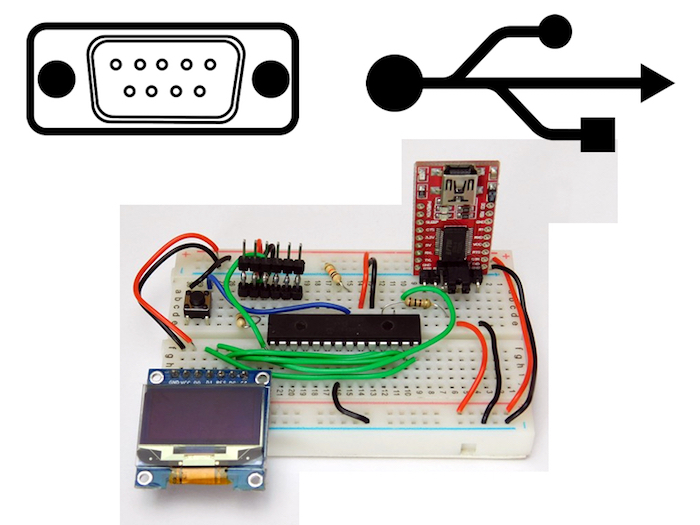
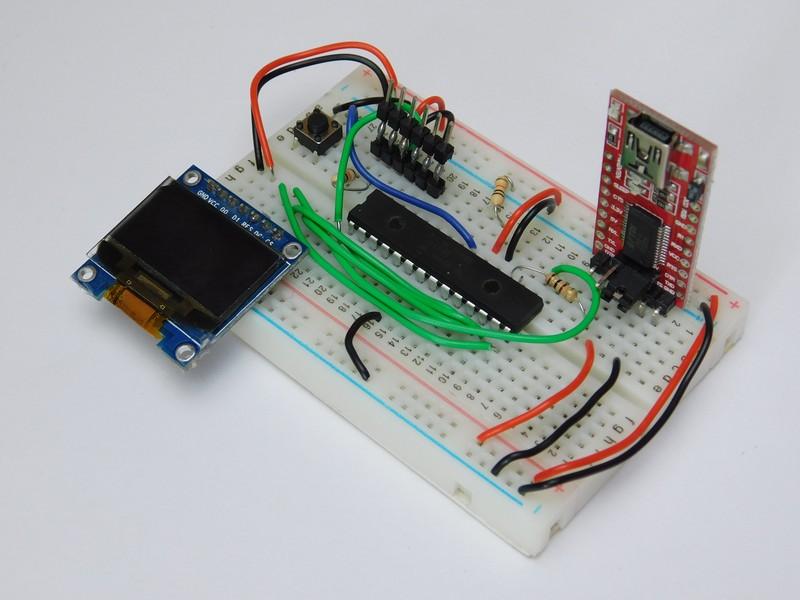
How to get a PIC and a PC to communicate with each other using a virtual serial port.
Creating circuits that use microcontrollers is great — but, if these circuits can also communicate with PCs, the possibilities of what the circuit can do become almost unlimited.
In this tutorial, we will look at how to get a PIC and a PC to communicate with each other using a virtual serial port.
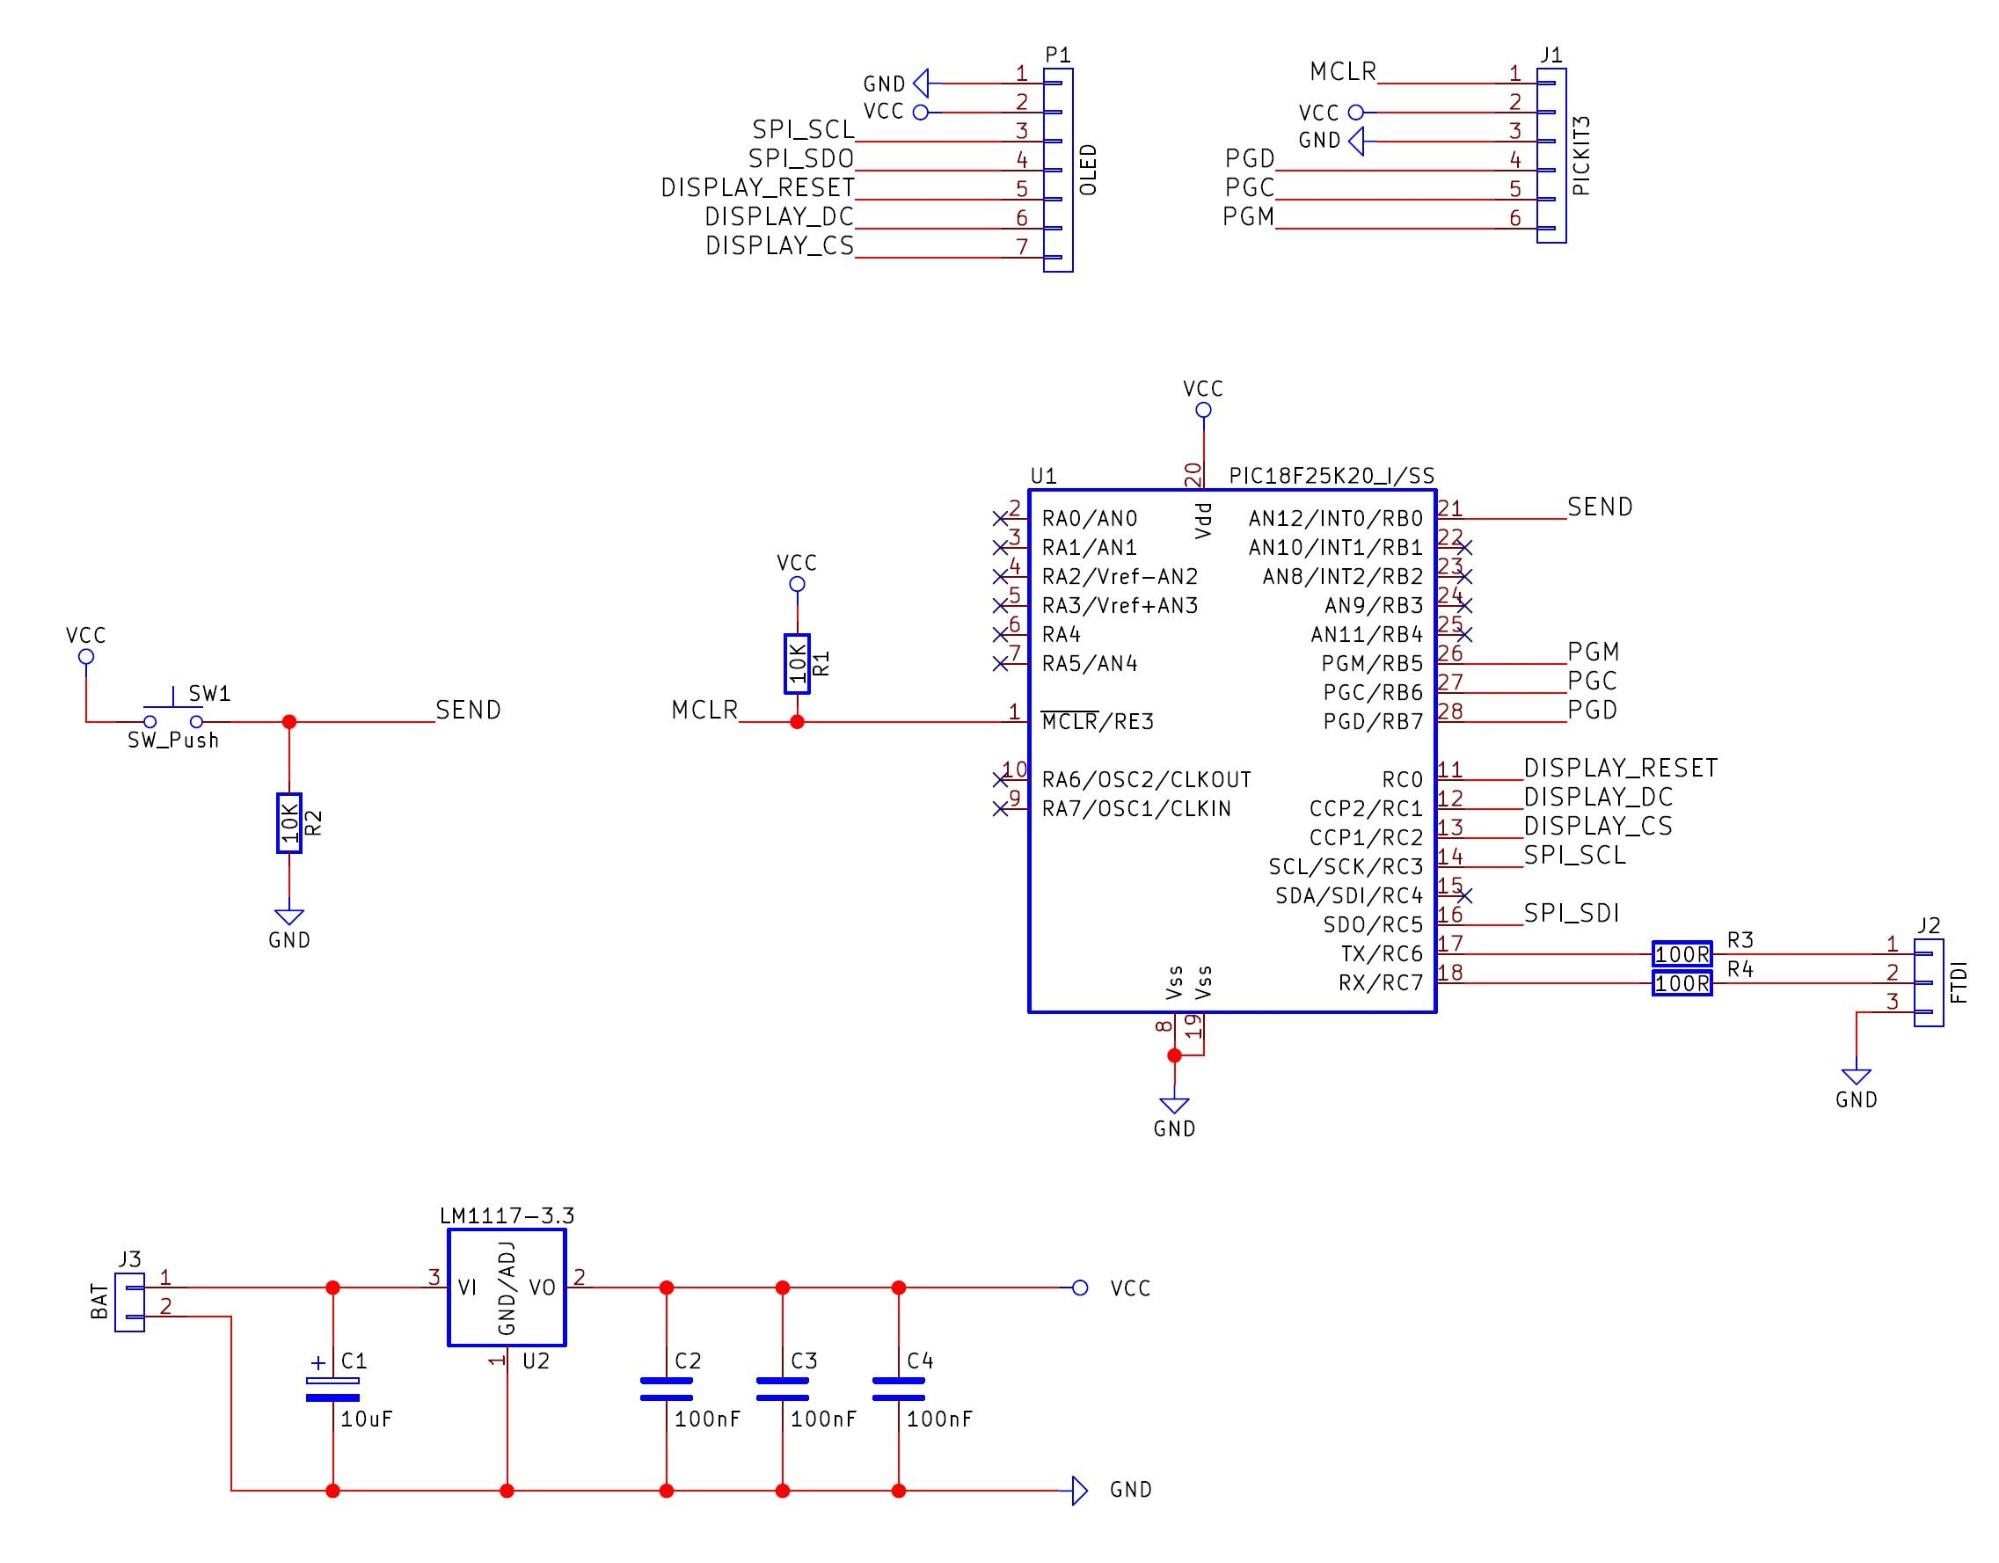
Serial Port Schematic
Prerequisites
Since many topics are covered in this tutorial, it’s important that you have some familiarity with general electronics and microcontrollers. Below is a short list of topics that you should be comfortable with before attempting this project:
- Microcontrollers – PIC18
- PIC UART Module
- Visual Studio
FTDI: Serial Communication Is Still Valid
Computers in the past had parallel and serial ports which allowed them to communicate with external hardware. Unlike the newer USB ports that are incredibly complicated to use, serial and parallel ports are a hobbyist’s best friend.
However, technology has moved on and left us in the dark with no more user-friendly ports to play with — that is, until FTDI came onto the scene.
FTDI (Future Technology Devices International) is a semiconductor device company founded in 1992. They’ve gained fame since then in the electronics world (especially the hobbyist scene) because they produce an IC that can bridge a USB port with a serial port. In other words, their IC will handle the USB side of things and present the user with a physical serial port connection on the IC, as well as a virtual serial port on a computer.
In this tutorial, we will use VB.net to produce a form program that can communicate with a PIC using a virtual serial port.
VB.net was chosen for this project because, in the author’s opinion and experience, VB.net is more user-friendly when dealing with serial ports. Unlike C++ and C#, VB.net is more forgiving and makes code easier to understand. A serial port can be set up in VB.net in a few short lines of code. By comparison, in C++ or C#, a lot more lines are needed just to initialize the port. This does not mean that VB.net is a better language overall; it’s just a very hobby-friendly language for PIC-to-PC communication.
PIC Serial Communication
The first step in this project is to get a PIC microcontroller configured so that we can use the UART module. This initializing code is found in setup.h and it configures the UART module to operate in asynchronous mode, use 8 bits, and operate at a speed of 10417 baud. It also configures the PIC to fire an interrupt when a byte is received over UART; this is so we can immediately process incoming data to prevent data loss.
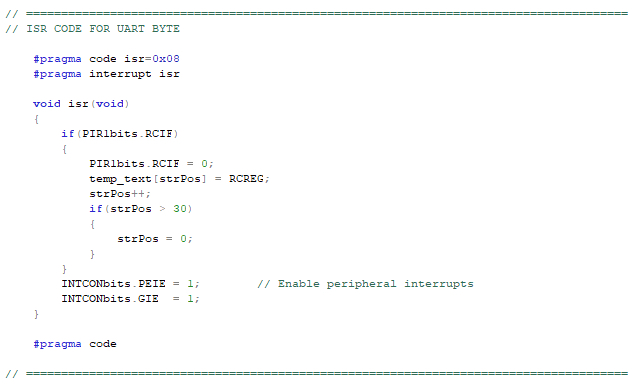
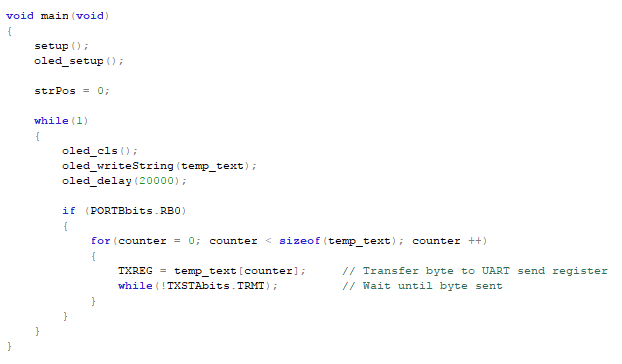
The PIC code here also has some OLED routines so we can display the text currently stored in the temp_text array. Whenever a receive interrupt is fired, the UART byte is stored into the temp_text and strPos is incremented.
The main loop will constantly clear the OLED screen, print the data found in the temp_text array, and then run a small delay (this improves OLED performance). The main loop also scans the B0 input pin, and if the pin is on, then the PIC will send the data found in temp_text to the UART to be transmitted over the serial port.
VB.net Form Application
For the FTDI to be recognized by Windows, the appropriate driver needs to be installed (these drivers can be found on the FTDI website).
The VB.net form program is created in two stages. The first stage is designing the form itself, and the second stage is coding the form.
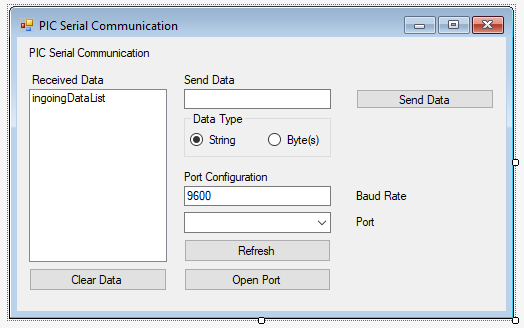
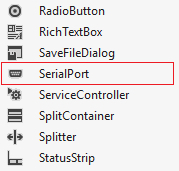
No matter what your opinion is of Microsoft, when it comes to making GUI applications, VS Express has to be one of the most fantastic IDEs ever conceived. Instead of coding buttons and elements line by line, you can just drag the objects that you want in your form, position them, and alter their appearance and properties. However, you should already know about this, as it is a pre-request! So with a new form, add all the features you see in the image below, or simply open the VB.net project attached and copy what you want. While the layout and object names are not too important, it is imperative that you drag in a serial port object, which can be found in the toolbox.
The next step is to code the program to add functionality to the objects in the form and get the serial port working. The first important function is to get the list of current serial ports that are available. When you click the refresh button, the combo box that contains all the serial port names is cleared. Then a loop iterates through all the available serial ports, adding each serial port name to the combo box.
With the serial ports found, its time to open the virtual port that will establish a connection between the PIC and the PC. When you click the open port button, configure the serial port to use a baud rate of 10417 (MUST be the same as the PIC baud rate), use no parity bits, use no handshaking, and use one stop bit. Then, open the serial port by first setting the port name to the selected item in the combo box and call the open() function. Note that this function does everything inside a try/catch, as IO can be prone to many errors.
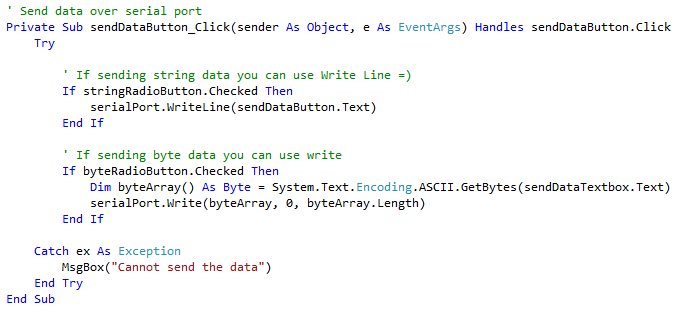
So, now that we have opened a port, we need to start sending data to the PIC. This is where the beauty of VB.net serial ports come in. The first function we could use is WriteLine, which essentially writes a string line and terminates it with a new line (usually carriage return line feed). But PICs will not typically want to receive strings, and may instead prefer byte data. Again, this is trivial in VB.net and is done by simply using the Write() function where the first parameter is an array of bytes to send, the second parameter is where to start in the array, and the last parameter is the number of bytes to send.
The last important function in our form application is to receive data over the serial port. Again, like many VB.net functions, this is trivial and can be done with one of two functions: ReadLine() and Read(). ReadLine is useful when receiving a string that is terminated with a new line, but it can cause your program to hang, because it waits until an entire line has been received. The second read function is Read() and works in the same way that Write does, where the first parameter is the array to store data into, the second parameter is where to start storing the data in the array, and the last parameter is the number of bytes to read from the buffer.
Construction
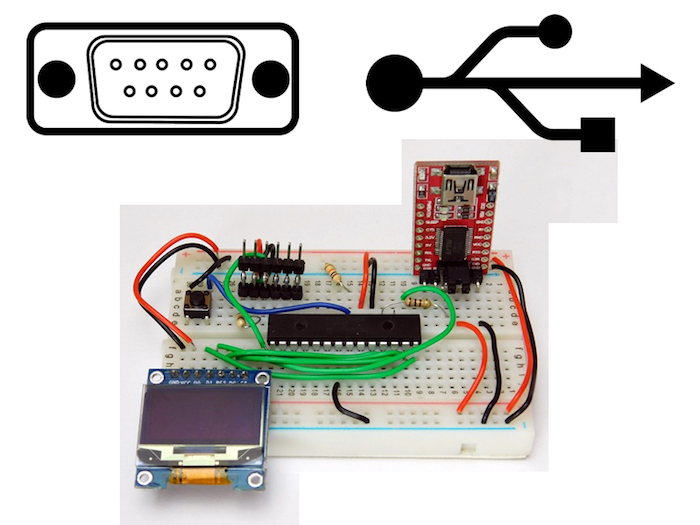
The PIC circuit can be made using most circuit construction techniques, but it would probably be best to use a temporary circuit if prototyping.
