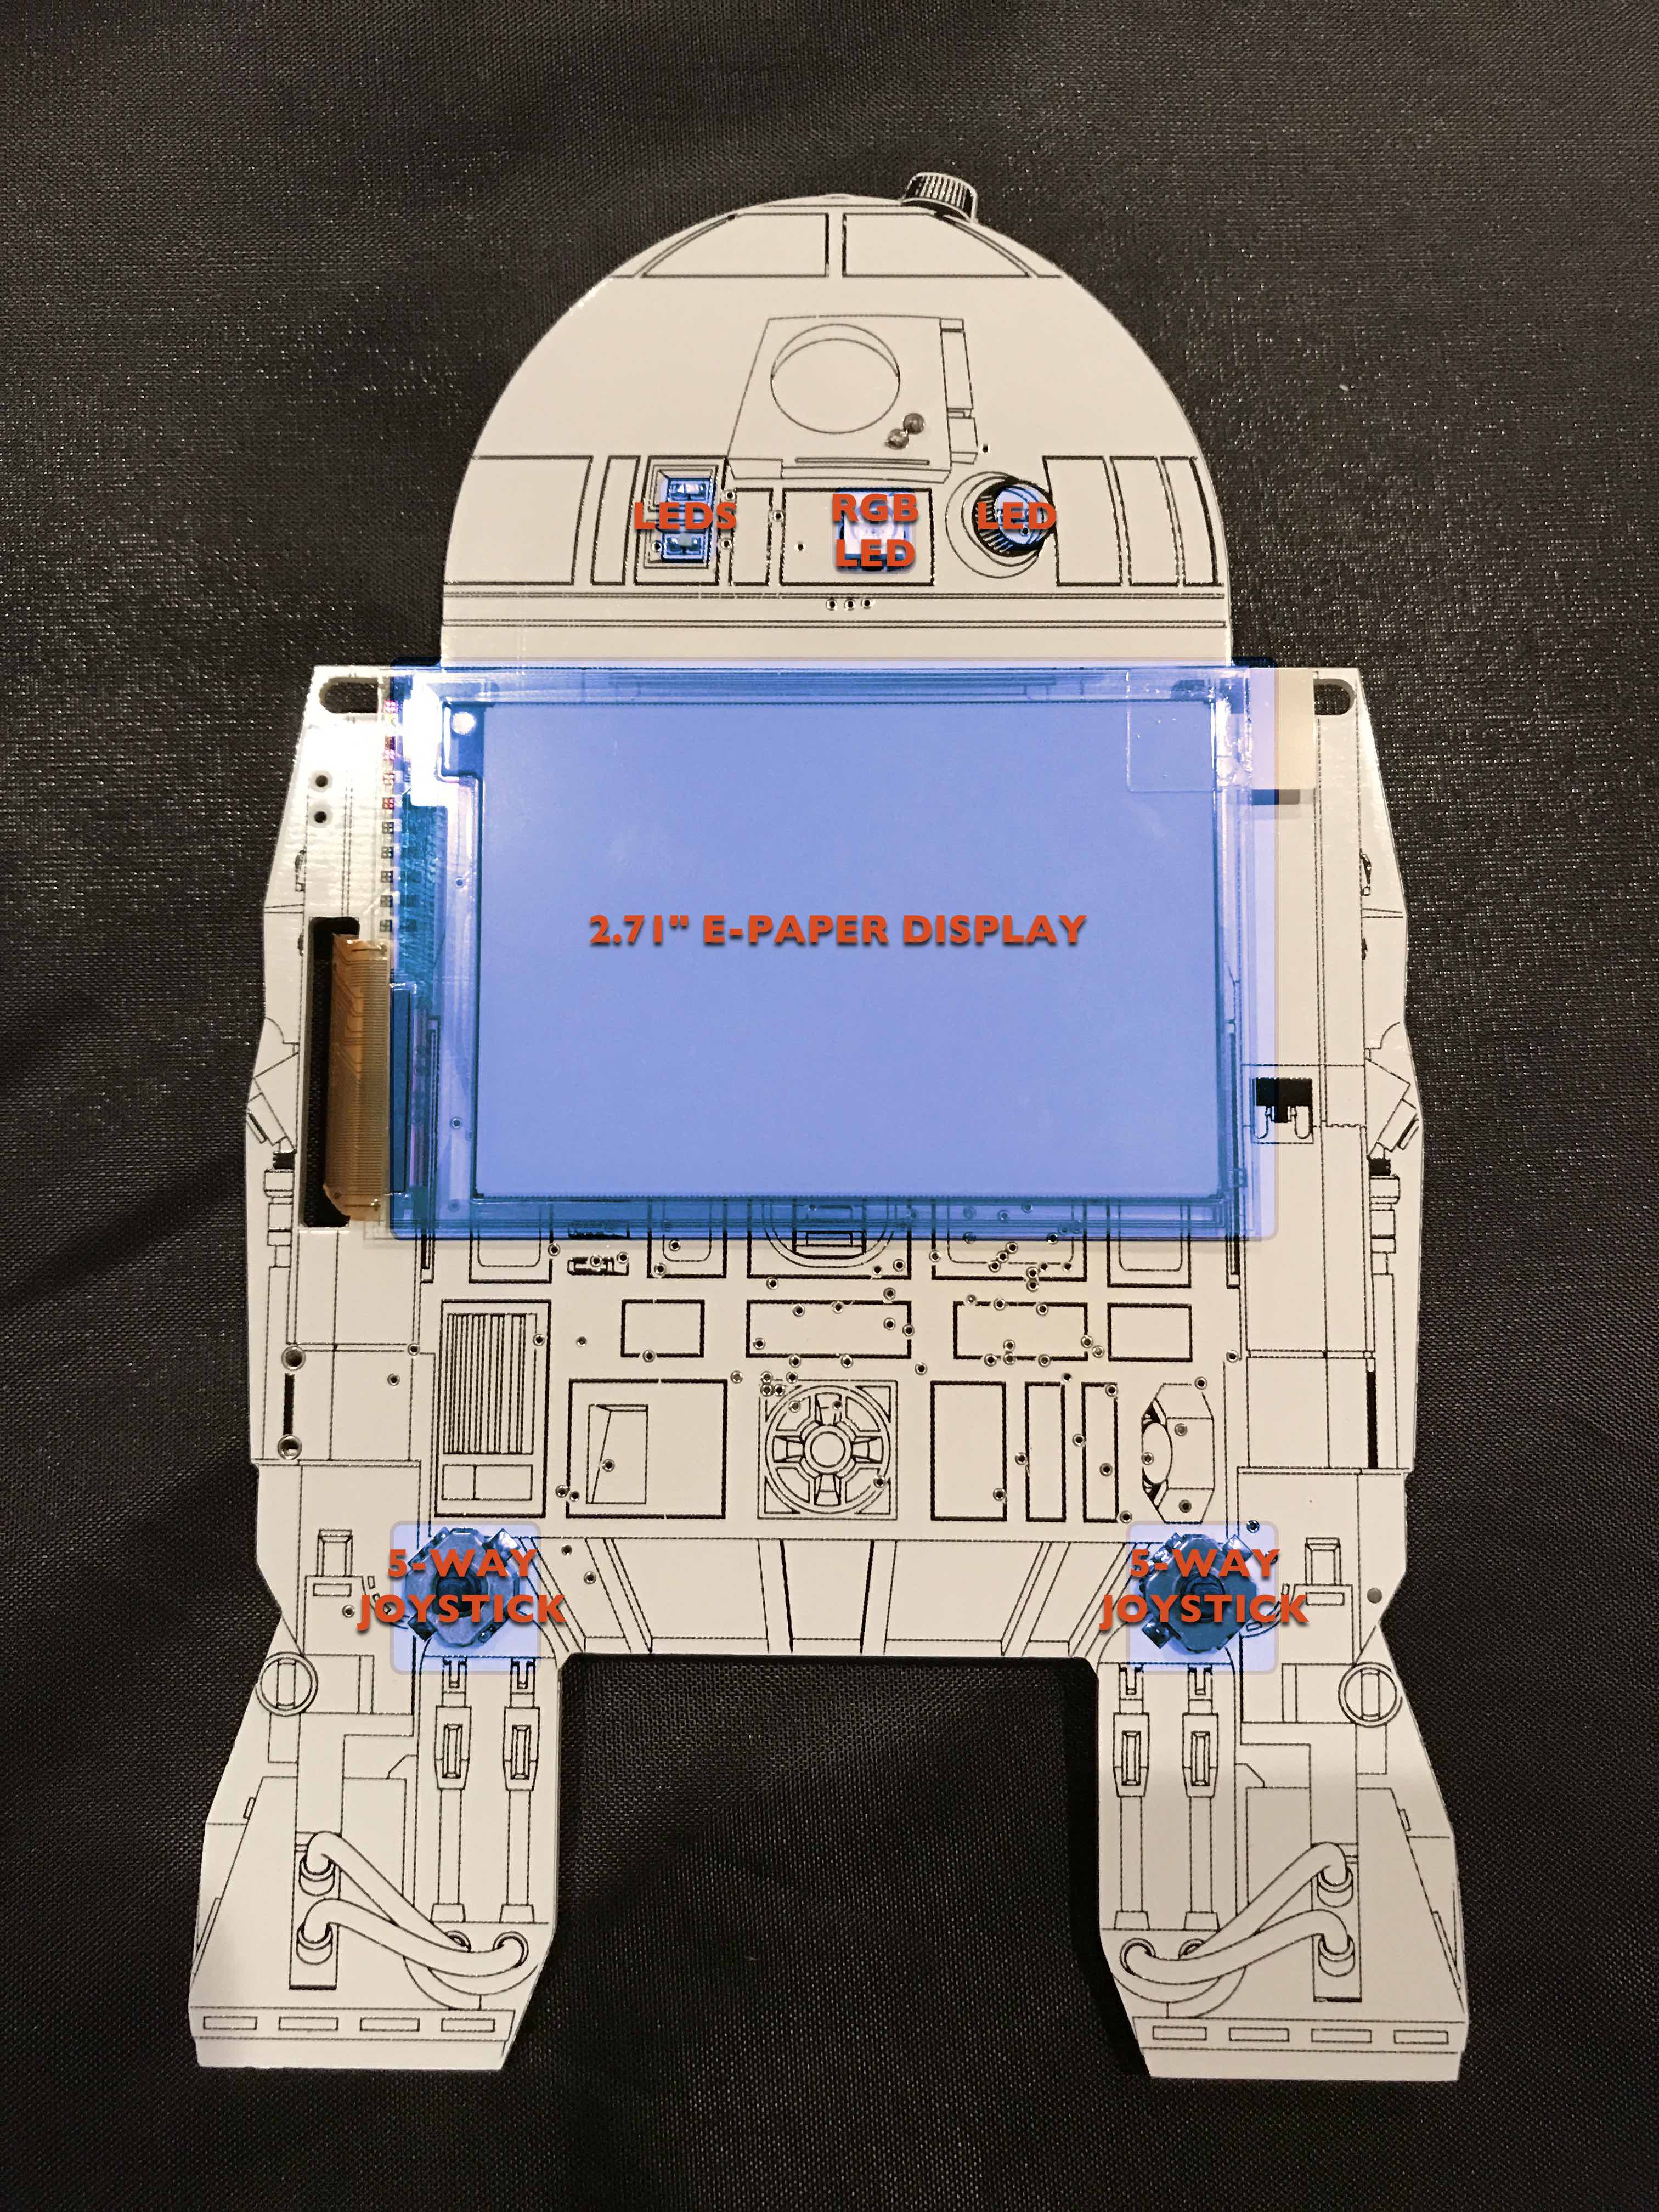
This battery-powered R2-D2 convention badge uses a microcontroller and an e-ink display.
Embedded engineers can be found working across a wide range of consumer, industrial, and automotive designs. Well-versed in getting the most out of a microcontroller, they are the brains behind many of the appliances, devices, and systems we use as part of our everyday lives at home and at work. Every so often, and usually for the very few, an embedded developer might have the opportunity to work on something very different from a traditional design. That was the situation I happily found myself in recently, although for me, it wasn’t as a result of my normal daytime job.
I’m part of a 20,000 member (and growing) global voluntary organization called the R2-D2 Builders Club. Yes, that’s right, R2-D2 from the Lucasfilm series of Star Wars films. Globally, there are about 4,000 active members who are responsible for having created approximately 2,000 R2-D2 replica droids, many of which are used for charity fundraising. Some of them have even been used in the recent films, and the core team of builder members, such as myself, have been working closely with Lucasfilm to make their replicas identical to the original R2-D2 used in the early films.
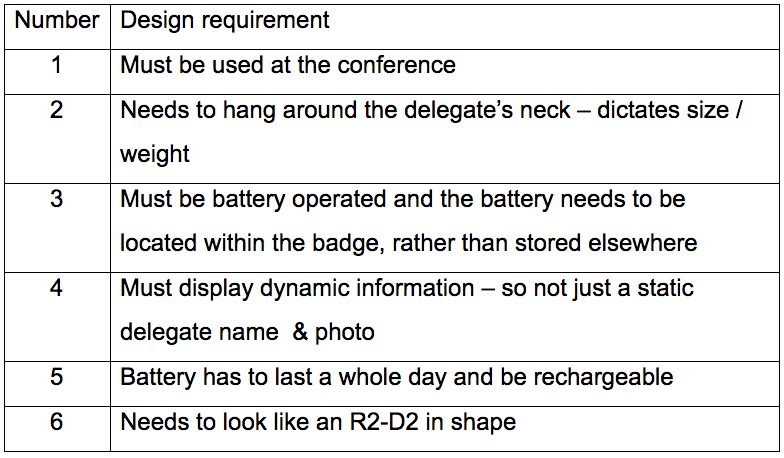
The biannual DroidCON Droid Builders conference brings like-minded droid developers together. At previous events, I enjoyed teaching delegates electronics skills and the use of different single board computers for creating dazzling lighting effects. Taking this one stage further, I thought that it would be a good idea if delegates could create their own battery-powered delegate badge using a microcontroller. Just like the initial design requirements' specification of a commercial development, I worked up the core design requirements for the badge. (See Table 1.)
Table 1. List of delegate badge design requirements
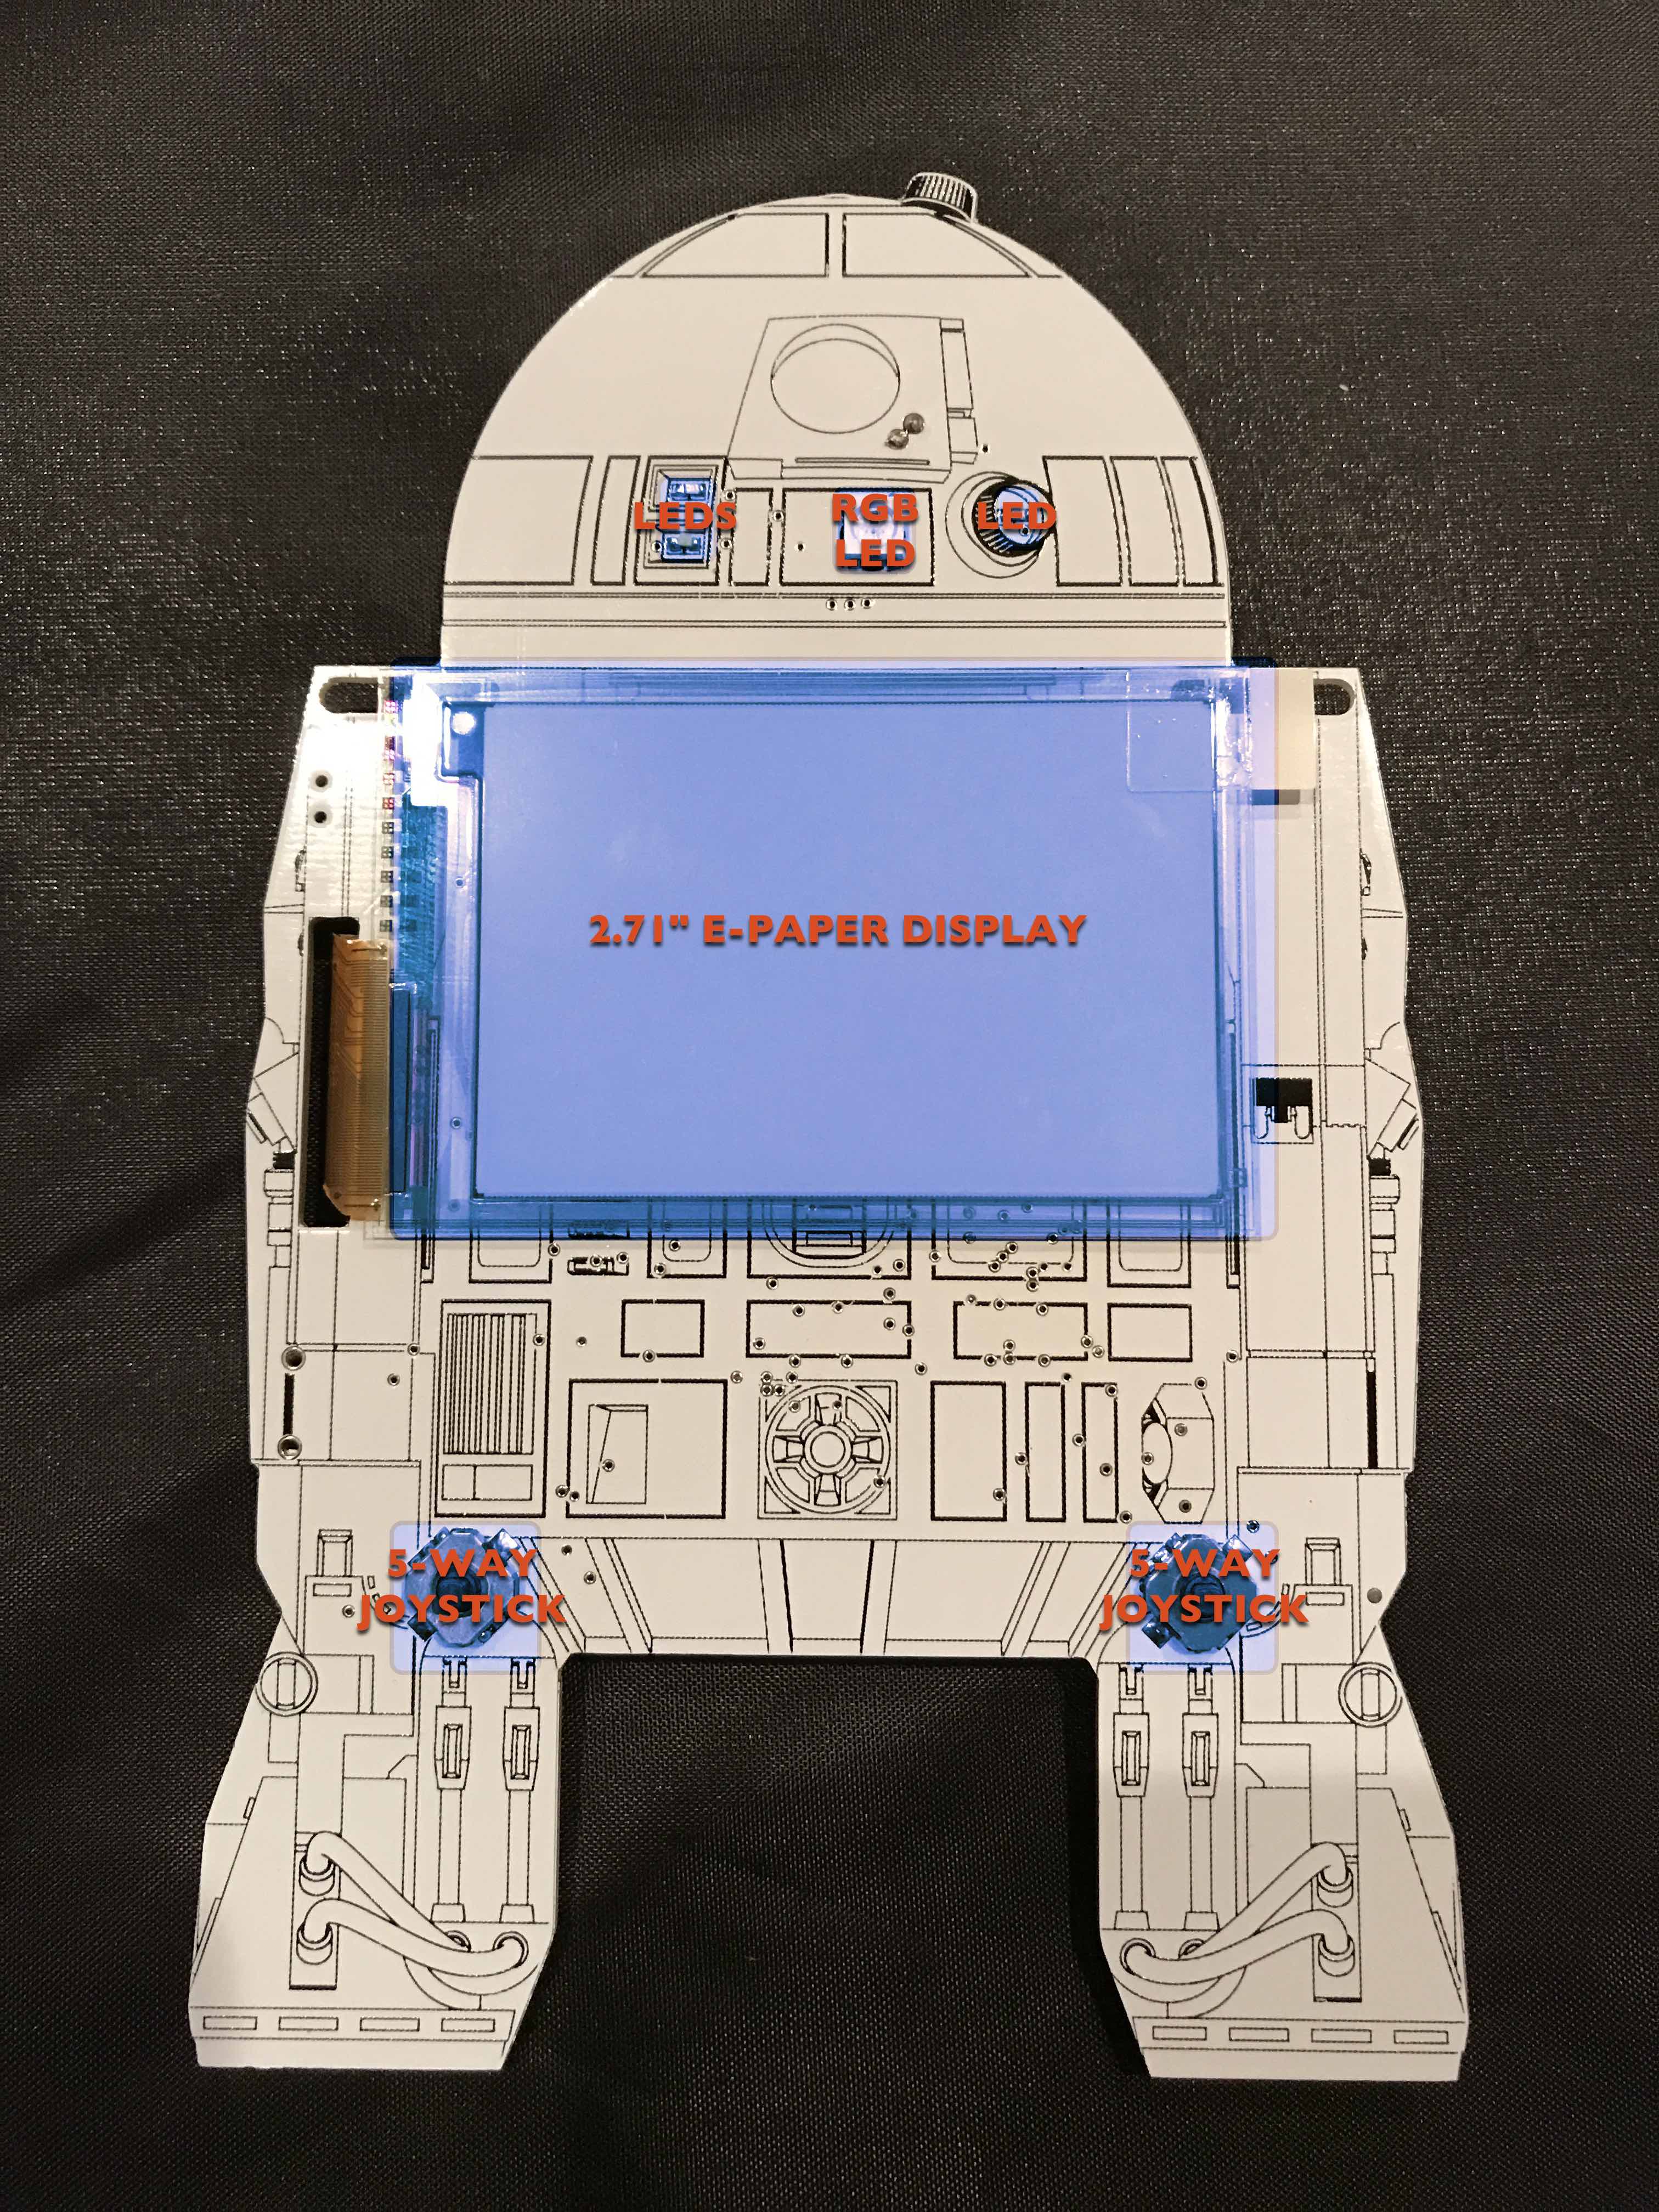
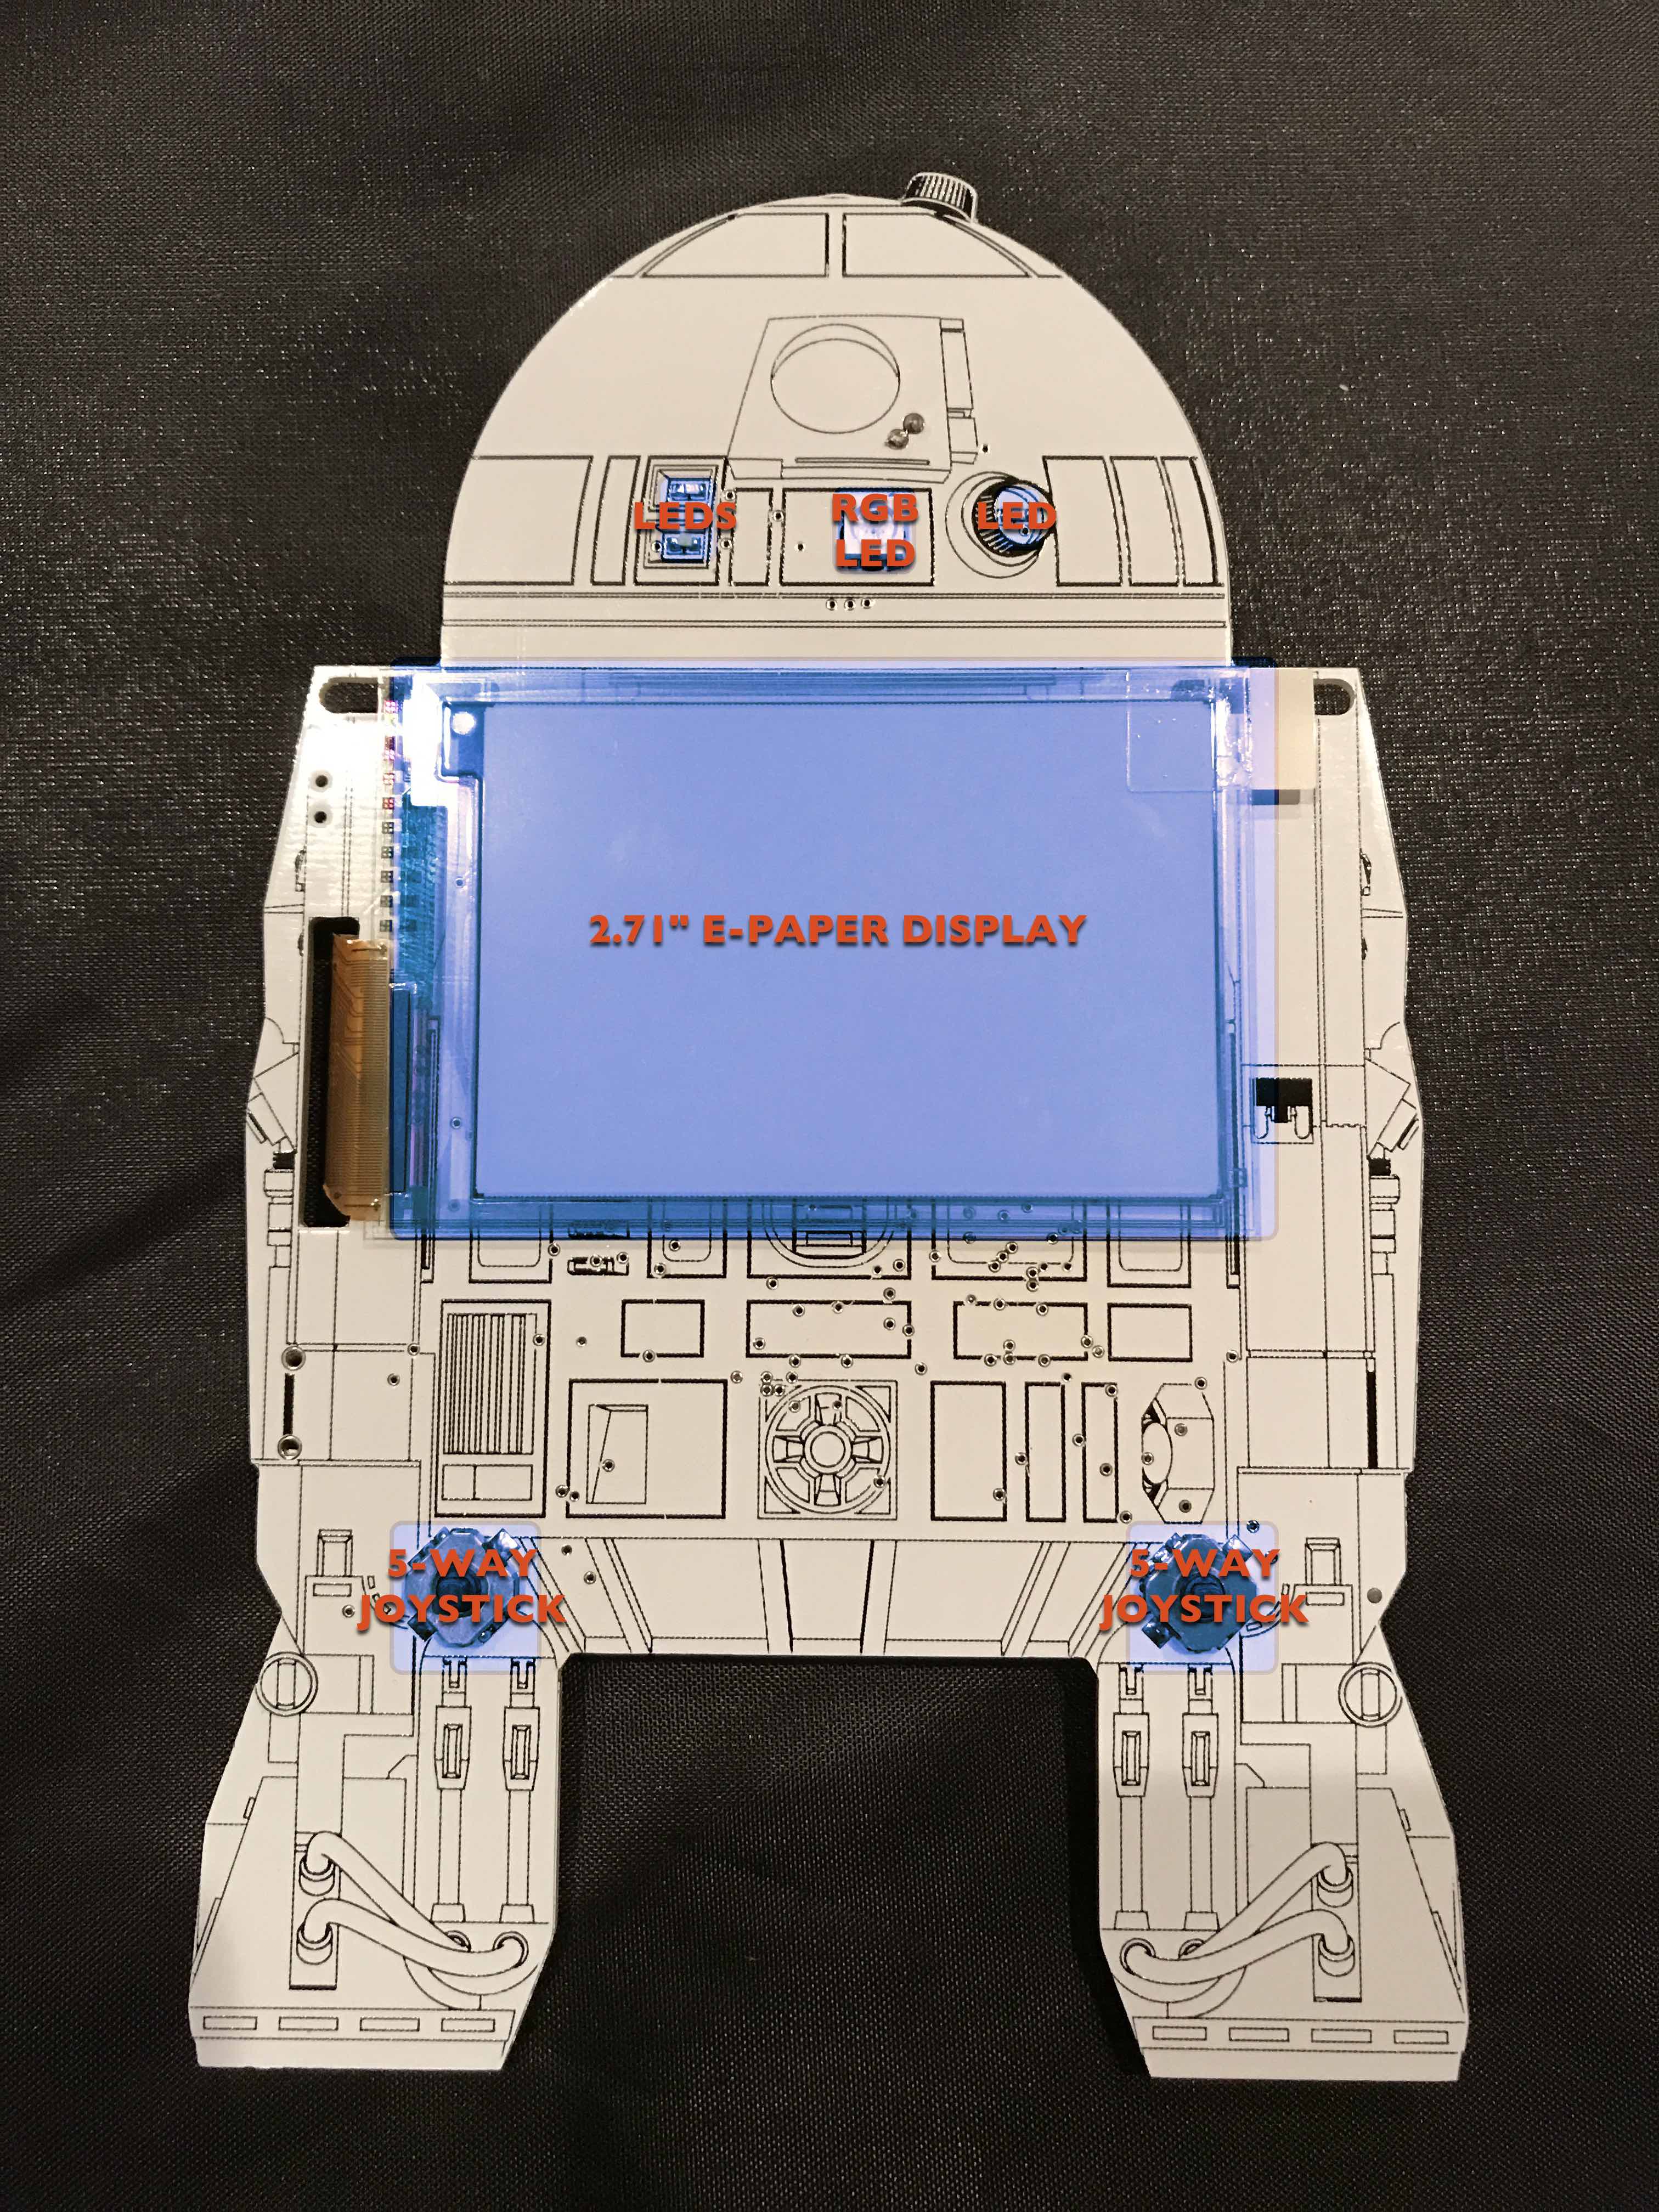
All of the above design criteria would help to shape the electronics design, but point No. 6 required permission from Lucasfilm. Any representation of an R2-D2 droid is intellectual property that is licensed by Lucasfilm Ltd., but I managed to secure their agreement, and the badge was approved. The finished badge can be seen in Figures 1 and 2.
Figure 1. Front of the R2-D2 Builders badge
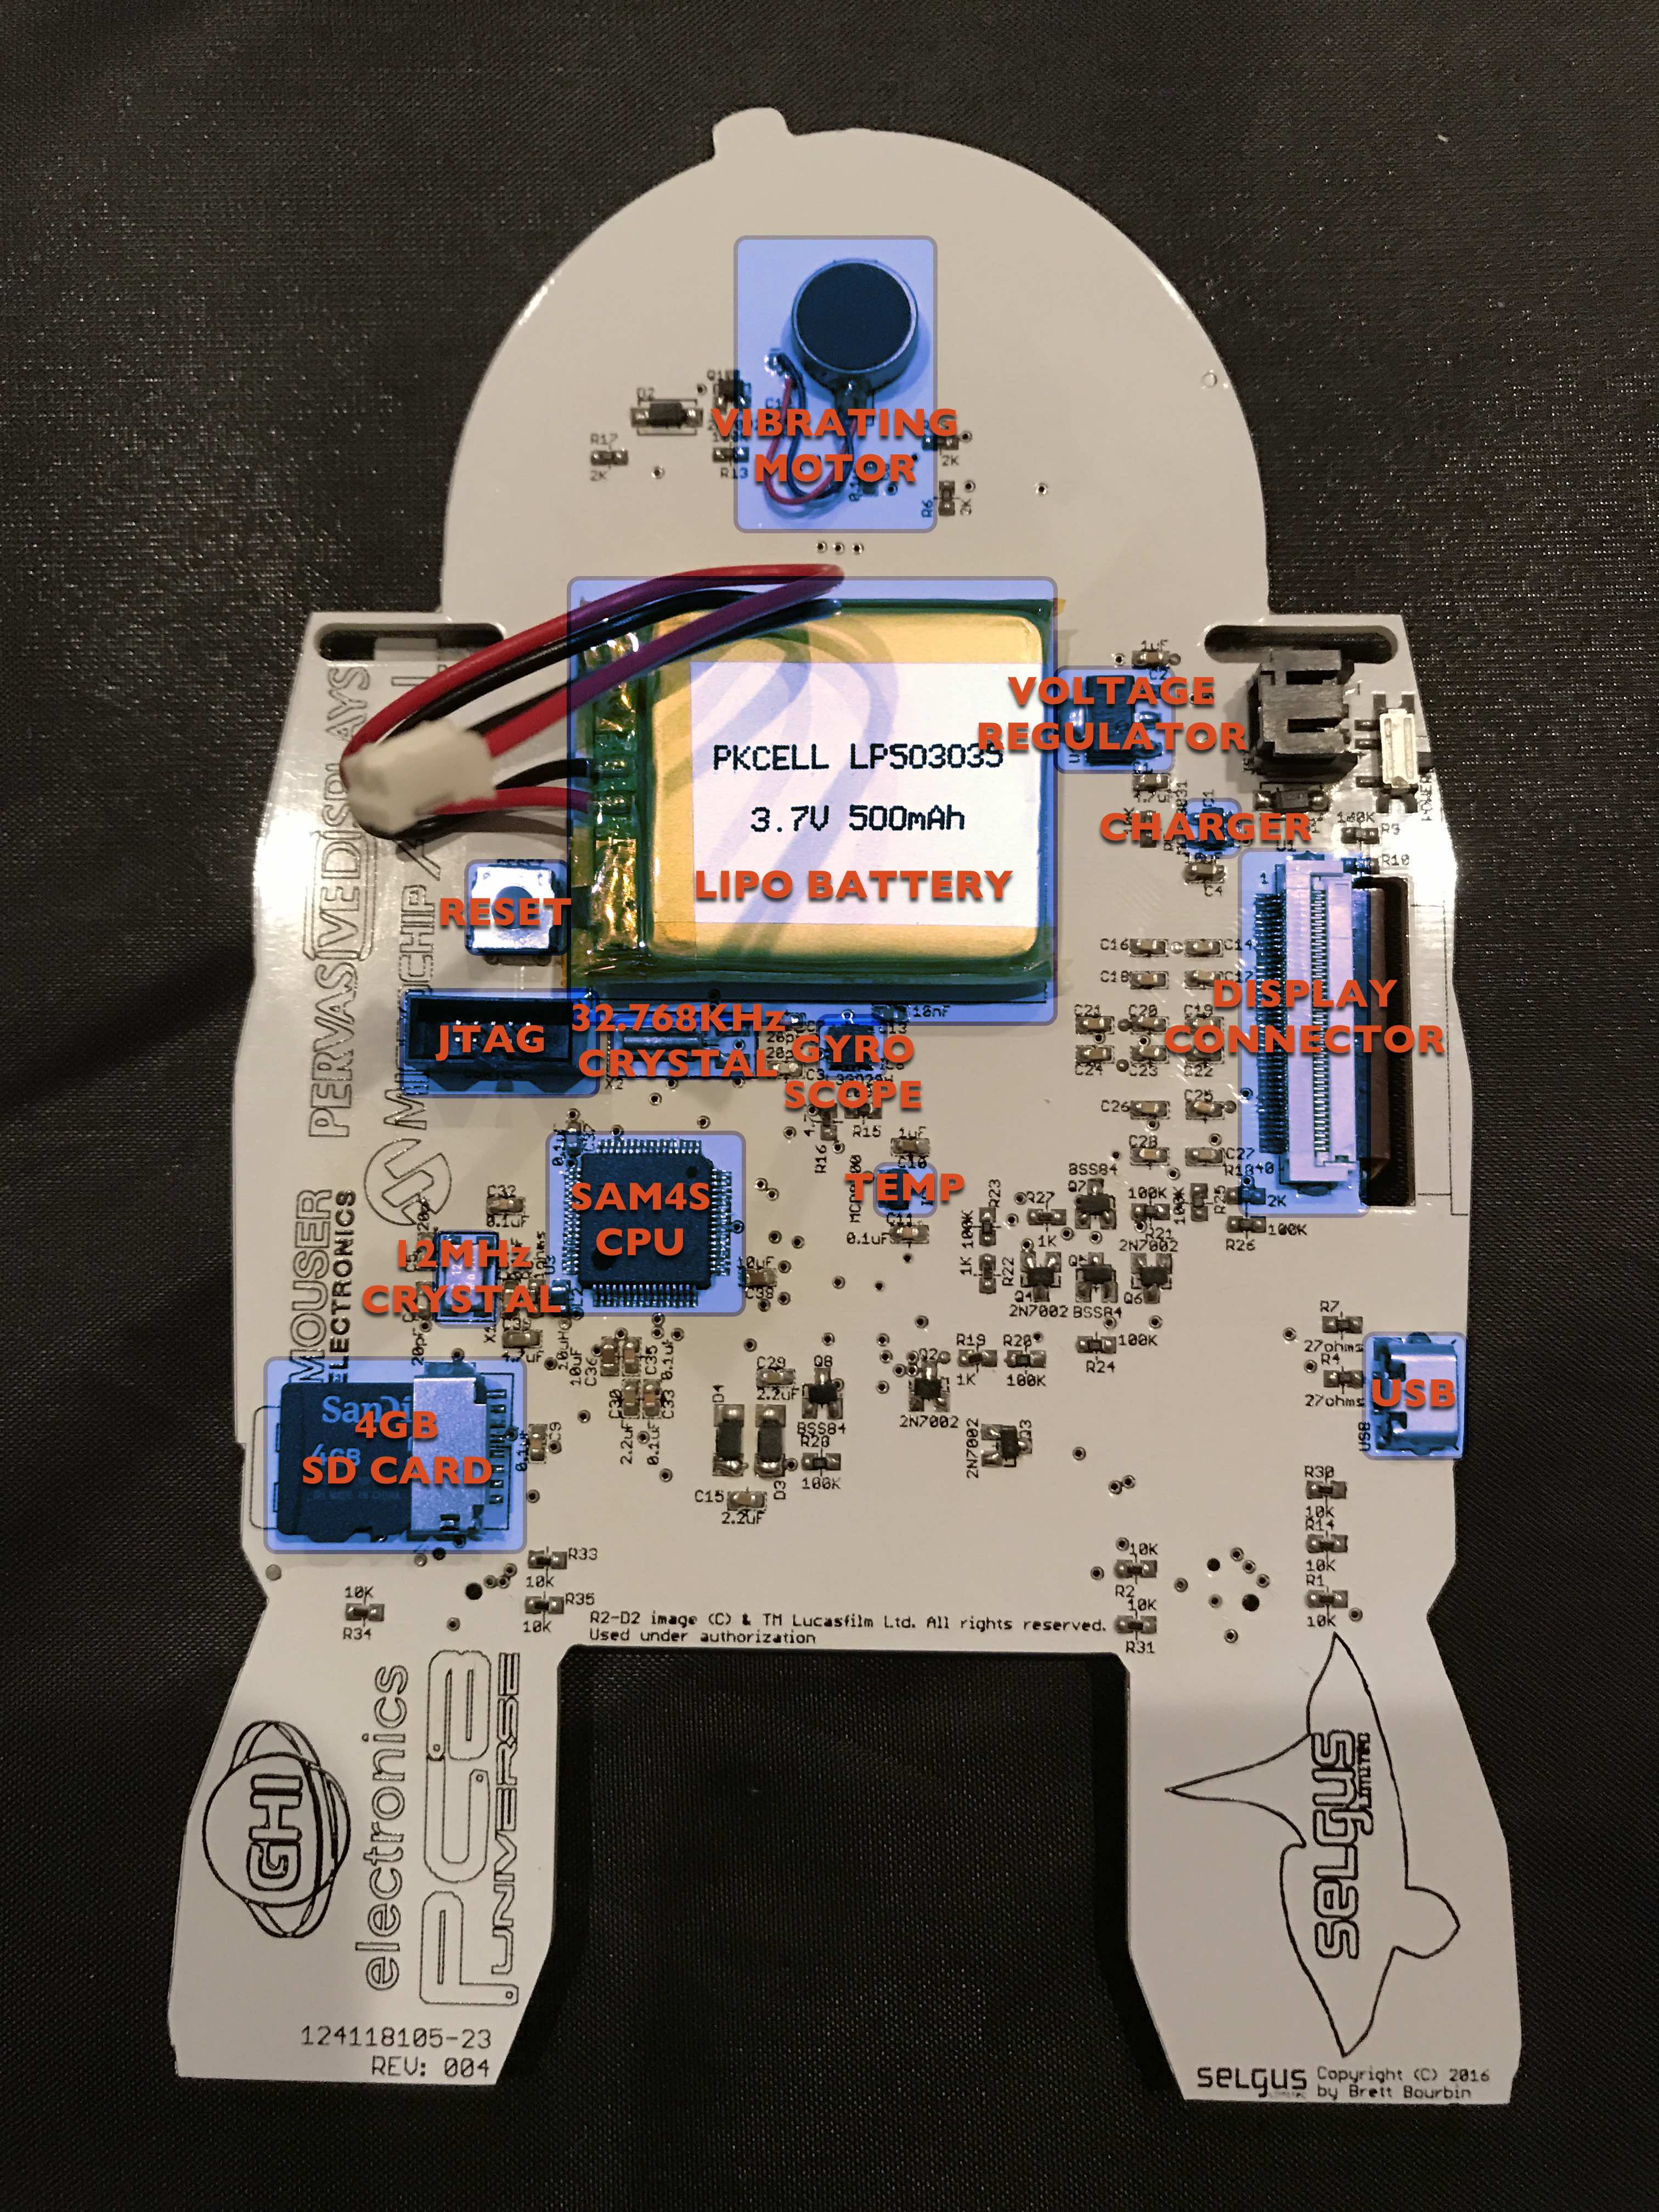
Figure 2. Back of the R2-D2 Builders badge
Each design requirement narrowed down the embedded development in a particular direction, and naturally many of them are interdependent. For example, many low-power embedded designs attempt to use a coin cell, but when you start to investigate the design options, you realize that you’ll need a battery with a larger capacity. This, in turn, leads to increasing the weight of the badge, which would become extremely uncomfortable for the wearer. Incorporating a display presented the most challenges. Initially, I thought a matrix display could be built using about 500 LEDs — a concept popular with fashion wearables. However, rendering the image would require much more MCU RAM than the Microchip/Atmel device I had been thinking of using. The biggest drawback of this approach turned out to be the current consumption, which is not much for each LED, but 500 of them meant it would require nearly 9 Amps to drive the whole matrix. The next idea was to use an OLED display that could be driven via the microcontroller and a Serial Peripheral Interface (SPI). While these looked promising, the budget of around $20 for the display out of a total $40 badge budget was exceeded by the OLED.
It was then that I discovered e-paper displays. The minimal power consumption credentials made it extremely attractive. It could display dynamic information when required, but when not changing the display information, the power consumption of the display was zero. Rather than having to budget a power overhead to power, backlight, and refresh a display, I found myself facing a design that I could add more features to with fewer constraints around the power budget.
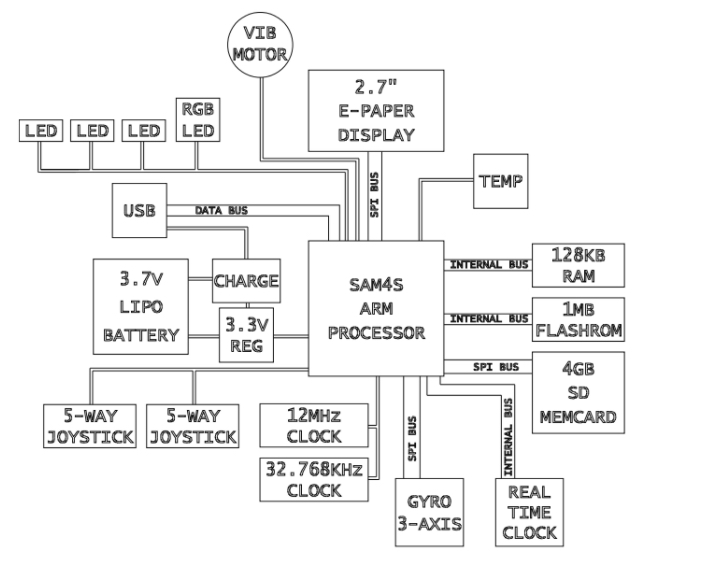
Figure 3. R2-D2 Builders badge block diagram
The final functional block diagram of my design is illustrated in Figure 2. Selecting a 2.71 inch E Ink display allowed me to incorporate a number of other software features and hardware capabilities into the design that, up until that stage, had only been on the “maybe” list. This included adding a real-time clock that could display the time accurately, which enabled delegates to store their conference schedule in the badge with automatic alarms when sessions were about to start. The alarm feature used a haptic motor to give a vibration alert to the wearer. Allowing users to navigate information stored in the badge required a method of selecting and moving through options, for which two 5-position joysticks were added to the badge front. Not only could the badge store schedule information, but I managed to add digital maps so delegates could find their way to the venue conference room with ease.
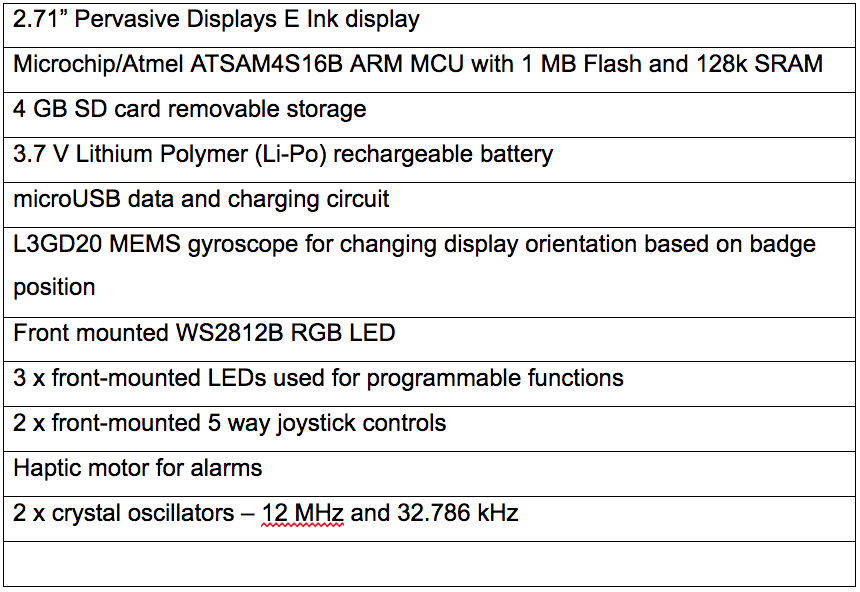
A list of the major components used in the design are listed in Table 2.
Table 2. R2-B2 Builders Club electronic badge — major components
Moving forward, I would like the badge to be capable of being used at any club conference. The SD card addition would allow ease of reconfiguration of the badge to accommodate any conference and delegate information.
Related Articles
