Create a funky synth that is based on a popular circuit called a stepped oscillator (aka an Atari Punk Console).
The 555 chip has to be one of the most iconic integrated circuits of all time and is a very popular part with both hobbyists and engineers alike. In this project, we will create a funky synth that is based on a popular circuit called a stepped oscillator (also known as an Atari Punk Console).
How Does the 555 Synth Work?
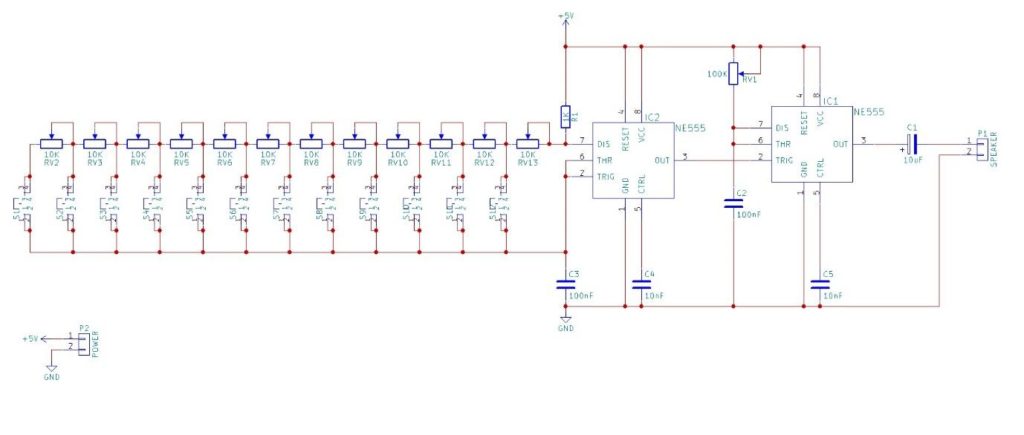
The circuit is split into two functioning units. The first unit is an astable oscillator consisting of the potentiometers RV2 to RV13, switches S1 to S12, resistor R1, capacitor C3, and 555 timer IC2. When no switches are pressed, the astable circuit cannot function as there is no connection between the charging/discharging resistors and the timing capacitor C3. When a switch is pressed, current flows from R1, through the various potentiometers and then into C3. This results in the 555 producing an oscillation that forms the base audio frequency of the synthesizer.
The second unit is a monostable formed by components RV1, C2, and the second 555 timer (IC1). When the trigger input is pulsed the 555s output goes high for a period of time depending on the resistance of RV1 and the capacitance of C2. The larger the value of either (or both) the longer the time the 555 output remains. The trigger for the monostable is connected to the output of the first oscillator which creates a continuously triggered monostable signal (and hence a tone).
When the length of a monostable pulse becomes longer than the duration between two trigger pulses, the output frequency of the monostable suddenly drops (as the monostable is triggered only once every two input triggers). If the potentiometer is varied so that the monostable length is shorter than the width of n pulses, then the frequency suddenly increases. Hence, the function of the Atari Punk Console is realized.
Construction
This circuit (like many others of mine), can easily be built using most circuit construction methods. For this project, I have used a custom PCB made on a CNC milling machine and all files needed to make your own PCB are supplied with this project.
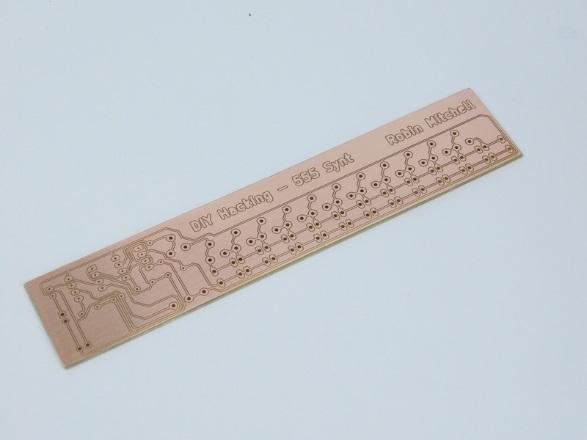
PCB underside — Note that the h on the end of synth did not mill out for unknown reasons
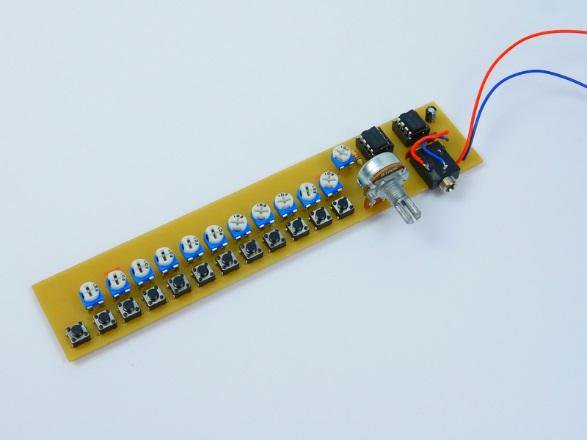
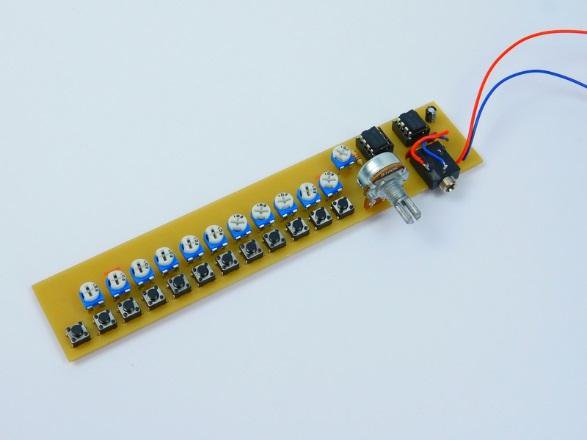
The completed synthesizer
How to Use Your 555 Synth
The POT RV13 is used to set a base resistance and the size of this is not too important (adjusting this value will adjust the overall output frequency of the synth). The individual potentiometers RV2 – RV13 are used to tune individual keys. While not obvious, the potentiometer that controls the fine tuning of each key is actually shifted such that the potentiometer responsible for a switch is located above the next switch to the right. Optionally, you can add a 3.5mm jack to connect the output of the synth to a speaker to hear the sound but ensure that the speaker has a volume adjust otherwise the sound could be very loud. All files needed for this project can be found below and include the original KiCad files and CNC machining files.
555 Synth Project Files


