Learn how to build an LTE-connected circuit with Particle Boron through Particle Cloud and Boron's LTE connection.
Now that you’ve set up and claimed ownership of the Particle Boron, we can start on building the circuit that will be controllable through the Particle Cloud and the Boron’s LTE connection.
Building the Circuit
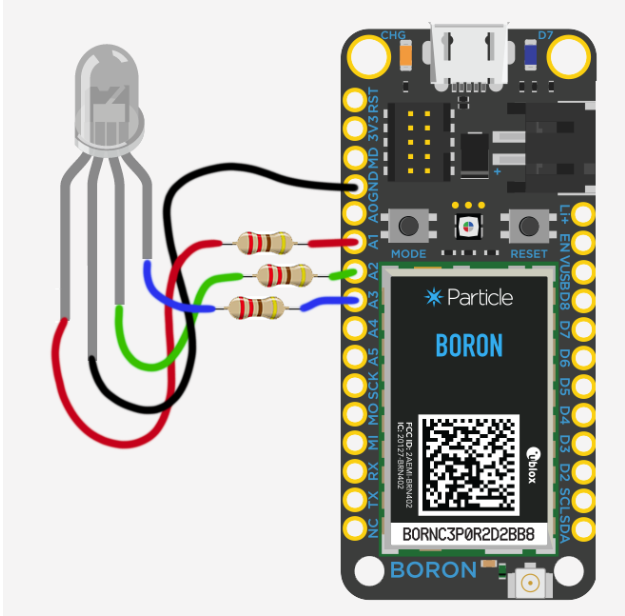
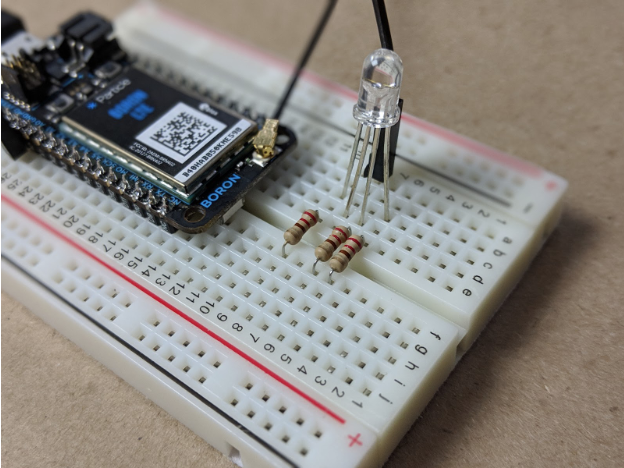
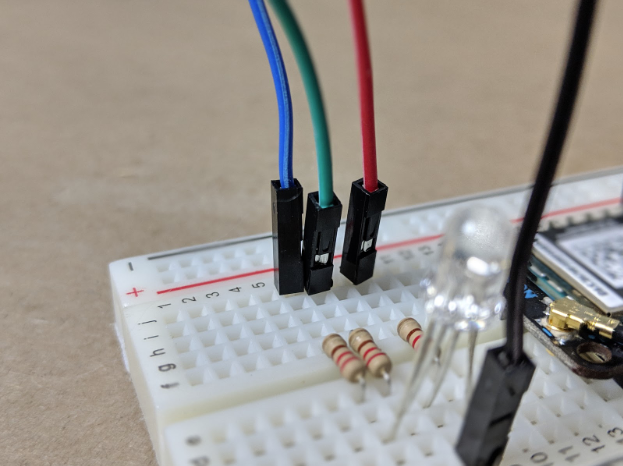
The circuit is a simple one consisting of the Particle Boron itself, RGB LED, and three current-limiting resistors for the LED. To make assembling the circuit easy, we will build it on a breadboard.
Part List
Part | Link |
|---|
Particle Boron LTE | |
Breadboard | |
RGB LED | |
3 x 220Ω Resistors | |
Circuit Assembly
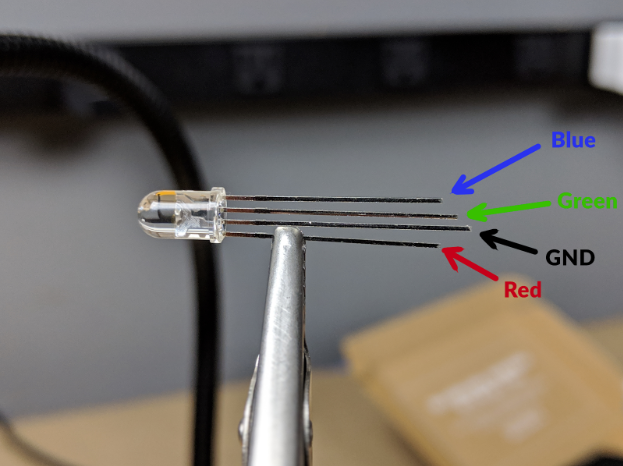
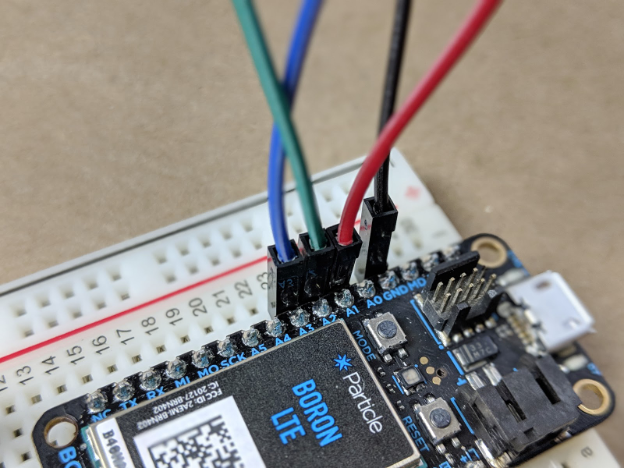
The trickiest part of assembling the circuit is identifying the connections on the RGB LED. The LED has four legs, one for ground and one for each color. Each of the legs is a different length. Refer to the table below, which lists out what each leg of the LED is responsible for.
Connections |
|---|
RGB LED | Particle Boron |
GND(longest leg) | GND |
Red(shortest leg) | A1 |
Green(second longest leg) | A2 |
Blue(third longest leg) | A3 |
A 220Ω resistor connects between each color lead on the LED and the Particle Boron pin to limit the current into the LED.
Each color lead on the LED and the Particle Boron.
Leads to the Particle Boron.
Programming the Particle Boron
With the circuit complete, we will move on to the code that will make the system run. As mentioned in the hardware overview, one of the most powerful features offered by the Particle platform is the ability to flash firmware to Particle boards wirelessly, rather than requiring a USB connection like many other microcontrollers (although you can flash the firmware to the Particle Boron over USB if you want to).
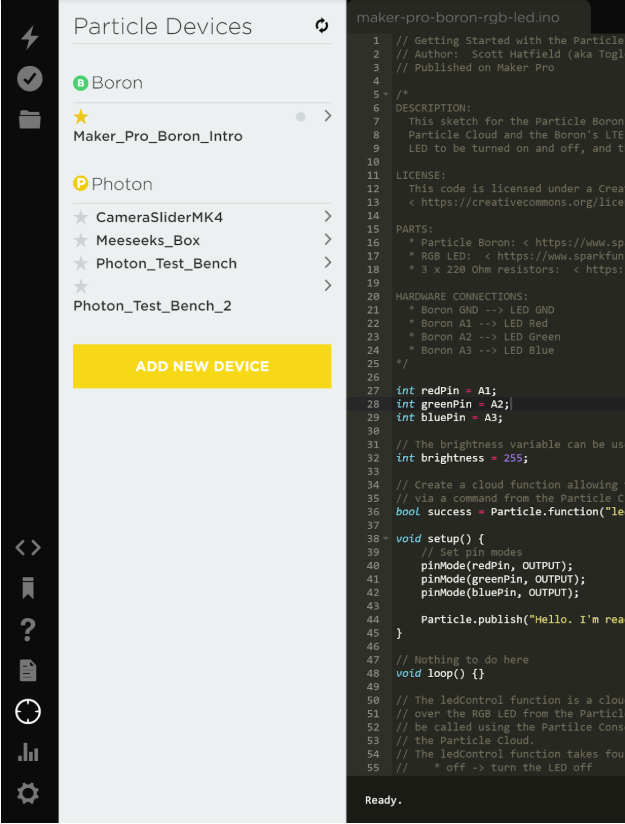
Particle has an online IDE for writing the code that will run on the Particle Boron. If you have any experience building projects with Arduino boards, the code will look extremely familiar.
Complete Code
// Getting Started with the Particle Boron
// Author:  Scott Hatfield (aka Toglefritz)
// Published on Maker Pro

int redPin = A1;
int greenPin = A2;
int bluePin = A3;

// The brightness variable can be used to control how bright the LED is (0 - 255)
int brightness = 255;

// Create a cloud function allowing the color of the LED to be set
// via a command from the Particle Cloud
bool success = Particle.function("ledControl", ledControl);

void setup() {
    // Set pin modes
    pinMode(redPin, OUTPUT);
    pinMode(greenPin, OUTPUT);
    pinMode(bluePin, OUTPUT);

    Particle.publish("Hello. I'm ready.");
}

// Nothing to do here
void loop() {}

// The ledControl function is a cloud function allowing control
// over the RGB LED from the Particle Cloud. Cloud functions can
// be called using the Particle Console or by other devices on
// the Particle Cloud.
// The ledControl function takes four arguments:
//    * off -> turn the LED off
//    * red -> set the LED to red
//    * green -> set the LED to green
//    * blue -> set the LED to blue
// Cloud functions must return int and take one String
int ledControl(String command) {
    // If the command is "red", turn off the blue and green pins
    // and only turn on the red pin
    if(command == "red") {
        analogWrite(redPin, brightness);
        analogWrite(greenPin, 0);
        analogWrite(bluePin, 0);

        return 1;
    }

    // If the command is "green", turn off the red and blue pins
    // and only turn on the green pin
    else if(command == "green") {
        analogWrite(redPin, 0);
        analogWrite(greenPin, brightness);
        analogWrite(bluePin, 0);

        return 1;
    }

    // If the command is "blue", turn off the red and green pins
    // and only turn on the blue pin
     else if(command == "blue") {
        analogWrite(redPin, 0);
        analogWrite(greenPin, 0);
        analogWrite(bluePin, brightness);

        return 1;
    }

    // If the command is "off", turn off all the LEDs
    else if(command == "off") {
        analogWrite(redPin, 0);
        analogWrite(greenPin, 0);
        analogWrite(bluePin, 0);

        return 1;
    }

    // If the command is none of the ones described above, send and error message
    else {
        Particle.publish("Error: unrecognized command");

        return 0;
    }
}
Flashing the Code to the Particle Boron
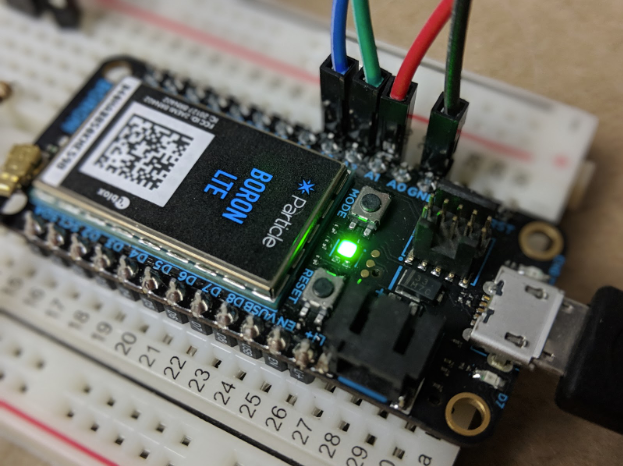
With the code above copied into your Particle IDE, we first need to make sure the Boron has a connection to the Internet before moving on. The status LED on the Particle Boron will likely be in one of two states. First, you may see a flashing green light.
If the status LED on your Particle Boron is blinking green it means that the system is attempting to establish an Internet connection.
The flashing green LED indicates that the system is searching for an Intranet connection. If your Boron is showing this status, simply wait a couple of minutes for it to establish a connection to the cloud. Typically, each time the board is power cycled, and each time you upload new code to the board, the system will return to the flashing green mode until it re-establishes an Internet connection.
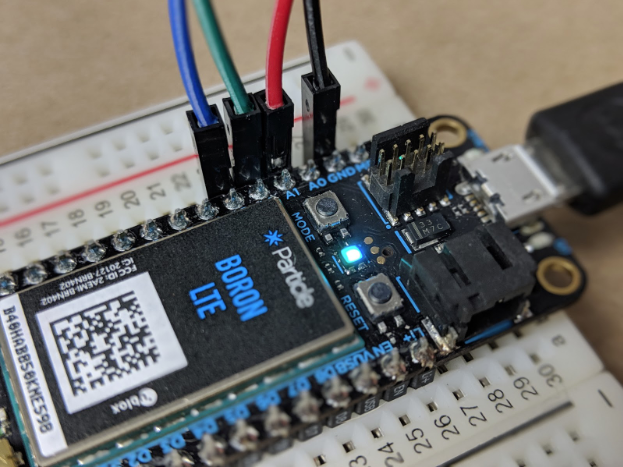
After a minute or two, the Boron should connect to the Internet through its LTE connection. This mode is indicated by a breathing cyan.
If the status LED is breathing cyan, the Boron is connected to the Internet and ready to receive your firmware upload.
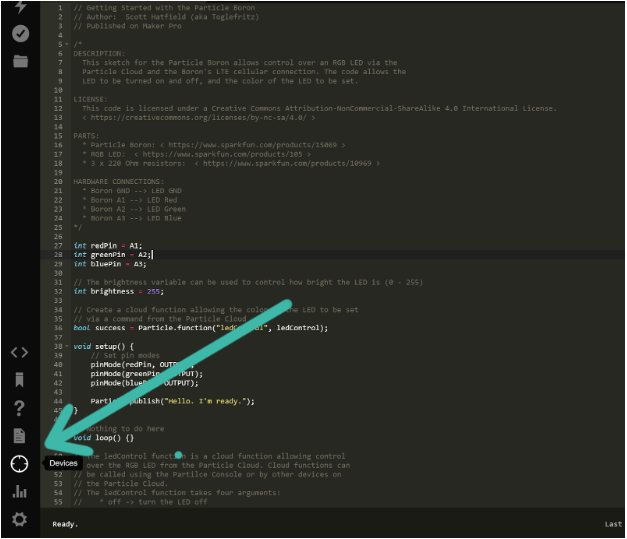
With a connection established, we can begin the process of flashing code to the board. First, we need to “target” the board in the Particle IDE, meaning we are designating the Boron as the board to which we will be uploading code. In the Particle IDE, click the Devices tab near the bottom of the screen. The icon looks like a crosshair.
Then, in the Particle Devices tab, locate the Particle Boron. You should see a cyan dot next to the device name if it is online. To target the Boron, click the star near the name of the device.
Finally, to flash the code to the Particle Boron, click the Flash button in the upper-left corner of the screen; it looks light a lightning bolt. It will take a minute or so to finish flashing the board. When the process completes, you will get a confirmation message at the bottom of the screen. During the flashing process, you will also notice that the status LED on the Boron will blink magenta. Then, as before when you first applied power, the Particle Boron will spend a minute flashing green while it re-connects to the Internet, then it will change to breathing cyan when a connection is established.
Communicating with the Particle Boron
At this point, the build is complete! All we need to do now is learn how to communicate with the Particle Boron from the Particle Cloud through the Boron’s LTE connection. First is a little background on how the code running on the Boron works. Much of the code is fairly basic with a few fundamentals from developing Arduino boards, plus some if/else statements. However, there is one important part that is unique to the Particle platform.
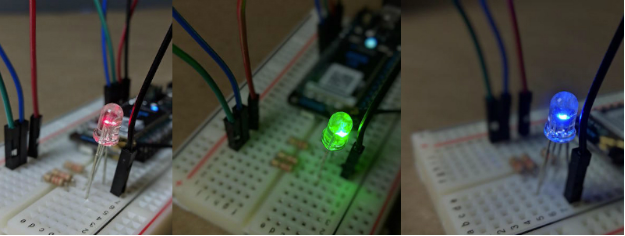
The main part of the firmware is a function called ledControl. The function takes one argument, a string. There are four possible commands we can give the function.
Function Argument | Effect |
|---|
"red" | Turn the red LED on and the blue and green off |
"green" | Turn the green LED on and the red and blue off |
"blue" | Turn the blue LED on and the red and green off |
"off" | Turn the LED completely off |
The magic happens by turning the ledControl function into a cloud function.
Particle.function allows code on the device to be run when requested from the cloud API. You typically do this when you want to control something on your Photon, say an LCD display or a buzzer, or control features in your firmware from the cloud.
- Particle Reference
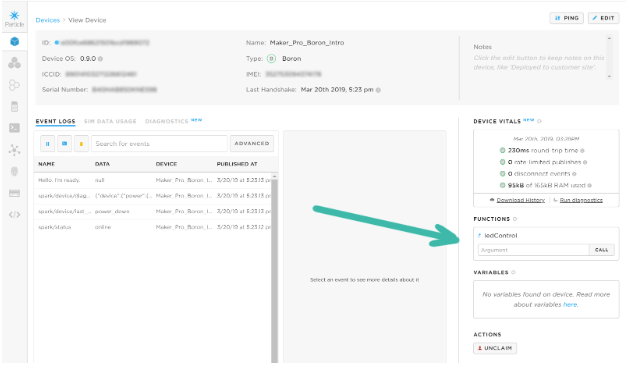
We will be able to call the ledControl from the Particle Console tool. This tool gives us access to cloud functions, as well as a lot of functionality we are not exploring in this introductory project. With the code running on the Boron, you will see the ledControl function in the right pane.
To send commands to the Particle Boron, simply enter a command into the function within the Particle Console, and press the Call button. It’s that simple.
The Particle Cloud is a powerful and versatile system upon which you can build all kinds of projects.
Have you tried this board yet? What about other LTE-connected boards? Let us know in the comments!