Try Netduino.Foundation, a powerful platform to build connected things quickly and easily with .NetMicroFramework.
Try Netduino.Foundation, a powerful platform to build connected things quickly and easily with the .NetMicroFramework and Netduino.
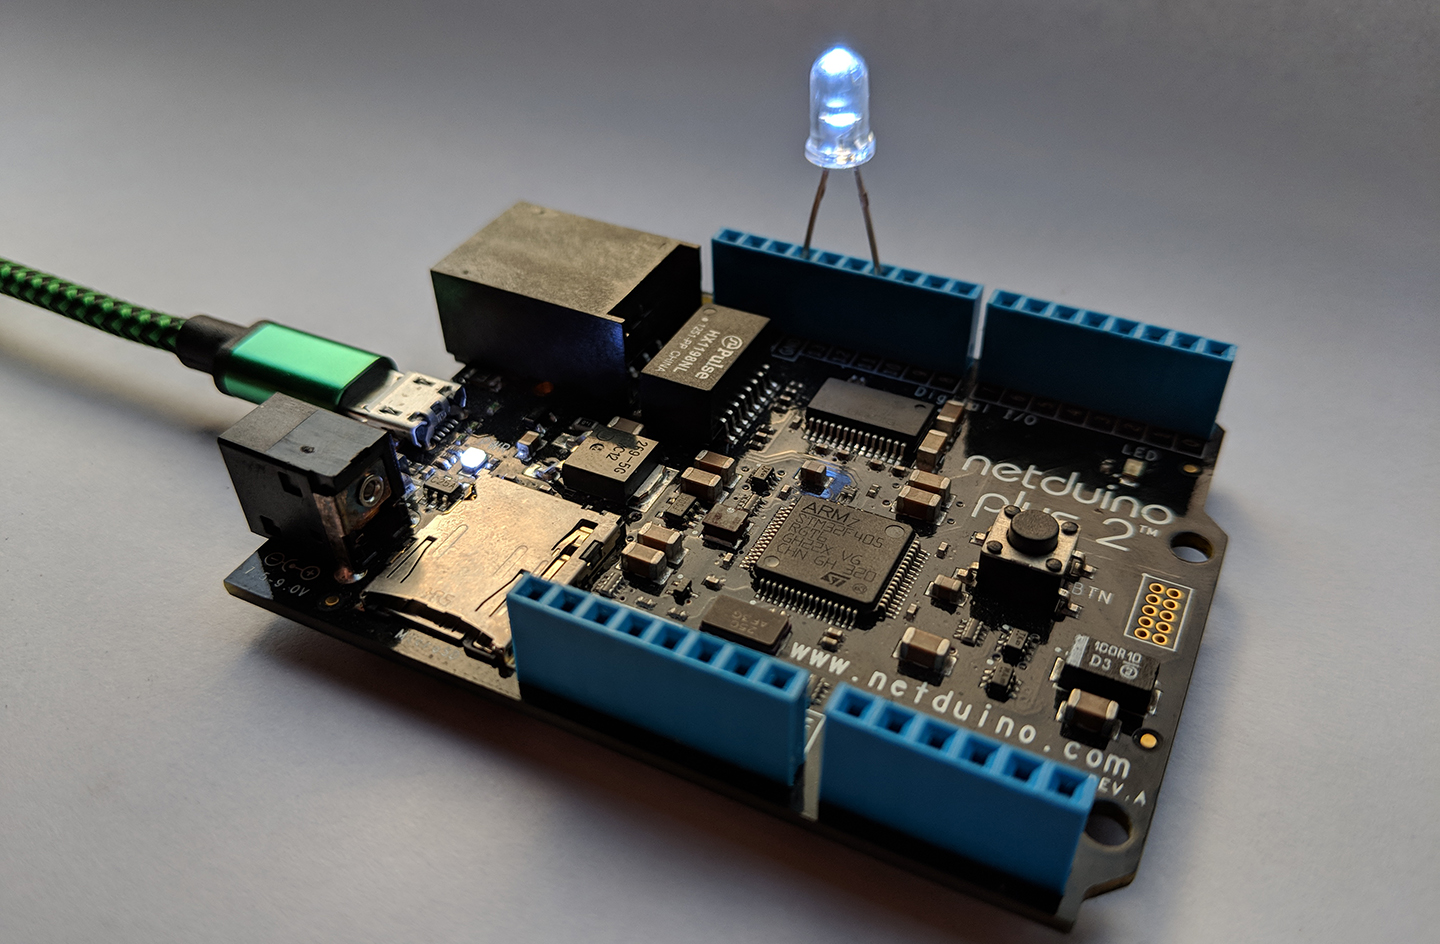
This project shows you how to control the brightness of a generic LED using Pulse Width Modulation. We'll use the Pulse Width Modulation library included in Netduino.Foundation to make driving an LED quick and easy.
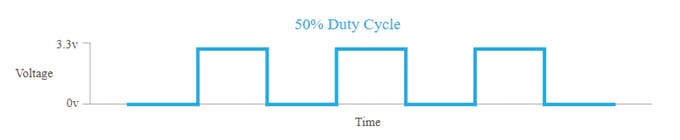
Pulse With Modulation is a way of controlling voltage digitally to emulate an analog signal. Netduino boards generate this signal as a square wave. The two key parameters under the control of the developer are the frequency and duty cycle. You can read more here.
In the above diagram, the time where the signal is high is the same as the time where the signal is low. The percentage of time the signal is on (high) is called the duty cycle. So, in the above, the signal is high 50% of the one cycle and so the duty cycle is 50%.
Netduino.Foundation is a platform for quickly building connected things using the .NET MicroFramework on Netduino. Created by Wilderness Labs, it's open source and maintained by the Netduino community.
If you're new in Netduino development, I suggest you go to the Getting started with Netduino project to properly set up your development environment.
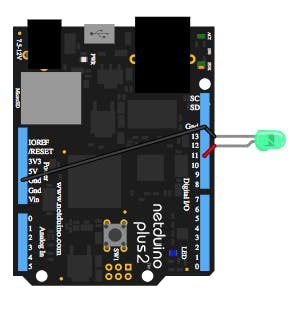
Step 1: Assemble the circuit
For this project, simply connect the LED's cathode (short pin) to the GND, and the anode (long pin) to the pin 11 on your Netduino.
Step 2: Create a Netduino project
Create a Netduino project in Visual Studio 2015 for Windows or the latest Visual Studio for Mac; name the project PwmLedSample.
Add the Netduino.Foundation NuGet Package
Windows
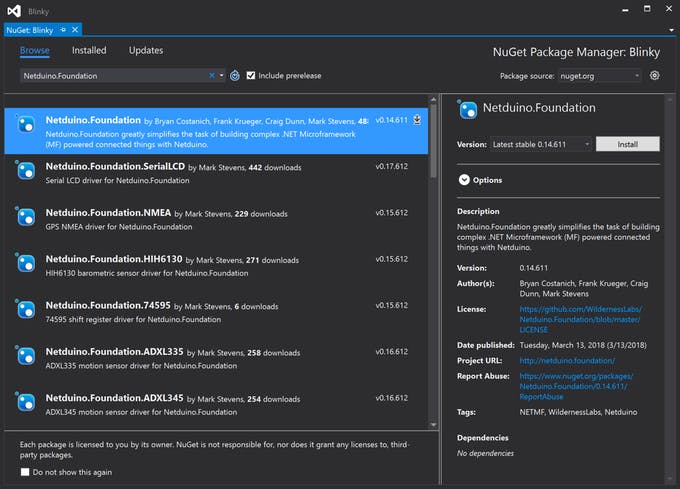
Right-click on your PwmLedSample project and click Manage NuGet Packages. In the Browse tab, search for Netduino.Foundation; it should be the first search result. Click the Install button.
Adding Netduino.Foundation NuGet package
macOS
Alt-click on your PwmLedSample project in the Solution Explorer, and click Add => Add Nuget Package to open the NuGet Package window. Search for the Netduino.Foundation package and click Add Package to add it to your project.
Adding Netduino.Foundation NuGet package
Step 3: Control the LED
You'll use the Pulse Width Modulation library contained in Netduino.Foundation to control the brightness of your LED.
Add the Netduino.Foundation namespace: add a using statement for SecretLabs.NETMF.Hardware.Netduino. The code below uses an Alias named N.
In the Main method, create a new PwmLed object named pwdLed. In the constructor, specify the pin you're using to control the LED (pin 11) and the color of the LED (to select an appropriate voltage).
Using pwmLed, you can now invoke different APIs to light up your LED, such as StartBlink, StartPulse, or SetBrightness. These methods include parameters to control the LED behavior such as duration, high brightness and low brightness.
using System.Threading;
using N = SecretLabs.NETMF.Hardware.Netduino;
using Netduino.Foundation.LEDs;
namespace PwmLedSample
{
    public class Program
    {
        public static void Main()
        {
            var pwmLed = new PwmLed
            (
                N.PWMChannels.PWM_PIN_D11,
                TypicalForwardVoltage.R
            );
            // pulse the LED
            pwmLed.StartPulse();
            // keep the app running
            Thread.Sleep(Timeout.Infinite);
        }
    }
}
Step 4: Run the project
Click the run button in Visual Studio to see your LED pulse! It should be similar to the following:
Running PwmLedSample project sample
Check out Netduino.Foundation!
This project is only the tip of the iceberg in terms of the extensive exciting things you can do with Netduino.Foundation.
- It comes with a huge peripheral driver library with drivers for the most common sensors and peripherals.
- The peripheral drivers encapsulate the core logic and expose a simple, clean, modern API.
- This project is backed by a growing community that is constantly working on building cool connected things and are always excited to help new-comers and discuss new projects.
References