Learn how to set up a micro:bit with an LCD screen modules to display messages and feedback from your projects.
The BBC micro:bit is a pocket-sized, easy-to-code computer that allows users to get their ideas implemented through technology. It’s a small device that packs a lot of features.
It helps users learn coding and programming in a fun and engaging way. By experimenting with customizing and controlling many of the micro:bit functions (such as digital displays, motion detectors, Bluetooth, and compass), you can encode a simple action in seconds. No previous coding knowledge required!
You can find the code for this project as a downloadable zip file at the end of this tutorial.
The BBC and Microsoft engineers state that they firmly believe that they have a social responsibility to ensure that no one is falling behind in the digital journey. Their mission is to help and enable people to understand and accept the coding and a new digital world – no matter who they are.
The best way to learn is by getting right into it. micro:bit provides people with tools to help you master the code. If this is your first time using the micro:bit, check out our intro to micro:bit tutorial.
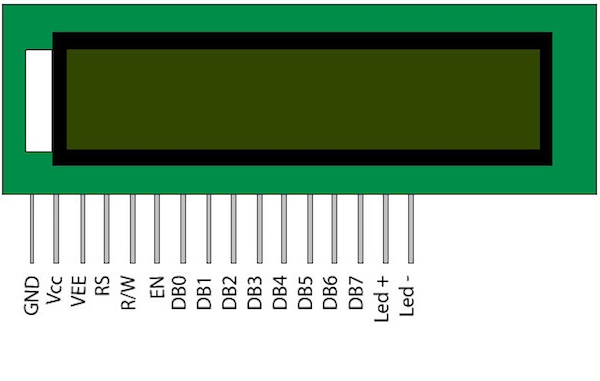
The 16x2 LCD Screen Module
The 16x2 LCD screen is an electronic display module that can be found in a wide range of devices and circuits. These modules are superior to seven segments and other multi-segment LEDs because it can have a custom backlight. LCD monitors are economical, easy to program, and have no restrictions on displaying special and custom characters (unlike seven parts), and animations.
A 16x2 LCD indicates that there are 2 lines and each line can display 16 characters. Each character in the module is displayed in a matrix of 5x7 pixels. The LCD has two registers: command and data.
The command register stores command instructions to the LCD. Commands are orders that perform predefined tasks on the LCD, such as initialization, clearing the screen, setting the cursor position, controlling the display, and so on.
The data register of LCD will always contain the data. The data in the data register must contain the values of characters in ASCII.
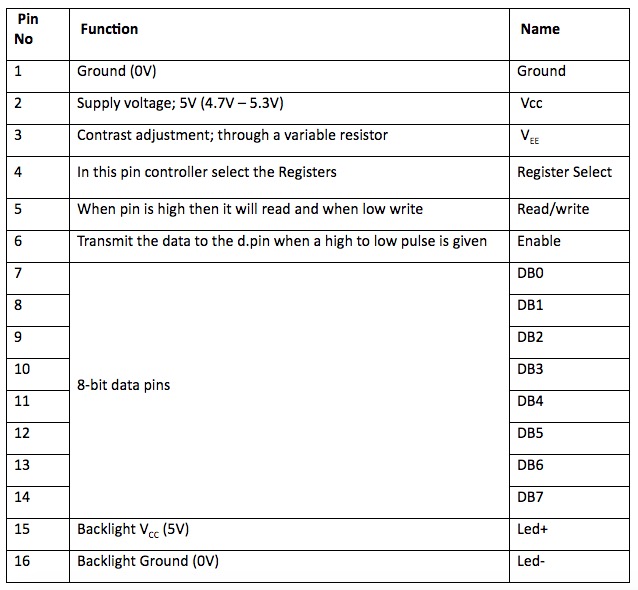
Pin Descriptions
Pin layout for 16x2 LCD screen module.
Pin layout chart for 16x2 LCD screen module.
Required Hardware and Software
- BBC micro:bit
- BBC micro:bit breakout board
- Character LCD 16X2
- Bread Board
- Jumper Wires
- Potentiometer: 10K or 20K
- MicroPython
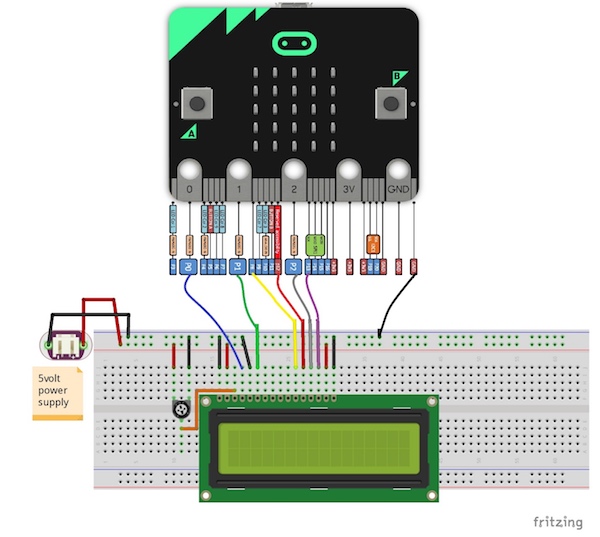
Wiring the Project
Wire up everything as shown in the Fritzing diagram below:
Note that the ground pin of micro:bit should be connected to the external power source of ground, as shown below. Also we are not using the first few data pins from DB0-DB3.
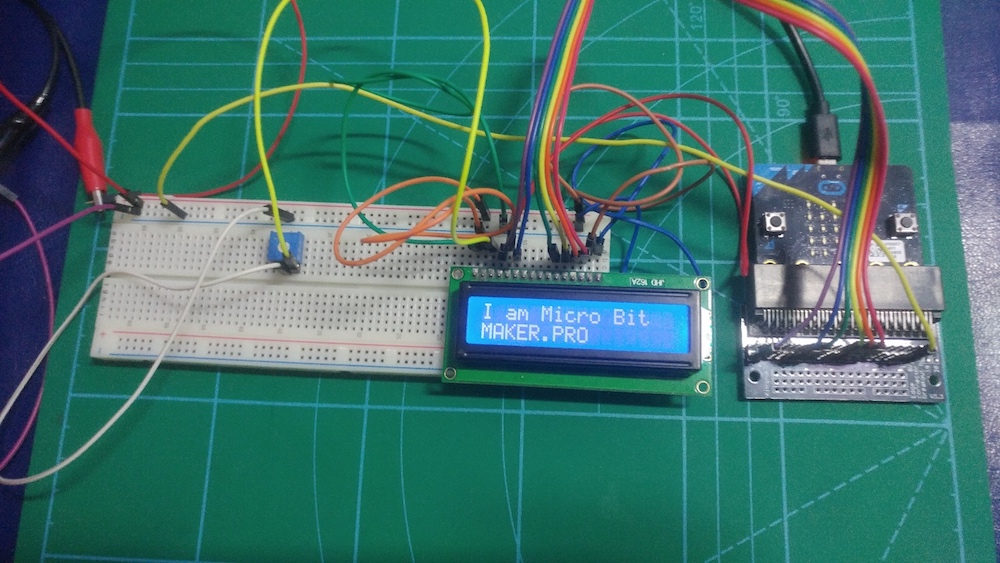
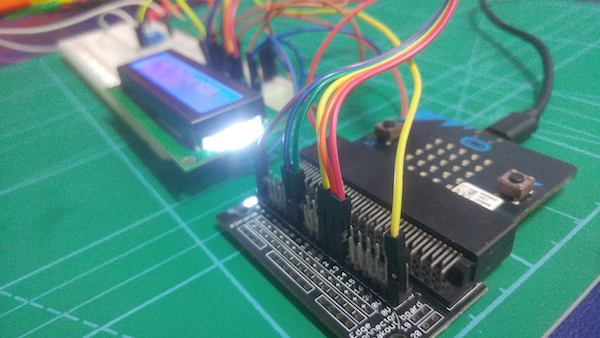
Once everything is wired, it will look something like this:
Uploading Flash Source Code
Open up MicroPython and follow the procedure for uploading the Python script directly into the micro:bit as mentioned below:
Copy the code and paste in the editor window and click on Flash.
Click on the "Flash" button after uploading the project's code.
After clicking on the Flash button, a browsing window will pop up. Select your micro:bit then click “Ok”. Your micro:bit’s orange light will being to blink and in just a few seconds your code will load.
Select your micro:bit to get the code to load.
And that’s it! You now have the power to easily add a display to your DIY projects.
Check out the video below to see how the project is set up and to see it action!
You can use this display for many different projects, whether it's your own portable game controller or way to show feedback from sensors.
Let us know in the comments what you use your display for!