In this article, we'll learn how to use Python on a BBC micro:bit to blink an LED!
What is a micro:bit?
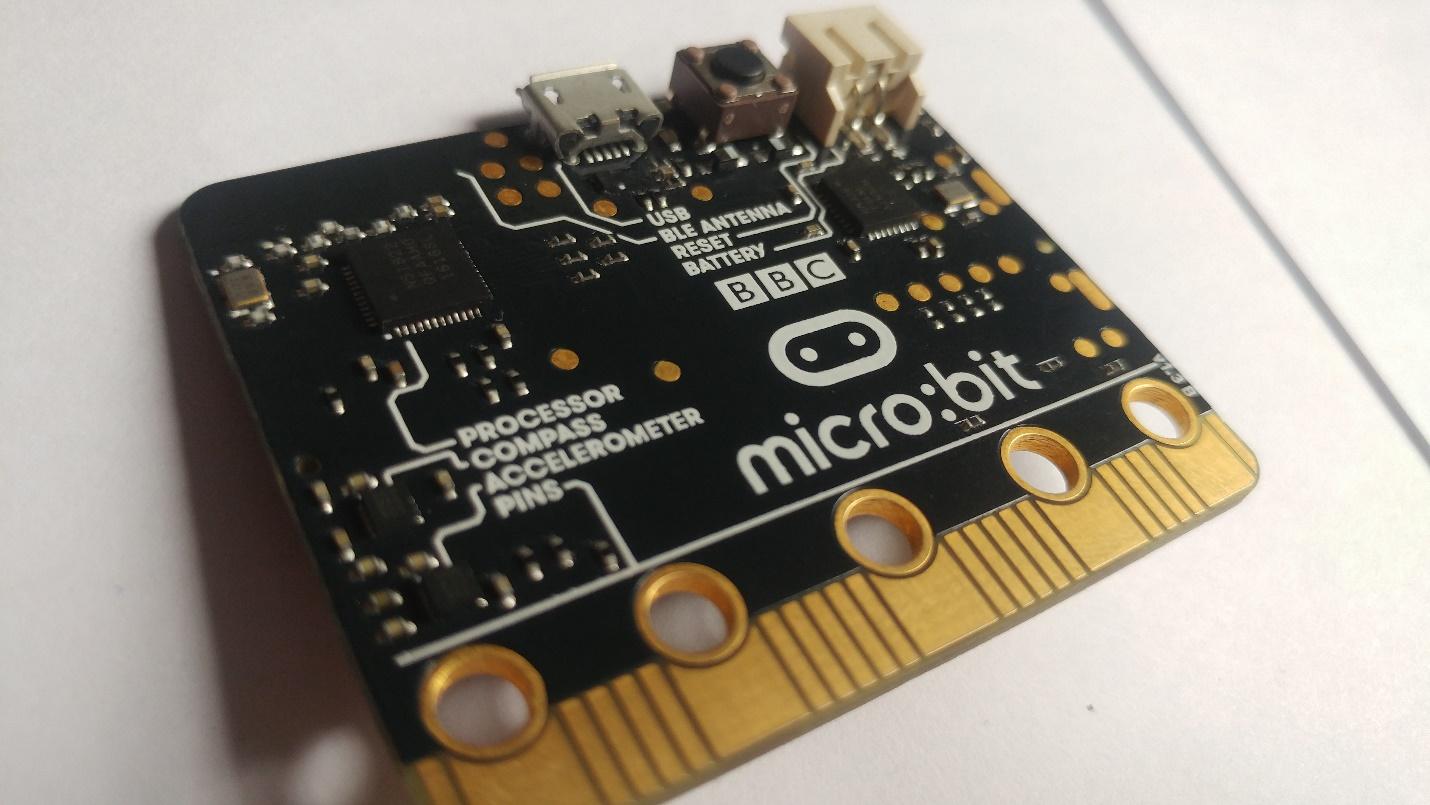
The micro:bit is a small computing device designed for beginners to explore the popular Python programming language.
The Python version running on the micro:bit is called MicroPython. It is also one of the most popular platforms used by Makers to hack something together because of its simplicity and low cost, as well as its built-in accelerometer and LED matrix.
Usage of micro:bit
You can use the BBC micro:bit to make a unique variety of cool projects, from robotics to musical instruments, all with endless possibilities.
Micro:bit is a handheld, fully programmable computer that is offered free of charge to children around the age of 7 across the UK. It is 70 times smaller and 18 times faster than the BBC microcomputers used in schools in the early 1980s.
This small device has many features, such as 25 red LED lights that can flash messages. There are two general-purpose buttons that can be used as a controller for your programs.
The BBC micro:bit can detect motion with its built-in accelerometer and also can interact with other devices through the internet with a low-energy Bluetooth connection.
You can write custom scripts for the micro:bit on the official website. Anyone can visit the website and use the online editor, write code, and see how it will play on the BBC micro:bit using an online simulator. You can also find stand-alone offline editors for your PC, tablet, or phone, at school or your workplace.
In this article, I will introduce you to the BBC micro:bit by blinking an LED on a breadboard using a bit of Python programming.
Your First micro:bit Project: Blinking an LED
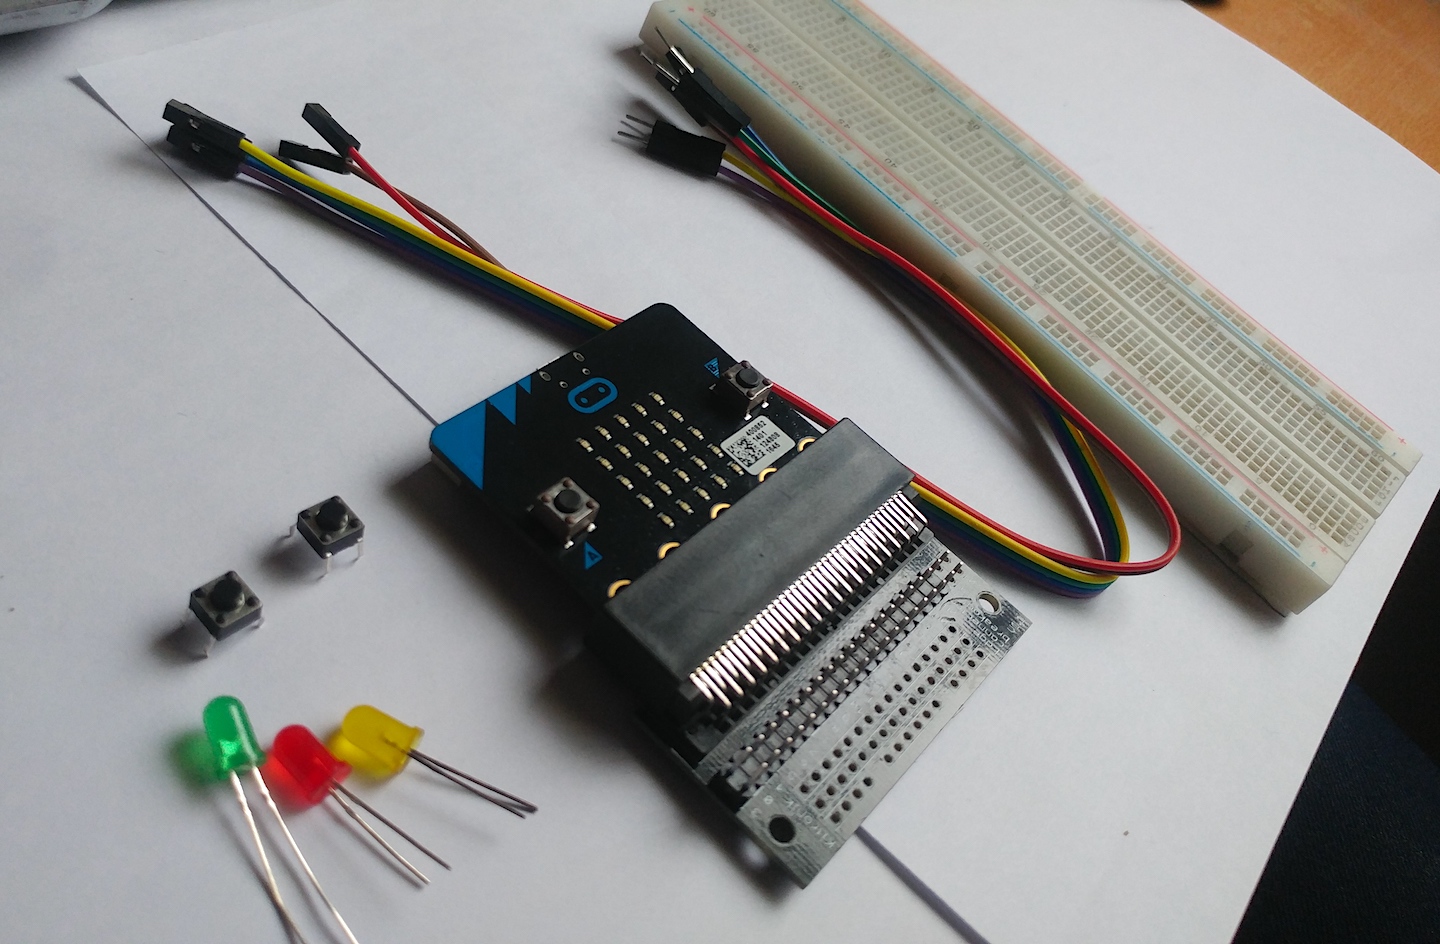
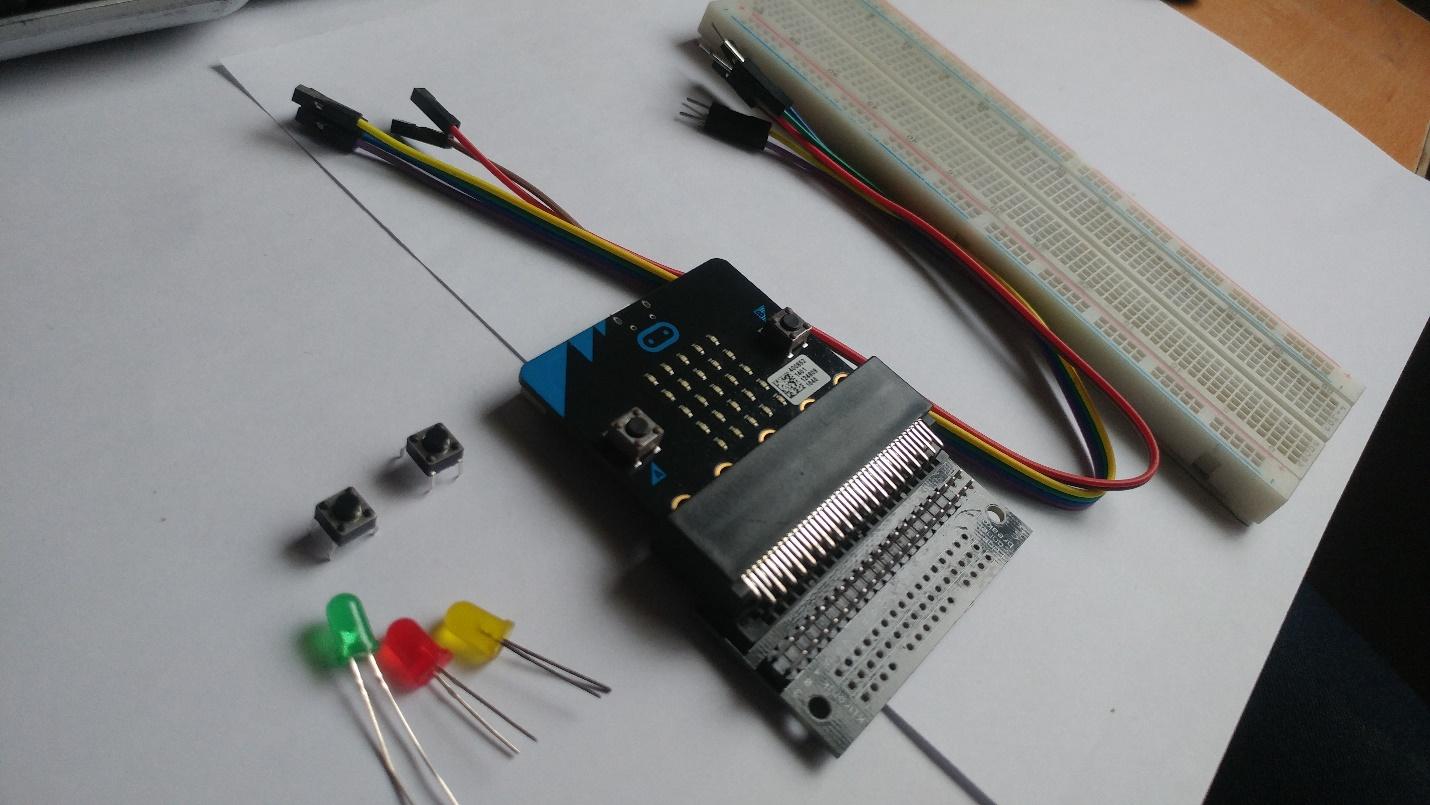
Collect Hardware
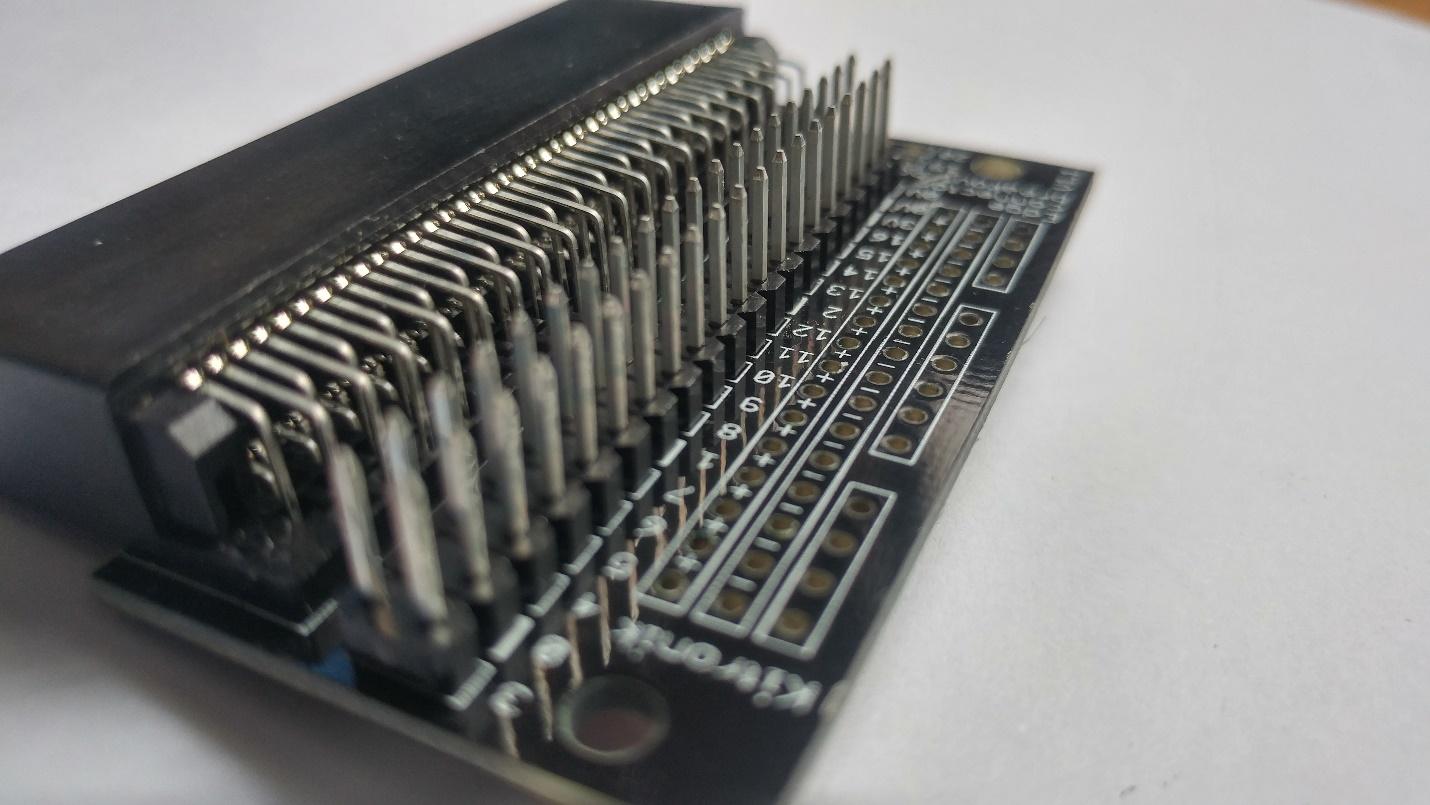
Edge Connector
According to Adafruit, this connector fits directly to the edge contacts of a BBC micro:bit. The connector has 80 pins, but because of the different widths of the micro:bit edge contacts, some of the micro:bit contacts will map to more than one of this connector's pins. Also, the back half of the pins are not used at all.
The edge connector gives access to all the important pins on the bottom edge of the micro:bit. Check the datasheet for the pin spacing and orientation. This connector is best used with a custom PCB.
You will also need a tool to allow you to use MicroPython on the BBC micro:bit. You have a couple of options:
- micro:bit Python Editor: An in-browser tool from the micro:bit website for working with MicroPython.
- Mu: A simple compiler editor for kids, teachers, and beginner programmers. This is probably the easiest way to program MicroPython on the BBC micro:bit.
- uFlash: Basically a command line tool for flashing raw Python scripts onto a BBC micro:bit. In the uFlash tool, we transfer the hex code from Python over USB or via Bluetooth module.
Let’s Code
The traditional way to start programming in a new language is to get your computer to say, “Hello, World!”.
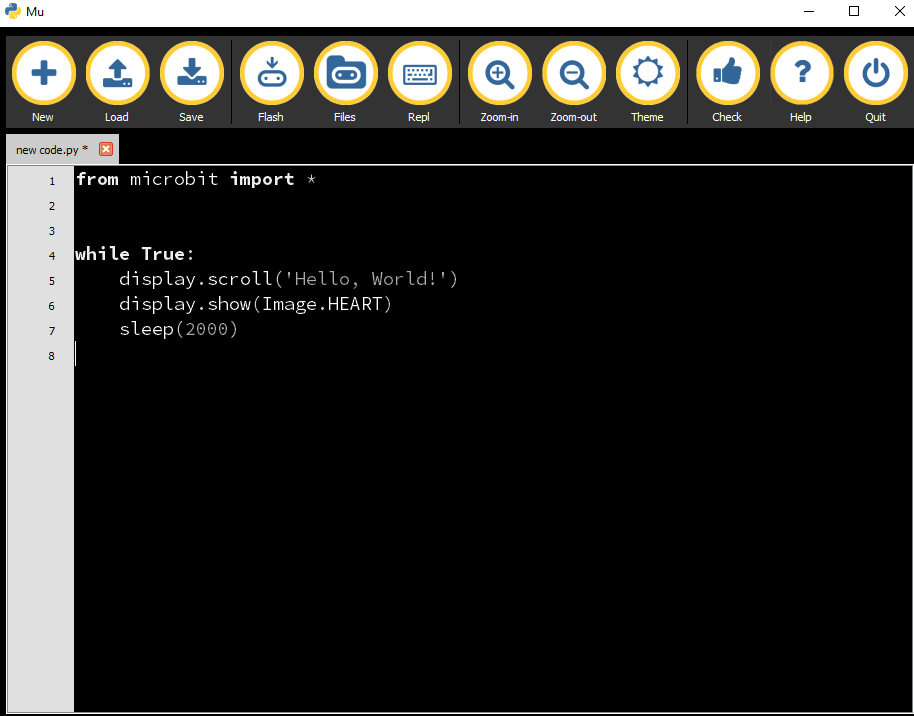
For this tutorial, we will use the Mu editor for this very basic test.
Step 1: Coding "Hello World!"
Download Mu and upload the first hello world program:
from microbit import *
while True:
	display.scroll(‘Hello world’)
	display.show(Image.HEART)
	Sleep(200)
Write the Python script and click on “flash”. While uploading, the yellow light will start blinking, and after the upload, it will stop and display the output.
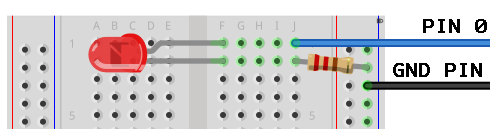
Step 2: Blinking the LED
Let’s connect external LED with GPIO 0 pin of BBC micro:bit and write a program to blink the LED.
If you are a beginner to electronics, you need to know that electric current can only flow one way through a light emitting diode (LED). It must flow through its anode (+) and out its cathode (-) to light.
The anode has a longer leg and often has a bend in it.
A 220Ω resistor is added to reduce the current; without it, the LED would overheat and break.
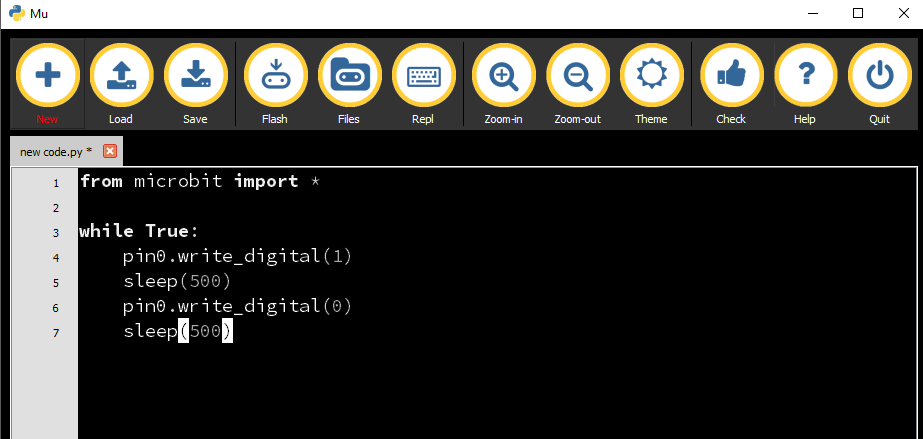
Upload source code with Mu Programmer as I described above.
from microbit import *

while True:
    pin0.write_    pin0.write_digital(0)
    sleep(500)digital(1)
    sleep(500)
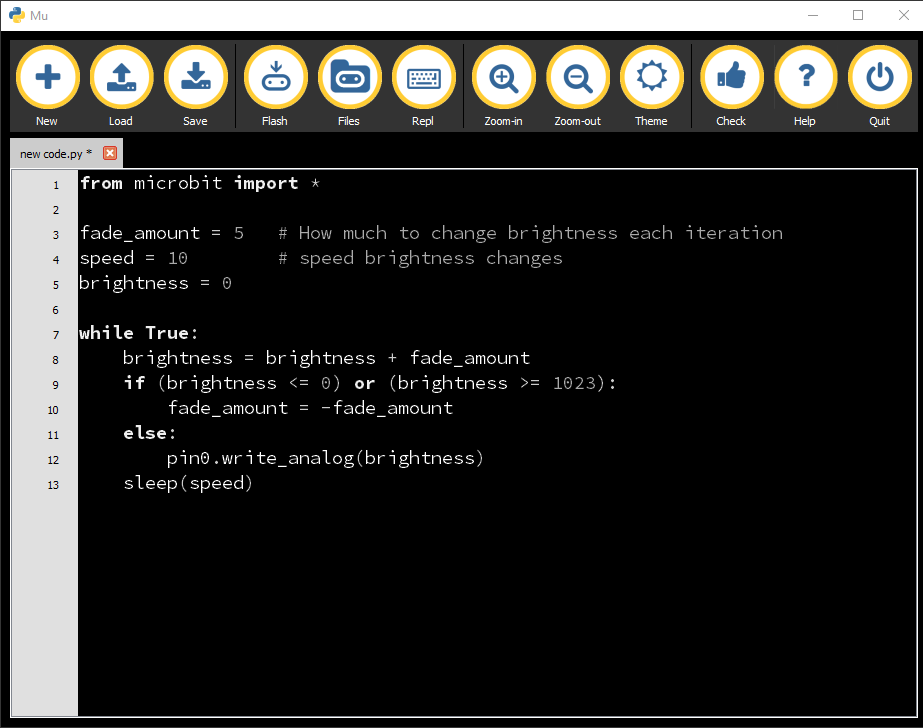
Okay, now we will use the same program as before, but in this program we will control the speed of blinking and brightness of the red LED.
from microbit import *

fade_amount = 5   # How much to change brightness each iteration
speed = 10        # speed brightness changes
brightness = 0

while True:
    brightness = brightness + fade_amount
    if (brightness <= 0) or (brightness >= 1023):
        fade_amount = -fade_amount
    else:
        pin0.write_analog(brightness)
    sleep(speed)
And there you go! You've hooked up an LED and learned how to control it with simple instructions.
By now, you probably have a basic understanding of how to start working with the micro:bit. If you want to hack something together, the micro:bit provides a simple, low-cost way to build something.
Try exploring more of the micro:bit’s possibilities and be sure to share your projects!