Leap motion technology for object sensing and motion detecting.
I think this is a very cheap budget project, and also I can say this is a very good learning concept for Arduino users as well as electronics engineers.
You can build anything you want by some coding and you can control any apps or video player or Microsoft presentation slides when you present your project to the audience.
There are many other ideas which you can apply for IoT devices and home automation by using this technology. This technology on PC is developed by HP in 2012. You can also find on Youtube and Google
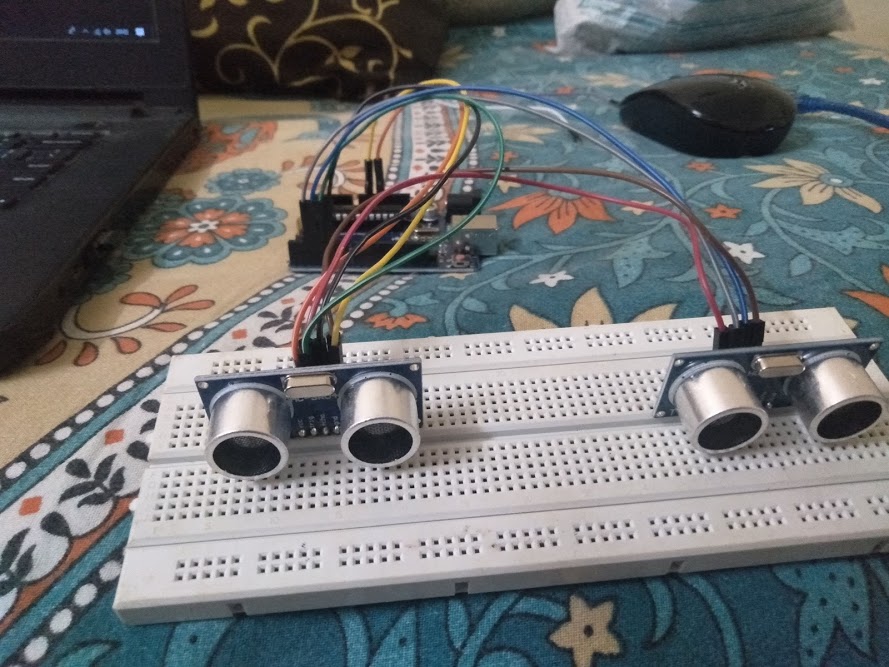
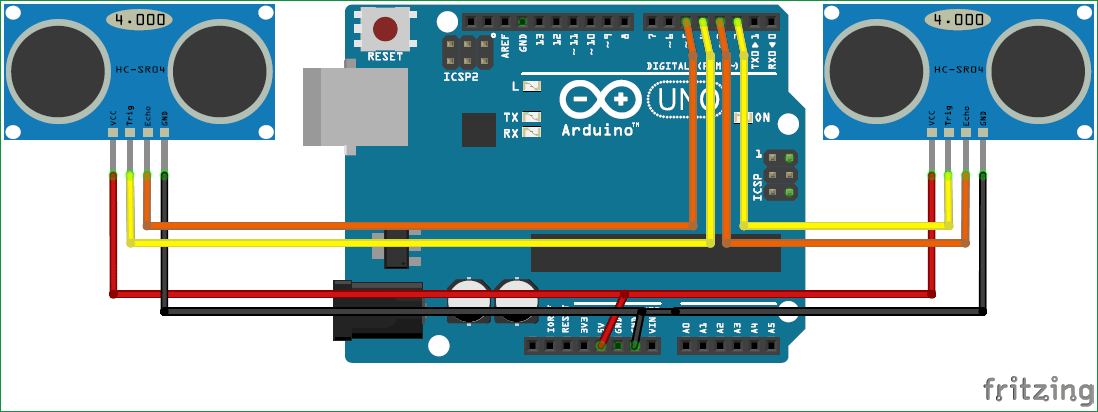
Before coding, first connect the circuit as mentioned below circuit diagram and require file installment.
Circuit Diagram
ARDUINO CODE:


const int trigger1=2;
const int echo1=3;
const int trigger2=4;
const int echo2=5;
long time_taken;
int dist,distL,distR;


void setup() {
  // put your setup code here, to run once:
  Serial.begin(9600);

  pinMode(trigger1,OUTPUT);
  pinMode(echo1,INPUT);
  pinMode(trigger2,OUTPUT);
  pinMode(echo2,INPUT);
}

void calculate_distance(int trigger,int echo)
{
  digitalWrite(trigger,LOW);
  delayMicroseconds(2);
  digitalWrite(trigger,HIGH);
  delayMicroseconds(10);
  digitalWrite(trigger,LOW);

  time_taken=pulseIn(echo,HIGH);
  dist=time_taken*0.034/2;
  if(dist>50)
  dist=50;
}

void loop() {
  // put your main code here, to run repeatedly:
  calculate_distance(trigger1,echo1);
  distL=dist;

  calculate_distance(trigger2,echo2);
  distR=dist;

  if((distL >40 && distR>40)&&(distL<70 && distR<70))
  {
    Serial.println("play/pause");
    delay(500);

  }
  if ((distL >40 && distL<50) && (distR ==50)) //Detect Left Hand
 {
  Serial.println("Rewind");
  delay (500);
 }

  if ((distR >40 && distR<50) && (distL ==50)) //Detect Right Hand
  {
  Serial.println("Forward");
  delay (500);
  }


  if (distL>=20 && distL<=27)
{
  delay(100); //Hand Hold Time
  calculate_distance(trigger1,echo1);
  distL =dist;
  if (distL>=20 && distL<=27)
  {
    Serial.println("Left Locked");
    while(distL<=40)
    {
      calculate_distance(trigger1,echo1);
      distL =dist;
      if (distL<15) //Hand pushed in
      {Serial.println ("Vup"); delay (500);}
      if (distL>25) //Hand pulled out
      {Serial.println ("Vdown"); delay (500);}
    }
  }
}

if (distR>=20 && distR<=27)
{
  delay(100); //Hand Hold Time
  calculate_distance(trigger2,echo2);
  distR =dist;
  if (distR>=20 && distR<=27)
  {
    Serial.println("Right Locked");
    while(distR<=40)
    {
      calculate_distance(trigger2,echo2);
      distR =dist;
      if (distR<15) //Right hand pushed in
      {Serial.println ("Rewind"); delay (500);}
      if (distR>25) //Right hand pulled out
      {Serial.println ("Forward"); delay (500);}
  }
}
}

delay(200);
}
|
import serial |
|
import time |
|
import pyautogui |
|
|
|
ArduinoSerial = serial.Serial('com7',9600) #Create Serial port object called arduinoSerialData |
|
time.sleep(2) #wait for 2 seconds for the communication to get established |
|
while 1: |
|
incoming = str (ArduinoSerial.readline()) #read the serial data and print it as line |
|
print incoming |
|
|
|
if 'Play/Pause' in incoming: |
|
pyautogui.typewrite(['space'], 0.2) |
|
|
|
if 'Rewind' in incoming: |
|
pyautogui.hotkey('ctrl', 'left') |
|
|
|
if 'Forward' in incoming: |
|
pyautogui.hotkey('ctrl', 'right') |
|
|
|
if 'Vup' in incoming: |
|
pyautogui.hotkey('Fn', 'up') |
|
|
|
|
|
if 'Vdown' in incoming: |
|
pyautogui.hotkey('Fn', 'down') |
|
|
|
incoming = ""; |
|
|
After connecting board with ultrasonic sensors, make sure that you go to Python and Arduino coding and install Python 2.7.
Also, some Python libraries required for this project. That link is given below you can download from there and install it after installation of Python 2.7.
Pyserial library
https://drive.google.com/open?id=1cbgh-SBPOC4QlSguLXhcJXUq0iFUv-nr
After this installation, you are able to measure distance via Arduino serial monitor.
NO...that's not at all for this technology. You also need a Python library that can control your keyboard functions.
Keyboard function tool
Pyautogui library that provides keyboard control function,,it's basically custom python library ,,hence you can download via pip.
Steps:
Go to Python27 file where your programs saved on your computer.
You will find "Scripts"
Now you can find "pip" application. Just open it after complete installation of pip.
Open windows command prompt.
Type:
cd C:\Python27\Scripts
then
pip
then
pip install pyautogui
After some process or downloading you can start coding you won't get any error when you import libraries on Python 2.7.
Example of this project
IF YOU ARE ABLE DO OTHER STUFF USING THIS TECH, TELL ME IN COMMENT SECTION.
Update:
People who got query or any error or questions for this project..
Do comments I will try to solve your problem..
And also who made successfully..
Like it on my project..
Other products will come soon..