We will basically design a 3D gear and an excavated 3D model in this article.
3D Designing is an unimaginable ability that is being utilised in numerous enterprises. In this tutorial article, we will direct you on 3D designing utilising SelfCAD . I decided to involve SelfCAD as a need might arise to have insight in 3D displaying to utilise it.
Whenever you are finished with the 3D design process, you can involve SelfCAD's in-fabricated slicer to set up your plan for 3D printing. The slicer is viable with the vast majority of the normal FDM 3D printers and modifying the settings is simple as well.
You can also visit our page and go through articles, for example how to create a triangular optical illusion.
So we should now begin!
Designing the 3D gear
Now, we will begin with our first design, which is a 3D gear. We will begin by choosing the 3D shapes, and then we will change it with tools like Move, Scale, and Rotate and so on. This article guides the move tool to place the position that we wanted without upsetting the entire turn of events.
Step1: Insert a reference image
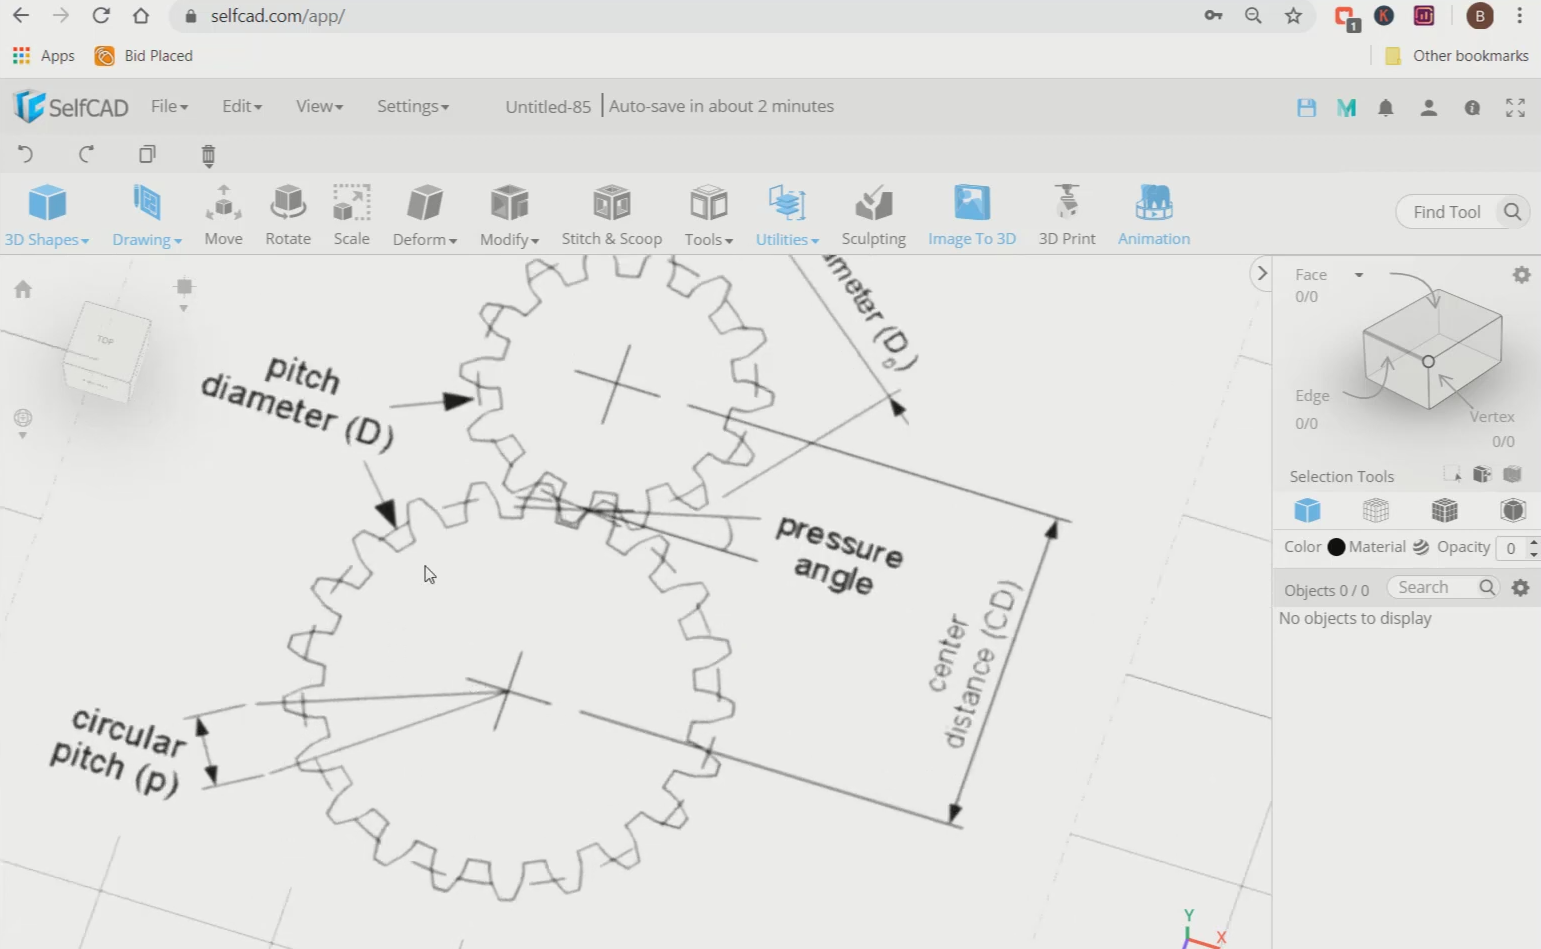
First of all go to views and click on the reference image. Then add an image of a gear for reference.
Step2: Insert a gear shape and change its settings
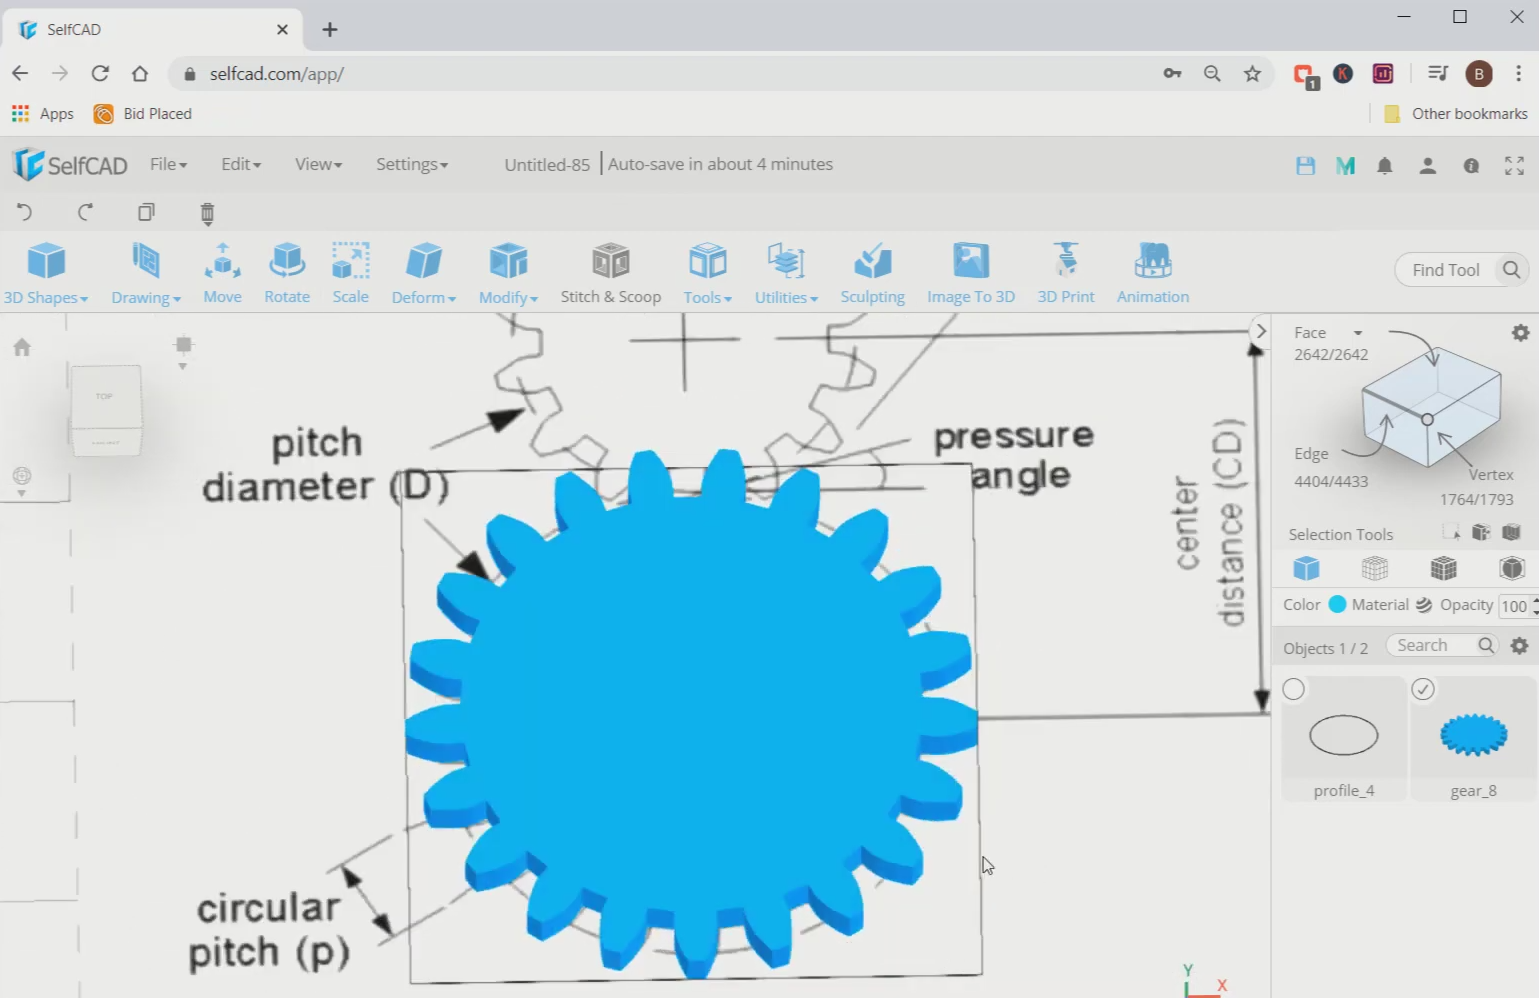
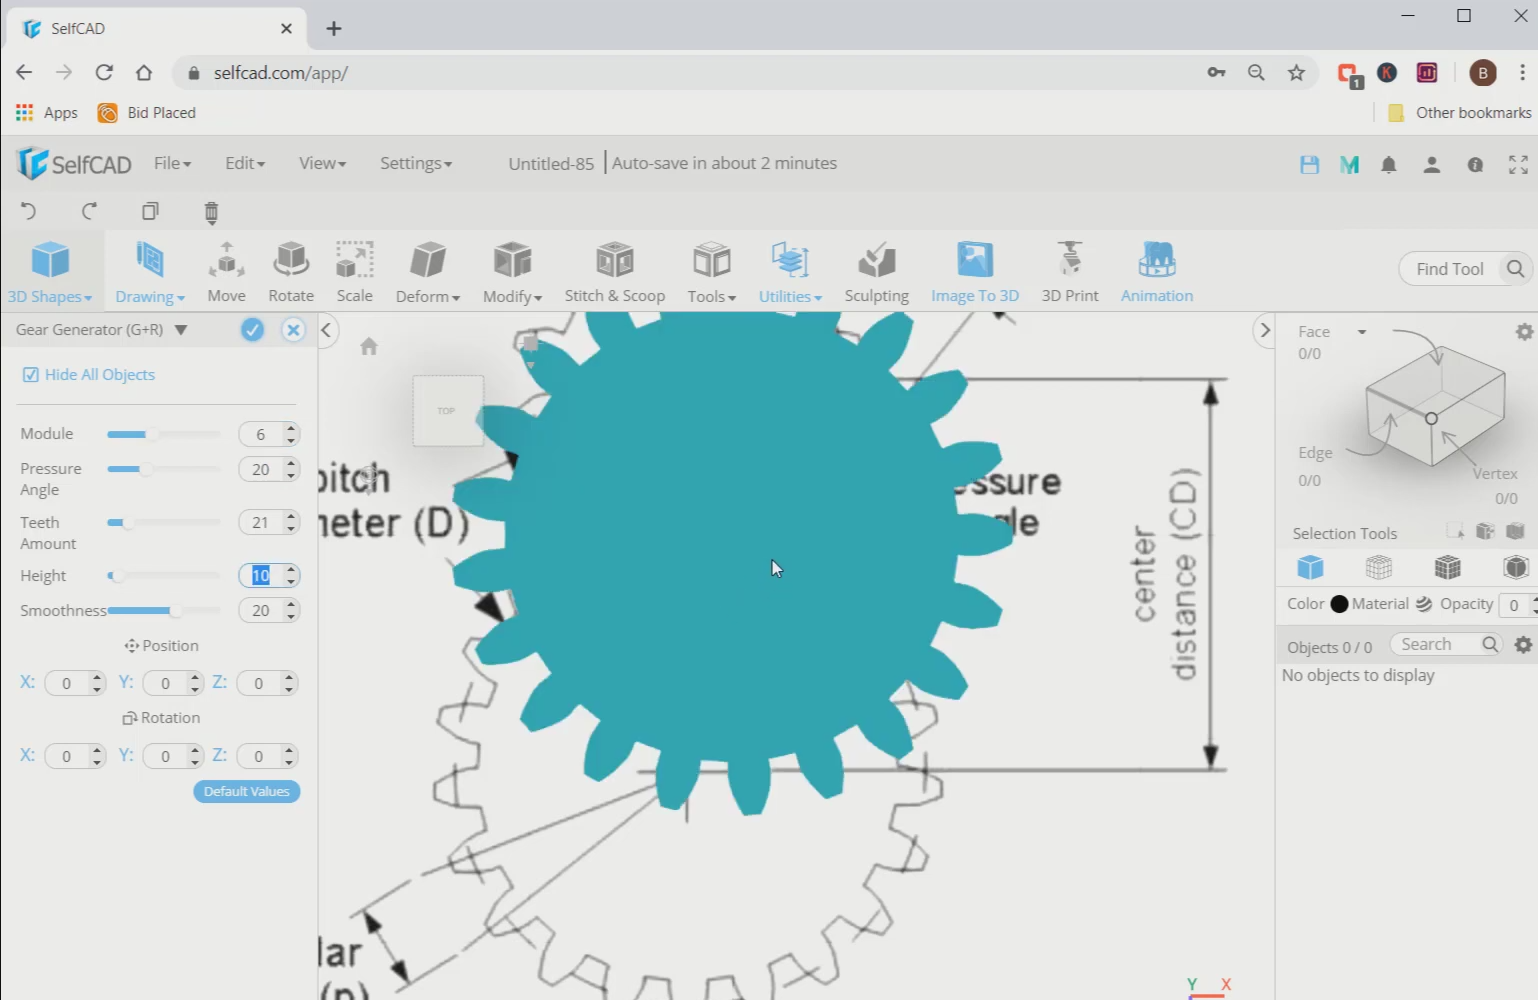
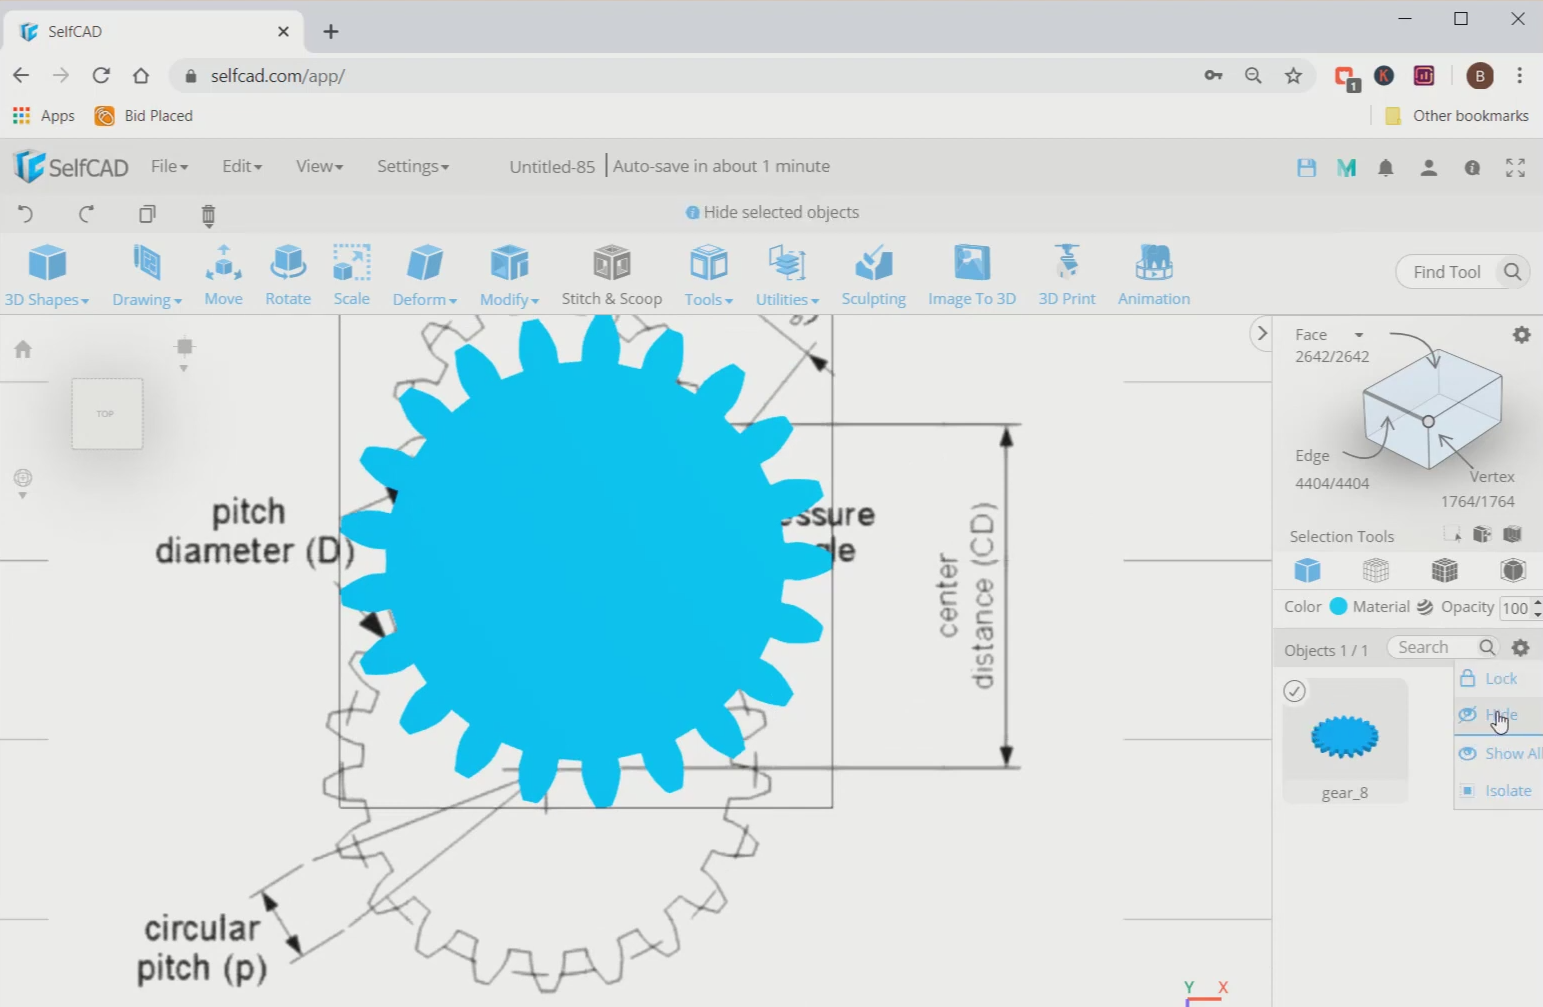
Next, go to 3D shapes and insert a gear shape from there to the working interface. Set teeth amount to 21, pressure angle to 20 and module to 6. Then hide the object by selecting the hide option.
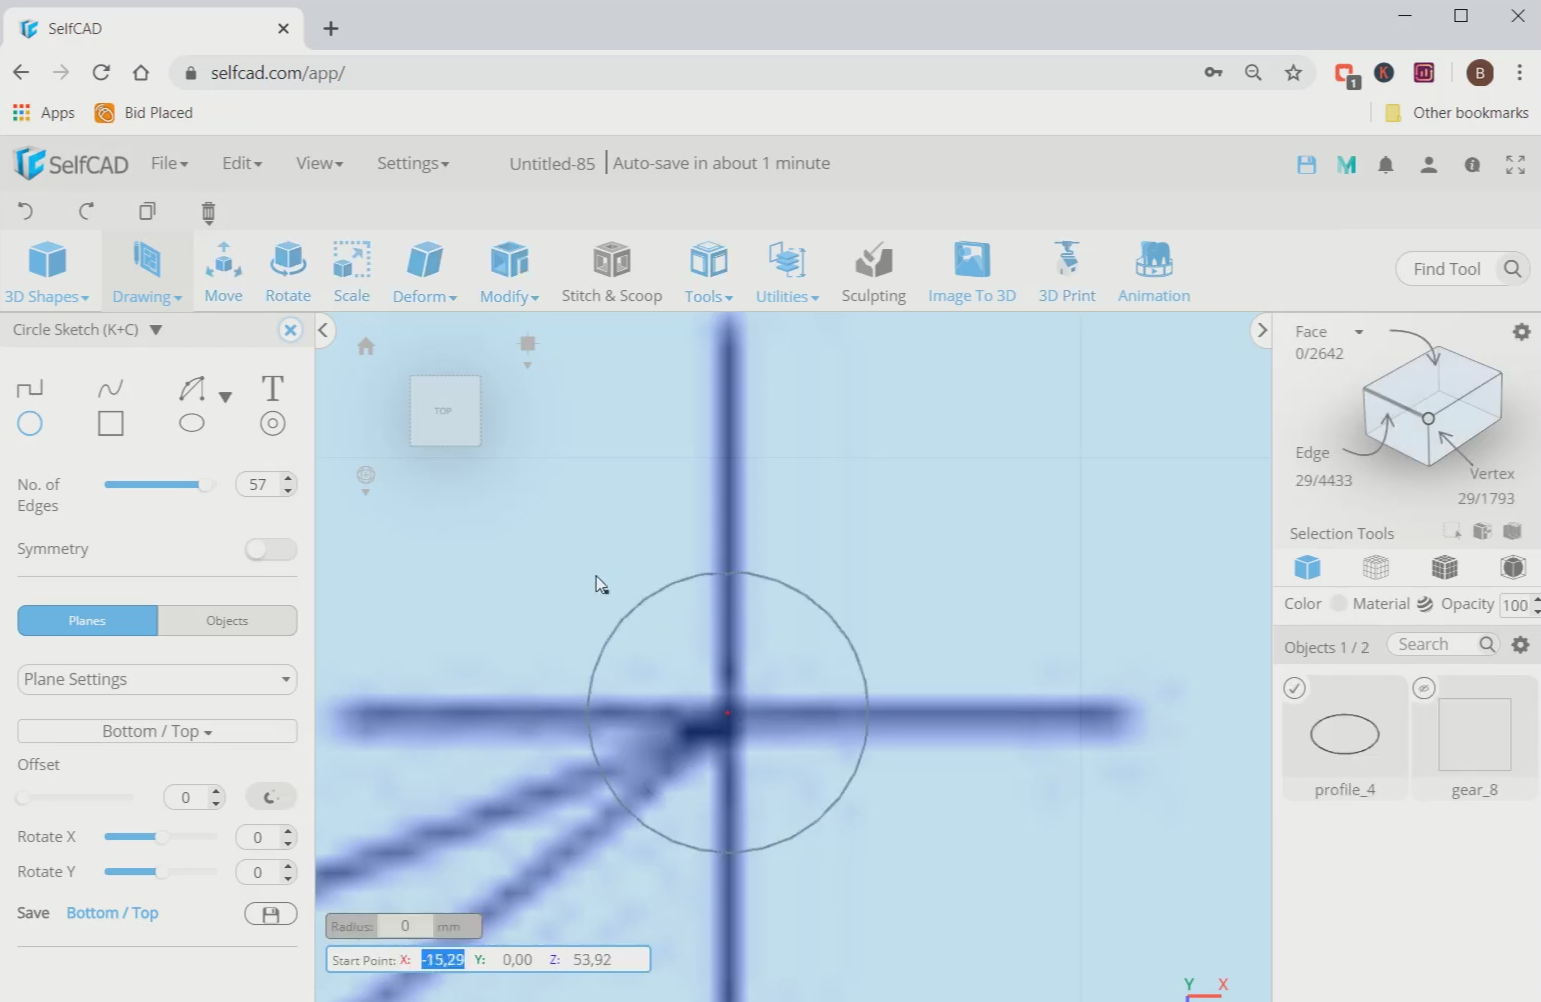
Step3: Go to 3D sketch and draw a circle
Next, go to the 3D sketch and use the circle sketch. Specifying from the centre point of the reference gear, draw a circle. Then, click on the circle and go to the move tool. From there you can check the values for the x-axis, y-axis and the z-axis.
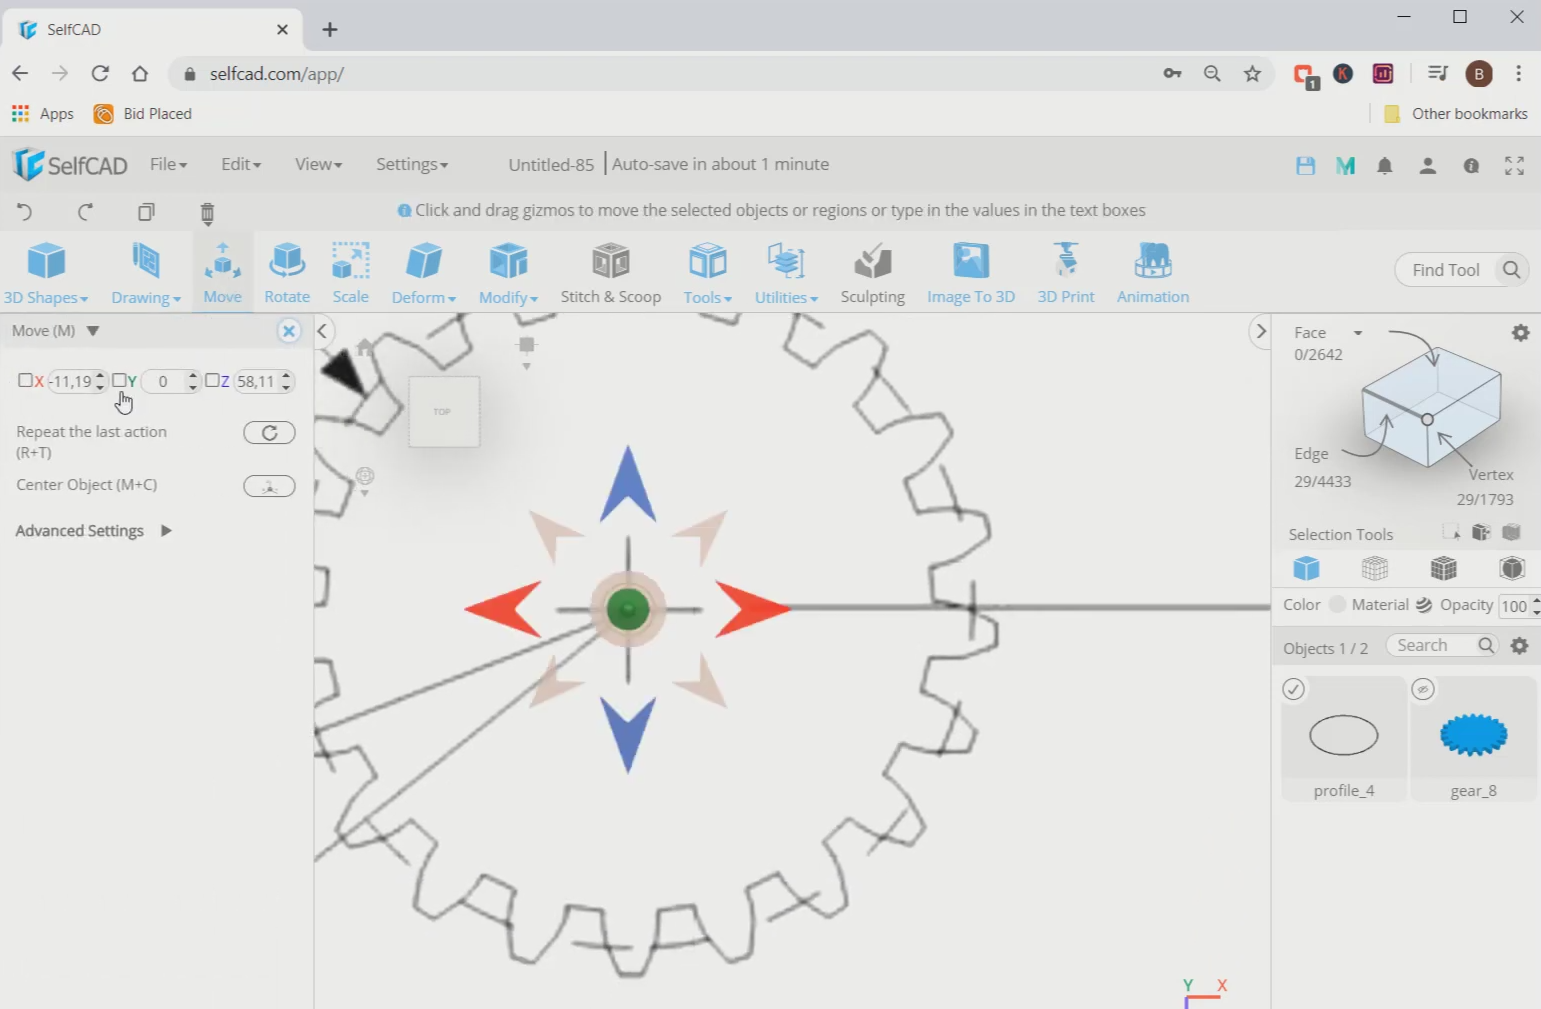
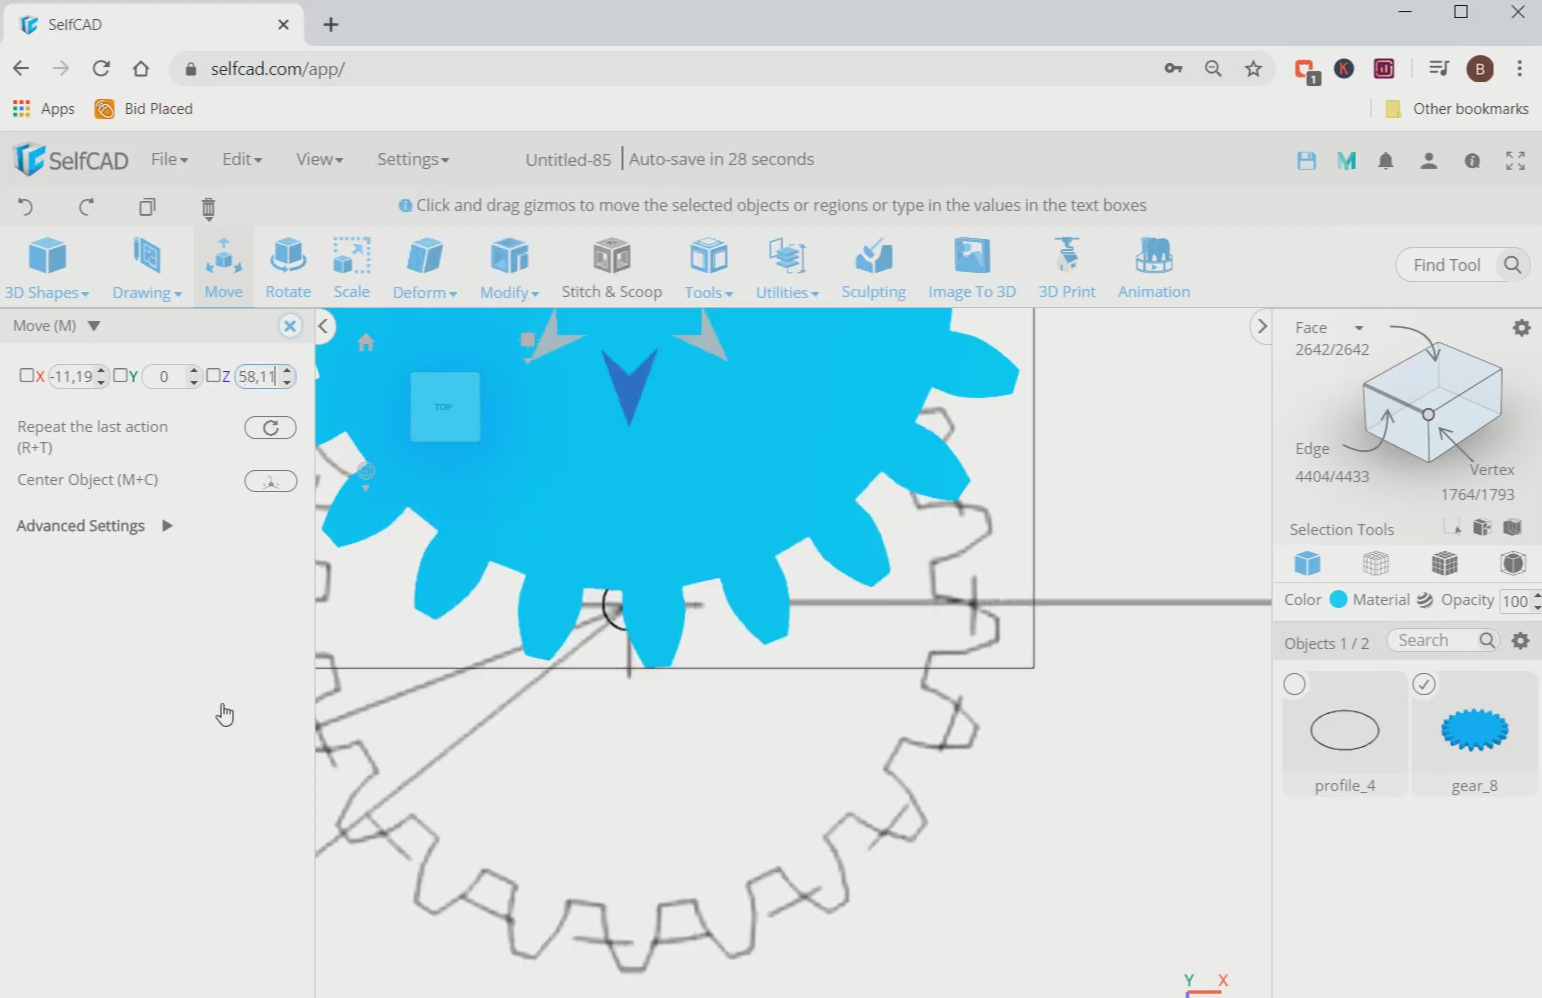
Step4: Move the gear to the centre point
Now, select the gear that we created and move it using the move tool. Then set the values of the axes exactly the same of the values of the centre point of the circle.
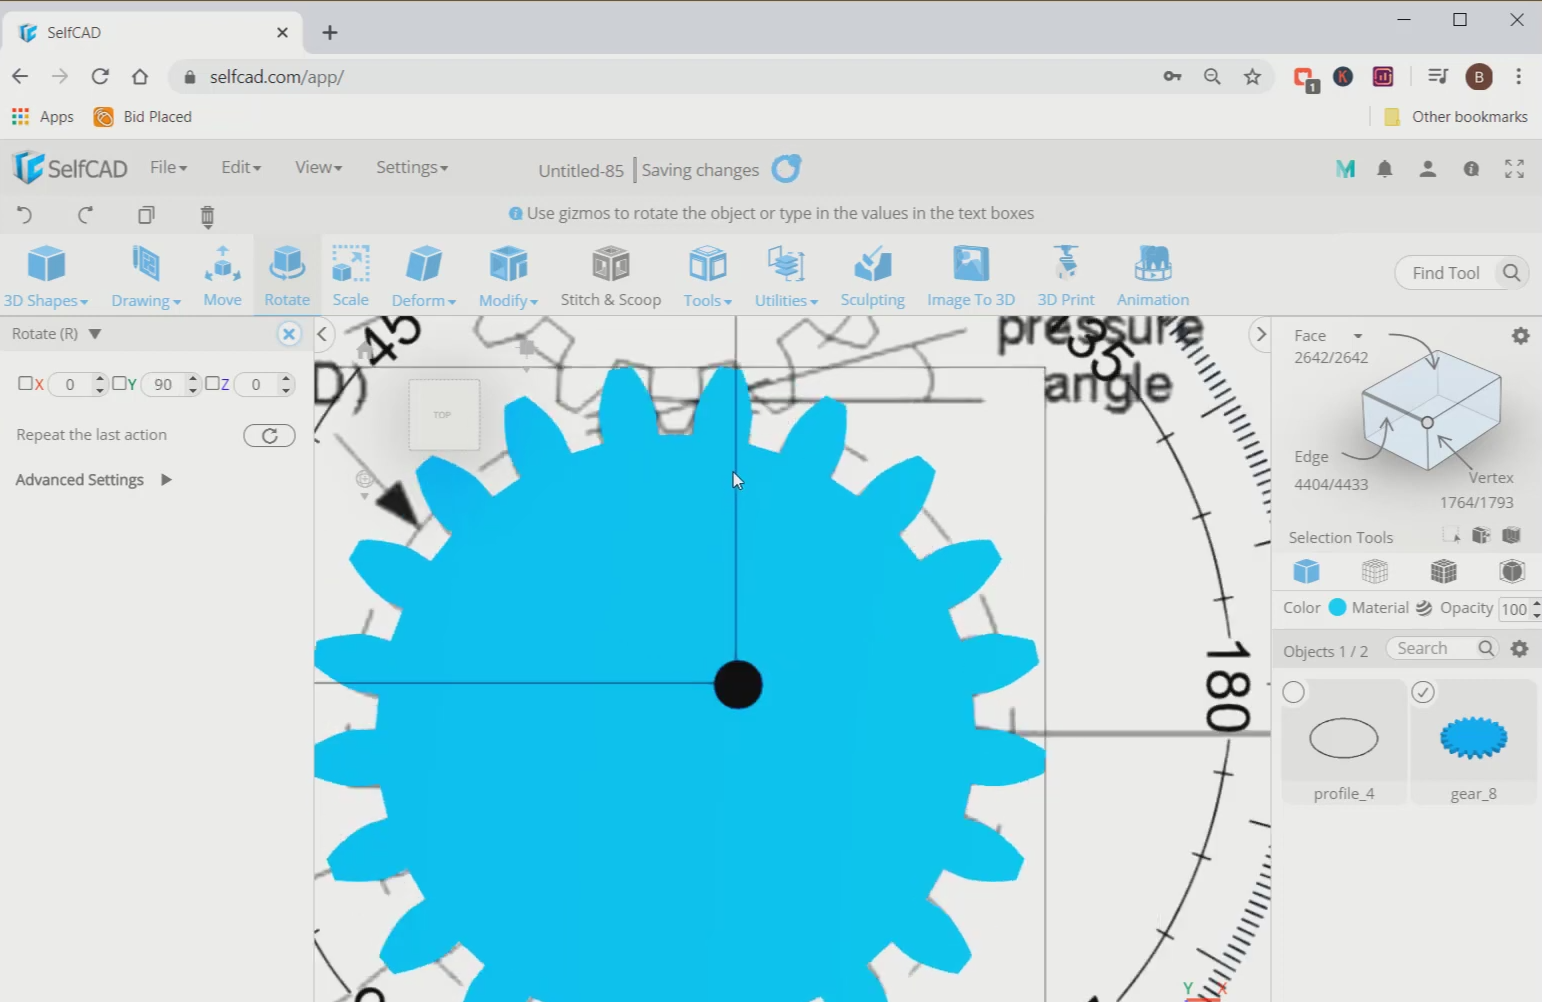
Step5: Scale the gear and rotate it
Next, use the scale tool to scale the gear bigger or smaller according to your preference, from the centre point. Then use the rotate tool to rotate the gear along the green axis or y-axis about a rotation angle of 90 degrees.
Conclusion
Hence, we created a 3D gear by using SelfCAD.
Designing the excavated 3D model
So, we will now begin with the designing of the excavated 3D model. We will start by inserting the cube,and then transforming it with tools like Polygon Selection, Inset, Round object, etc. This article guides the inset tool assemblies to make the shape that we truly needed without disturbing the whole development.
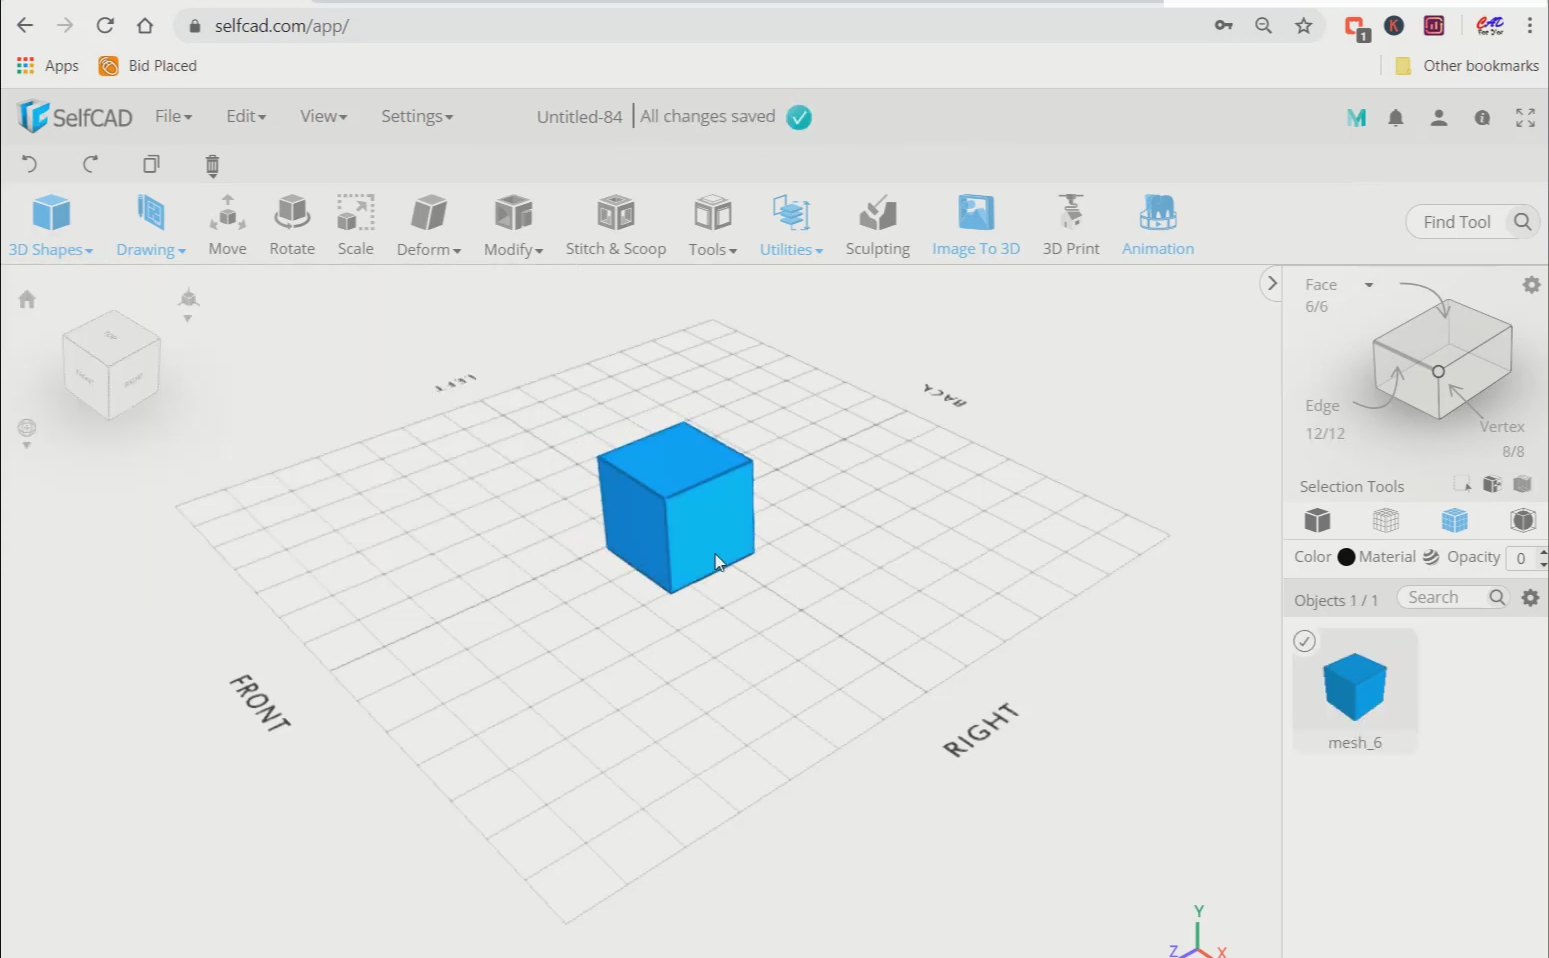
Step1: Insert a cube and inset it
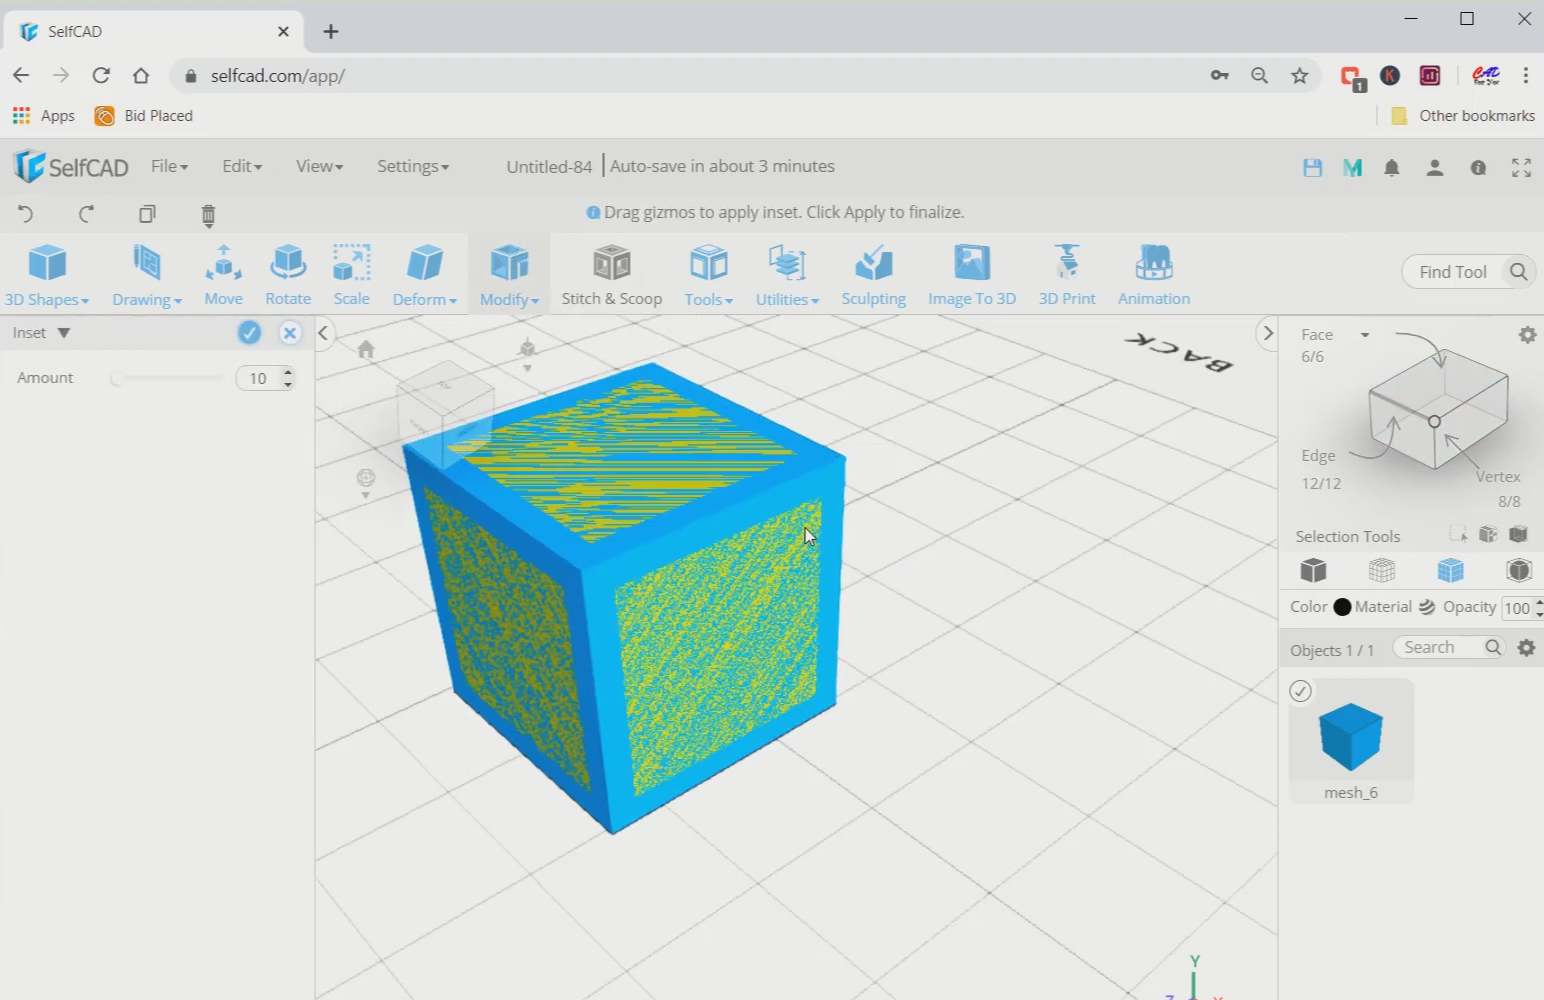
First of all, go to 3D shapes and insert a cube from there. Choose mesh+wireframe view. Then go to modify and select the inset tool. Set the amount to 10.
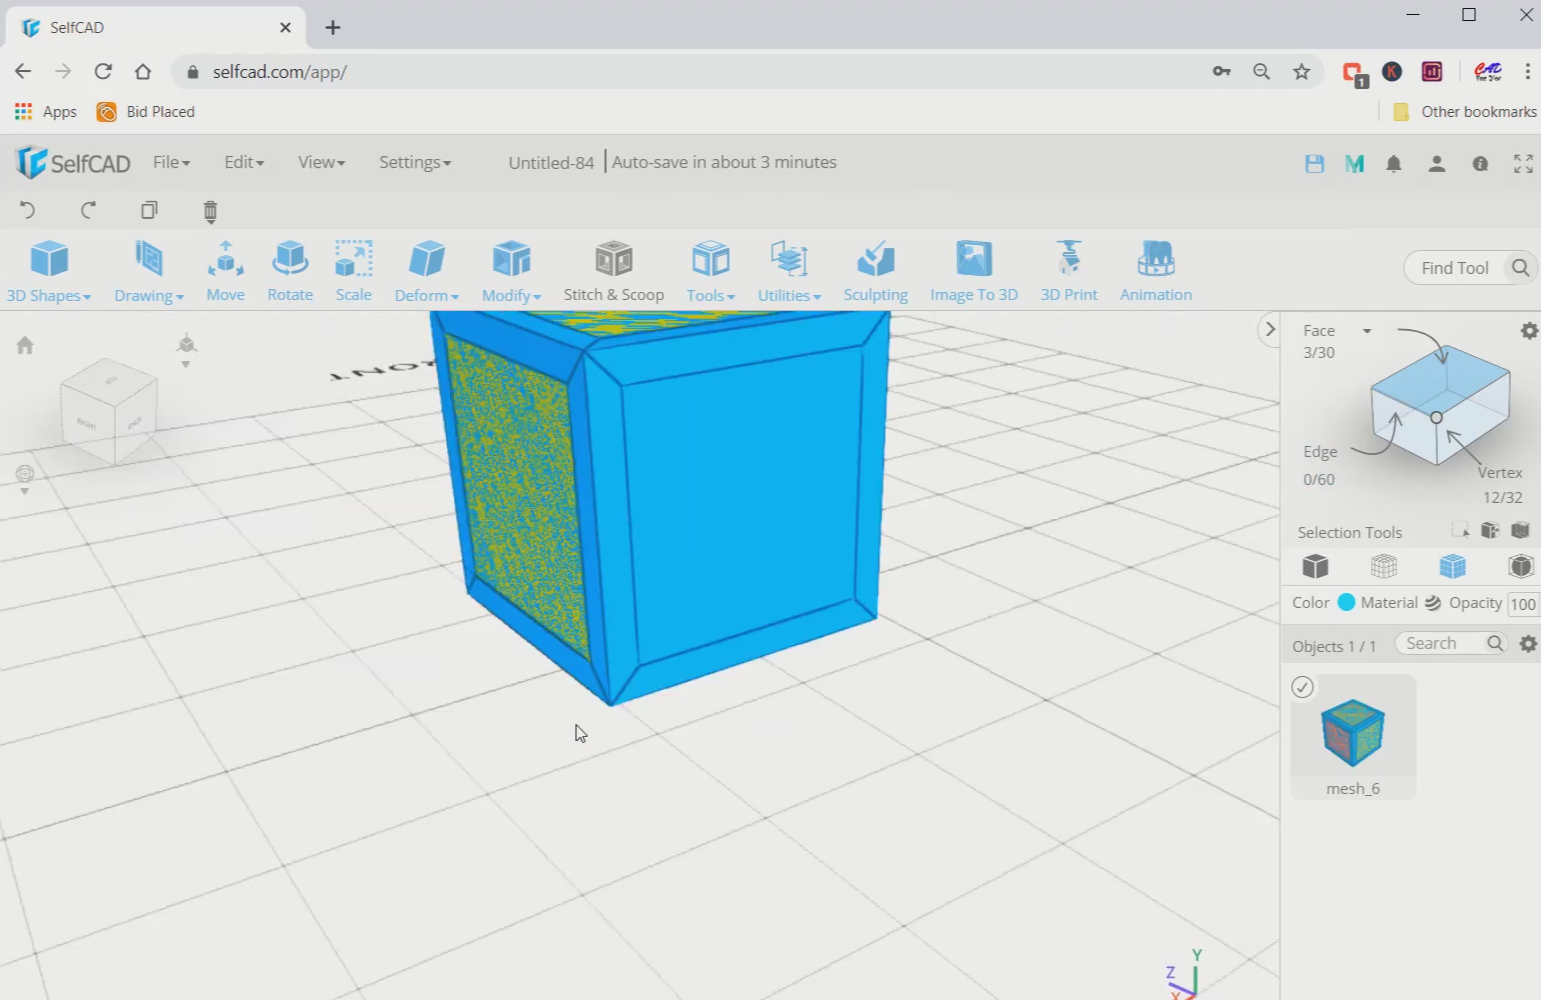
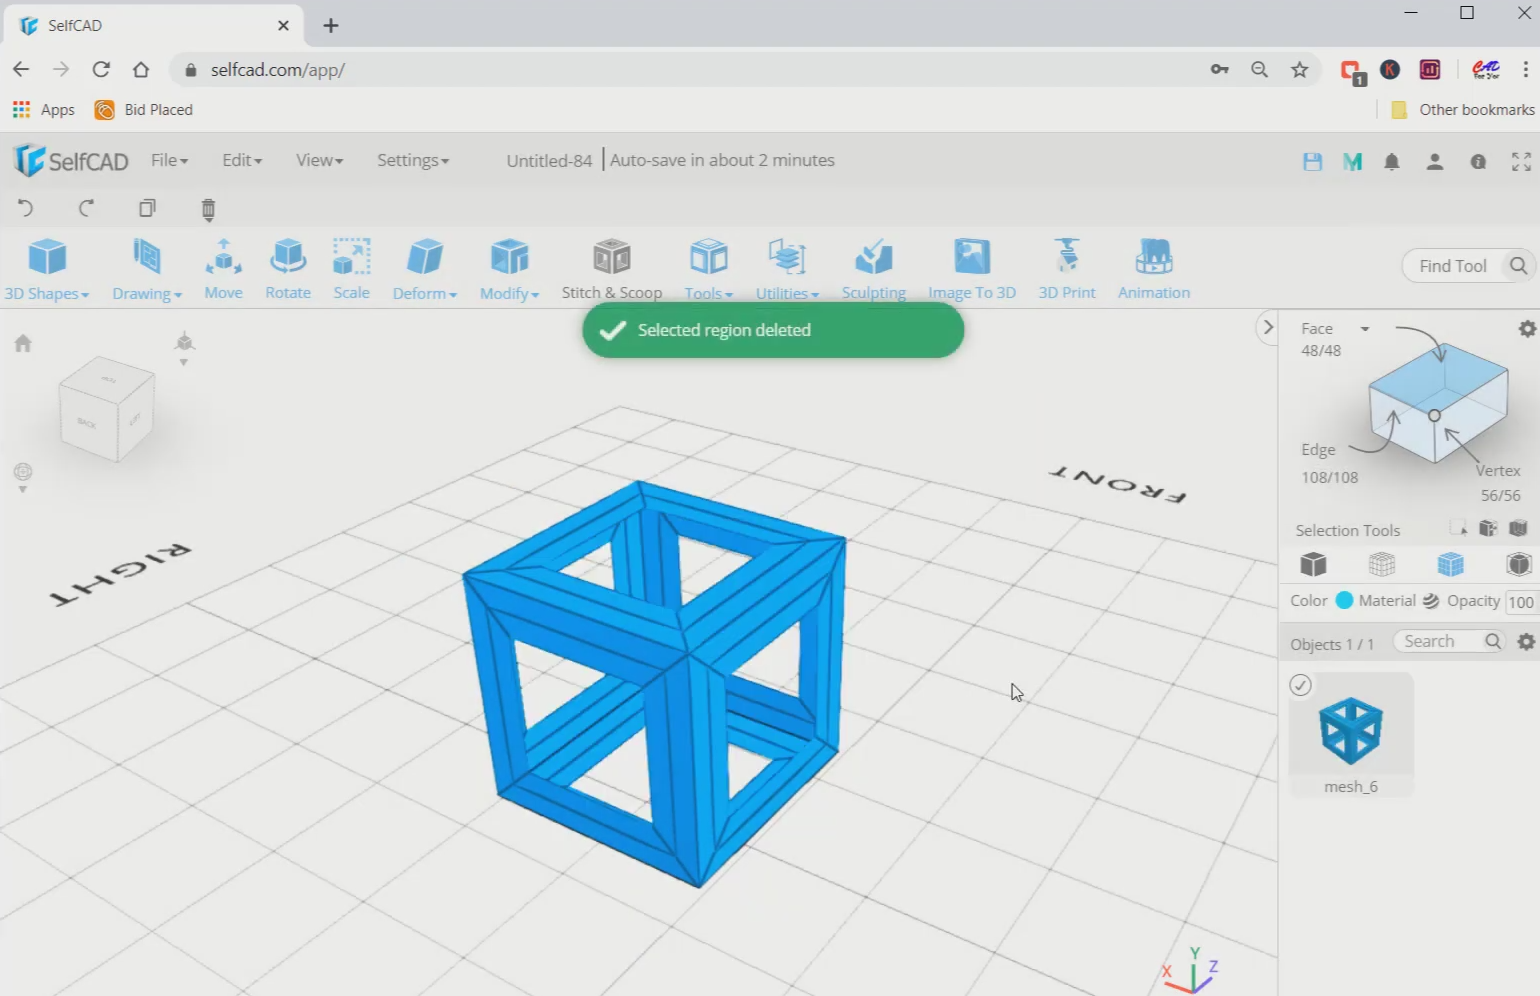
Step2: Select the middle face of each side and inset then again
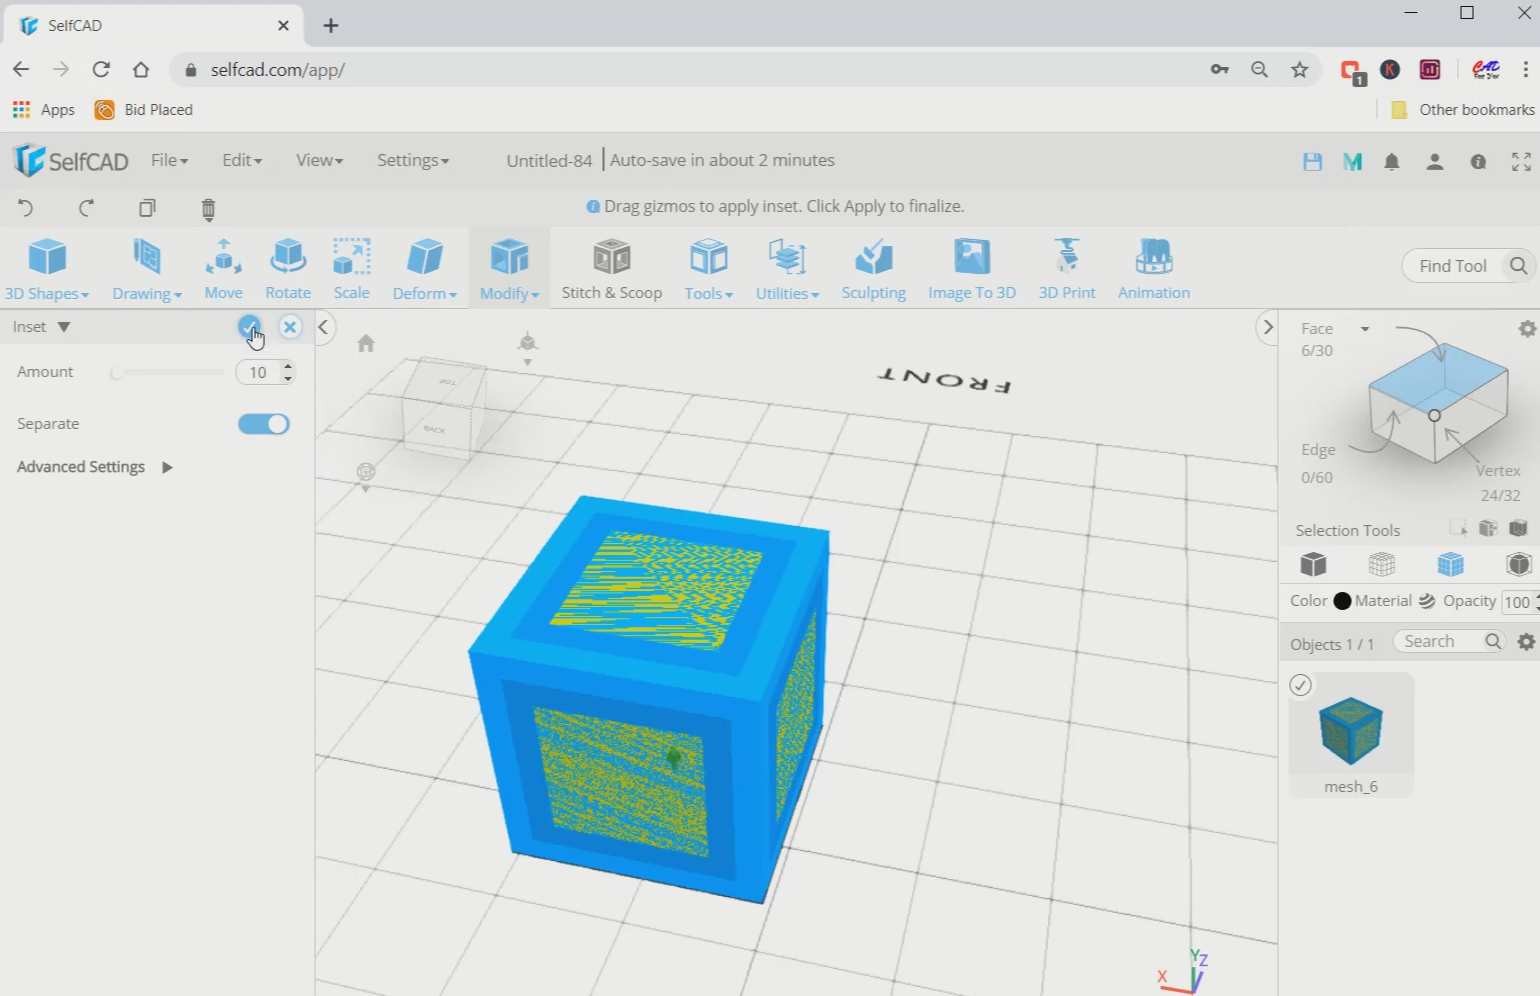
Next, opt for polygon selection and select all the middle faces of every side. Then inset them again with an amount of 10 but this time opt for the separate option.
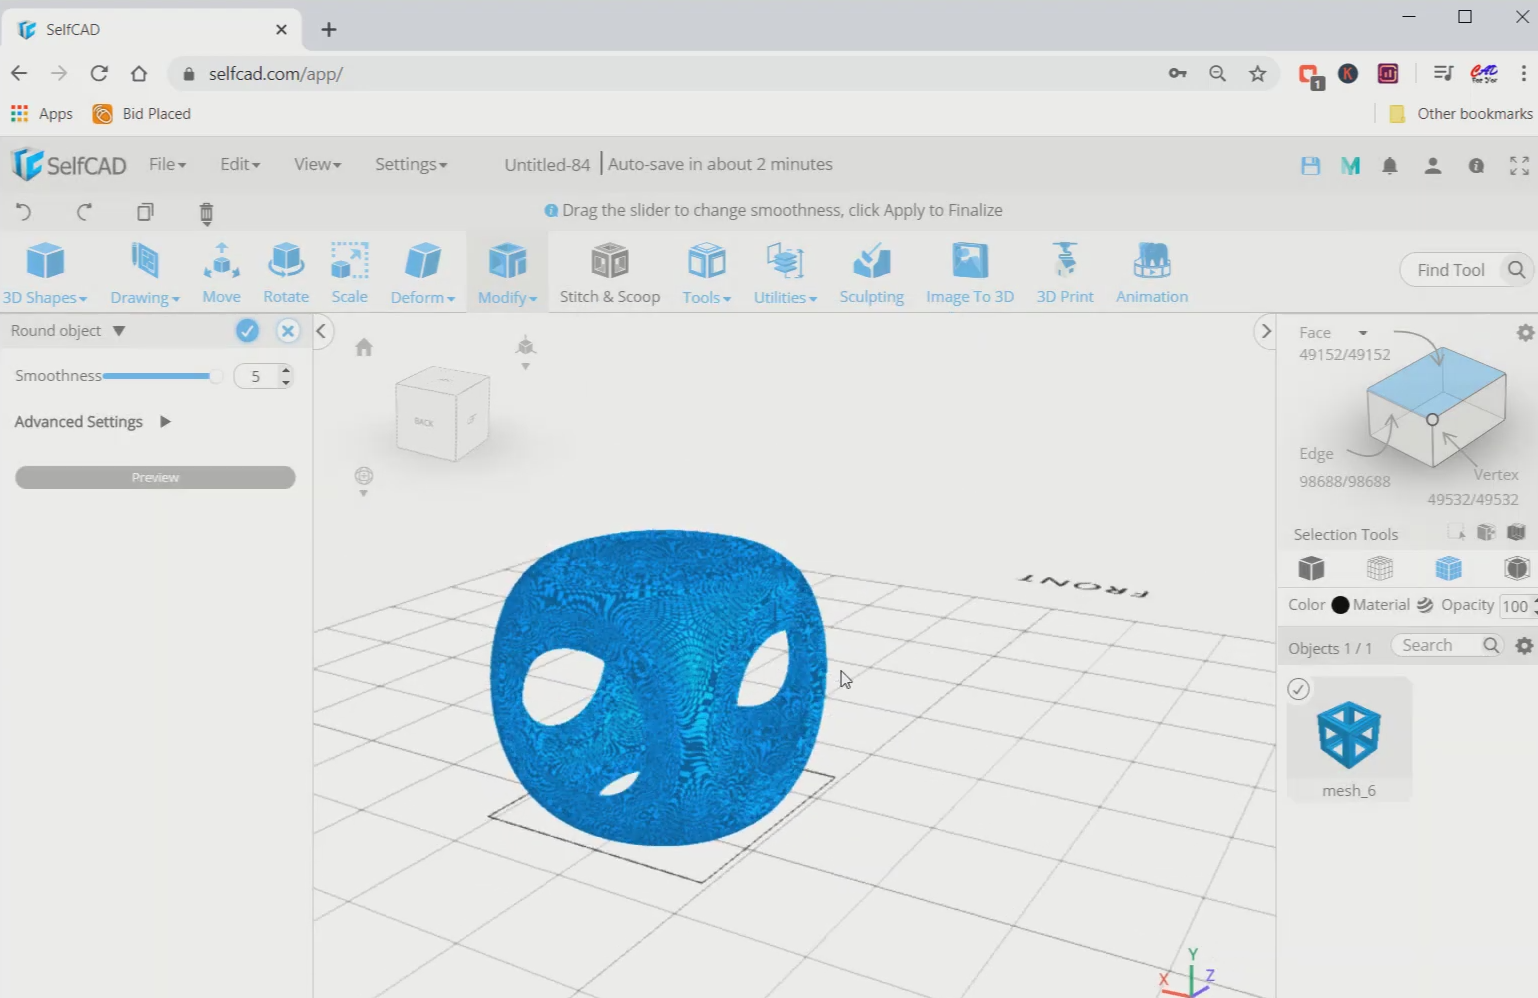
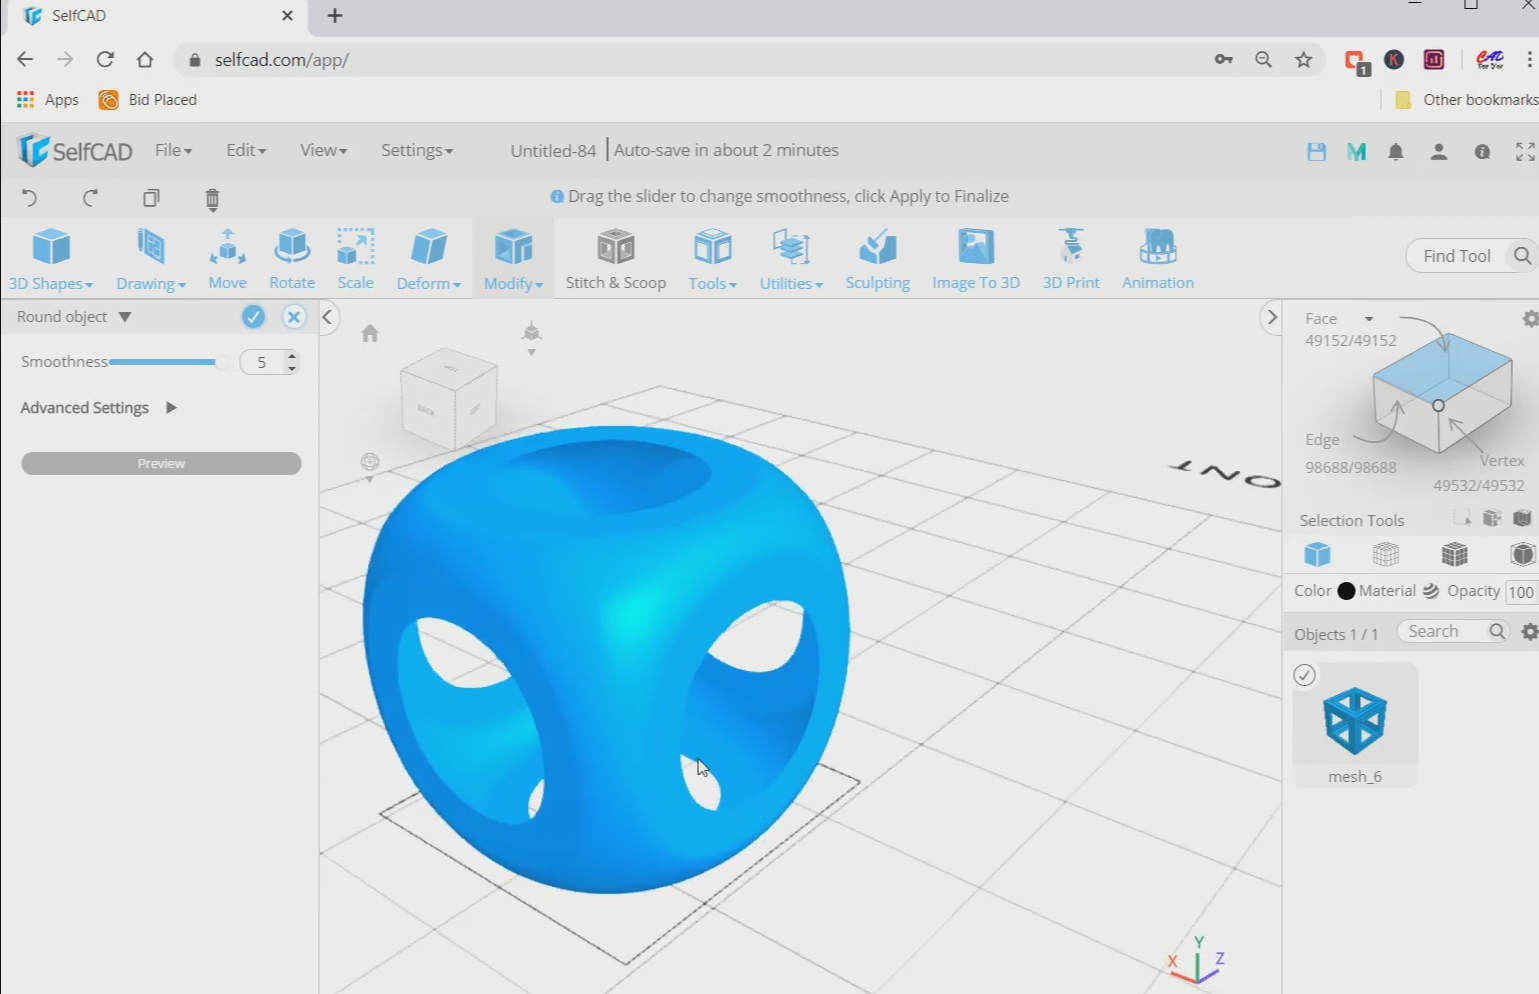
Step3: Add smoothness to the object
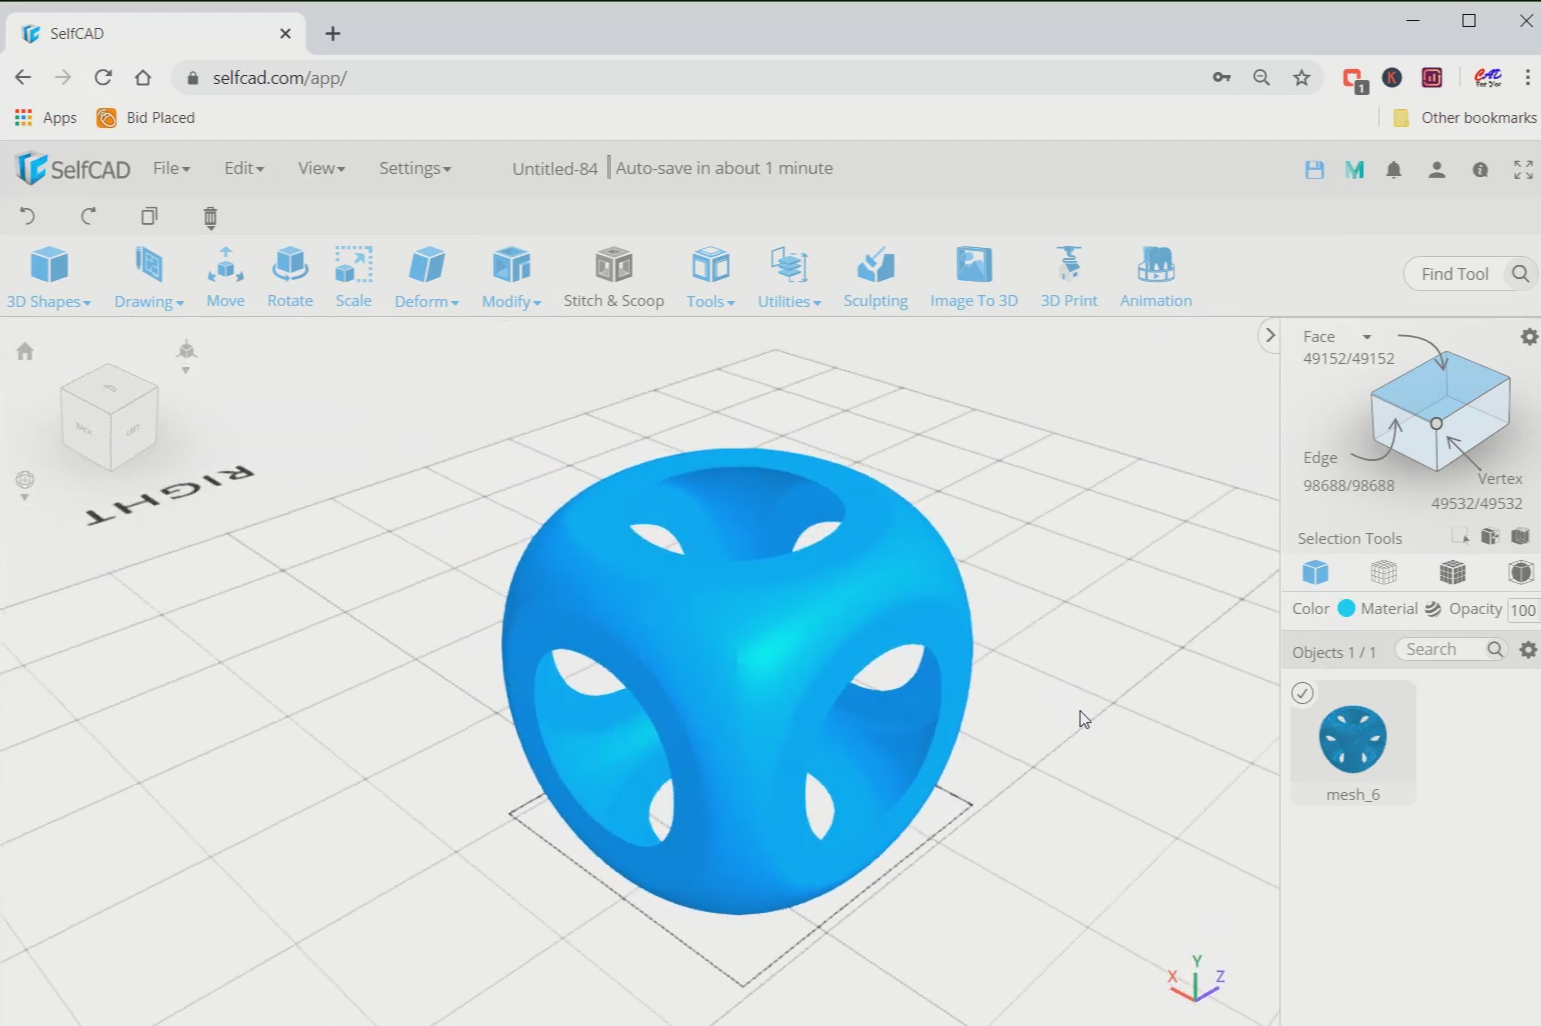
Now, just delete the selected faces by pressing the delete button. Then, go to modify and select the round object tool. Set smoothness to 5. After that, change to the mesh option.
Conclusion
Therefore, we are done with designing the excavated 3D model.
Conclusion: So, we have created both the models in SelfCAD
We've used different tools of SelfCAD to 3D design both the models. Beside knowing how to 3D model the thing, you can involve a near strategy in 3D designing different models in SelfCAD. Register yourself in SelfCAD today itself!! Give us your perspectives and ideas in the comments section below!