Maker Pro
Maker Pro

Hooking up deadbolt motor to TB6612FNG Stepper Motor Controller

Hey all I am in need of some help with hooking up this little motor to the TB6612FNG Stepper Motor Drive Controller that I purchased. I am wanting some feedback on how to go about hooking it up to this deadbolt motor so that I dont mess up the motor. This board will be controlled by an Arduino.

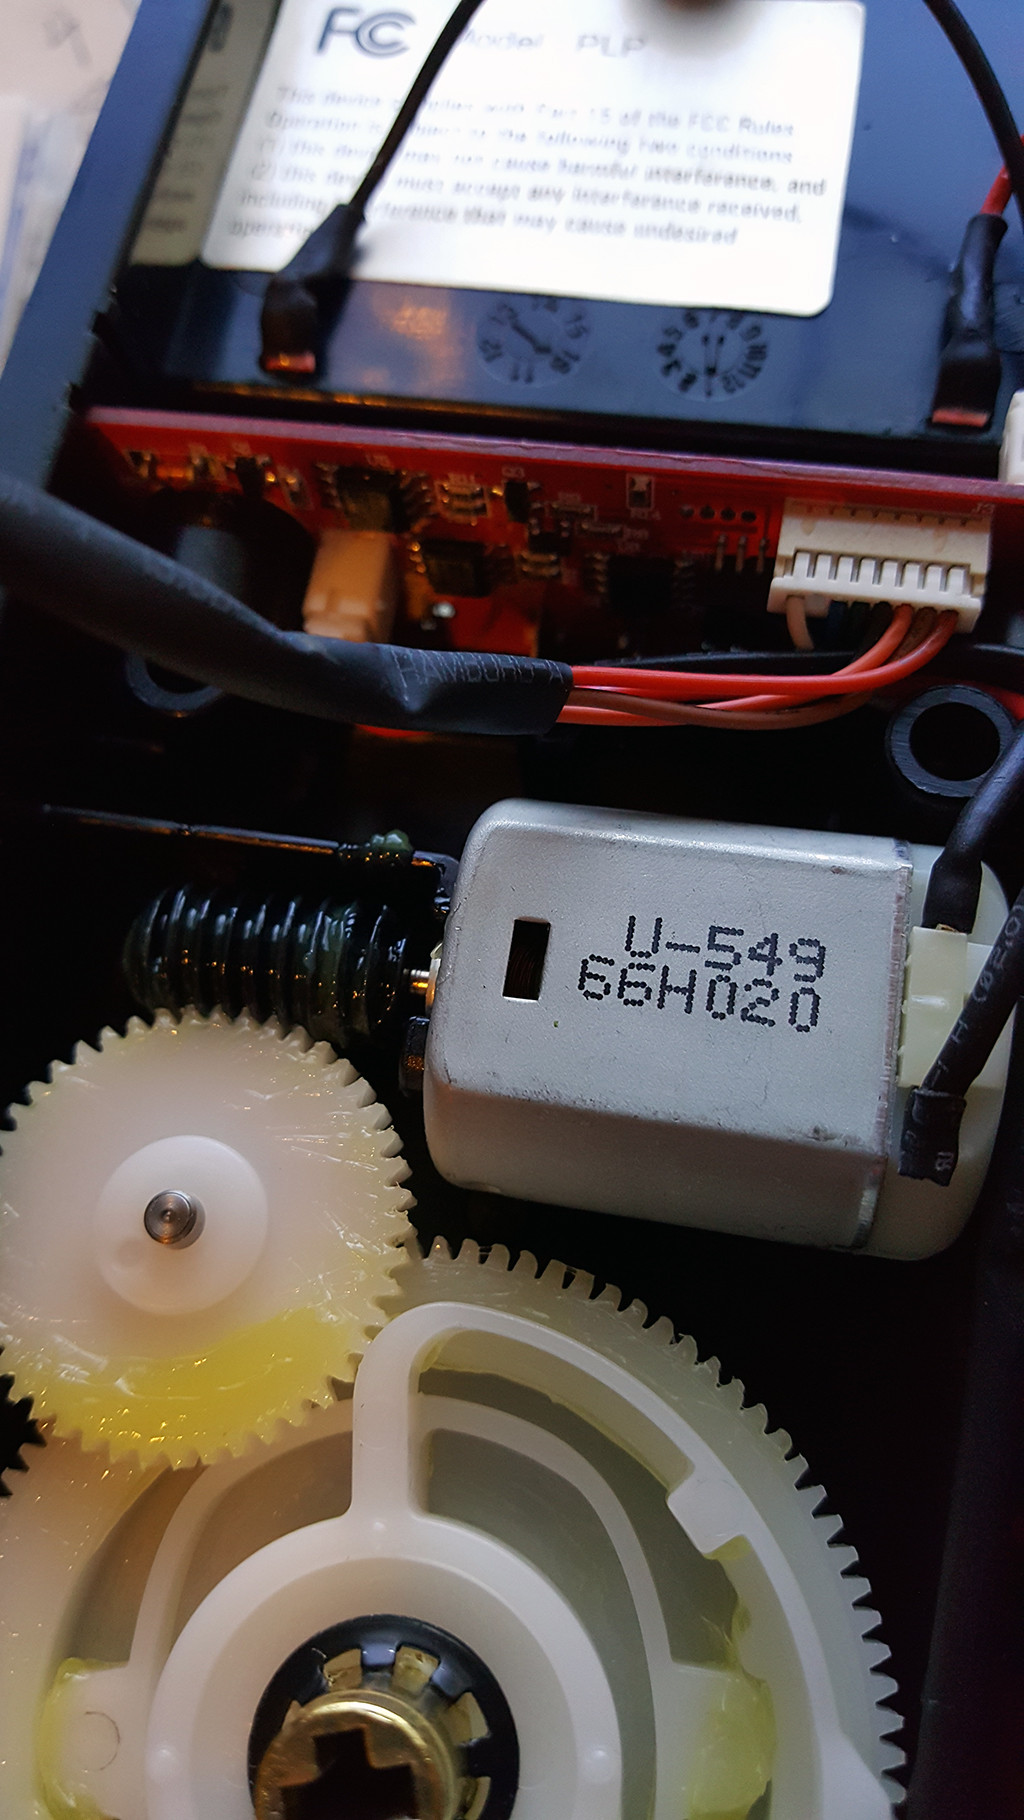
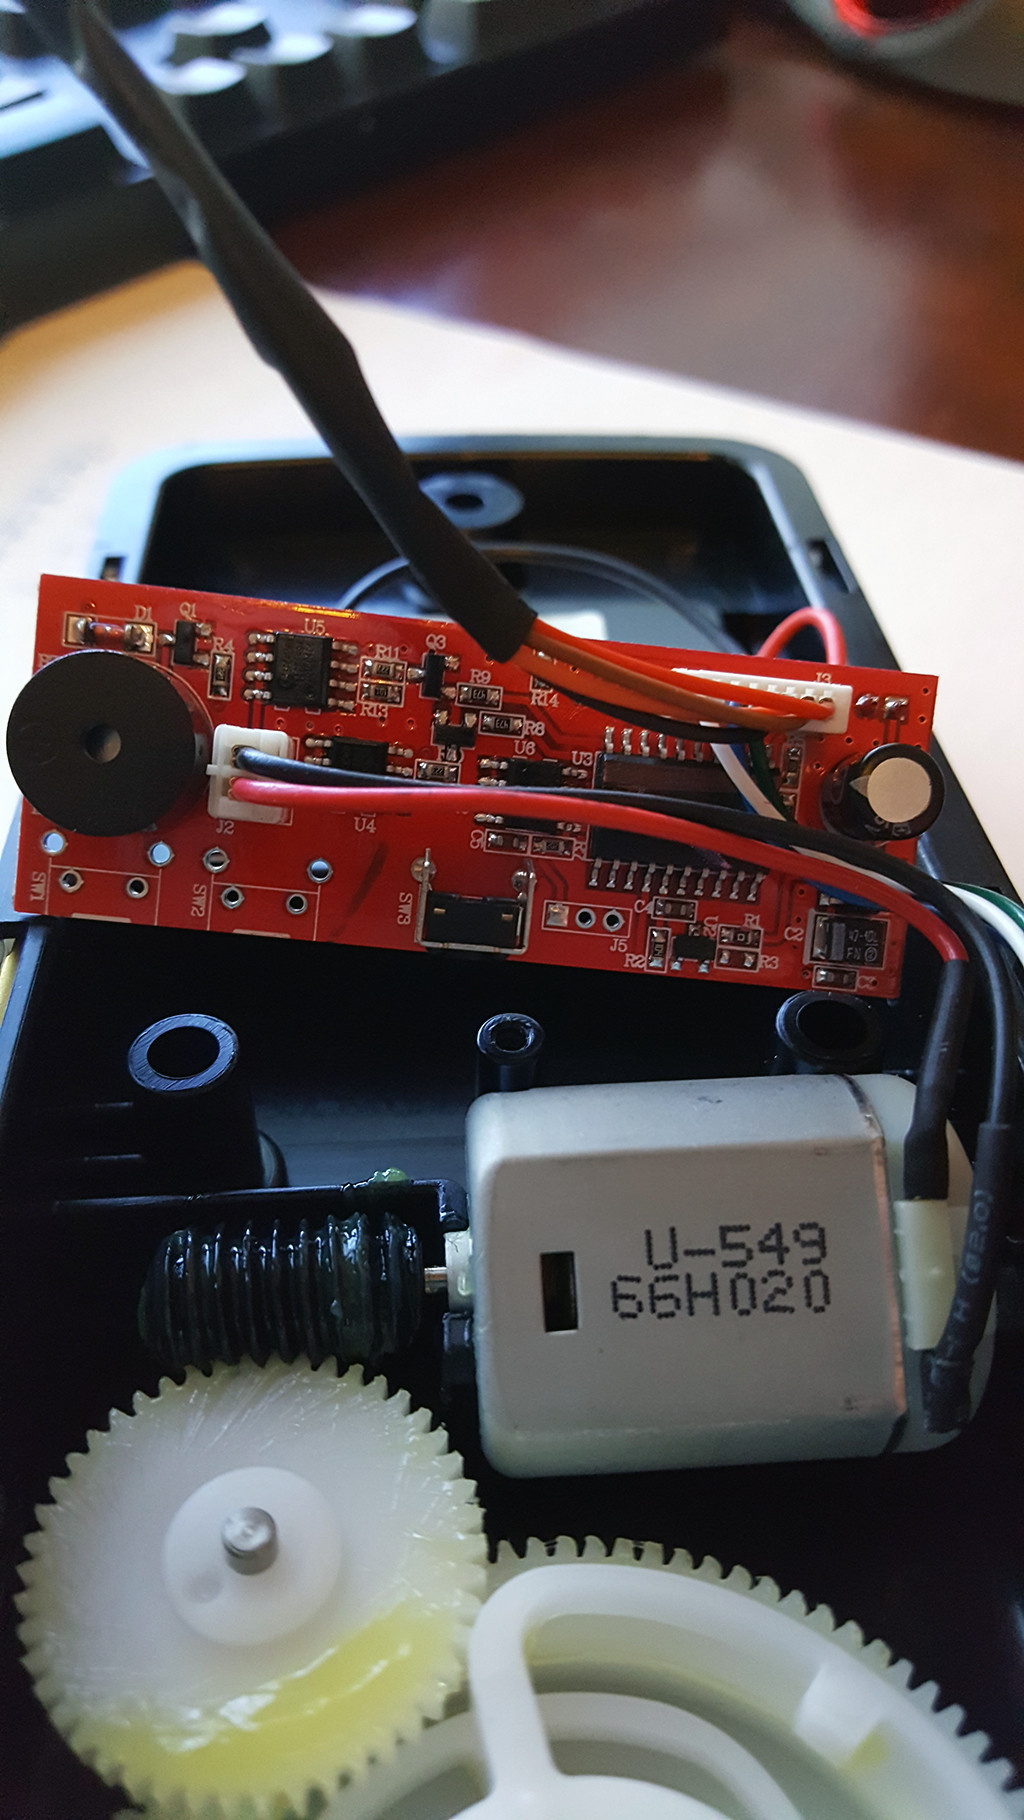
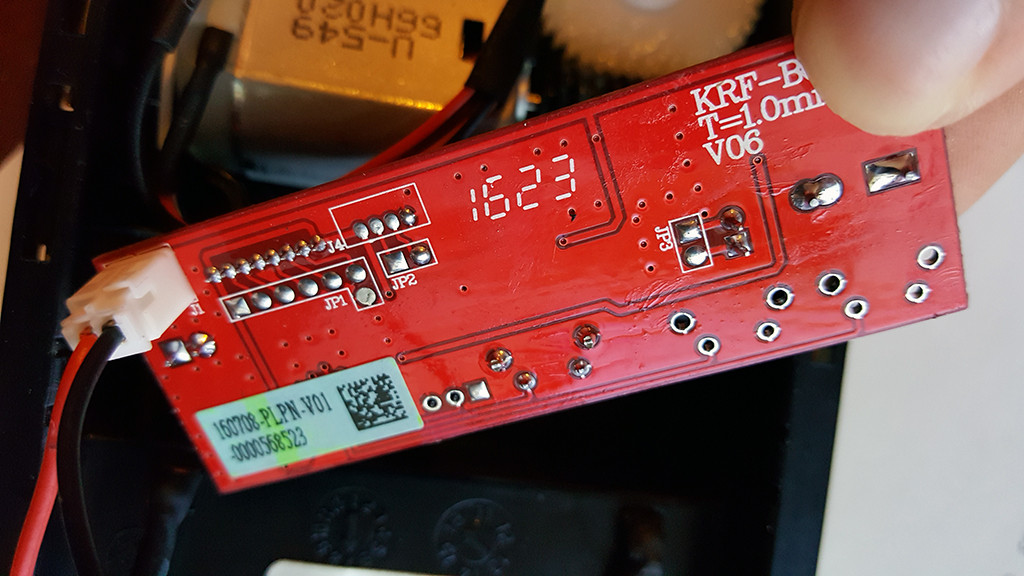
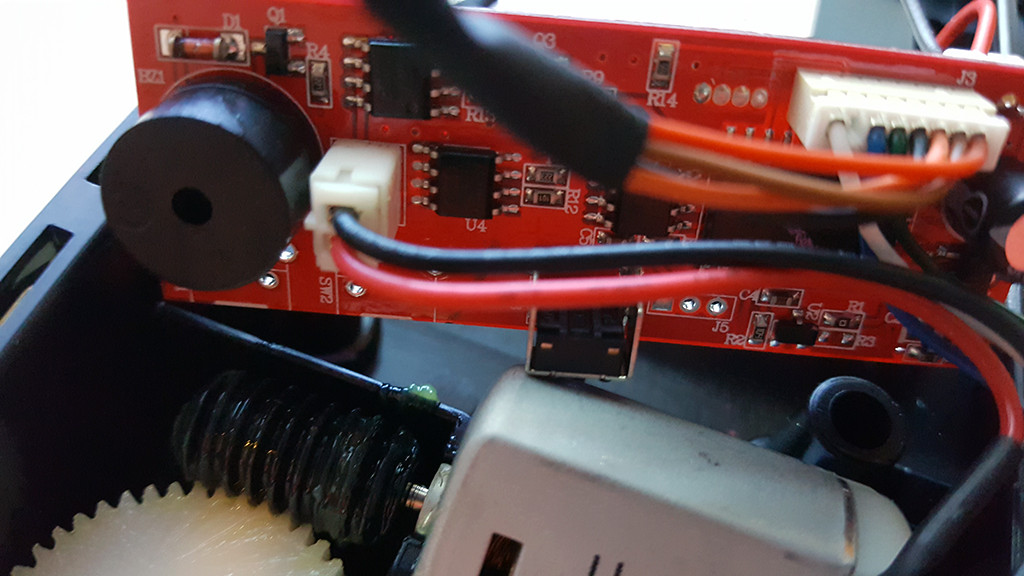
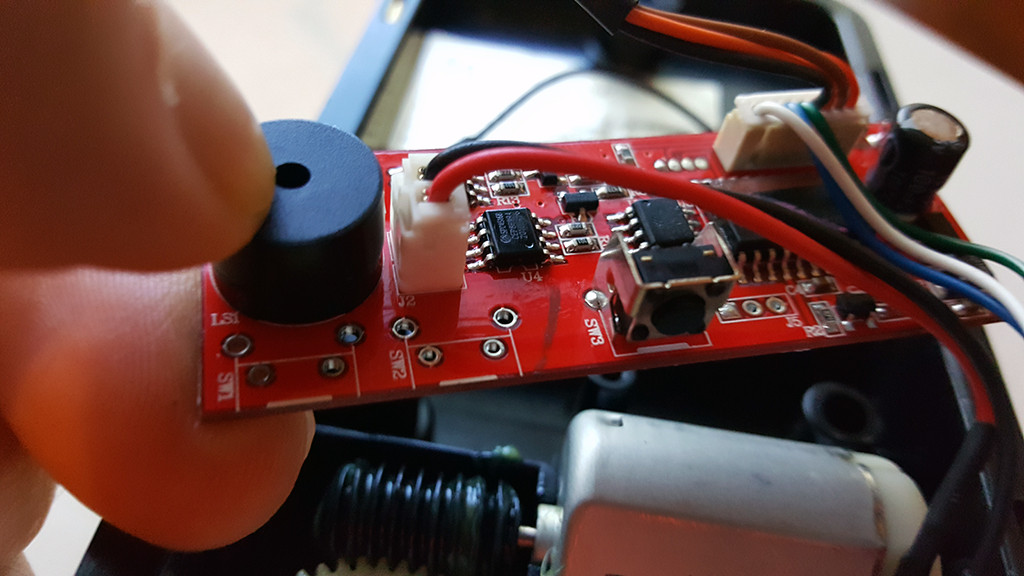
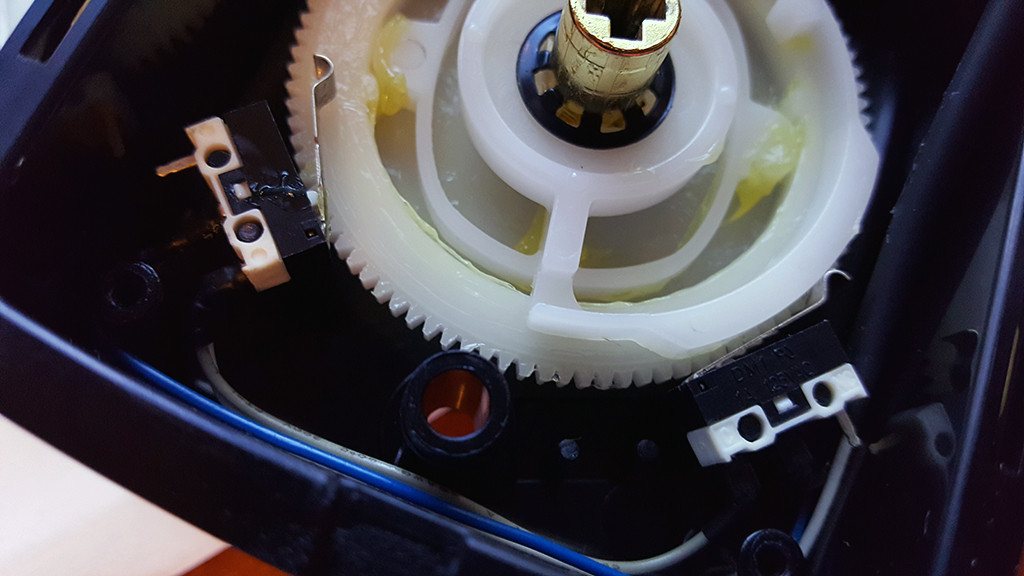
The deadbolt insides look like this:
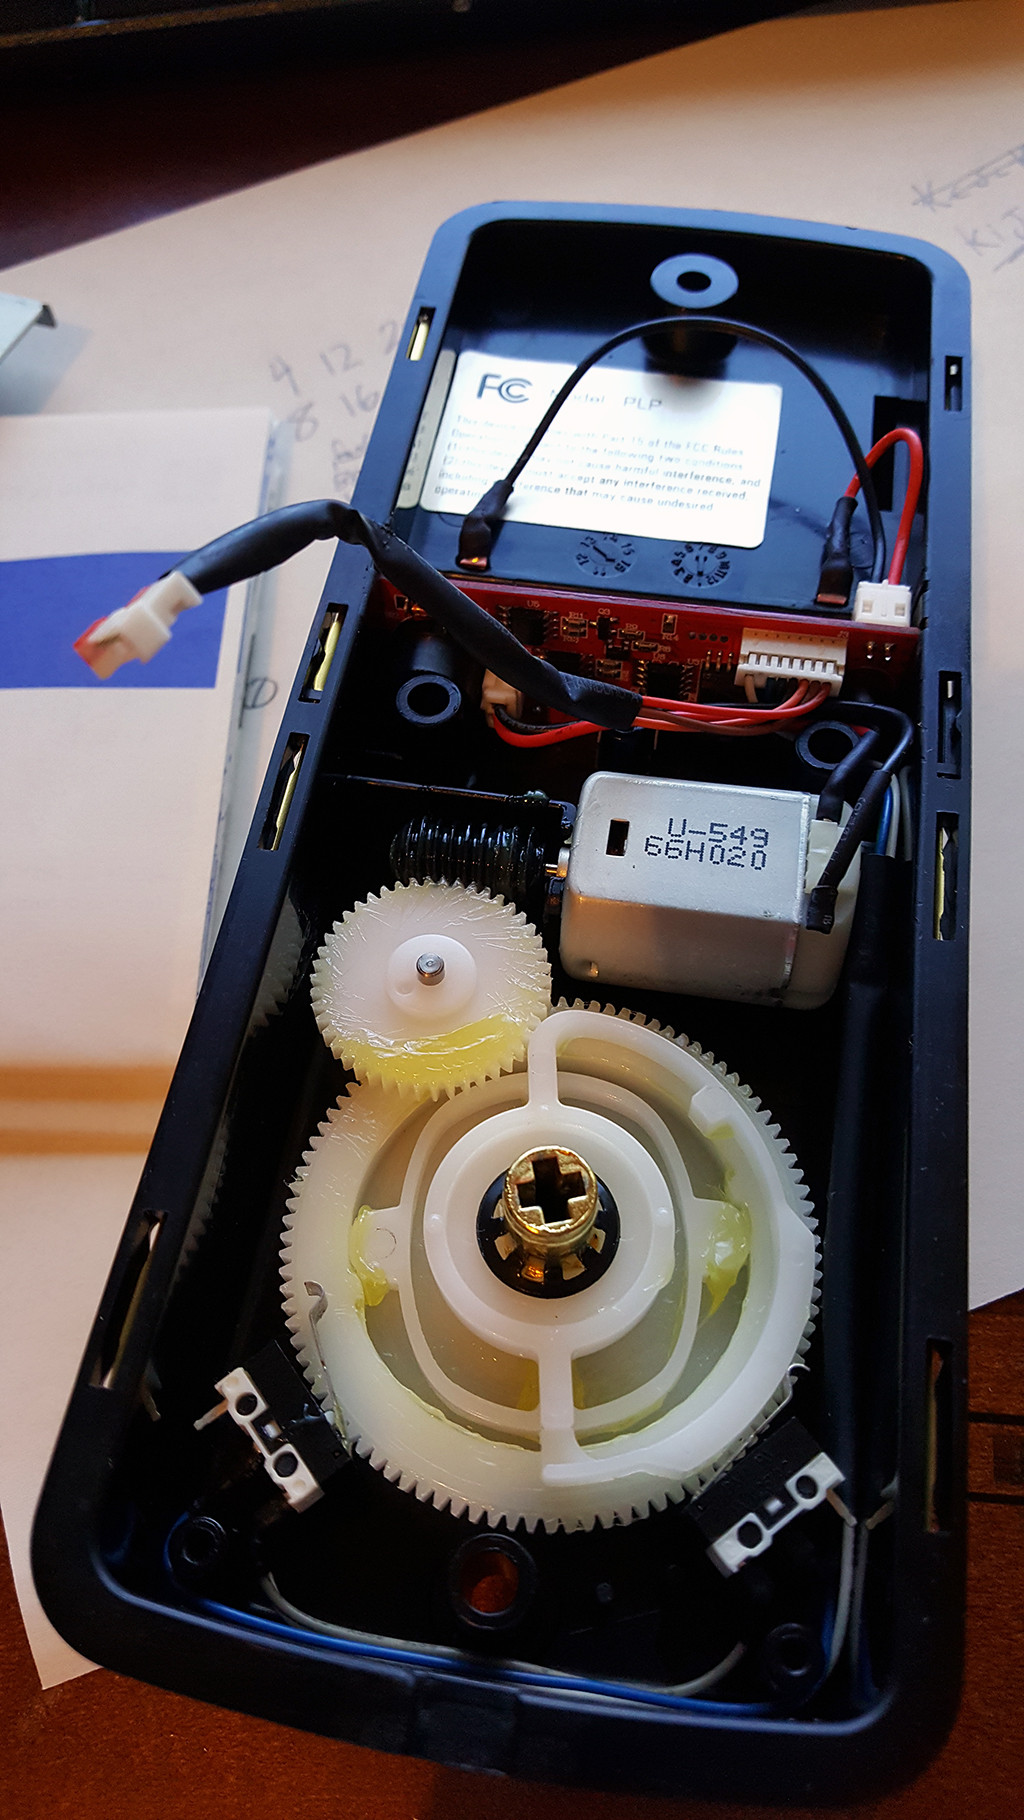
0plqK.jpg

oTqYB.jpg

VT1g9.jpg

9zUEA.jpg

WeWIX.jpg

pKb9N.jpg

TOiFv.jpg


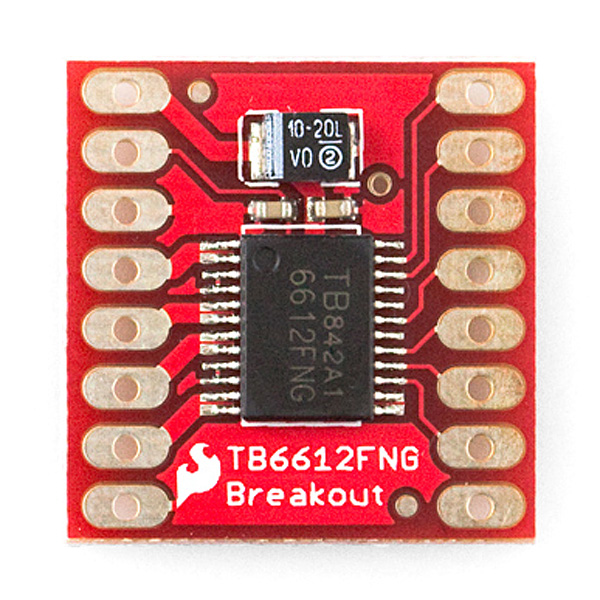
And the TB6612FNG is this:
YGVst.jpg


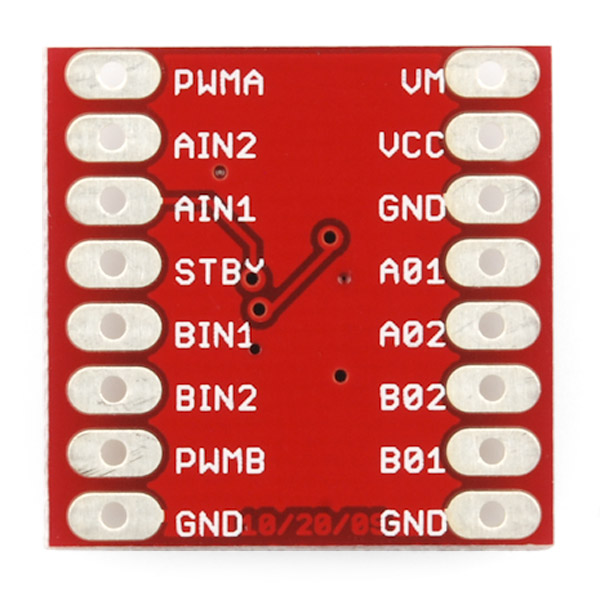
Back of the board
I2ktl.jpg


Each pin and its function is covered in the table below.
Code:
     Pin        Label                      Function    Power/Input/Output Notes
     VM         Motor Voltage              Power       This is where you provide power for the motors (2.2V to 13.5V)
     VCC        Logic Voltage              Power       This is the voltage to power the chip and talk to the microcontroller (2.7V to 5.5V)
     GND        Ground                     Power       Common Ground for both motor voltage and logic voltage (all GND pins are connected)
     STBY       Standby                    Input       Allows the H-bridges to work when high (has a pulldown resistor so it must actively pulled high)
     AIN1/BIN1  Input 1 for channels A/B   Input       One of the two inputs that determines the direction.
     AIN2/BIN2  Input 2 for channels A/B   Input       One of the two inputs that determines the direction.
     PWMA/PWMB  PWM input for channels A/B Input       PWM input that controls the speed
     A01/B01    Output 1 for channels A/B  Output      One of the two outputs to connect the motor
     A02/B02    Output 2 for channels A/B  Output      One of the two outputs to connect the motor
Now, for a quick overview of how to control each of the channels. If you are using an Arduino, don’t worry about this too much as the library takes care of all of this for you. If you are using a different control platform, pay attention. When the outputs are set to High/Low your motor will run. When they are set to Low/High the motor will run in the opposite direction. In both cases, the speed is controlled by the PWM input.
Code:
    In1  In2 PWM Out1 Out2 Mode
    H    H   H/L L    L    Short brake
    L    H   H   L    H    CCW
    L    H   L   L    L    Short brake
    H    L   H   H    L    CW
    H    L   L   L    L    Short brake
    L    L   H   OFF  OFF  Stop
Don’t forget STBY must be high for the motors to drive.

And the data sheet on the TB6612FNG is http://www.sparkfun.com/datasheets/Robotics/TB6612FNG.pdf.

I found a great tutorial http://bildr.org/2012/04/tb6612fng-arduino/ but want to make sure I hook up the wires correctly for this deadbolt motor and thats why I ask someone whos more knowledgeable about these types of things to help me out.

Thanks!
 
Motor in your unit is a series motor, not a stepper.
Not sure about the controller as the pdf wants me to download some extra font files which I am not about to do.
What is it you are planning to do by hacking the apparent "new" device.
 

hevans1944

Hop - AC8NS
I was able to open the Toshiba controller datasheet in a Firefox PDF reader window. It didn't save properly (font problem?) but my free PDF Creator app was able to open and save the image. Looks to be a bit of over-kill to open and close a dead-bolt lock driven by a puny PM DC motor powered from four AA cells. But what the heck, it should work fine if you incorporate the two micro-switches into the Arduino program, or if they are wired to disable power to the motor when the limit stops are reached.
 

Attachments

  • TB6612FNG Dual H-Bridge Driver.pdf
    225.1 KB · Views: 95
I was able to open the Toshiba controller datasheet in a Firefox PDF reader window. It didn't save properly (font problem?) but my free PDF Creator app was able to open and save the image. Looks to be a bit of over-kill to open and close a dead-bolt lock driven by a puny PM DC motor powered from four AA cells. But what the heck, it should work fine if you incorporate the two micro-switches into the Arduino program, or if they are wired to disable power to the motor when the limit stops are reached.
Thanks for the great info! Would you be able to draw up a schematic of how i would go about hooking the motor up to the driver board? I really dont want to hook it up incorrectly and fry something.
 
Still has me baffled as to why you want to chop into this unit.
By the looks of it, it already does what is required, however................

Hevans1944 has already provided you with a re-formatted pdf file with all the info needed.....
Circuit diagram page 7
IC usage considerations page 9 and 10 ( suggest you read them)

Other than that, from what I've seen so far I find you last concern unavoidable really.:eek:
 

hevans1944

Hop - AC8NS
Thanks for the great info! Would you be able to draw up a schematic of how i would go about hooking the motor up to the driver board? I really dont want to hook it up incorrectly and fry something.
I will not provide you with a schematic. Follow the Application Note in the datasheet. Draw up your own schematic and post it here for comment. You just pick which one of the two H-bridge output channels you want to use, connect the two motor terminals to the two outputs of that channel, apply PWM pulse input, IN1, IN2 and STBY control inputs from your Arduino, and power (separate connections) to the controller and the motor. You also need to figure out what those two micro-switches in the lock do (how they are wired and how their contact position, actuated or deactuated, is used to limit-stop the motor).

There was a person here, @KrisBlueNZ sadly now deceased, who would do as you requested, but so far no one has stepped up to replace Kris. It may not ever happen, for I have never met anyone on EP who has the passion, experience, time, and willingness to design circuits in the manner that Kris routinely provided. He was truly amazing and is sorely missed. We are here to help, but we help those who help themselves.

Yes, but commonly known as a "series" motor...depends on what country one comes from I imagine. ;)
I grew up with DC motors used to power heavy equipment. These had separate field coils and armature coils that could be wired in series or in parallel. Permanent magnet (PM) DC motors are relative late-comers to the scene, the first ones being "toy" motors with AlNiCo (aluminum, nickel, cobalt alloy) magnets replacing the field windings. These have torque/speed-regulation properties similar to series shunt-connected DC motors that have real field windings connected in series parallel with the armature windings. With the advent of rare-earth magnets and solid-state commutation, PM DC motor performance has considerably improved, but that's a story for another thread.

Good luck, @StealthRT with your hack of the lock. Maybe you can just throw away everything except the motorized dead-bolt mechanism and start fresh, retaining or not the ability to open the lock with a key. Post some more excellent images of what you are trying to DO. It is not clear how the micro-switches are wired to stop the motor at the limits of its travel and allow it to move in the opposite direction to take it out of a limit. Maybe you can use these two switches as inputs to your Arduino. Or, just connect the red and black motor leads to a power supply and see if the switches stop the motor at the dead-bolt travel limits. If so, you are ready to connect the motor to the PWM controller and the controller to your Arduino. If not, you have some more work ahead to integrate the switches with the motor. Please let us know what you find out!

Edit: corrected PM DC motor behavior to agree with @Minder's explanation of series versus shunt field windings.
 
Last edited:
Yes, but commonly known as a "series" motor...depends on what country one comes from I imagine. ;)
Well I have worked with motors in both Europe and N.A. and a series motor usually indicates a series connected field as in Universal motors fitted to power tools and vacuums, also the older starter motors on auto's.
They actually operate in a runaway condition due to the field weakening.
The one shown is most likely a P.M. field, which is a shunt field.
The same phenomenon occurs in a wound shunt field DC motor, if the field is lost while running, it can run away to destruction.
M.
 
Think you are being a bit picky M.

Really? I am curious if you call that a series motor, and it appears to be DC brushed with a P.M. field, what do you call a shunt field motor.?
If it depends on what country one comes from, what is Your country of origin?
M.
 
Last edited:

hevans1944

Hop - AC8NS
I will have to defer to @Minder's experience and expertise, which is considerably greater than mine. I wasn't aware that a PM DC motor behaved like a DC motor with a shunt-connected field, but it does make sense because the magnetic field is constant with a shunt-connected field, and of course the PM magnetic field is also constant. Whatever, the motor in the dead-bolt lock is a PM DC motor, direction determined by polarity applied to the armature on two wires.
 
Well i hooked it up to the TB6612FNG and the Arduino and i got....nothing.

Code:
//motor A connected between A01 and A02
    //motor B connected between B01 and B02
    int STBY = 6; //standby
    //Motor A
    int PWMA = 3; //Speed control
    int AIN1 = 4; //Direction
    int AIN2 = 5; //Direction
    //Motor B
    int PWMB = 3; //Speed control
    int BIN1 = 4; //Direction
    int BIN2 = 5; //Direction
    void setup(){
      pinMode(STBY, OUTPUT);
      pinMode(PWMA, OUTPUT);
      pinMode(AIN1, OUTPUT);
      pinMode(AIN2, OUTPUT);
      pinMode(PWMB, OUTPUT);
      pinMode(BIN1, OUTPUT);
      pinMode(BIN2, OUTPUT);
    }
    void loop(){
      move(1, 50, 1); //motor 1, full speed, left
      move(2, 50, 1); //motor 2, full speed, left
      delay(1000); //go for 1 second
      stop(); //stop
      delay(250); //hold for 250ms until move again
      move(1, 50, 0); //motor 1, half speed, right
      move(2, 50, 0); //motor 2, half speed, right
      delay(1000);
      stop();
      delay(250);
    }
    void move(int motor, int speed, int direction){
    //Move specific motor at speed and direction
    //motor: 0 for B 1 for A
    //speed: 0 is off, and 255 is full speed
    //direction: 0 clockwise, 1 counter-clockwise
      digitalWrite(STBY, HIGH); //disable standby
      boolean inPin1 = LOW;
      boolean inPin2 = HIGH;
      if(direction == 1){
        inPin1 = HIGH;
        inPin2 = LOW;
      }
      if(motor == 1){
        digitalWrite(AIN1, inPin1);
        digitalWrite(AIN2, inPin2);
        analogWrite(PWMA, speed);
      }else{
        digitalWrite(BIN1, inPin1);
        digitalWrite(BIN2, inPin2);
        analogWrite(PWMB, speed);
      }
    }
    void stop(){
    //enable standby 
      digitalWrite(STBY, LOW);
    }

GBC3K.jpg

gRz6x.jpg

qZGuO.jpg
 
Should the motor turn when i apply 5vdc to the red wire and gnd for the black wire? It does nothing when doing that.
I would expect a DC brushed motor to turn when power is applied. with apply power across the two, what is the continuity across them?
M.
 

hevans1944

Hop - AC8NS
Should the motor turn when i apply 5vdc to the red wire and gnd for the black wire? It does nothing when doing that.
Are you applying 5 V DC to the motor wires alone in the lock mechanism, and not through the PWM controller? If so, the dead-bolt mechansim may be in a limit condition, as detected by one of the two micro-switches. You would need to reverse the polarity of the motor wires to bring the dead-bolt mechanism out of the limit condition.

Nice pictures! Nice code, too.

The protoboard with the PWM controller appears to be mechanically connected to another protoboard with plastic thingys, but I don't see that the lower positive (blue) rails are electrically connected. And is the thingy bridging the top and bottom pair of rails some sort of power supply regulator? Check your connections to make sure the power and ground rails are connected where you think they should be connected.
 
Last edited:
Ah it seems to be working now. YAY! :)

Just need to tweak the code a little and hook up the limit switches to the analog inputs and see if i get readings from them. That would just consist of grounding one side and running the other to the arduino analog pin, correct?
 

hevans1944

Hop - AC8NS
Just need to tweak the code a little and hook up the limit switches to the analog inputs and see if i get readings from them. That would just consist of grounding one side and running the other to the arduino analog pin, correct?
Yes, I think that would work. IIRC, there are built-in "weak" pull-up resistors on the Arduino inputs, but you might want to add external 10 kΩ pull-ups just to be sure the switches produce well-defined 0 and 1 logic levels. The inputs should be programmed as digital inputs, not analog inputs. Normally, you would "de-bounce" the switch inputs with software before accepting their position as gospel. This is not strictly necessary for a limit-stop indication... the first change in switch state is an affirmative indication that the motor has driven the mechanism into a limit stop; subsequent changes in state caused by contact bounce can be ignored. Likewise, on driving out of a limit-stop toward the other limit stop, the switch that operated to indicate a limit-stop occurred can now be ignored while your software waits for a change in state of the other limit-stop switch.

So, what was the problem with your breadboard configuration? And where did that voltage regulator module come from? It looks like a nice piece of kit for breadboarding applications.

Congratulations on figuring it all out! Please let us know how it all turns out after you finish the installation. I may want to do something similar at a new home we purchased in Venice, FL.
 
Last edited:
Top