Learn to make a remote heart rate monitor using a Pulse Sensor and ThingSpeak.
Remote health monitoring is rapidly growing in the healthcare field. With tools like the Fitbit and Apple watch, people are able to monitor vital health data from anywhere in the world. Researchers, engineers, and health care professionals are continuously involved in research in this field with the aim of improving the quality of healthcare services. It is essential to monitor the proper functioning of the human body considering various parameters such as heart rate, body temperature, and pressure. Nowadays most of the wearables have these health monitoring features built-in.
If you are a person with an inclination towards biomedical technology, this is an exciting project you’ll want to try. This project will teach you how to build an IoT-based remote heart rate monitoring system with the ESP32. Once you set up this project, you can monitor your heart rate from anywhere in the world using a laptop or a mobile phone.
Let’s get started.
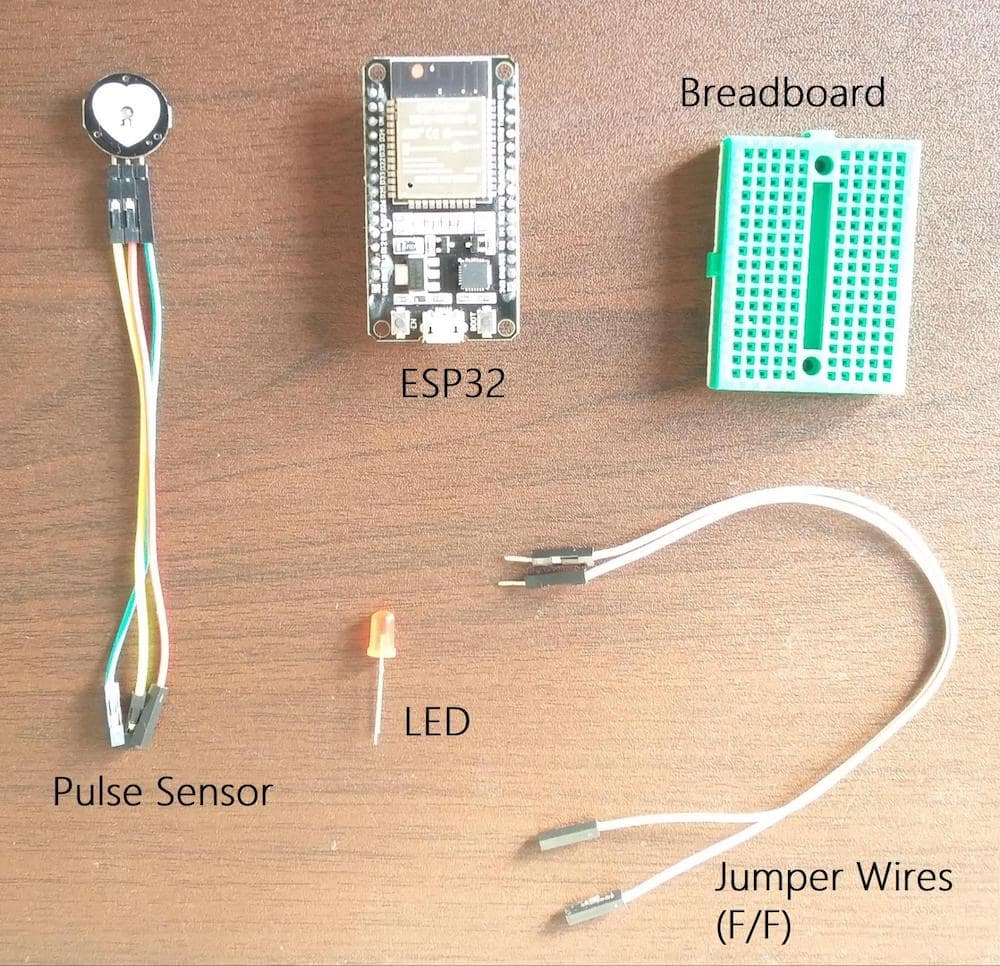
Required Hardware
- ESP32
- Pulse Sensor
- Red LED
- Breadboard and Jumper Wires
Required Libraries
Connecting the Pulse Sensor to the ESP32
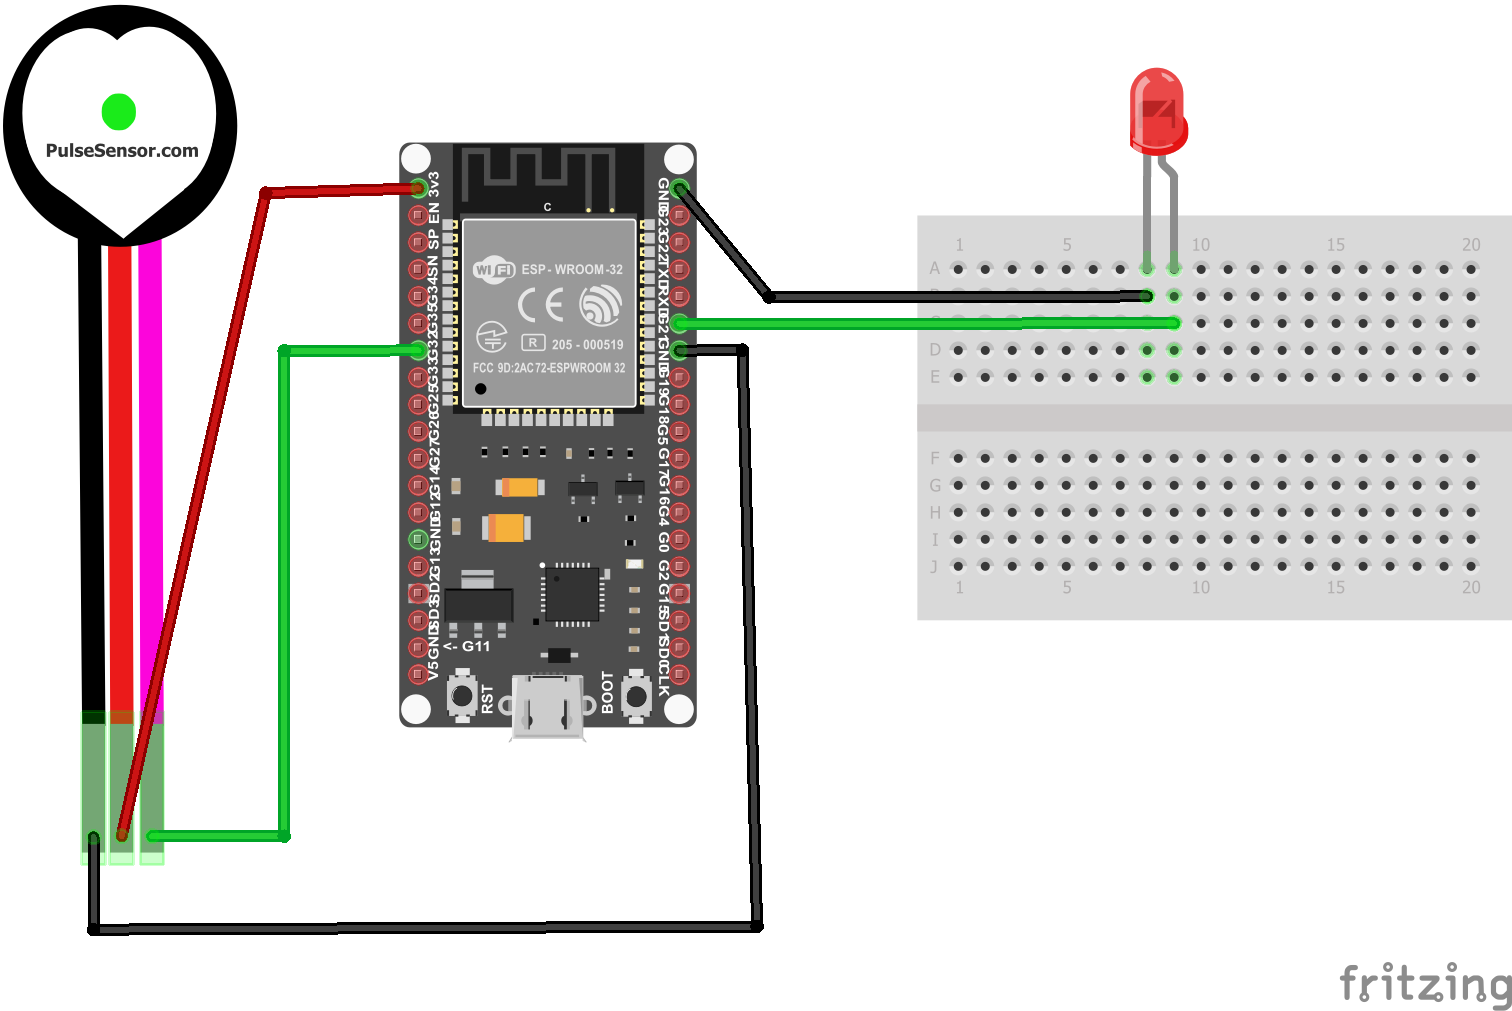
The Fritzing diagram below shows the connections between the Pulse Sensor, the ESP32, and the LED.
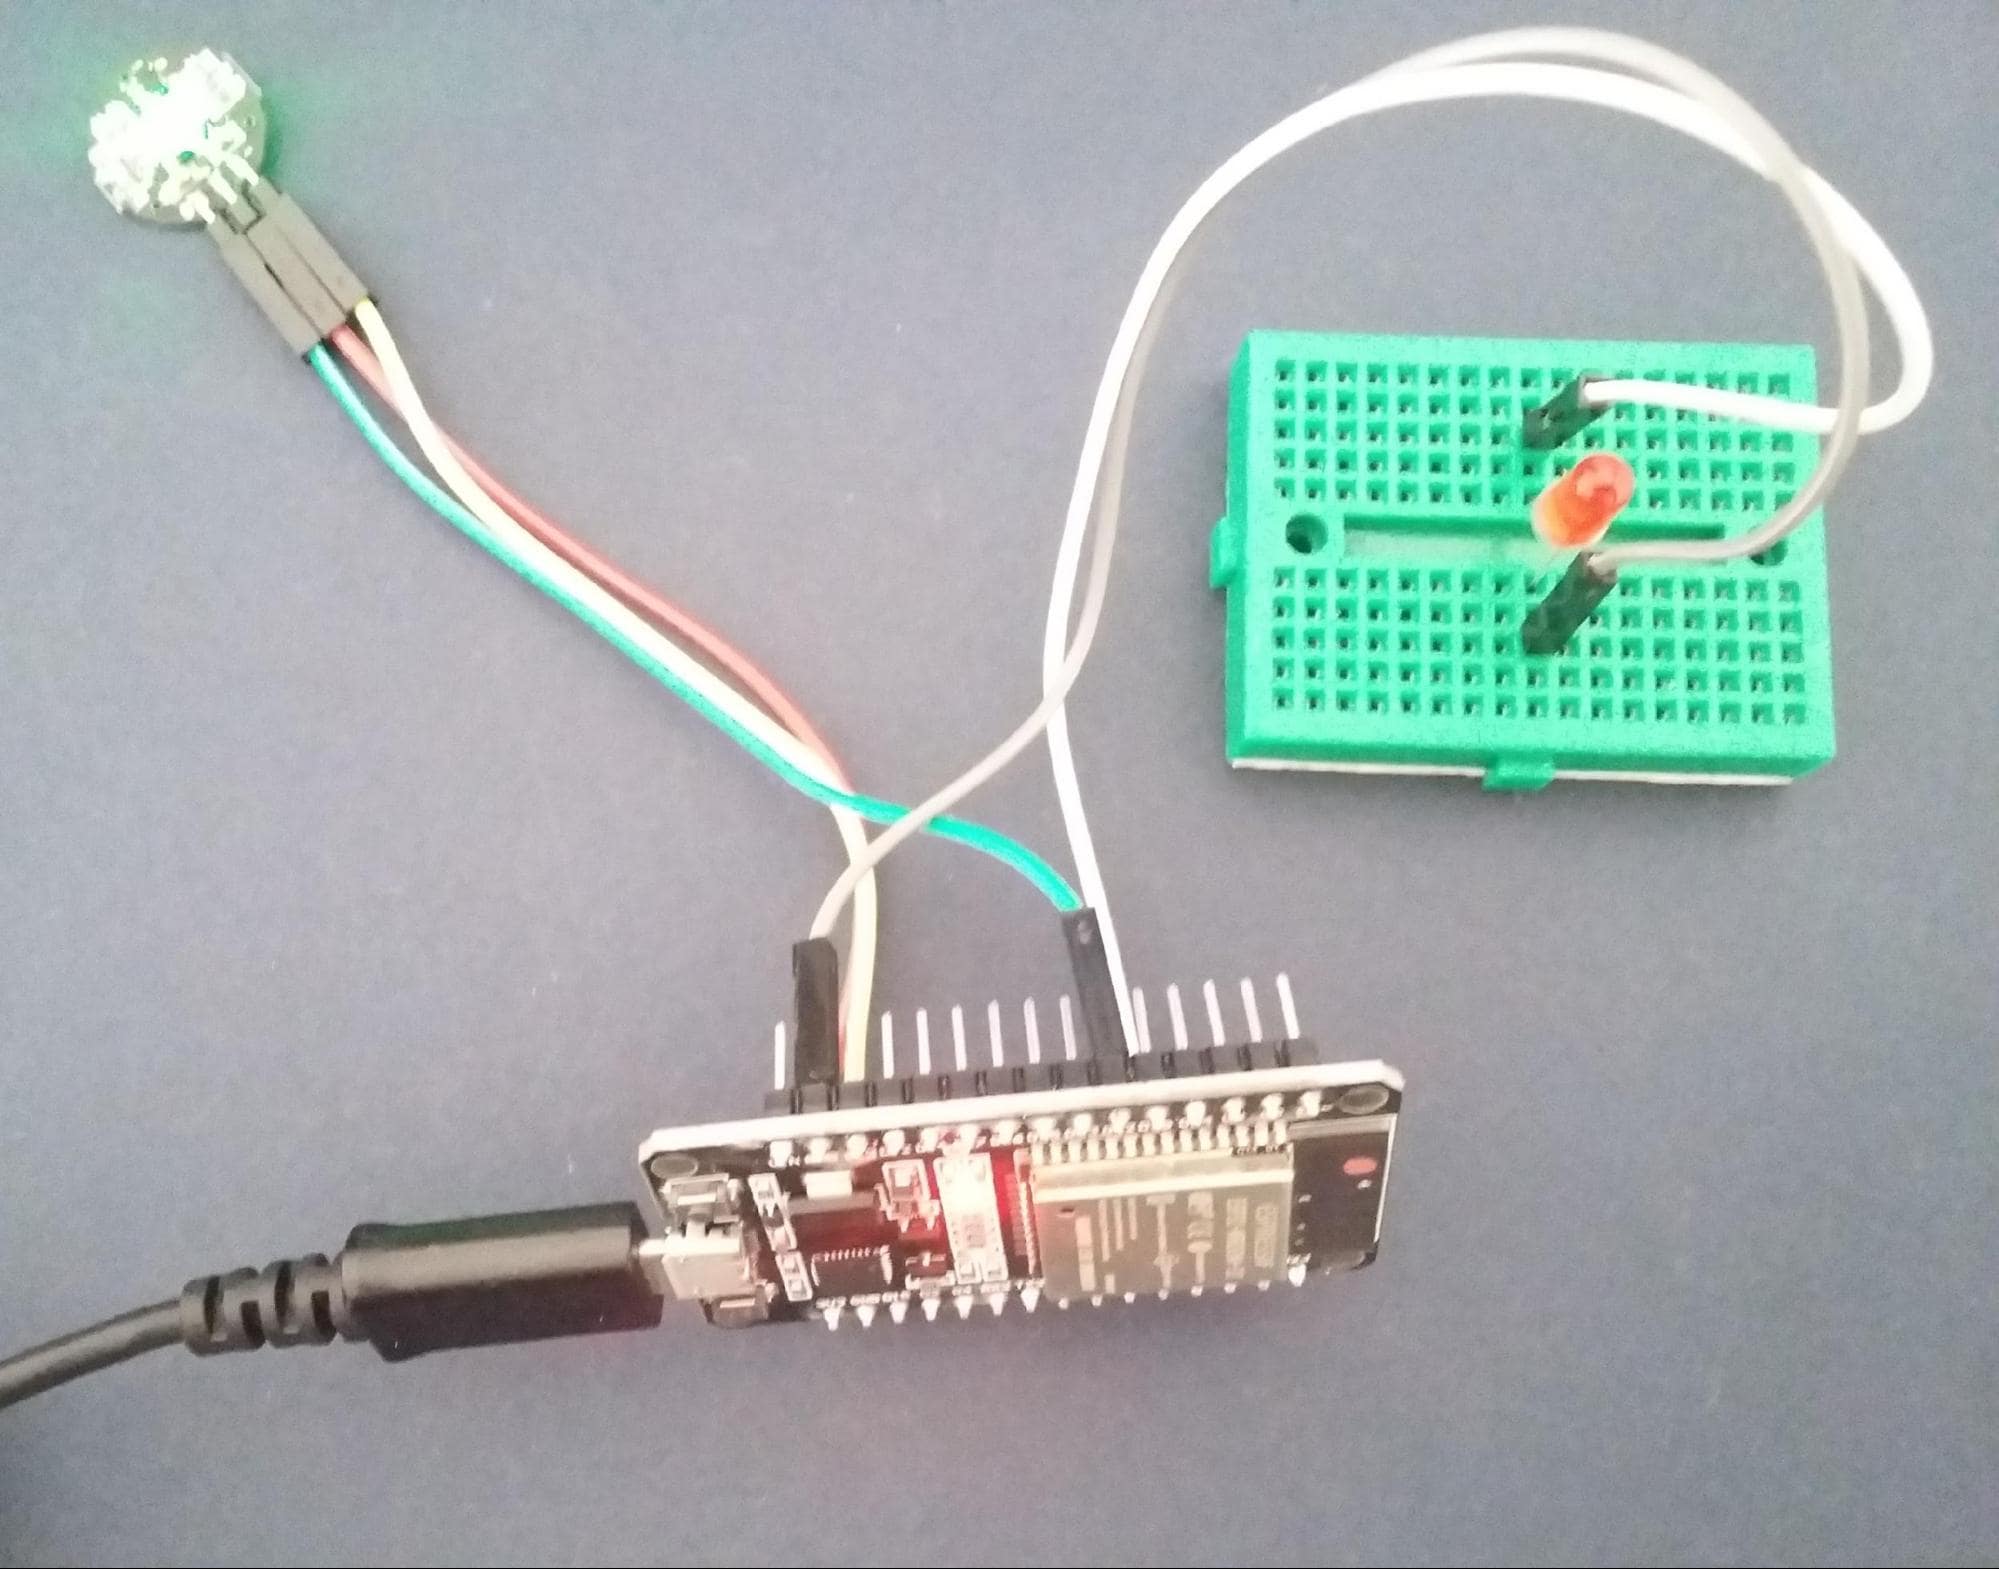
Once your hardware is connected, it should look something like this:
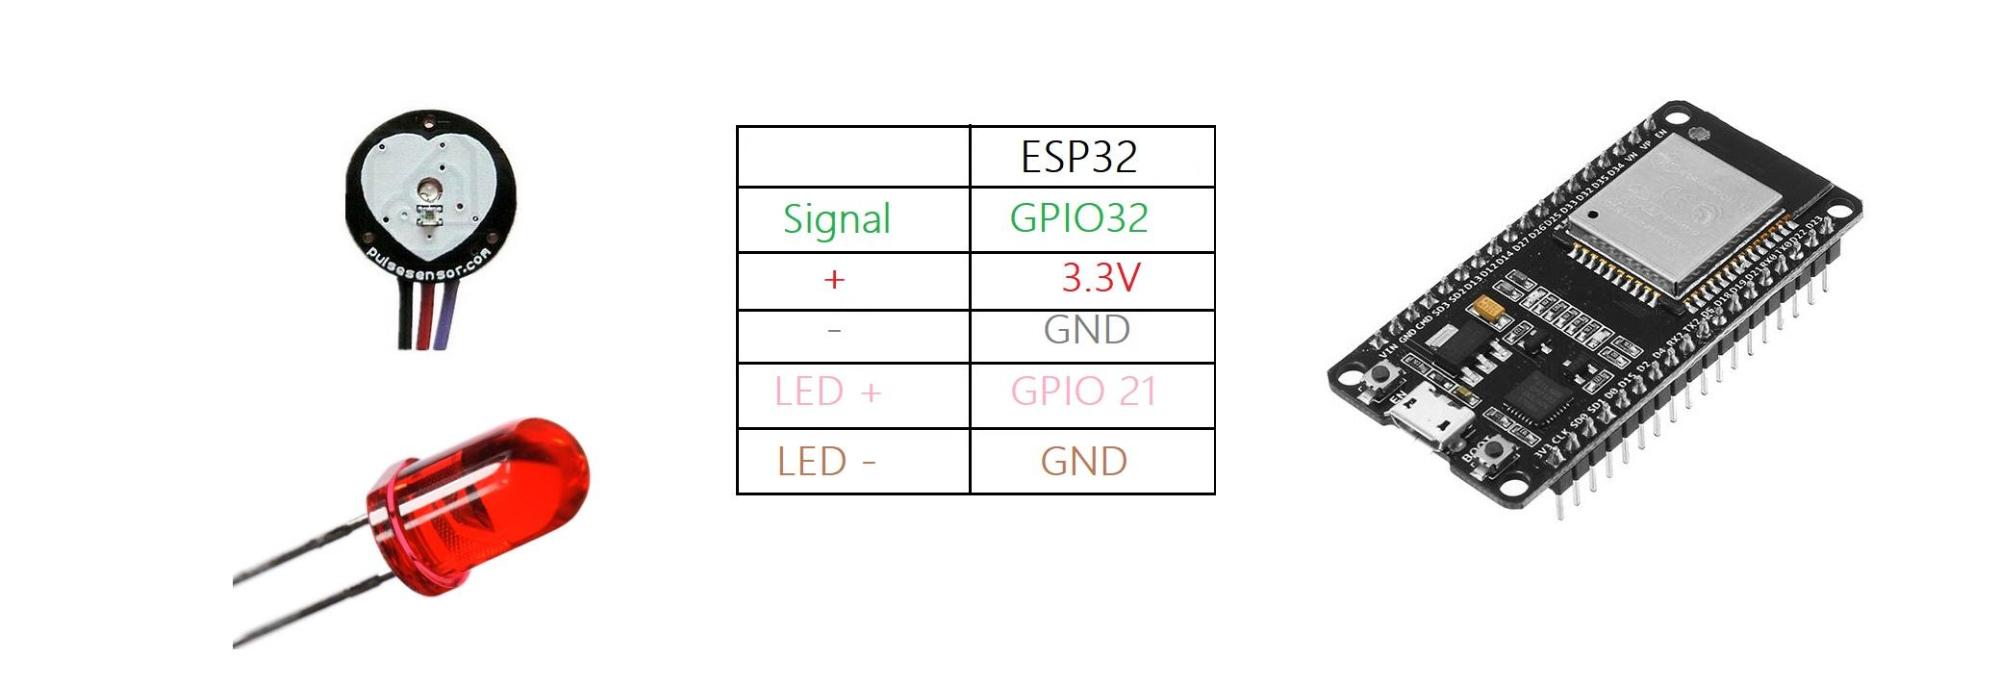
The signal pin of the pulse sensor must be connected to an analog pin of ESP32. There is also an LED connected to the digital pin of the ESP32 that blinks according to the sensor pulses.
Some analog pins read faulty values when reading the sensor data while the board is connected to a Wi-Fi network because there can be conflicts between the ADC and the Wi-Fi on the ESP32. So it is recommended to follow the exact pin arrangement I listed in the image above. Most of the time, GPIO pin 32 and 36 work fine with the Wi-Fi.
Heart Rate Monitoring System Overview
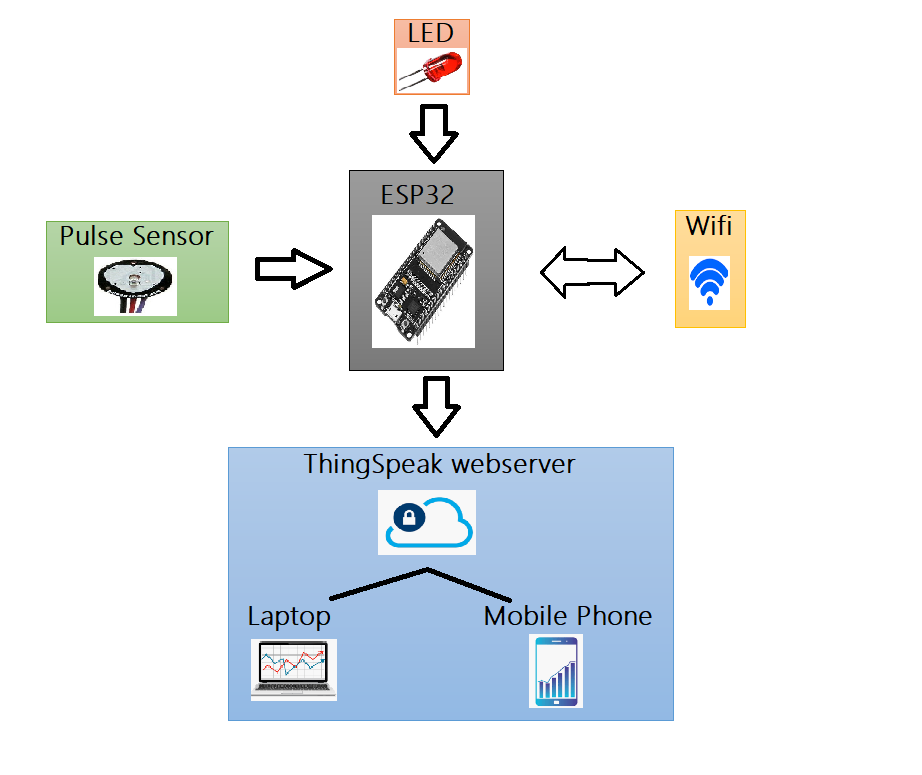
The following block diagram shows the entire setup for the system.
Some analog pins read faulty values when reading the sensor data while the board is connected to a Wi-Fi network because there can be conflicts between the ADC and the Wi-Fi on the ESP32. So it is recommended to follow the exact pin arrangement I listed in the image above. Most of the time, GPIO pin 32 and 36 work fine with the Wi-Fi.
Heart Rate Monitoring System Overview
The following block diagram shows the entire setup for the system.
The sensor collects heart rate data and pulses from the human body, the LED blinks according to the pulses. Then the ESP32 sends the data to the ThingSpeak cloud. In order to do that, the board must be connected to a Wi-Fi network.
The ThingSpeak platform gives us the flexibility to manage and store data. It also has smart tools and widgets to visualize and analyze data using graphs. It can be used to monitor real-time data and the result can be viewed remotely via a monitor, mobile phone, or laptop.
How to Set Up ThingSpeak for Remote Monitoring
Setting up the ThingSpeak IoT platform is very easy. First, you have to create a free account on ThingSpeak’s website.
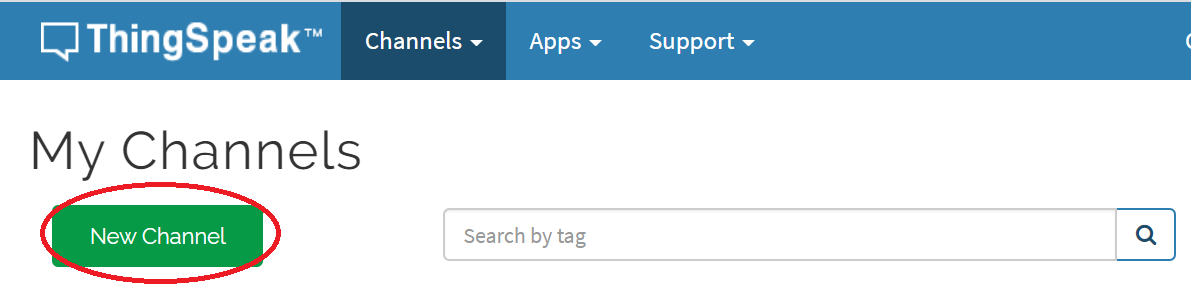
Once you’ve signed up, create a new channel.
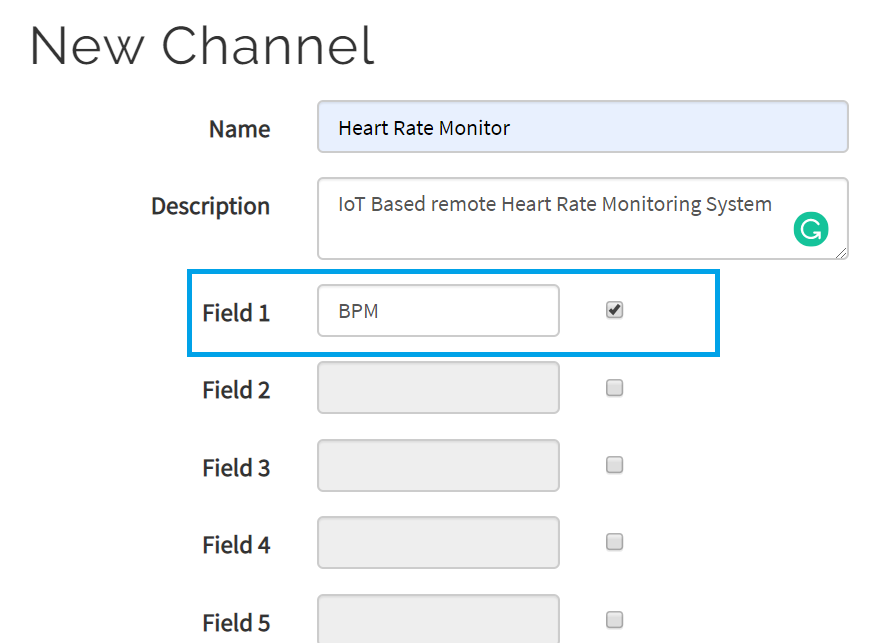
Then, create a field to save the beats per minute (BPM) value of the heart rate.
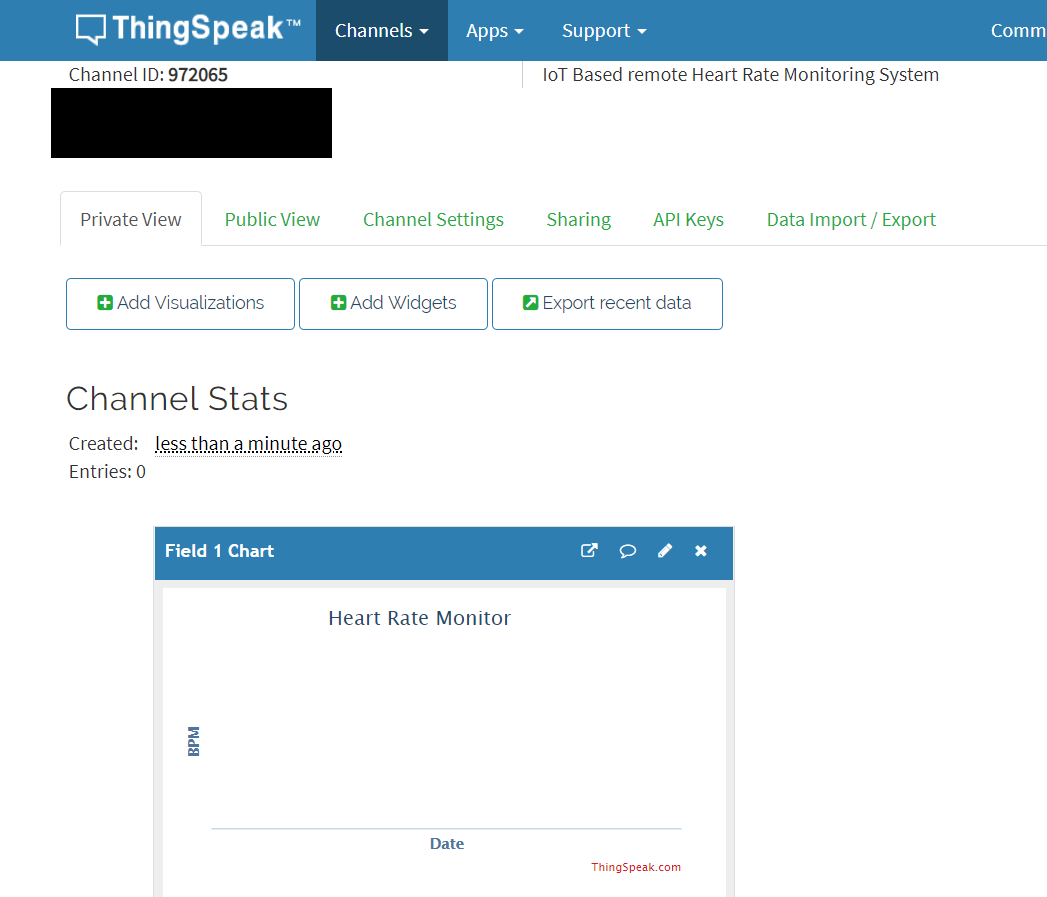
Once you create your channel, ThingSpeak directs you to a webpage with a customizable graph, like the one shown below.
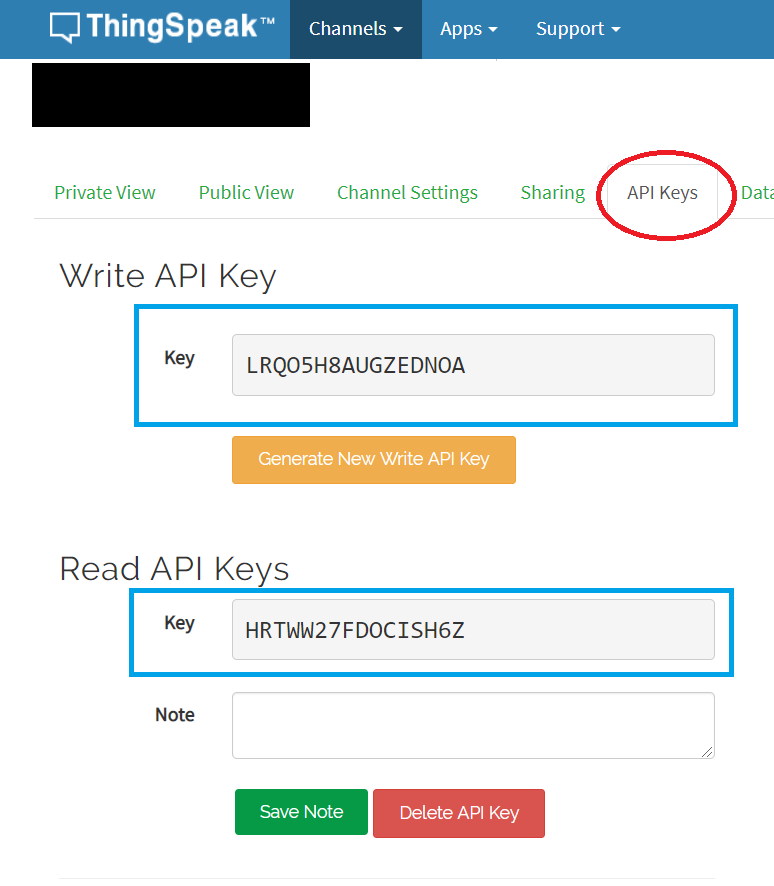
Finally, click on the “API Keys” tab.
- The “Write API Key” is useful when we attempt to write data or send data from the ESP32.
- The “Read API Keys” can be used to monitor data from a remote device.
Full Project Code
The full project code can be found at the link below:
IoT Heartrate Monitor Code
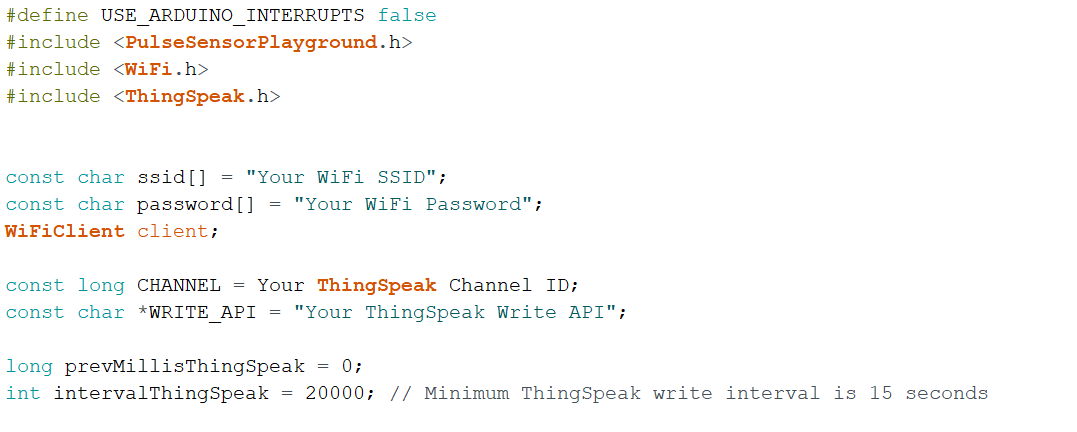
Make sure to disable Arduino interrupts at the top of the code since the ESP32 doesn’t support hardware interrupts with the sensor and Arduino library.
Before uploading the code into the ESP32, add your Wi-Fi ID, password, ThingSpeak channel ID, and write API key.
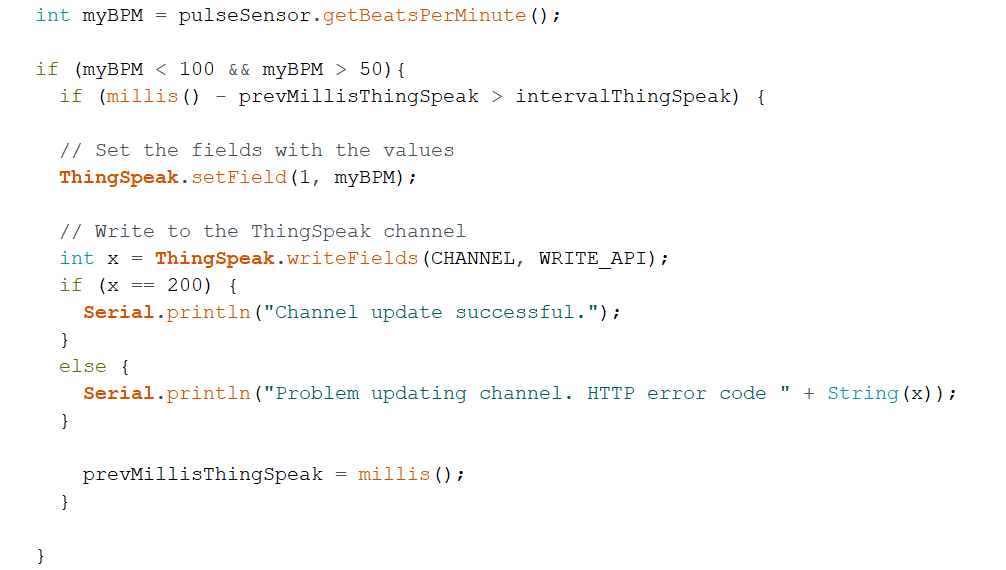
We can get the BPM value of the heartbeat using the getBeatsPerMinute() function. The code uses an “if statement” to filter the values between 50 BPM to 100 BPM. Adding this in avoids uploading inaccurate sensor values to the ThingSpeak cloud.
The Arduino program reads sensor data and sends it to ThingSpeak every 20 seconds. You can adjust the upload speed by changing the intervalThingSpeak variable.
Finished Heart Rate Monitor Demo
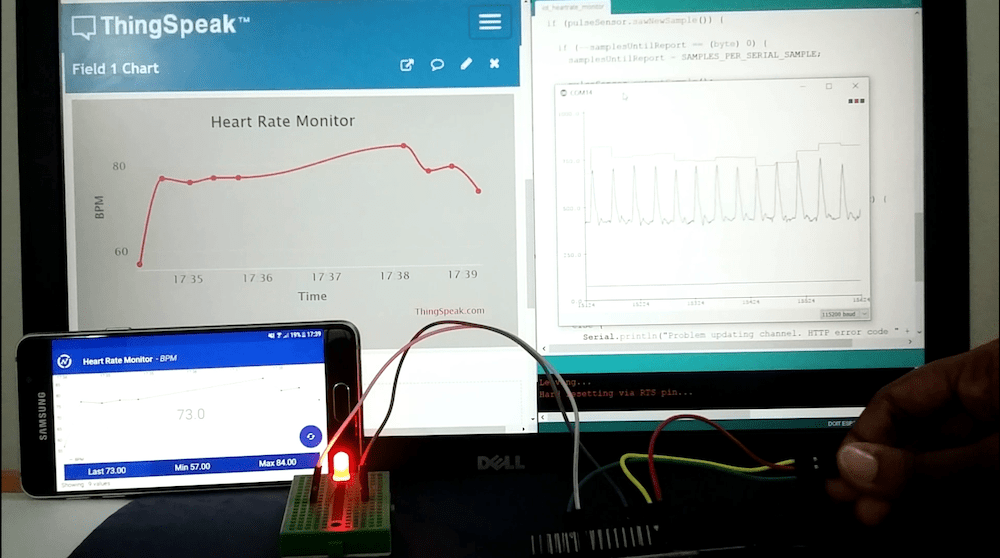
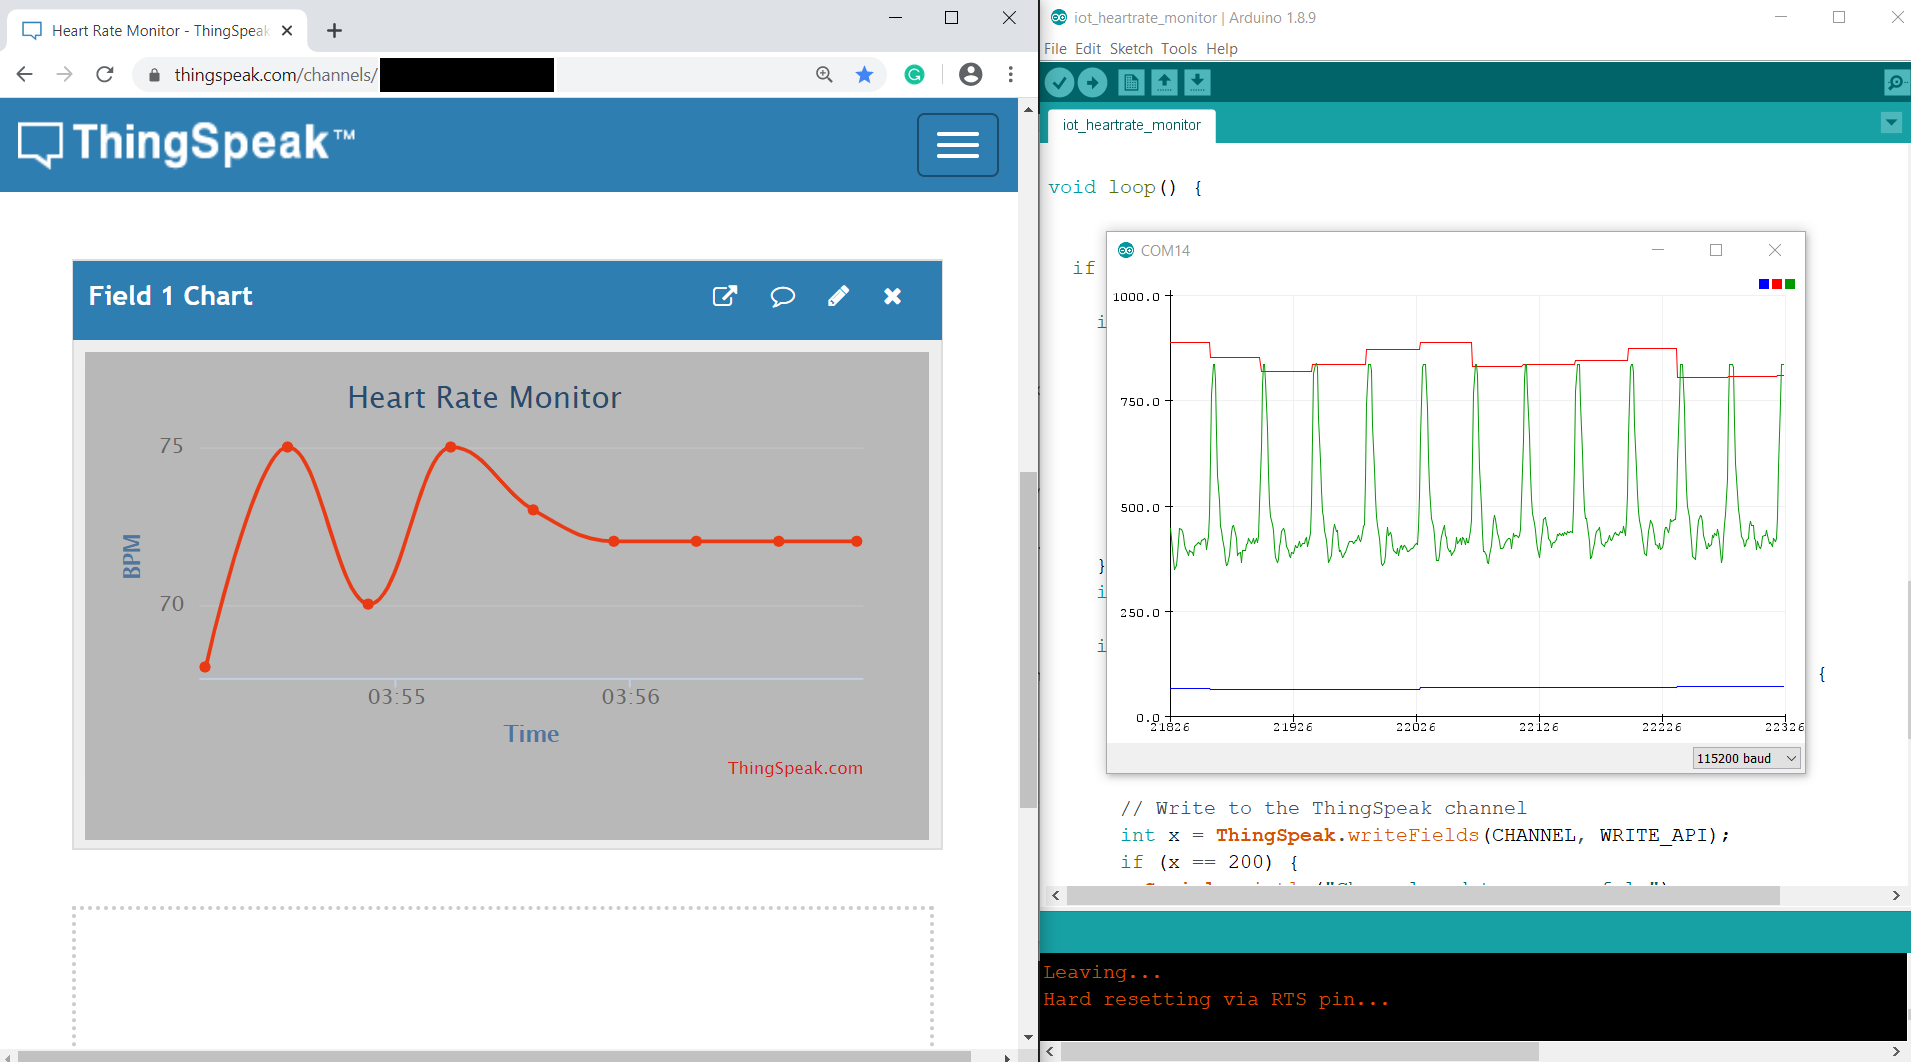
Once you successfully set up the project, you can observe the heart rate pulses from the serial plotter. The ThingSpeak graph updates the BPM value every 20 seconds.
Download and install the ThingSpeak Viewer app to monitor the graph from your mobile device. For successful installation, make sure to have your channel ID and read API handy.
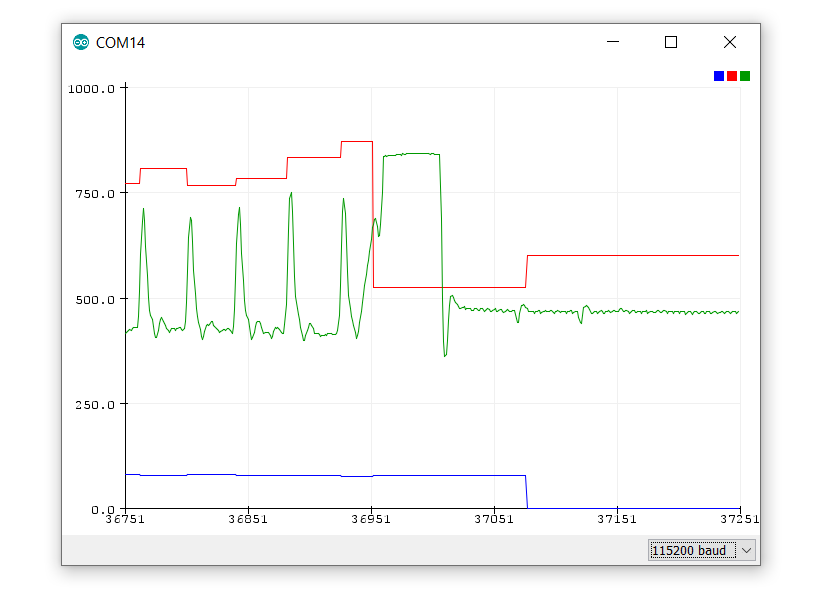
When you hold the sensor between your fingertips, the serial plotter shows your heart rate pulses in green. Once you take off your fingers from the sensor, a straight line displays on the graph.
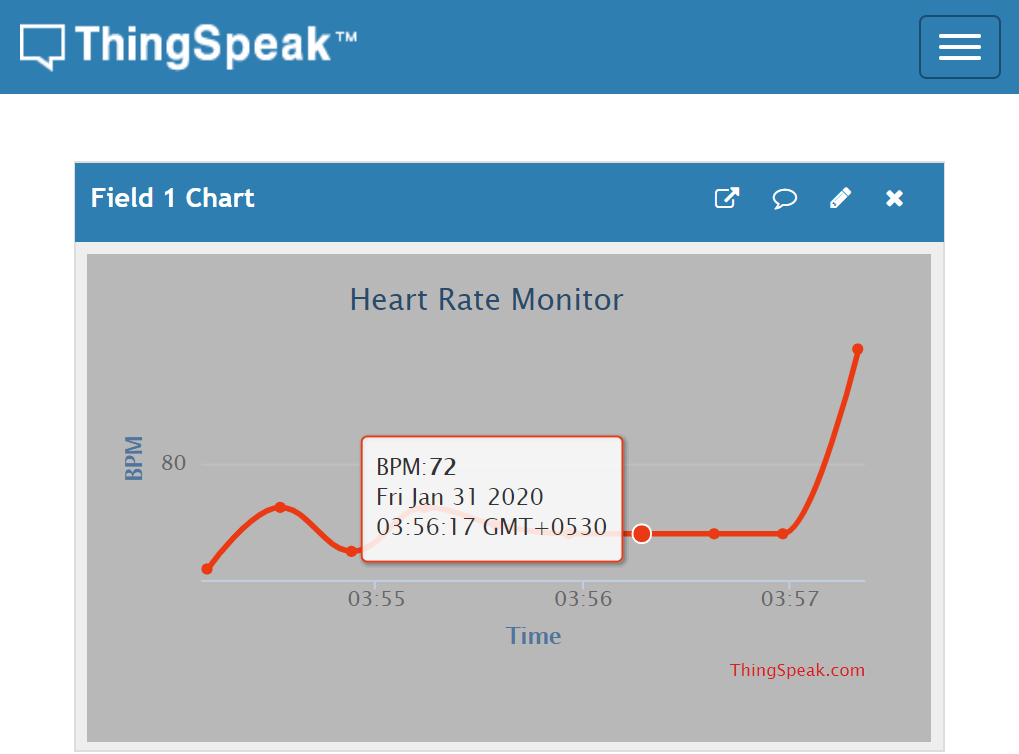
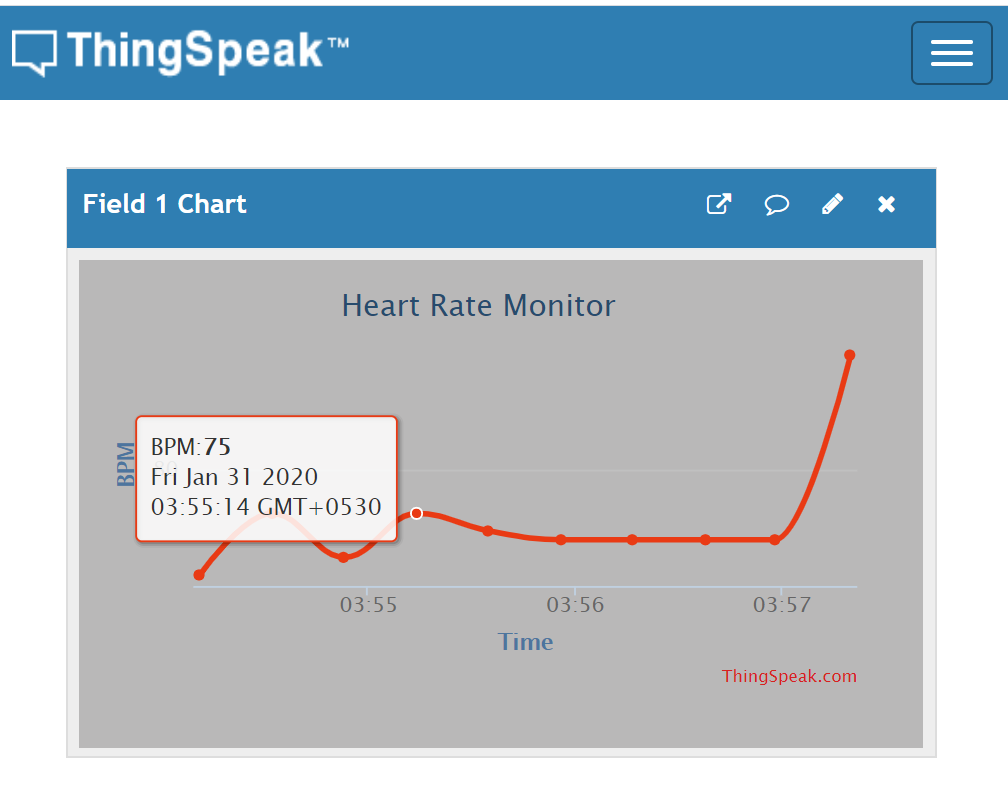
ThingSpeak updates the BPM value with the date and the time.
Further Readings
The more you learn the more you grow, so don’t stop here. There is a lot of research available on this topic. As the next step, you can build a wearable health monitor. I encourage you to read more on this topic.