Learn to use MicroPython on a NodeMCU ESP8266 through uPyCraft with an LED sample code.
The NodeMCU ESP8266 is a development board with firmware based on the LUA programming language. In this tutorial, we will use the NodeMCU ESP8266 with MicroPython software supporting the ESP8266 chip.
MicroPython: Python for Microcontrollers
Python is an open source programming language with easy-to-use syntax and many libraries to help make coding much easier. Python has a lot of application from web applications, scientific and numeric computing, and creating software prototypes. Because it’s open source, it also has massive support from its community.
Python is mostly used on web and software, but what about Python-based hardware? This is where MicroPython comes in.
MicroPython is a programming language based on Python 3 and written in C for the specific purpose of running on a microcontroller. MicroPython allows for the simplicity of the Python language to be used on microcontrollers rather than more complex, low-level languages.
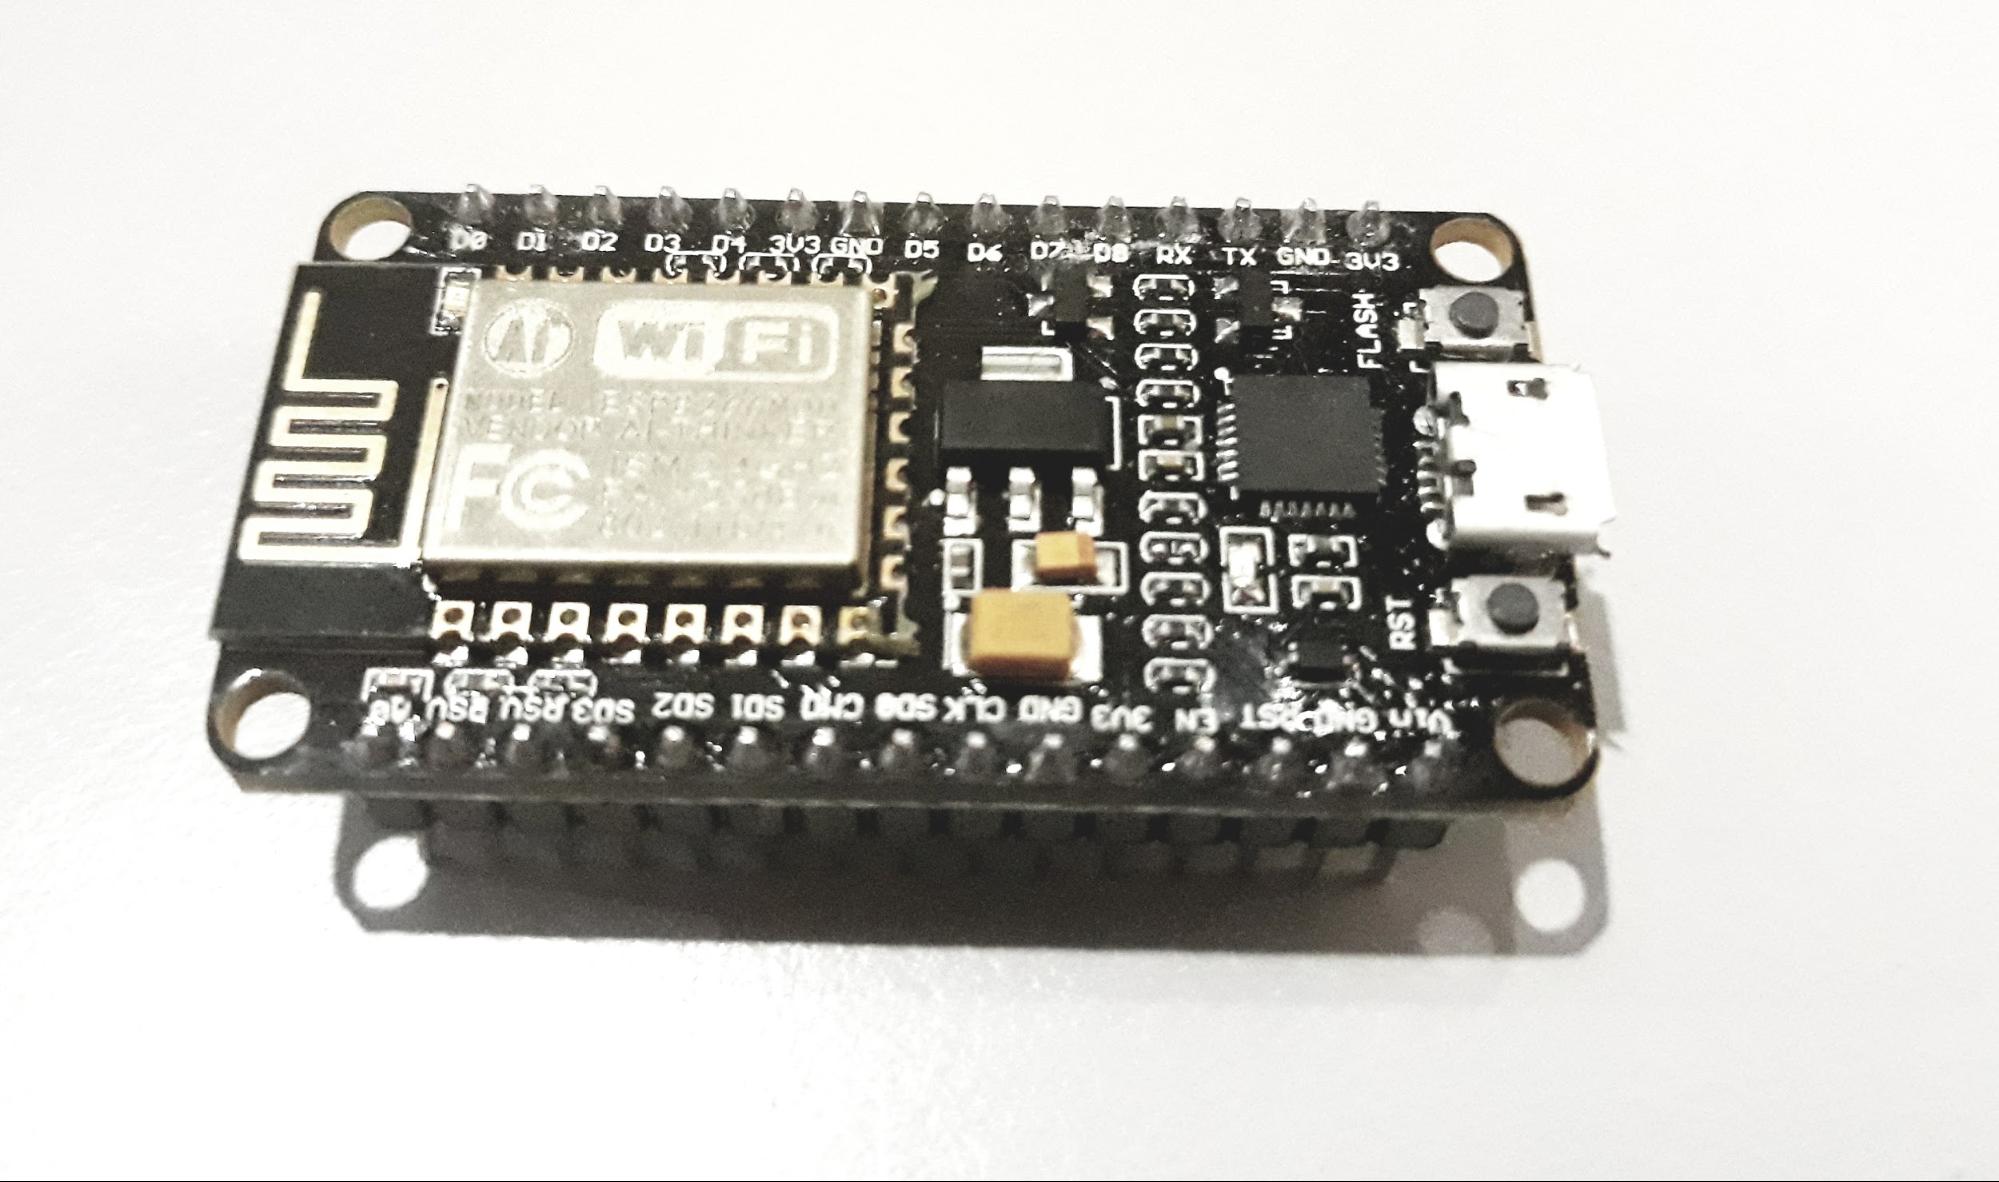
NodeMCU ESP8266 Board
The NodeMCU ESP8266 board has 30 pins connected to the development board. Out of the 30 pins, 17 are GPIO pins. These GPIO pins can be used as:
- ADC Channel: 10-bit ADC (Analog to Digital Converter) channel
- UART interface: used to load code serially
- PWM outputs: for dimming LEDs or controlling motors
- SPI and I2C interface: to hook up all sorts of sensors and peripherals
- I2S: to add sound to your project
These GPIO pins are multiplexed, meaning a single GPIO pin can act as PWM/UART/SPI.
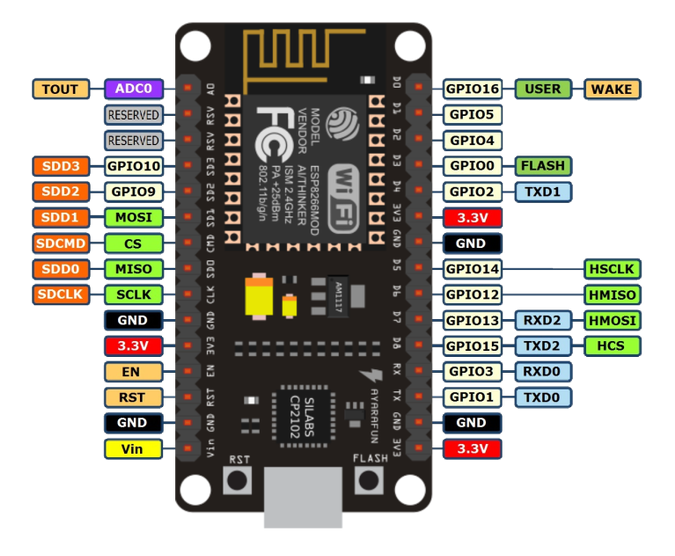
NodeMCU ESP8266 Board Pin Details
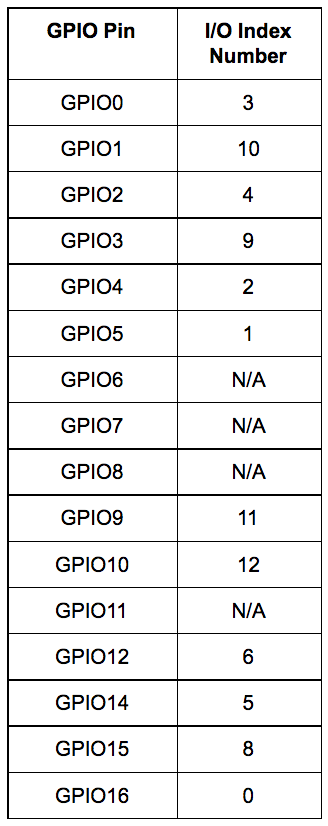
To use the GPIO pins of the NodeMCU ESP8266 with MicroPython code, we need to address them using the I/O index number rather than the GPIO pin number. Below is a table of the equivalent I/O index numbers for the GPIO pins.
Setting Up the uPyCraft IDE
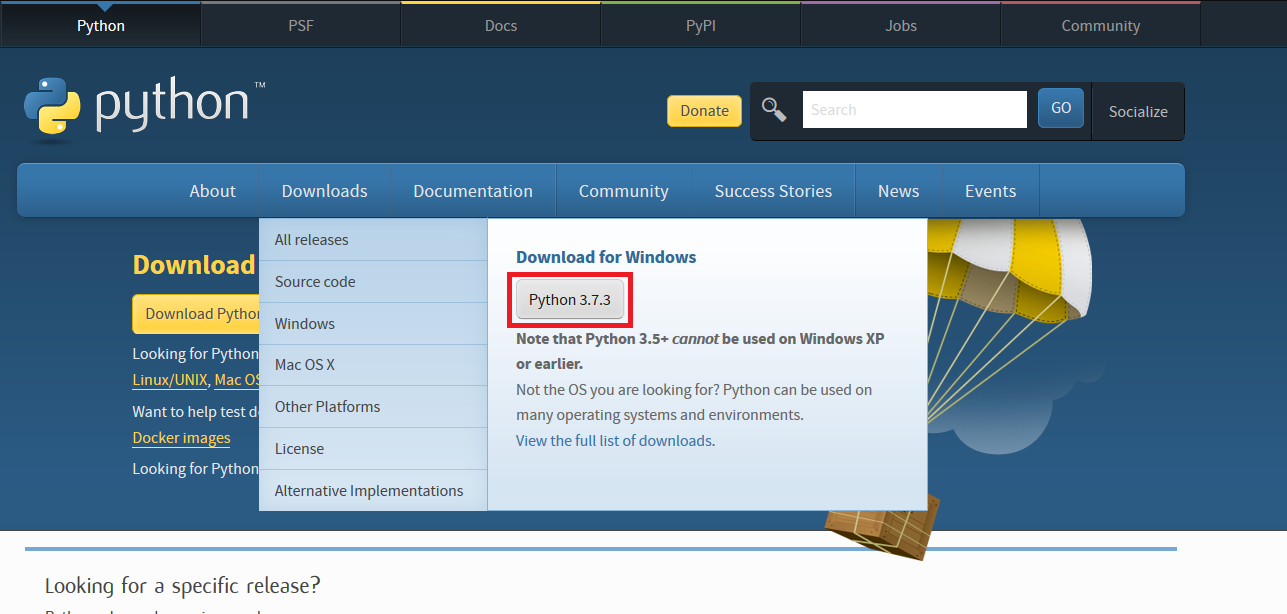
While there are MicroPython programming options, this tutorial uses the uPyCraft IDE for flashing firmware and code for the ESP8266 NodeMCU. In order to install uPyCraft IDE for Windows PC, we need to install Python 3 to our operating system.
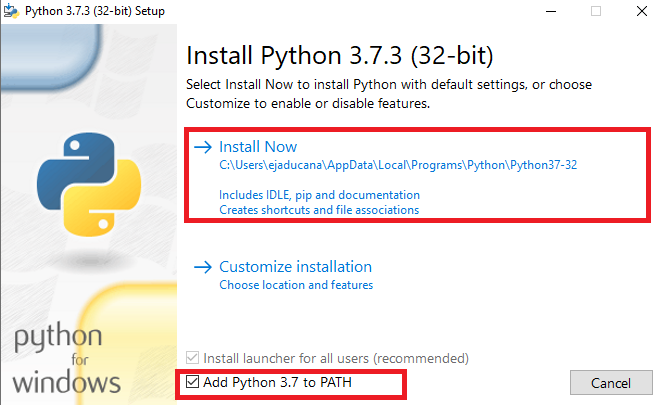
To install Python 3, go to Python Downloads and download the installation file from the Python website.
Install the downloaded Python 3.7.X.exe and enable Add Python 3.7 to PATH. Then click on Install Now.
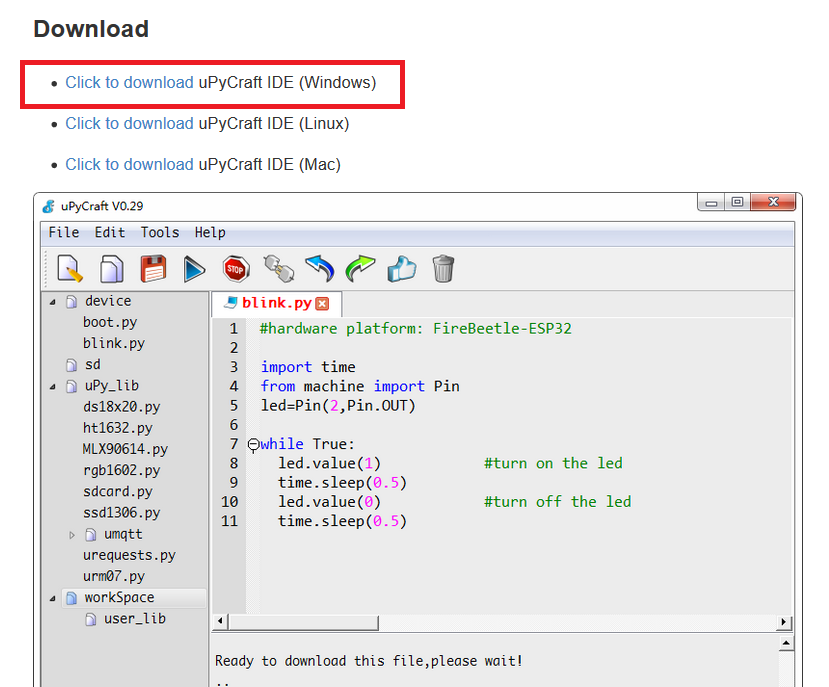
After installing Python 3, we can download uPyCraft IDE for Windows. To download, check the image below.
Next, install the downloaded uPyCraft to Windows.
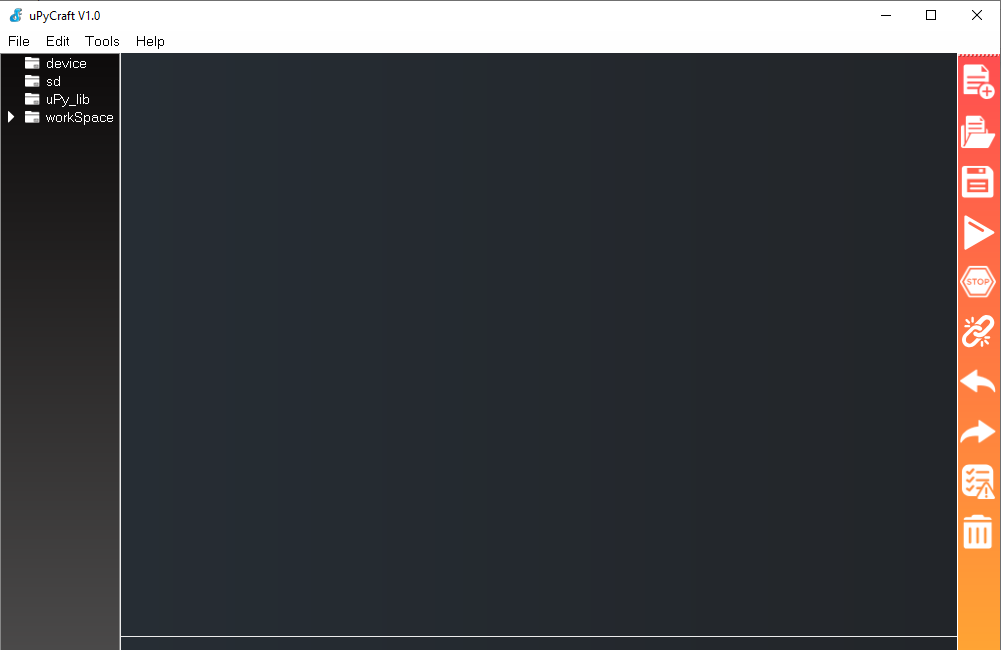
After installing and opening uPyCraft, you will see the following screen:
With uPyCraft installed, we can use it to flash the ESP board with MicroPython firmware. But first we need one last download: the CP20X Driver.
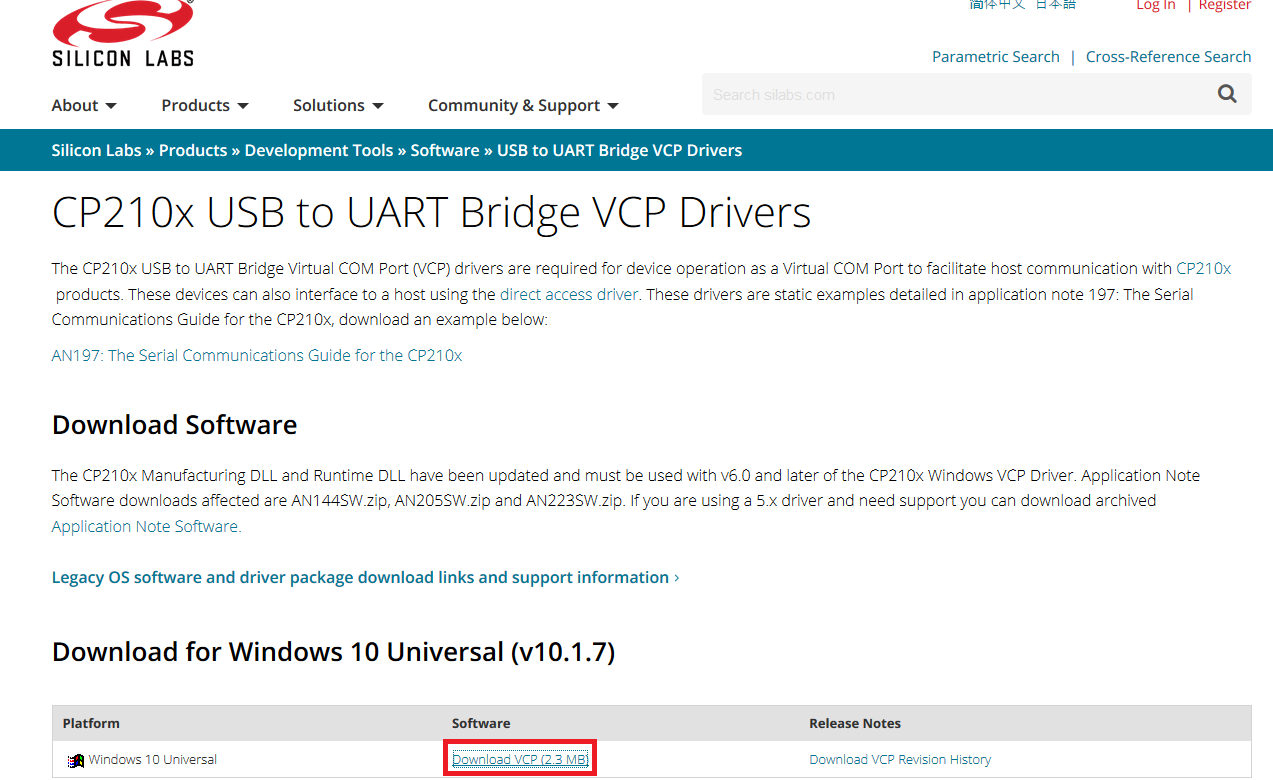
Installing the CP210X Driver
In order to flash anything to our board, we need to download and install the CP210X driver. The CP210X driver is a USB-to-UART bridge virtual COM port driver that facilitates host communication.
After downloading, install CP210X to Windows. This will enable us to see the COM port used by the NodeMCU on the uPyCraft IDE.
Flashing MicroPython Firmware to the ESP8266
By default, the ESP8266 isn’t flashed with MicroPython. So before we start programming, let’s flash MicroPython firmware on our board.
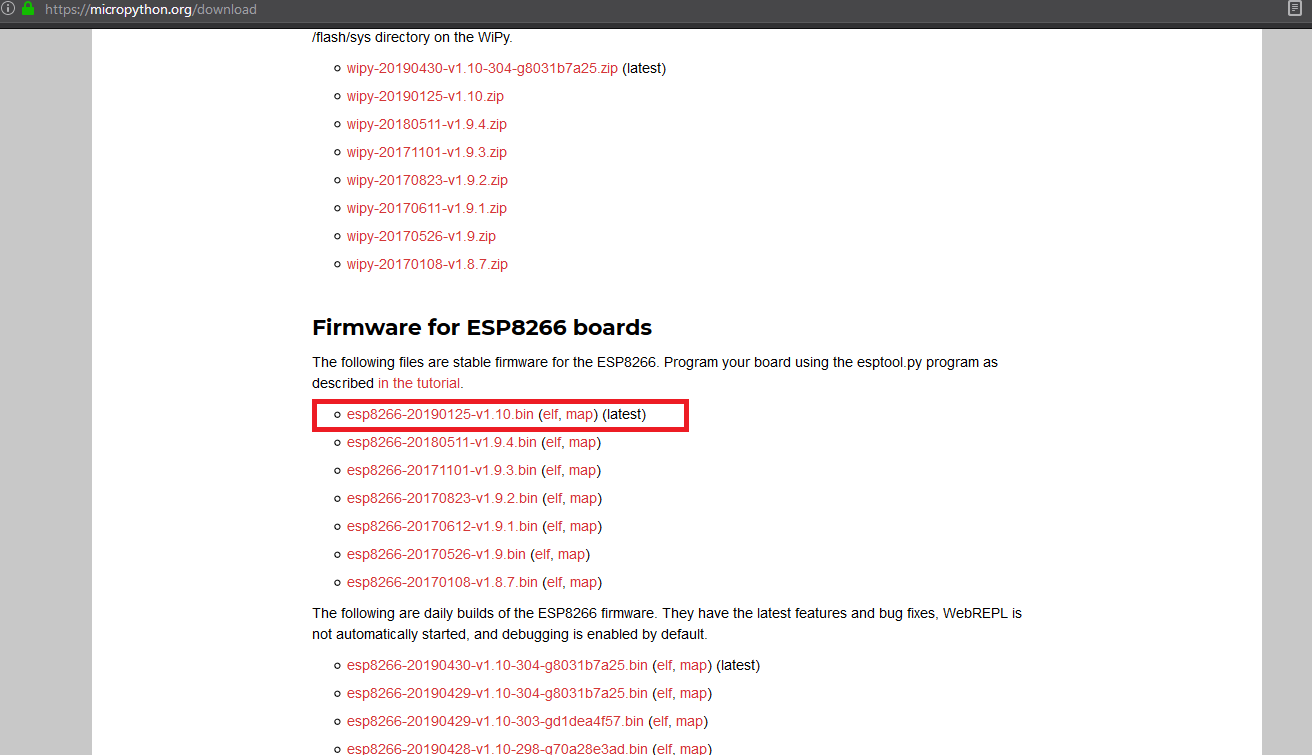
First, download the latest version of MicroPython firmware for the ESP8266.
Downloading the ESP8266 Firmware
Note: Make sure you download the correct firmware for your board. Use a different firmware for the specific board on MicroPython Download.
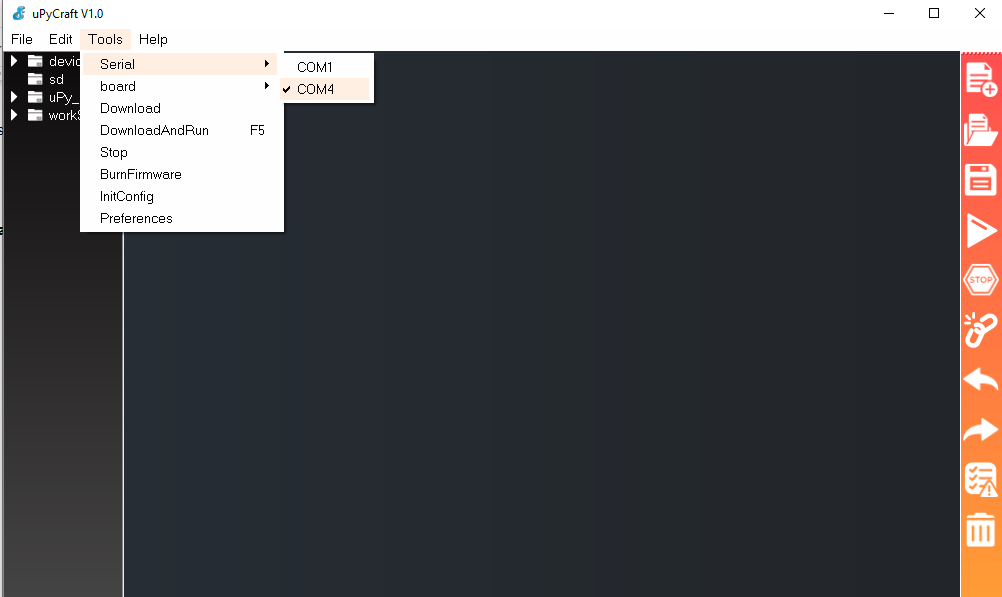
After downloading the MicroPython firmware, open the uPyCraft IDE and check the serial port and board being used.
To select the serial port, go to Tools>Serial and select your ESP8266 COM port (see which COM port the ESP8266 is, mine is on COM4).
To select the board, Go to Tools>Board and select ESP8266 board.
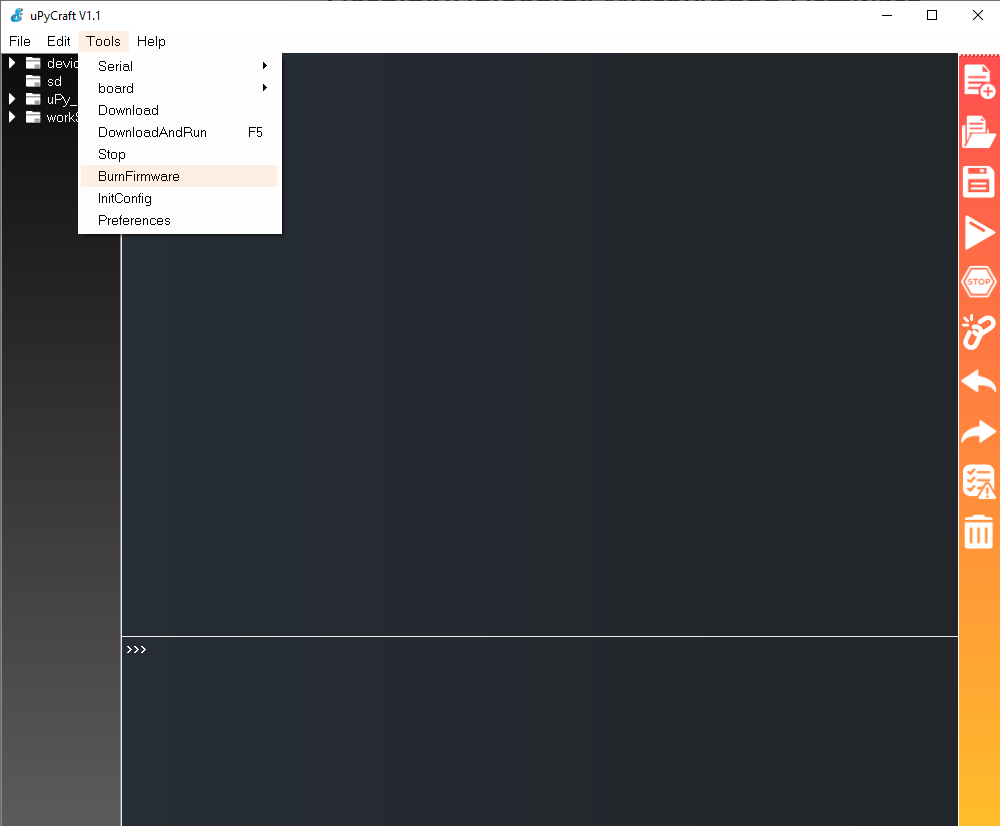
Now, we have selected the port that our ESP8266 is connected and board we are using. let us flash the firmware to the board.
Go to Tools>BurnFirmware and click Burn Firmware.
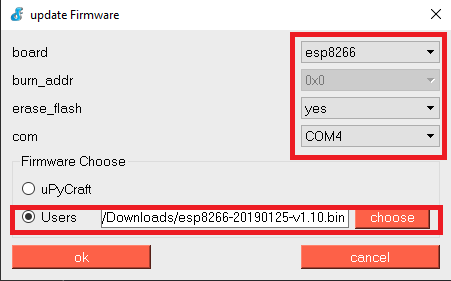
Set up the firmware with the following options:
- board: esp8266
- burn_addr: 0x0
- erase_flash: yes
- com: COM4
- Firmware: select “Users” and choose esp.8266.bin file we downloaded earlier
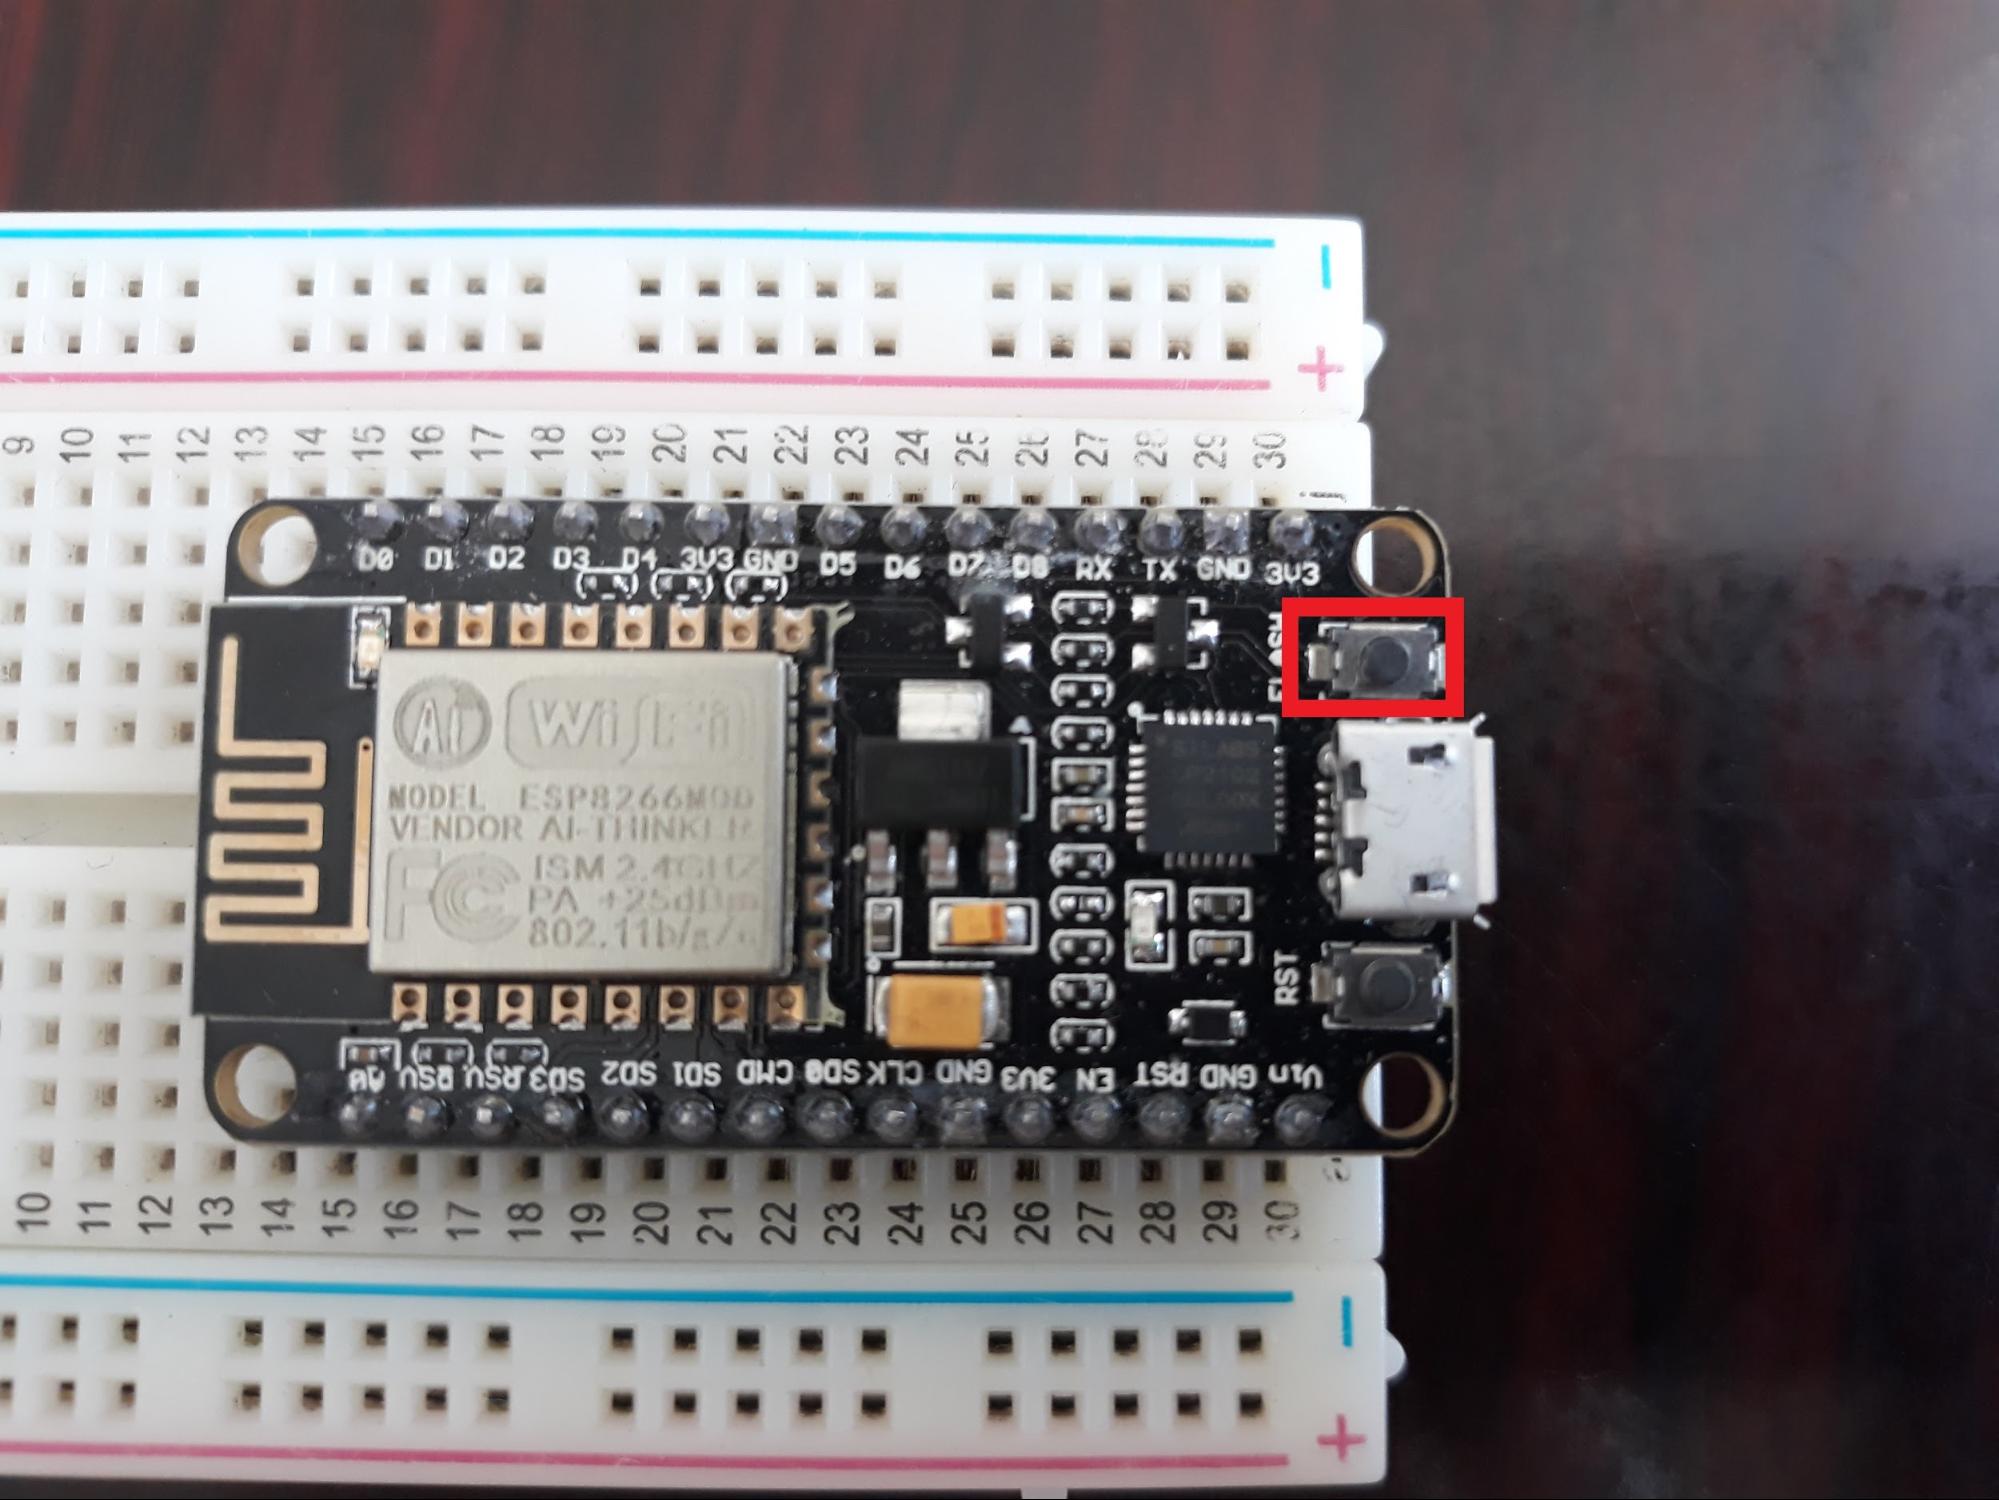
Before clicking OK, hold-down the flash button on the ESP8266 board.
While holding down the button click “OK” button in the burn firmware window.
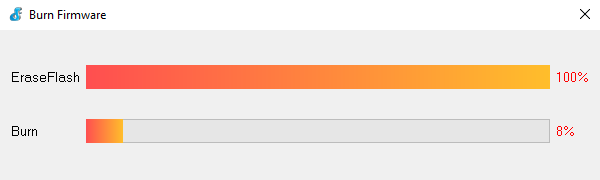
When a progress bar for the burn firmware begins, you can release the flash button. Once the burn reaches 100%, the firmware is done flashing onto the ESP8266 board.
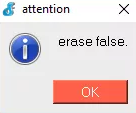
If you receive an “erase false” attention box, this means that the ESP8266 board wasn’t in flashing mode. Repeat the steps and hold the flash button again so that the ESP8266 goes into flashing mode.
uPyCraft and ESP8266 File system
The ESP board files can be seen on the “device” folder. The folder contains the default “boot.py” which runs the device at startup and setup the configuration for the device. Under the device folder, a “main.py” is recommended to be created to run the main code.
Aside from the device folder, the left side of the IDE has many folders. Let’s discuss these different folders.
sd - is used for accessing the storage of the sd card, only works with boards with sd card modules.
uPy_lib - contains the built-in IDE library files.
workSpace - is where your saved files is stored within your computer. You can set the directory path of the save files.
Basic uPyCraft Example
We already set up the uPyCraft and flashed firmware onto our ESP8266. Now let’s run a sample code to check whether our connection to the ESP8266 is working.
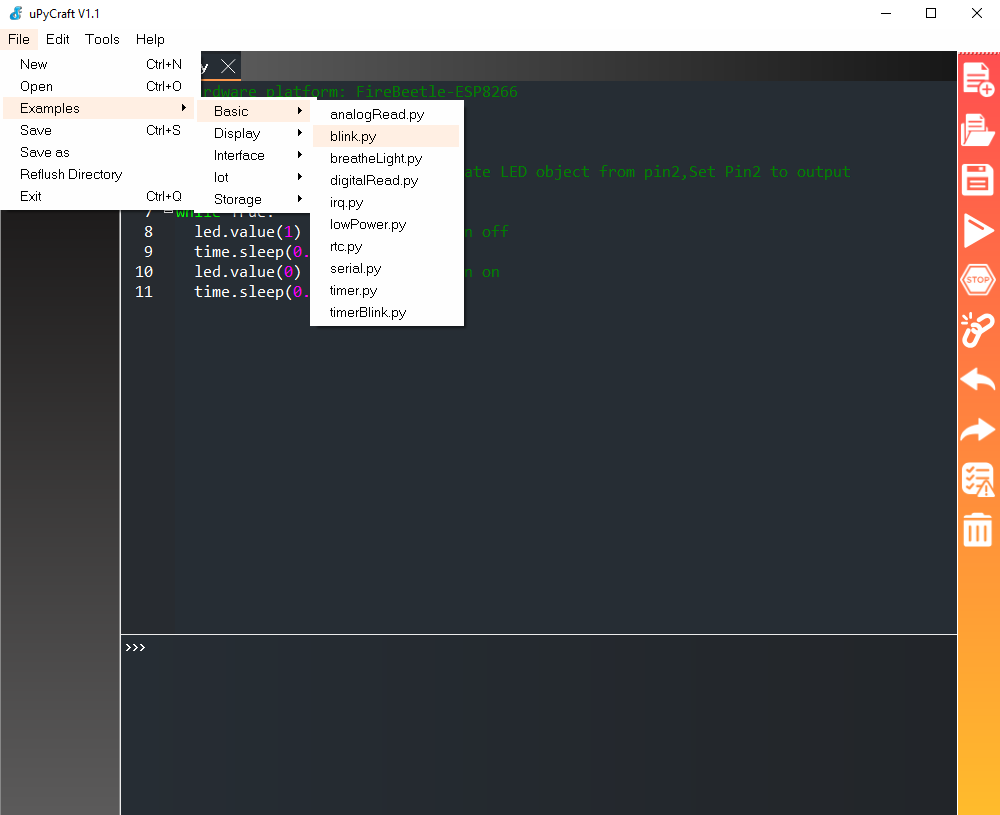
There are many sample codes that can be used within uPyCraft. In this example, we will use blink.py to see if we can blink the LED on the NodeMCU board.
Go to Examples > Basic > blink.py
Navigating Example blink.py
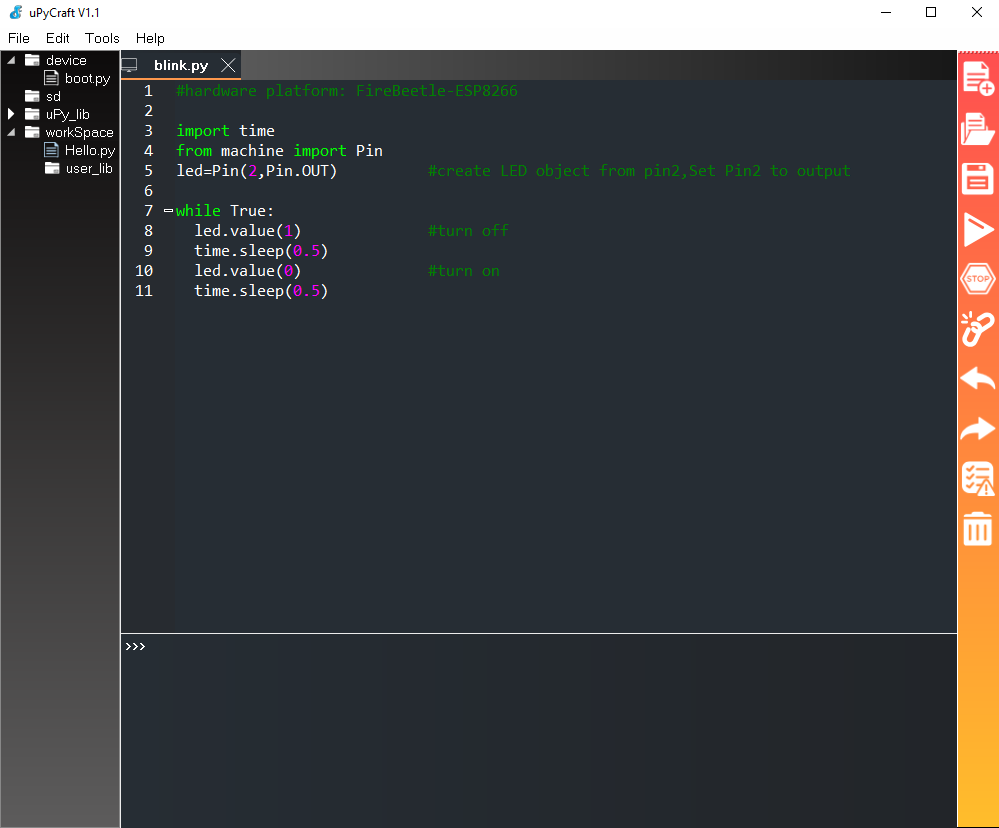
Below is the sample code for the blink.py
To connect to our ESP8266 board, click the broken chain icon to establish a connection to our board. The chain will change from a broken chain to a connected chain once it establishes a connection to the board.
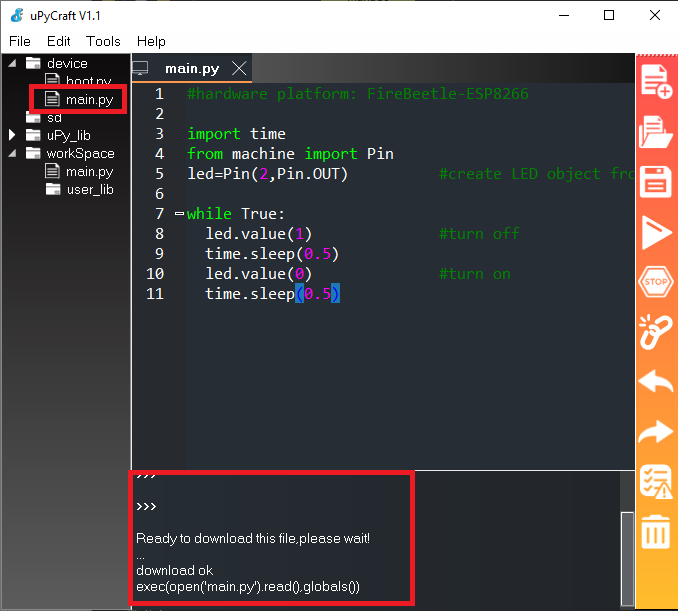
Once connected with the device, we can now download and run the code. Before we do that, let's first create a “main.py”.
To create a new file, click this icon:
#Copy this code below from the blink.py to the new file
#hardware platform: FireBeetle-ESP8266

import time
from machine import Pin
led=Pin(2,Pin.OUT)          #create LED object from pin2,Set Pin2 to output

while True:
  led.value(1)              #turn off
  time.sleep(0.5)
  led.value(0)              #turn on
  time.sleep(0.5)
After pasting the code in the new untitled file. Go to File and save it to “main.py”.
Now we are ready to download and run the code to the ESP8266. To flash the code, click the Download and Run button.
When the code is flashed correctly, a confirmation displays on the shell and the main.py file to indicate a successful download.
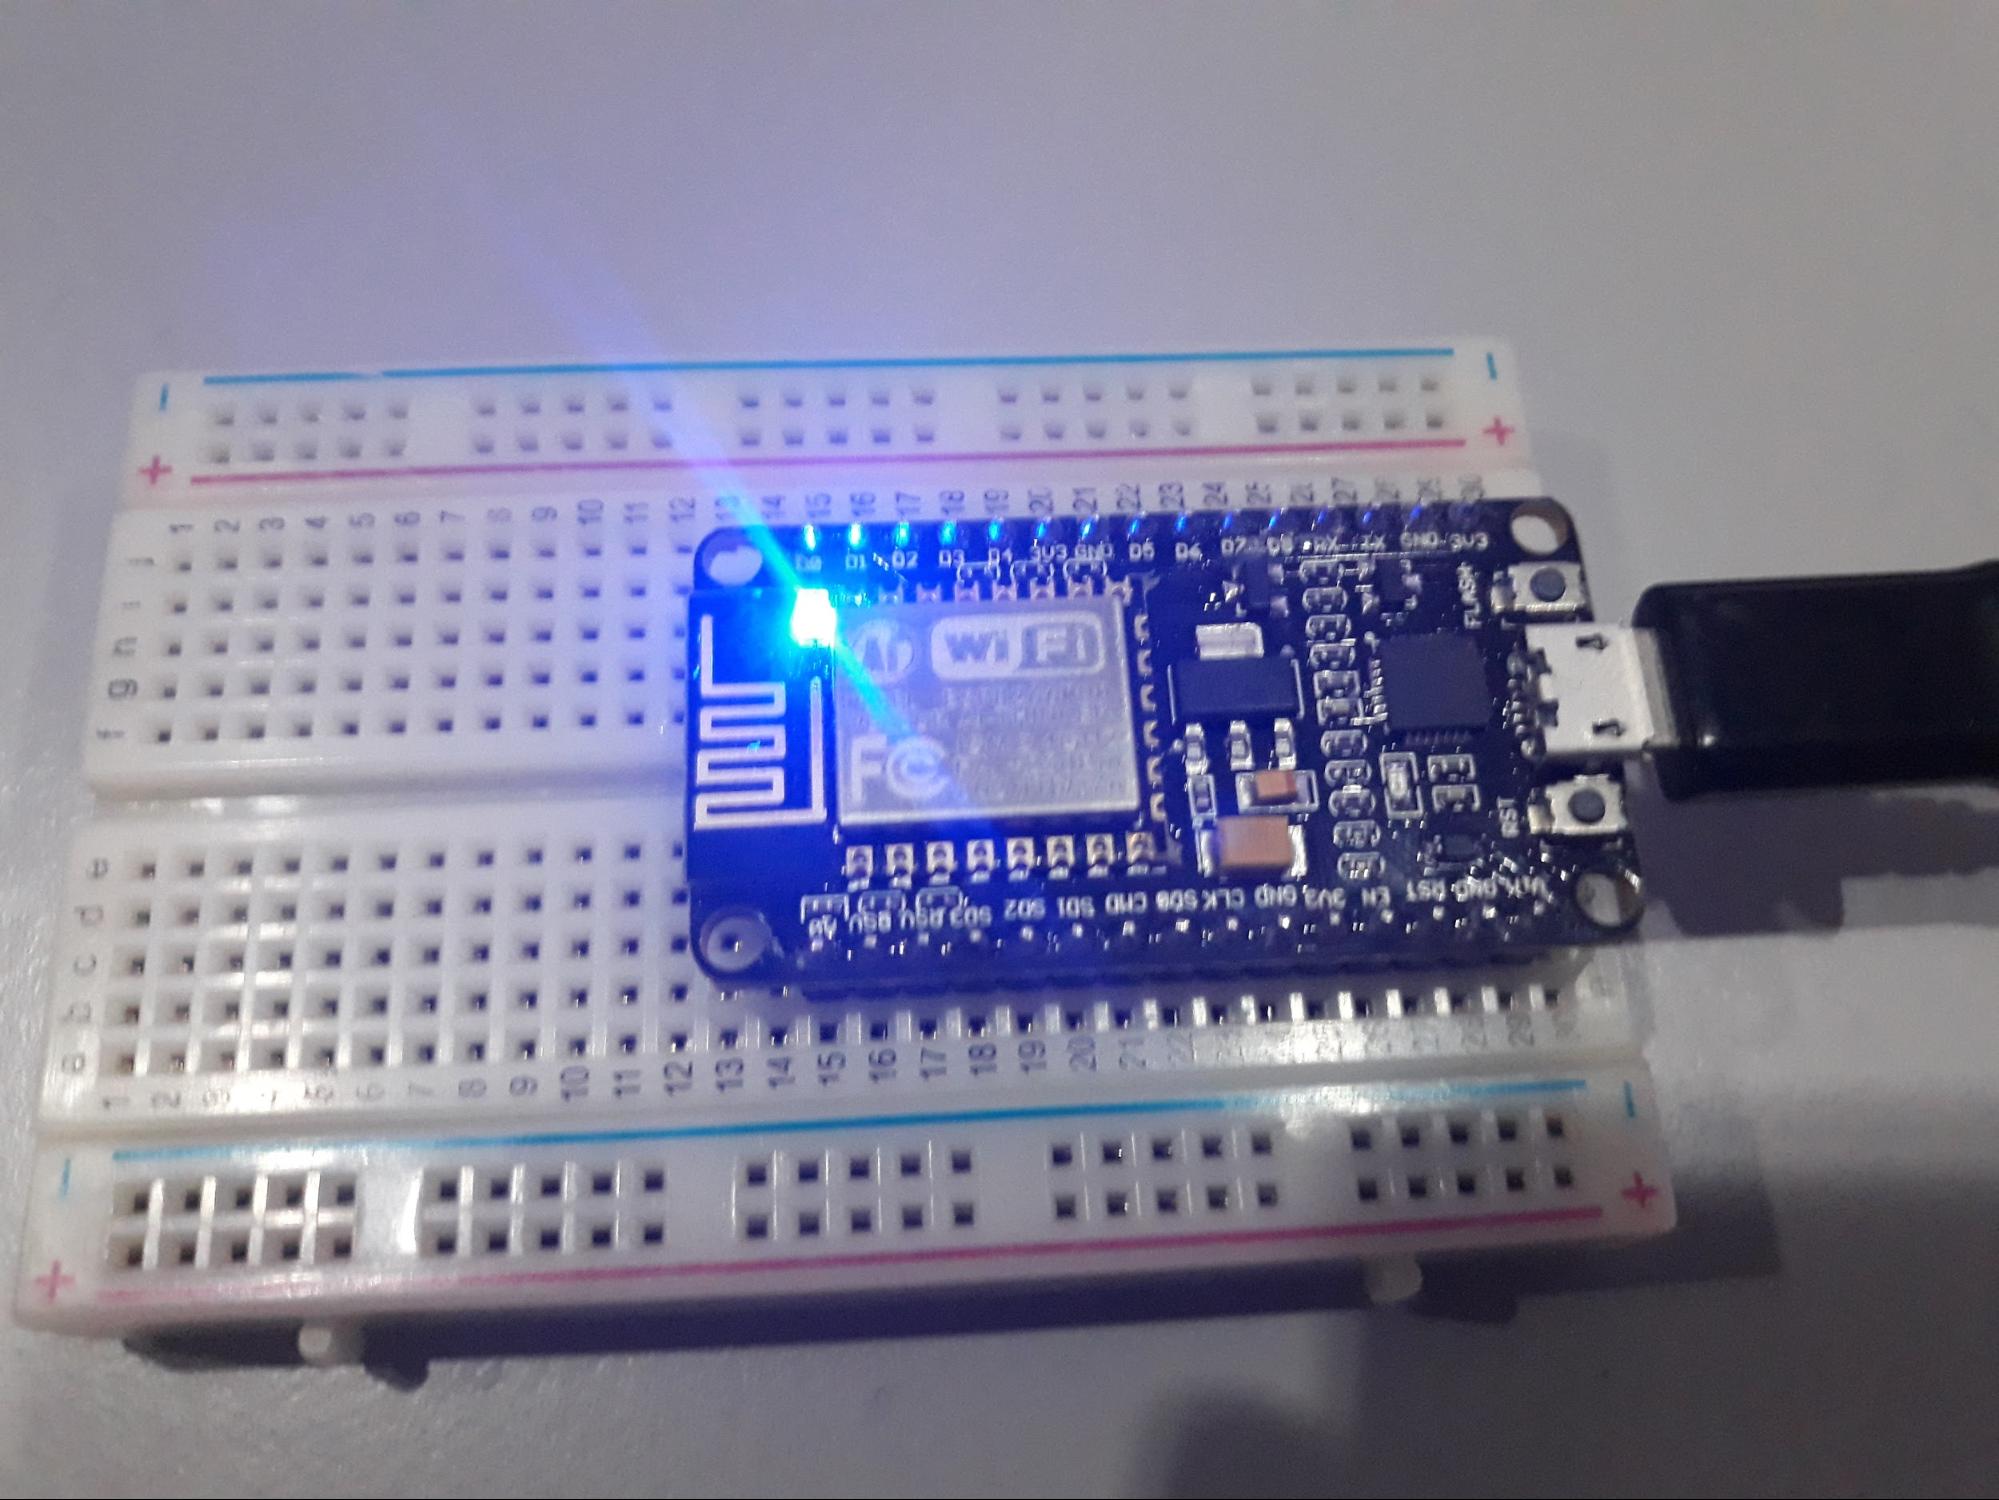
On your NodeMCU ESP8266 board, you should see the LED blinking every 0.5 seconds.
LED Turning On and Off for 0.5s
The blinking LED indicates that the blink.py code flashed on the ESP8266 works.
Congratulations! MicroPython is successfully written to the ESP8266. Now it's your turn to explore all of the possibilities for ESP8266 projects.