Build a receiver that automatically points toward your explorer probe with an ESP8266 ESP-01, serial ports, and Python.
In a previous article, How to Make an Explorer Probe for Rockets With DHT11 and an ESP8266, we learned how to create a simple circuit that can be used to relay data back to a server wirelessly.
In this article, we will use Python, serial ports, and some clever electronics to create a receiver that automatically points toward the explorer.
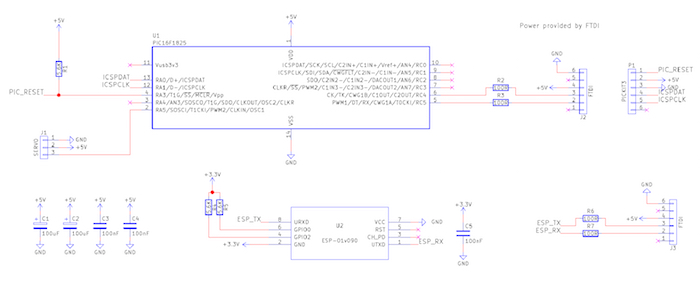
Schematic
How it Works: Hardware
The receiver is made up of two separate circuits:
- A motor controller that positions the antenna
- The antenna itself
The motor controller is a PIC16F1825 connected to a USB-Serial converter that receives commands from the connected computer. The commands sent by the PC instruct the microcontroller to set the motor servo to a specific angle, and since the servo is connected to the antenna, the antenna will be pointed toward the new angle.
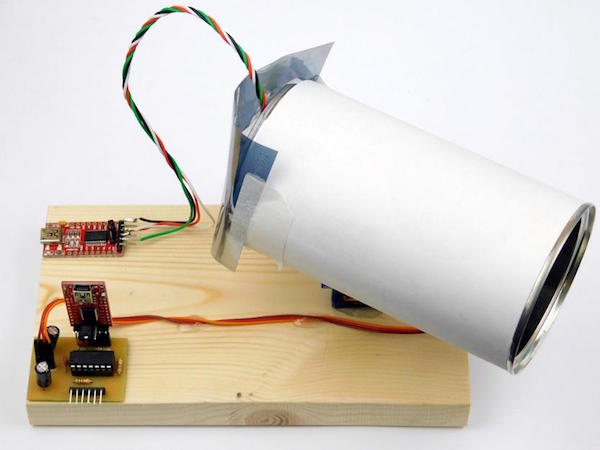
The antenna has an ESP8266 ESP-01 module attached to a Wi-Fi antenna that increases the sensitivity of the receiver. However, this antenna is directional, which means that if the antenna is not directly pointed toward the source, the signal is at its weakest value, and if the antenna is pointed directly toward the source, the signal is at its strongest value.
How it Works: Software
The motor drive circuit uses a very simple UART command structure. Numeric strings are sent by the connected computer and converted to a numeric value that indicates the angle that the servo should be pointed toward. Servos are controlled via the duty cycle of a PWM signal, so the incoming angle is converted into a duty cycle that is used to adjust the output PWM signal to the servo.
The computer that connects to both the antenna and the motor controller is programmed using Python, since it allows a wide range of computers to be used including a PC, OS X, Linux, and even a Raspberry Pi, which could make this project portable.
The Python script starts by opening two serial ports (one for the motor driver and the other for the ESP-01 module) and then configures the ESP-01 module. Once configured, the program starts by commanding the ESP-01 to scan for Wi-Fi networks, finding the network that is our explorer, and then reading the signal power. This reading is passed to a variable that is used to store the highest recorded signal strength, and then the program runs a for loop. This for loop runs 20 iterations, and upon each iteration, the antenna is moved slightly, and a new signal reading is taken.
When these 20 readings are done, the program then points the antenna to the angle that gave the highest reading, and the antenna should now be pointed toward the explorer.
Construction
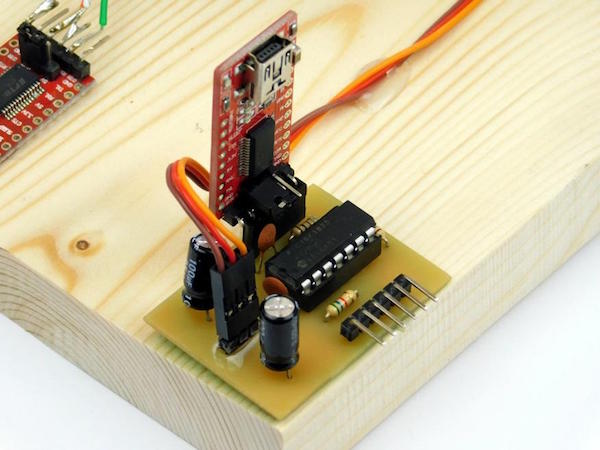
The circuits in this project can be constructed using most techniques including stripboard, matrix board, breadboard, and custom PCBs. For the servo controller, I have used a custom PCB, but the antenna system uses jumper wires to directly connect the ESP-01 to the USB-Serial Converter.
The servo controller board
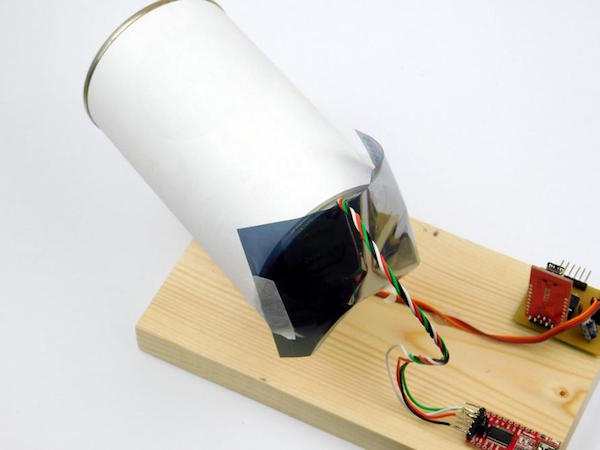
The antenna is a directional antenna that is made of an old tin connected to the servo with a small piece of wire inside as the receiving element. You can learn how to make a tin can Wi-Fi antenna here. This also includes a calculator for determining exactly where your wire needs to be placed inside the can.
The back of the antenna showing a cover which protects the ESP8266 from stray Wi-Fi signals.
The antenna inside the waveguide.
The servo that moves the waveguide and antenna.