Learn how to access and integrate time and date information with NTP into your ESP8266 projects.
We often need to refer to dates and time in IoT/Maker projects. This can be useful for timestamping information in an MQTT message or getting our system to respond to time-based information such as dusk/dawn interactions. In this tutorial, we will look at how to access and integrate time and date information into your ESP8266 project.
What is Network Time Protocol?
We often take time for granted on our computers, when we install a fresh Windows or OSX operating system it seamlessly sets itself to the correct date and time.
What we don’t see is how the operating system queries a time server to get this information. The Network Time Protocol (NTP) is a protocol that any computer linked to the internet can use to connect to a time server to get accurate date and time information.
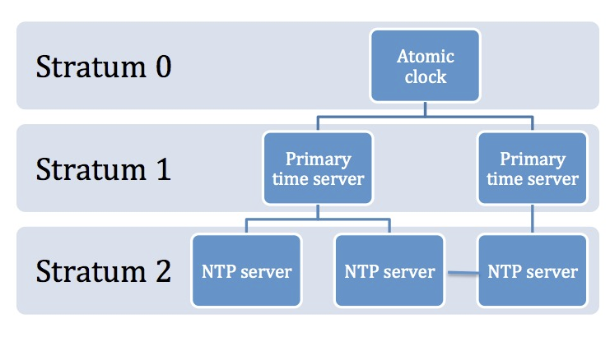
Figure 1. Structure of NTP pool network
pool.ntp.org is a system that distributes accurate time information via a hierarchy of servers called stratums. At the top of the hierarchy in stratum 0 are highly precise time devices such as atomic or radio clocks. In the next layer (stratum 1) servers are synchronized to a stratum 0 source. Stratum 2 servers can be synchronized to several stratum 1 servers and can communicate with other stratum 2 servers for verification. We can’t connect directly to an atomic clock, but we can access this information via subsequent hierarchies of this network.
Implementing NTP with an ESP8266
The ESP8266’s Wi-Fi capability allows us to access accurate time date information via the NTP network. An example project is available for download from GitHub.
To get this code running on your ESP8266 you need to do the following:
- Change the WIFI_NETWORK_NAME and WIFI_PASSWORD to your own network name and password
- Change the myTimeZone variable to your own time zone – these are listed in timezone.h which is included in this project. For example, if you reside within the North American Eastern Standard Time Zone (EST), you need to set myTimeZone = EST;
- Set upload speed on your Arduino IDE to 115200
- Verify and upload this sketch to a connected ESP8266
- Display the Arduino serial monitor and set the baud rate to 115200
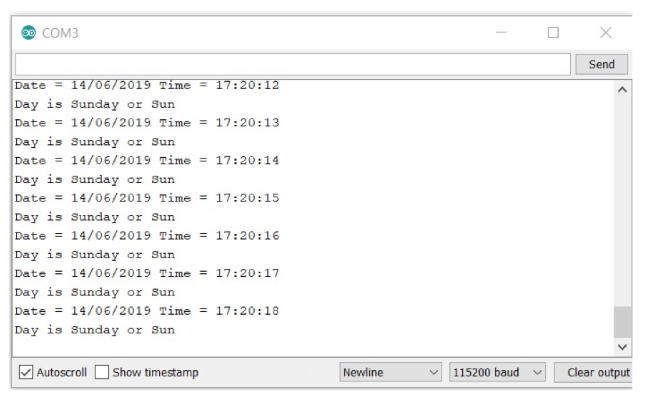
It may take some time to establish a connection to the NTP server, so please be patient! Once it does create a valid connection you will then see the date and time information displayed regularly on your serial monitor, as shown in Figure 2.
Figure 2. NTP time displayed on the Arduino IDE Serial Monitor
Discussion of the Software
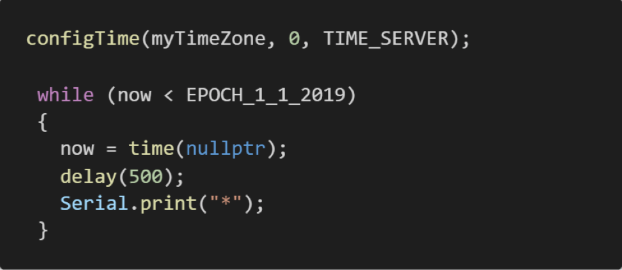
The purpose of the setup() function in this code is to establish a connection to the local Wi-Fi network and then to establish a connection to the pool.ntp.server (Figure 3).
Figure 3. Setup of NTP server
The configTime() function is used to connect to the time server, we then enter a loop which interrogates the time server and passes the current time into the “now” variable. When the server first connects it sometimes returns erroneous data, so this function is called until we receive a timestamp after 1/1/2019.
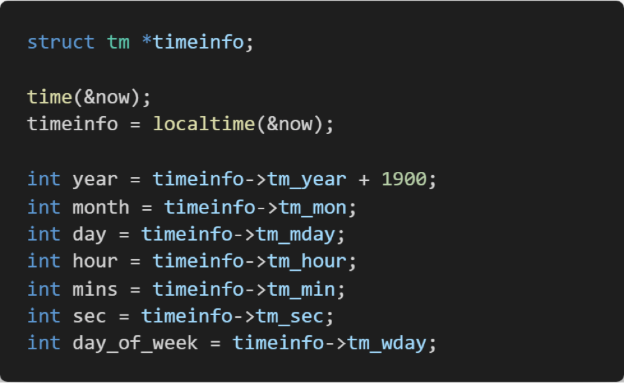
Within the loop() function we read the current time from the server and then store it in a data structure called timeinfo. We can then access the individual elements contained within our timeinfo structure by using the -> operator.
Then it's up to you to how much information you want to display. I have added a couple of arrays within the timezone.h which will convert the day of week variable into a string (for example “Monday” or Mon”).
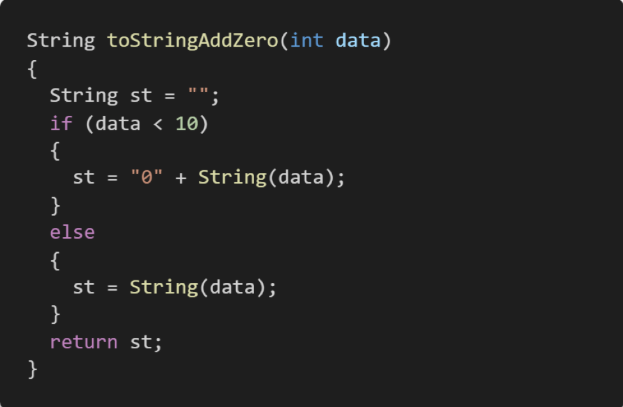
Figure 5. toStringAddZero() function
The toStringAddZero() is useful if you want your time or date format to add a leading 0 to your time.
Date and Time for ESP8266 Projects
One of the main selling points of the ESP8266 is it allows projects cheap access to Wi-Fi. It’s easy to take your projects to the next level with Wi-Fi access, including adding accurate date and time.
NTP can allow the scheduling of certain events (like when to save data in a weather station or when to water plants in your garden). This tutorial can help you get started with incorporating time and date functionality into your ESP8266 projects. Let us know what you come up with!