This small explorer probe is designed to sit in a small rocket, land, and relay data back to a server.
With probes reaching the deepest parts of our solar system and making important discoveries—and drones giving perspective in places that we could never go—it is clear that electronics play a central role. So, why not get yourself involved with discovery and adventure? In this DIY hacking series, we will build a small explorer probe that is designed to sit in a small rocket (such as a water rocket), land, and relay data back to a server using RIOTOUS.
How Does the Explorer Probe Work?
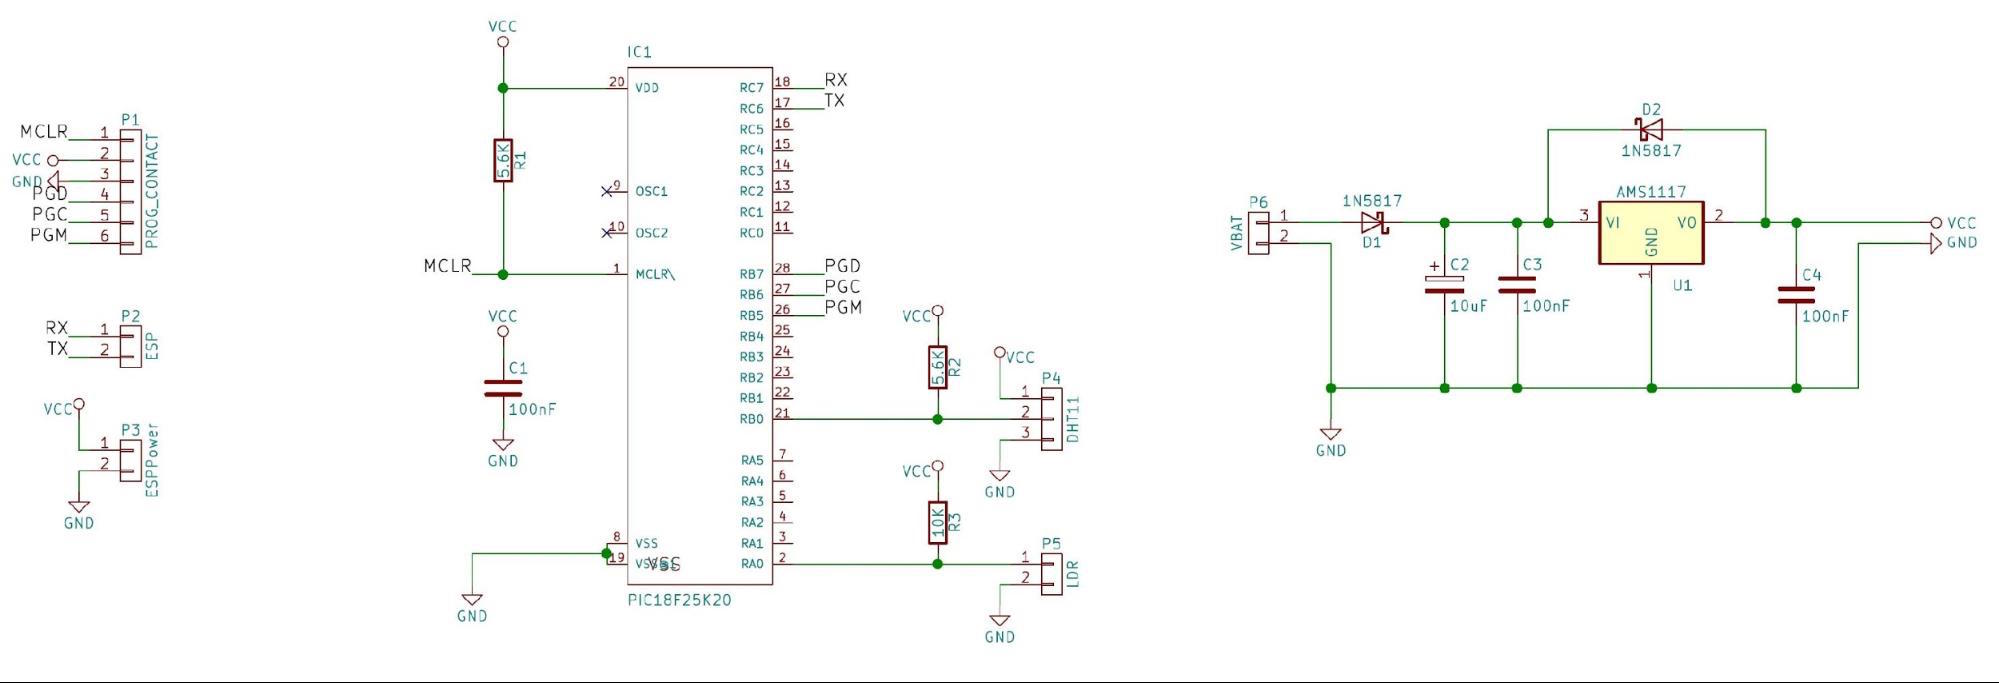
The magic behind the explorer in this project is achieved at two fronts: hardware and software. The hardware for this project has been designed to be as simple as possible, as to reduce the chance of damage during flight and landing (we all remember how the Beagle 2 Mars lander went). The circuit itself only consists of the needed modules connected to the main controller (PIC18F25K20), a DHT111 temperature/humidity sensor, an ESP8266 Wi-Fi module, and some power circuitry based on the AMS1117 3.3V regulator.
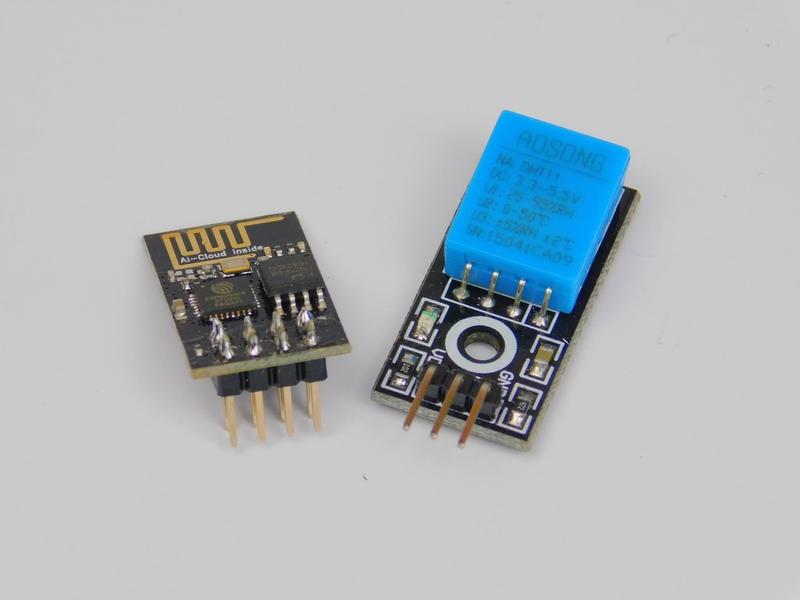
The DHT111 module is mounted externally, as to save space on the PCB (the PCB needs to be as small as possible). The module must be stored in the shade and kept away from water, so it is advised that the probe has air vents to allow the probe to measure the air temperature and humidity. But also to try and prevent water from entering the probe. The ESP8266 module is mounted externally, as to improve the reception for the receiver. The ESP8266 module, despite using Wi-Fi, has an incredible range (with the right transceiver) of up to 1130 meters. Therefore, the module should be mounted on the top of the probe to improve the chance of detection by the receiver. The power circuitry not only contains the needed decoupling capacitors, but also some protection diodes. D1 prevents damage to the circuit if the input polarity is wrong, and D2 prevents large voltage spikes on the VCC power-line from damaging the regulator.
The software for the probe is based on the RIOTOUS framework, which stands for real-time internet of things of unusual size. It is designed to allow internet access for small microcontrollers while still keeping RAM overheads low. The code is rather simple, and it contains all the instructions needed to make the DHT111 work, make readings, and then transmit those readings to a server of your own choice. However, this tutorial does not handle the server side (our receiver), and that will be covered in part two, where we will build a command center, including a dish to find our probe. To learn more about RIOTOUS, see the AAC projects below:
Construction
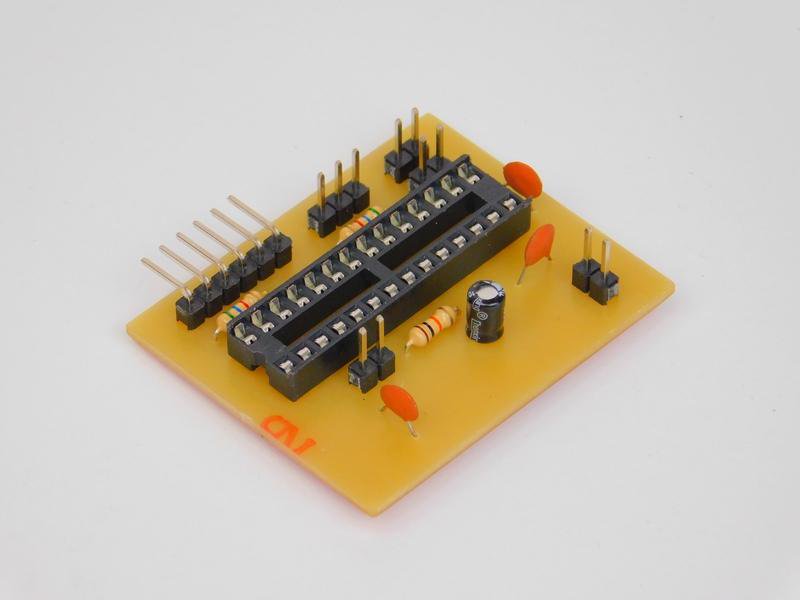
The main controller can be built using many circuit construction techniques during the prototyping stage, but it is recommended to use a more permanent circuit method for the final circuit. In this project, a custom PCB was designed and then engraved on a CNC. The probe itself can be designed in any fashion that you personally see fit for your application, but you can also use a cardboard tube to house the electronics. While it may not seem high tech, a cardboard tube will not only be easy to fashion into a probe, but it will also provide impact resistance, as cardboard deforms instead of being rigid. This means that landings that are more uncontrolled than expected will be less likely to cause damage to the internal parts.
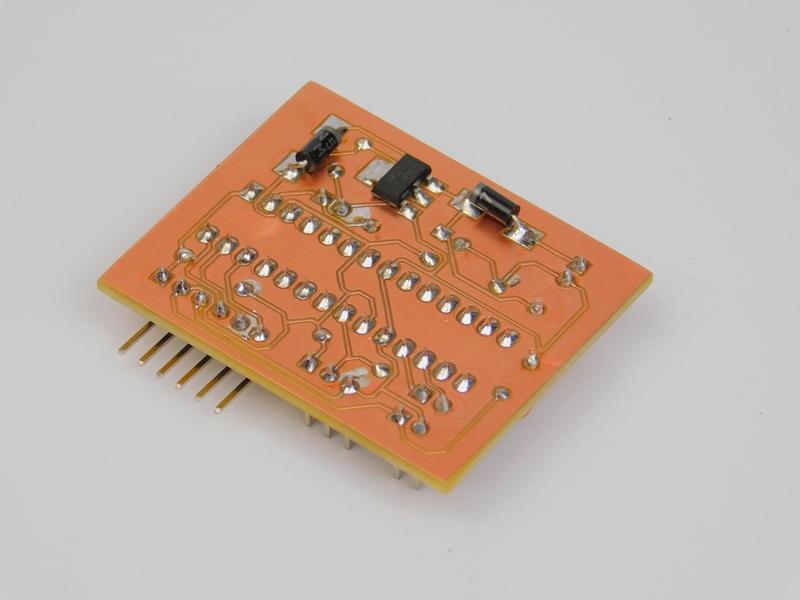
The underside of the PCB controller. Note the surface mount parts
The two modules, ESP8266 and DHT111
Powering the probe is entirely up to you, but this project uses coin cells because they are lightweight and very portable. However, coin cells do not last long and are more suited for one-off launches where data is only expected to be relayed back for a day or so. A more long-term solution would involve small solar cells that charge a battery and then turn the probe on once enough charge has been stored.