Get to know the 8051 MCU architecture and learn Keil IDE and be sure to try it out for your next project!
This article introduces the 8051, including its architecture and how to set up the Keil IDE to write an 8051 program. Specifically, I will cover how to use the AT89C51ED2 microcontroller, which uses the 8051 architecture (and explain why 8051 is now considered an architecture rather than an MCU itself).
The 8051 is for those looking to try something other than rapid prototyping, who want to take a step further and make projects on a larger scale, or who want to learn embedded system design.
Microcontroller Vs. Microprocessor
Before we continue, let’s quickly cover the differences between a microcontroller and a microprocessor. They may sound similar, but they are actually very different.
A microprocessor is an integrated circuit that acts as the central processing unit (CPU) of a system. When programmed, it can perform mathematical calculations, make logical decisions, communicate with external devices (memory, display, printer, mouse). Microprocessors are generally used only in computers and laptops where multitasking is a key factor. It runs on a speed of GHz and requires a large amount of memory (500GB or more).
A microcontroller is considered to be a whole computer on a chip because it not only contains a CPU, but also memory, I/O ports, and many other peripherals embedded on it. Microcontrollers are extensively used in embedded system design where tasks are predefined. Microcontrollers work in MHz and do not require much memory.
The difference between a microprocessor (left) and a microcontroller (right).
The History of 8051
The 8051 is an old school microcontroller invented back in the 1980s by Intel. It is considered to be one of the most basic microcontrollers in engineering, but since its invention, it has seen a lot of upgrades. Newer 8051 microcontrollers are more powerful and consume less power and are, more importantly, way cheaper.
The original 8051 had only 4KB ROM and 128 bytes of RAM while new 8051 variants have built-in external RAM, on-chip EEPROM memory for data storage, increased FLASH memory to save a program, and more UARTs and timers. PWM generators, ADC, and DAC are also added to some of its variants.
There is a misconception about 8051 that I would like to clear up. 8051 is an architecture, not a microcontroller. 8051’s architecture is free to use and popular vendors like Atmel, Cypress Semiconductor, Nuvoton, and NXP develop microcontrollers with 8051 as the core.
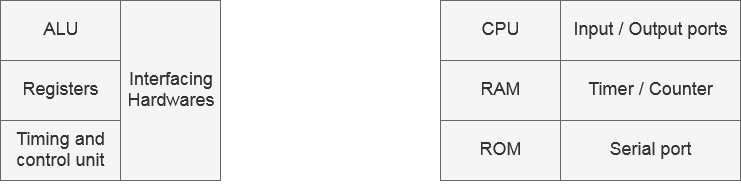
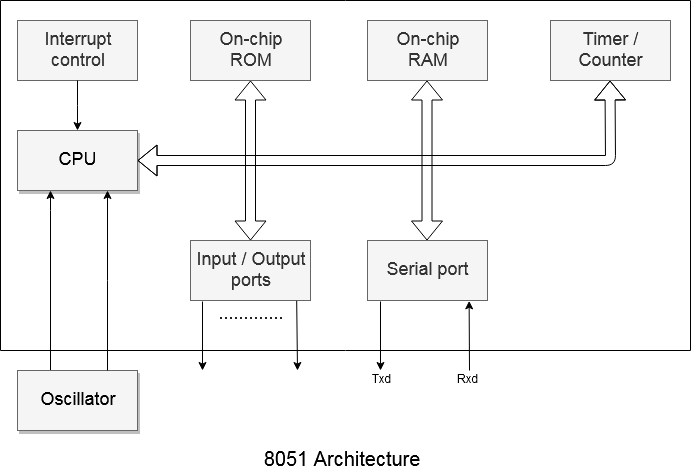
8051 Architecture
A CPU forms the main block of the system and all other peripherals are attached to it with the help of buses. An oscillator outputs clock signals to the CPU which helps to execute instructions, generate time delays and PWM pulses, and implement synchronous protocols to communicate with external devices.
Read-only memory (ROM) is a non-volatile memory, meaning data doesn’t erase when the MCU powers OFF. The memory stores the program, so this memory can only be erased through programming.
Contrary to ROM, there is also random access memory (RAM) which stores on-the-fly calculations and data. This memory is erased when power shuts OFF.
Serial and I/O ports are used to communicate with external devices or hardware such as computers, sensors, displays, and more.
Armed with all of that knowledge, let’s dive into 8051 programming!
How to Set up Keil IDE for Programming
Keil µVision IDE is a popular way to program MCUs containing the 8051 architecture. It supports over 50 microcontrollers and has good debugging tools including logic analyzers and watch windows.
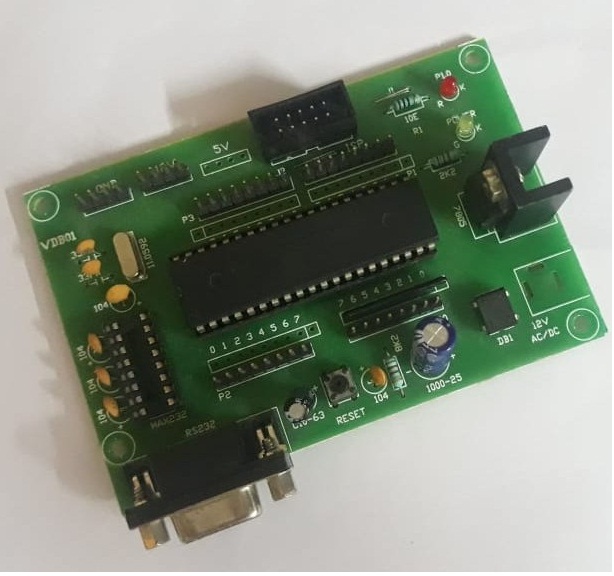
In this article, we will use the AT89C51ED2 microcontroller, which has:
- 64 KB FLASH ROM
- On chip EEPROM
- 256 Bytes RAM and 1792 bytes X-RAM
- In-System programming for uploading program
- 3 Timer/counters
- SPI, UART, PWM
To start writing a new program, you need to create a new project. Navigate to project —> New µVision project. Then save the new project in a folder.
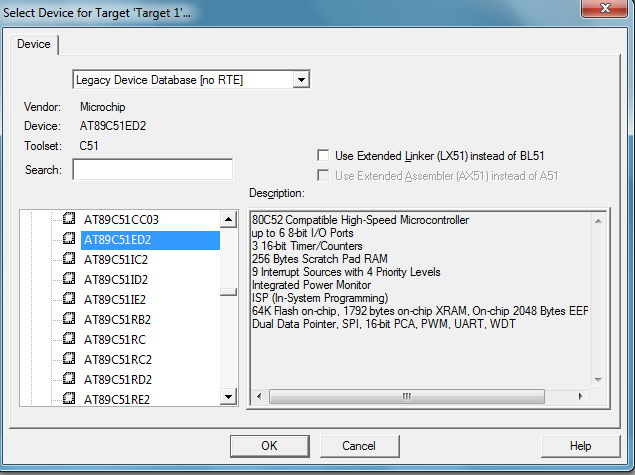
After saving the file, a new window will pop up asking you to select your microcontroller.
As discussed we are using AT89C51ED2, so select this controller under the Microchip section (as Atmel is now a part of Microchip).
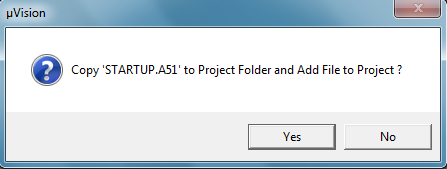
Select ‘No’ in the next pop up, as we do not need this file in our project.
Our project workspace is now ready!
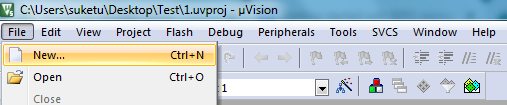
From here, we need to create a file where we can write our C code. Navigate to File —> New. Once the file is created, save it with .c extension in the same project folder.
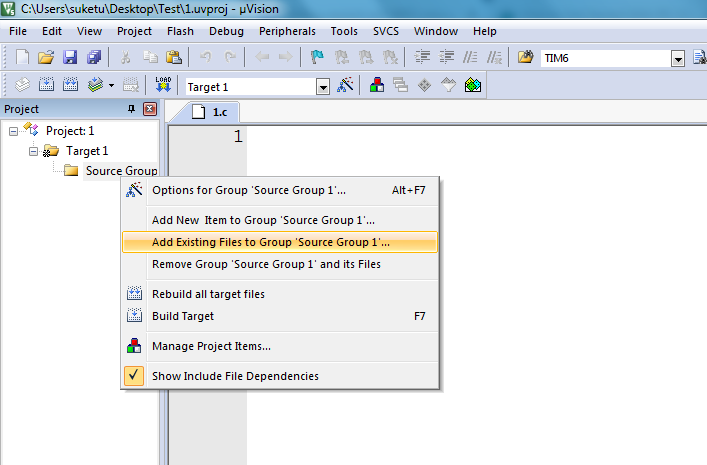
Next, we have to add that .c file to our project workspace. Select Add Existing Files and then select the created .c file to get it added.
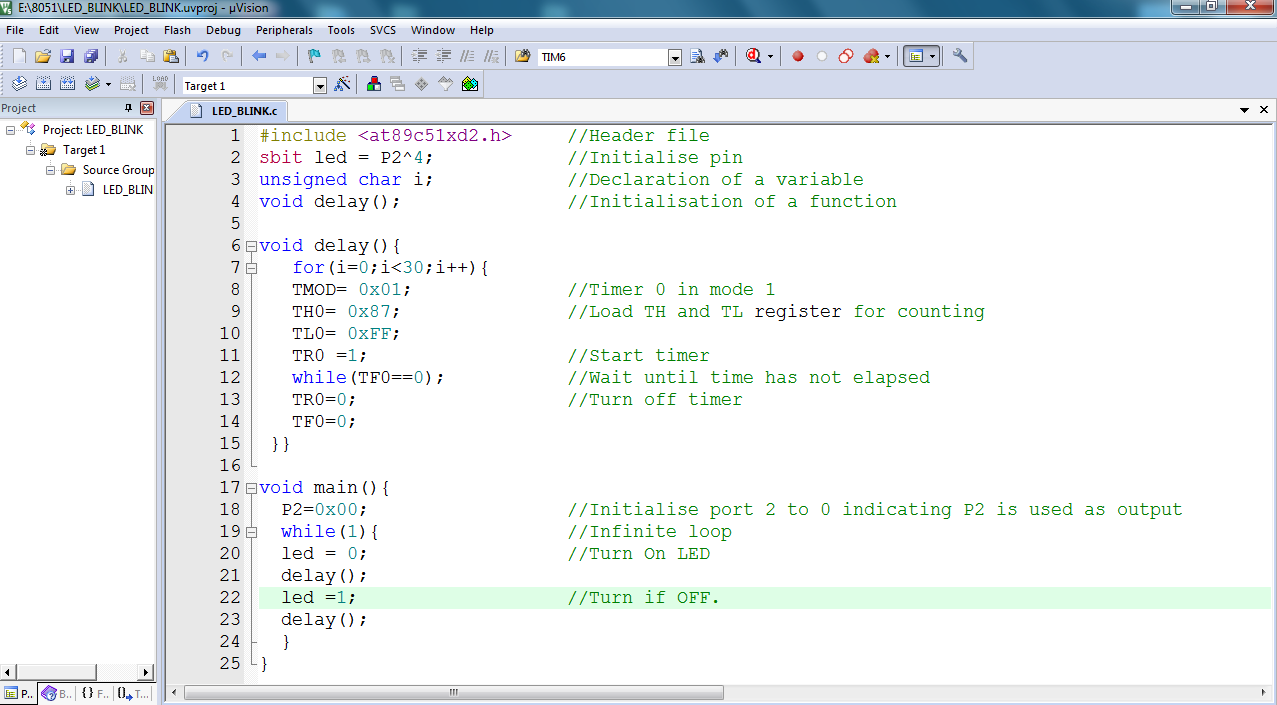
Hurray! The workspace and project file is ready. This tutorial shows an example of the LED blinking code using timers, which we will look into more in future articles.
A Comparison Chart of Popular Microcontrollers
Navigating the differences between microcontrollers can be a challenge as you move from using development boards to MCUs. The table below provides a comparison of popular microcontrollers.
| AVR | 8051 | PIC | ARM |
|---|
Invention | 1996 | 1980 | 1976 | 1981 |
Program and Data Memory Architecture | Modified Harvard architecture | Harvard architecture | Harvard architecture | Modified Harvard architecture |
Speed | >100 MHz | 12-24 MHz | Up to 252 MHz | Up to 1GHz |
On-chip Oscillator | Present | Not Present | Present | Present |
Bootloader | In-system programming using serial/JTAG | In-system programming and parallel programming | In-system programming using RS-232 | In-system programming and in-application programming |
On-chip Debugging | Using JTAG or DebugWire | Not present | Using MPLAB ICD or MPLAB Real ICE | Using JTAG or SWD protocol |
FLASH/ program memory size | Up to 256 KB | Up to 64 KB | Up to 2 MB | Up to 2 MB |
Compiler | Avr-gcc winAvr, AtmelStudio | Keil IDE | MPLABx | Keil, Eclipse IDE |
Note: Data shown in this chart is based on the newest variants of each microcontroller.
If you have any questions regarding setting up 8051 with Keil µVision IDE or you have another parameter of comparison between popular MCUs you find helpful, please put them into the comment section below!