In this article, we are going to show you the 3D printing design program, 123D, and give you some handy tips!
Both the maker community and various business sectors have embraced 3D printing to achieve a variety of results. It’s easy to see why with so many computer-aided design tools available, including Solidworks, Fusion 360 by Autodesk, Selfcad, Tinkercad, 123D and more. Each software has its own pros and cons.
123D is a free CAD development software used to develop meshes, solid designs, and custom models. The created designs can then be exported in STL format and fed to a 3D printer. Let’s look at setting up the 123D software.
How to Install 123D Software for Windows
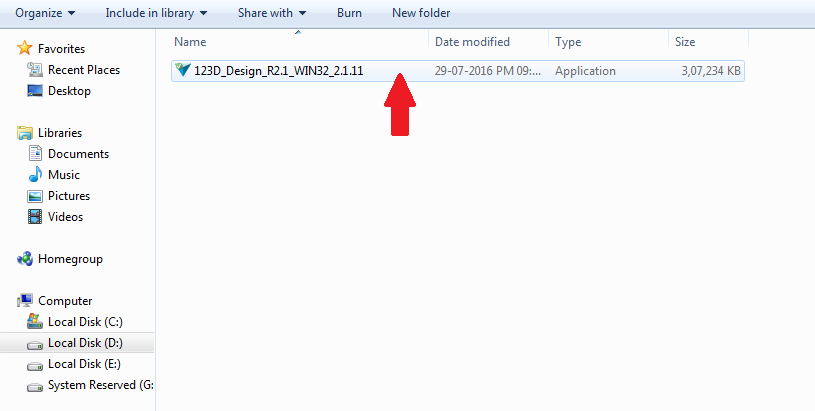
1. Open the exe file
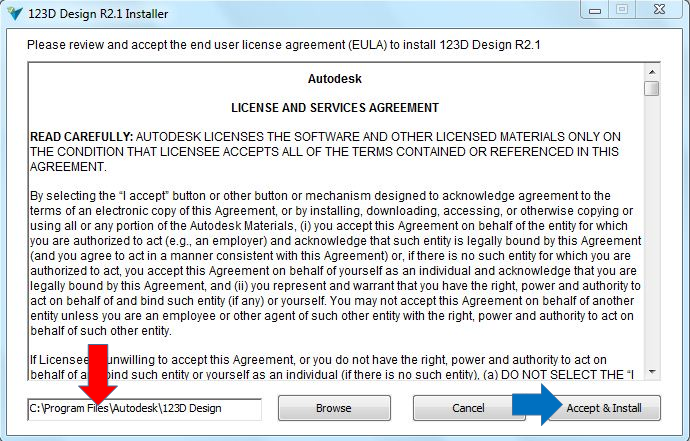
2. To select your desired path, click Browse and then click Accept & Install.
3. Installation takes some time, but be patient!
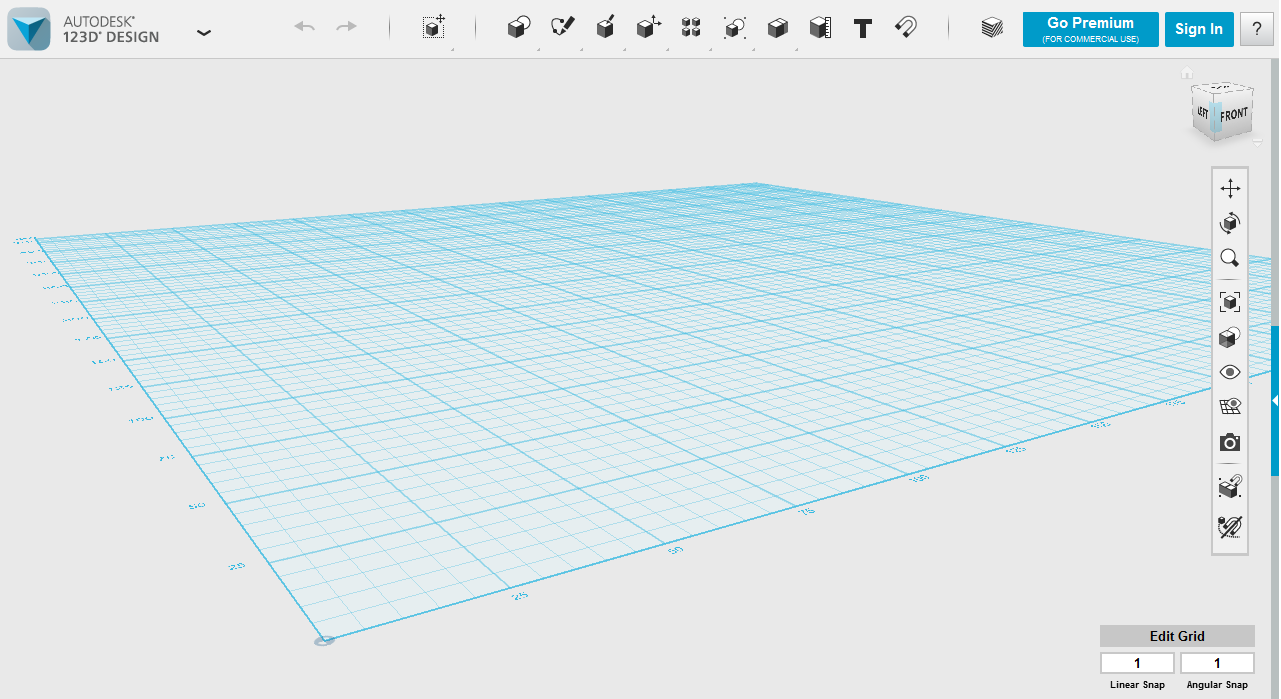
4. When installation is complete, a shortcut will be created on your computer’s desktop. Click on the icon to run 123D software. A plain grid, like the one shown below, will open.
Functions and Tools
Let’s start by looking at the most commonly-used functions and tools in 123D.
File
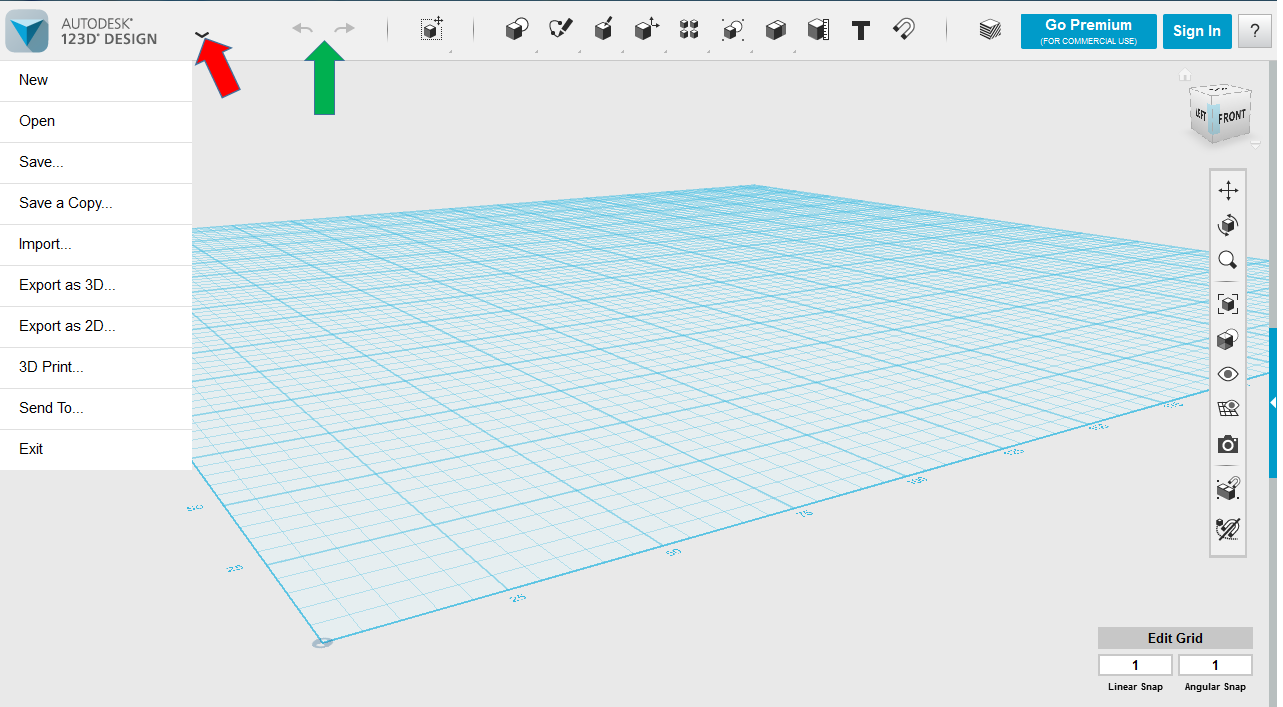
Clicking on the down tab (shown below with the red arrow) opens up the file option. Here, users can adjust their general settings like opening a previously saved file or creating a new 123D file.
The tabs shown by the green arrow are Undo (ctrl+Z) and Redo (ctrl+Y) and come in very handy when designing a model.
Note: Files saved to your computer are saved with a .123Dx extension, which means these files can only open in 123D.
Import
With Import, users can import a 3D model or a sketch/2D image in SVG format and then extrude this sketch to 3D.
Exporting as a 3D model provides four format options: STL, SAT, X3D, and VRML. I only work with STL but highly recommended that users figure out their 3D printer’s requirements and choose the appropriate format based on that.
Meshmixer and 123D Make are both handy tools I use to check my model before exporting it to my 3D printer.
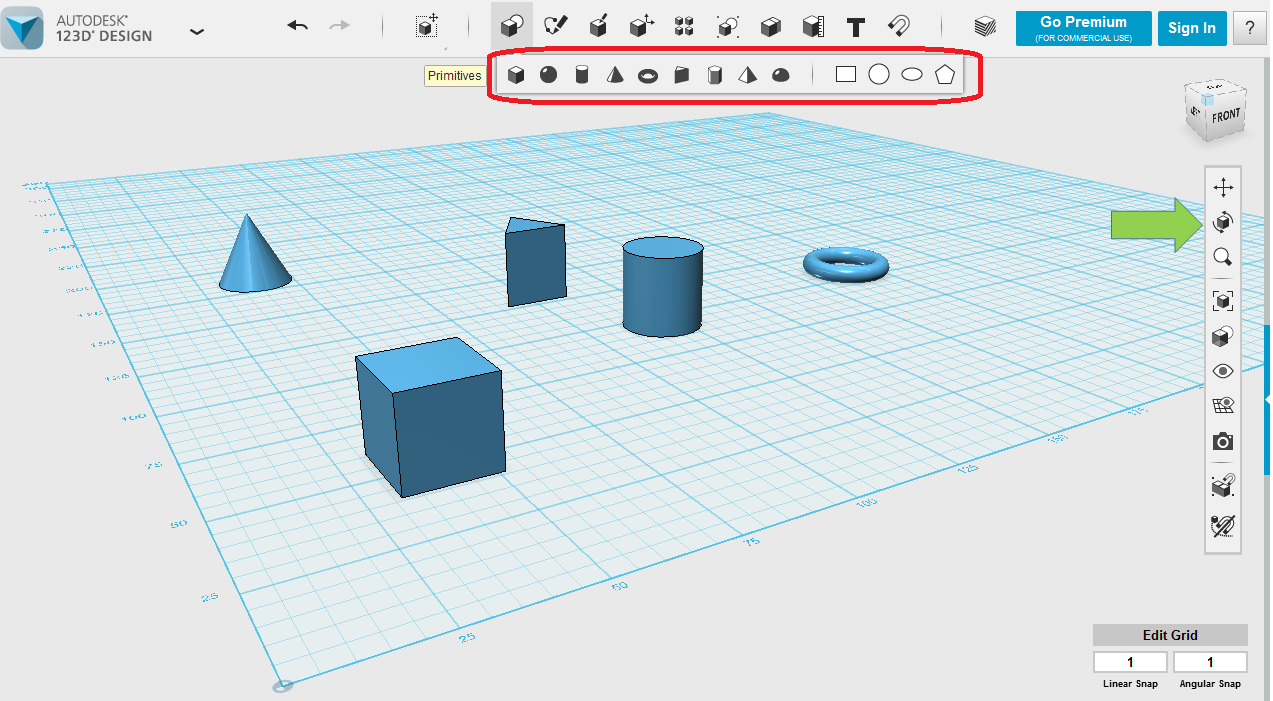
Primitives and Navigation
Primitives are pre-made 3D models that users can start a design with, but they are limited. One cool aspect of primitives is that users can adjust their size. After selecting the primitive from the menu, you much first input the dimensions of the object and then the object can be dropped on the grid.
The first three tabs on the right side (shown by the green arrow above) are for navigation. The first tab is Pan, which allows you to move the screen on the X-Y plane. It can also be accessed by long-pressing the wheel of your mouse. The next tab is Orbit, which changes the screen angle. An alternative option for orbit is a right-click of the mouse. The last tab is Zoom (magnifying glass symbol).
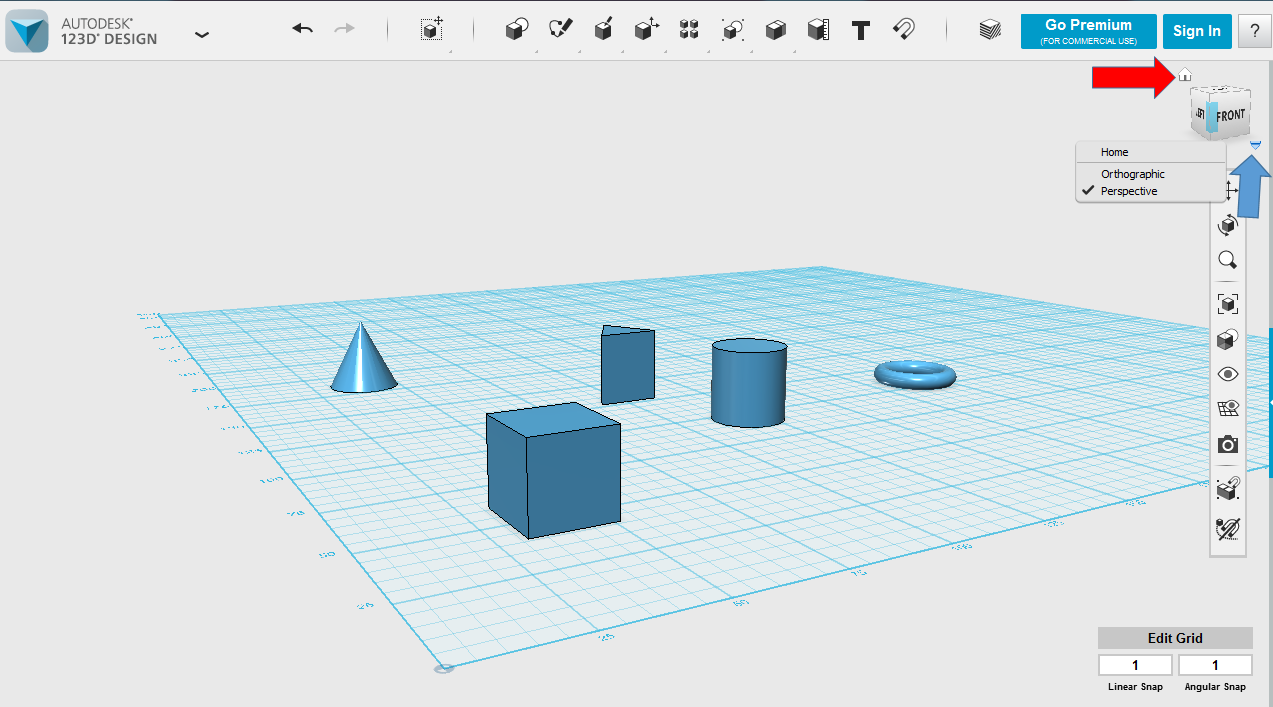
View Cube and Home Tab
If you do not like to use your mouse to orbit or hover around the grid, you can use the cube (shown by the blue arrow below) located on the top right for the same purpose.
The first three tabs on the right side (shown by the green arrow above) are for navigation. The first tab is Pan, which allows you to move the screen on the X-Y plane. It can also be accessed by long-pressing the wheel of your mouse. The next tab is Orbit, which changes the screen angle. An alternative option for orbit is a right-click of the mouse. The last tab is Zoom (magnifying glass symbol).
The home tab (shown above by the red arrow) get you back to the default camera angle.
For better visual appearance, there are two modes:
Perspective View - Here, models are displayed in terms of human perspective. If you look straight on at two objects situated some distance from one another, the object farther away will seem smaller than the other even if, in reality, they are the same height.
Orthographic View - As opposed to perspective view, here models are displayed with real measurements.
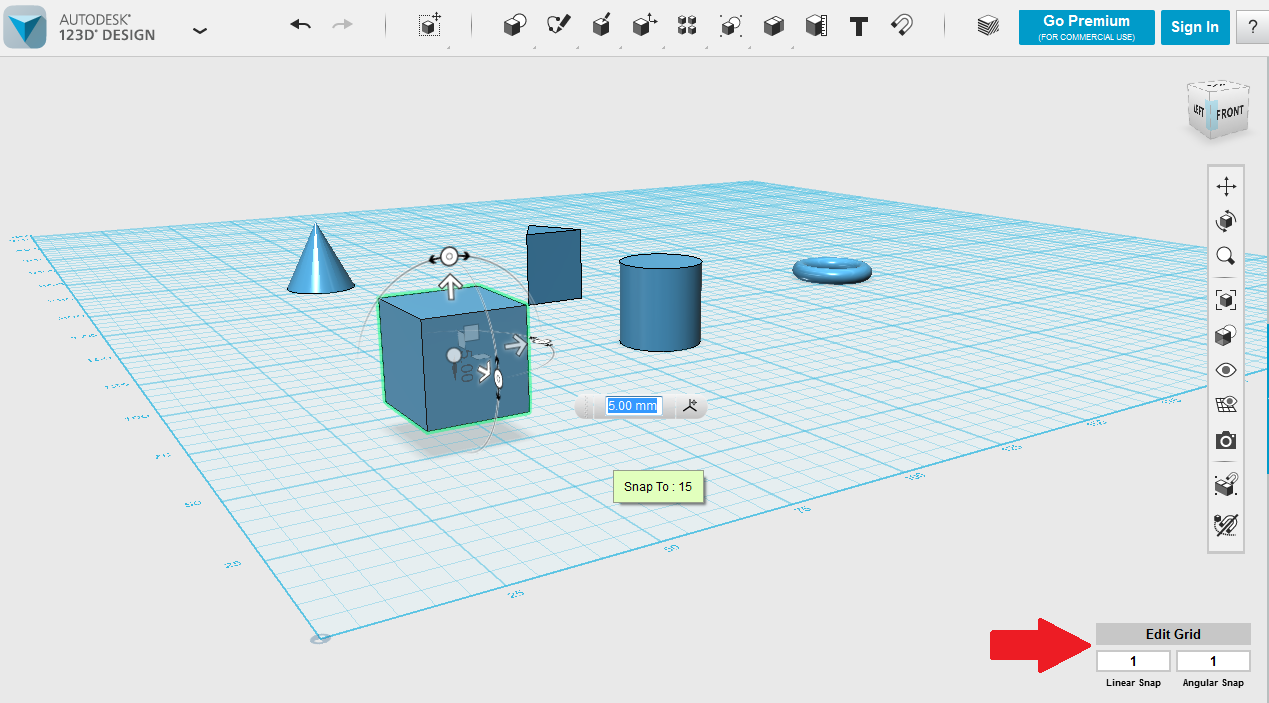
Snap, Units, and Edit Grid
Snap
Snap decides the intervals that an object can be moved/rotated on the grid. If required, the user can turn it off and drag the object randomly around the grid.
Units
3D printers use millimeters as the default unit for measurements. Knowing this, be careful when drawing custom designs. Otherwise, you could end up making a huge error. If you want to use inches, you can by adjusting the unit. However, before exporting, remember to convert it back to millimeters!
Edit grid
Edit Grid allows you to set the grid size to match your 3D printer. Simply enter the dimensions of your 3D printer’s plate and you’re good to go.
123D vs Other Platforms
123D is a free software mainly targeted towards beginners or users with some basic CAD experience.
When creating complex designs, 123D can sometimes run very slowly and I’ve often experienced crashes. I recommend it for beginners who want to try out Tinkercad but may not be ready to commit. Note that Tinkercad does not have options like orthographic view or a proper text tool compared to 123D.