Learn about the Google Cloud Platform and how you can set up the IoT WG development board for prototyping.
In a previous article, we took a look at the Microchip IoT WG development board which works with the Google Cloud IoT development platform. With a board that provides security, speed, and capabilities that compliment prototyping on Google Cloud IoT, let's explore how to get started with Google Cloud IoT.
To show Google Cloud IoT works, I'll use the IoT WG board. The board claims users only need "30 seconds to connect to the cloud" and I was skeptical. However, after setting everything up, I'll say this is true.
In this article, I'm going to walk you through the process of connecting to the cloud and provide some additional helpful information about the board.
**Please note that this example is targeted to Windows OS users.
About the Google Cloud Platform
Google Cloud IoT connects, processes, stores, and analyzes data from your devices with plenty of features, including but not limited to machine learning and Google Maps integration.
Anyone from individual developers to large companies can utilize Google Cloud IoT's computing power to store and analyze data from their IoT devices, which can be difficult to achieve with local hosting.
At the time of this writing, Google is offering a $300 credit to new customers for any of their products but they also have some completely free tools anyone can utilize.
Google Cloud IoT Compatible Hardware
Custom hardware can be connected to the platform. There is also a network of Google Cloud IoT Device Partners who offer developer kits as well as stand-alone products already configured to work with the MQTT or HTTP protocols supported by Google Cloud IoT.
Though we will be using Google Cloud for this article, it is only in a limited sandbox mode created by Microchip. A link to instructions on adding this device to your own Cloud IoT account can be found below.
Materials Needed
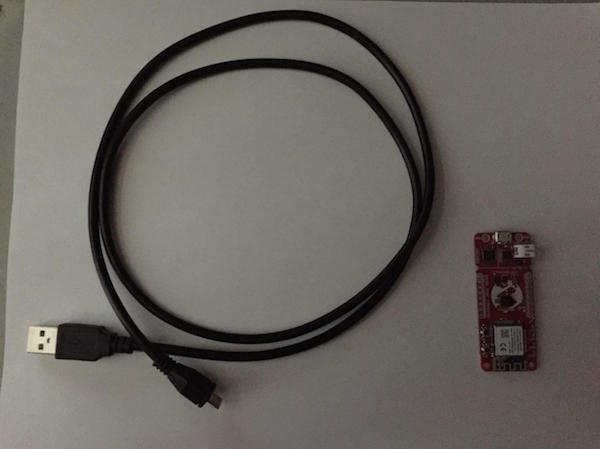
To get started, you need a Microchip IoT WG development board and a USB Micro B connector to plug it into your computer.
To get started, you'll need a cord to connect the board to your computer.
You'll also need your Wi-Fi network’s information on hand to connect the board. Once all of the materials are gathered, it's time to plug in the board.
Hardware Setup
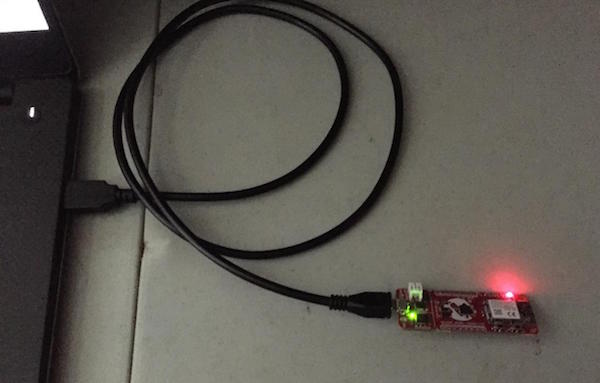
This is where the 30-second countdown starts. Plug the USB cable into your computer and to the WG development board. Once it is powered up, you should get a red light signaling that you are not connected to the internet. This is completely normal since we haven't yet configured the device. To connect, let's configure!
Initially, the red LED on your board will flash, indicating the board is not connected to the internet.
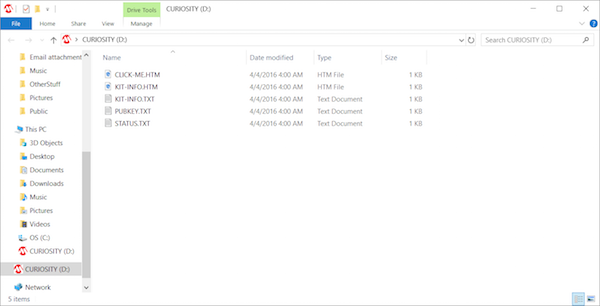
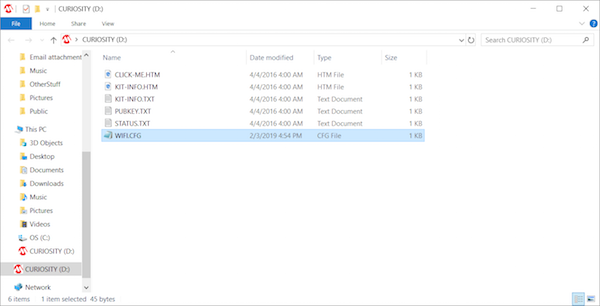
Much like plugging in a flash drive, hard drive, or smartphone, your computer will let you know a new device has been connected. It will show up as a device named “CURIOSITY” with the Microchip logo. Double click it to open it up. You should see something similar to the screen below.
My device’s files right after connecting it to my computer.
Here are the files that show up once you launch CURIOSITY (if you do not care about the specific files and just want to get started as quickly as possible, you can skip the rest of this section):
STATUS.TXT
This will give you the current status of the device. Mostly, it will just say “Ready” and be ready for your input.
PUBKEY.TXT
This file contains your device’s specific public key that is used to connect to your own private Google Cloud Project. Microchip provides a guide on how to set this up, which can also be found at the end of this article. Keep in mind that you will need to open the Windows-exclusive Atmel START too.
KIT-INFO.TXT
This file contains your device’s current firmware version, the kit type (AVR-IoT WG), and your device’s serial number. The .HTM version of KIT-INFO will take you to Microchip’s website and provide more information about the kit as well as links to valuable resources.
Web Setup
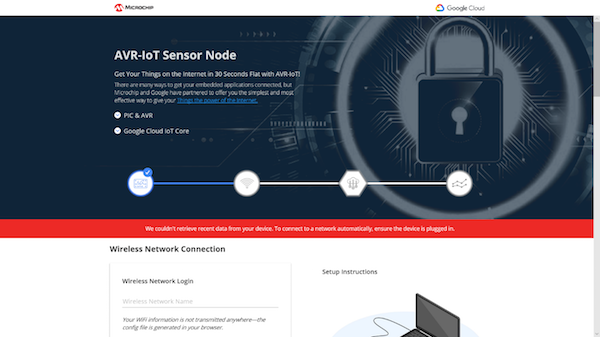
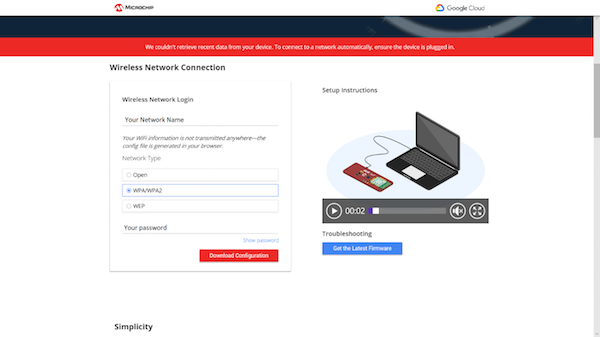
To set up the internet, client the file CLICK-ME.HTM to open up the cloud setup program in your browser. It probably goes without saying, but in order to connect to the cloud via Wi-Fi, you'll an internet connection.
Your network's password and name will only be used locally on your browser. You confidential data will not be uploaded anywhere.
First screen after clicking the CLICK-ME.HTM file.
Ignore the red banner as we have not yet tried to connect. Scroll down and enter your network details in the designated boxes. You can also watch the setup instruction video.
Enter your network details in the box. Watch the setup video on this landing page for additional information.
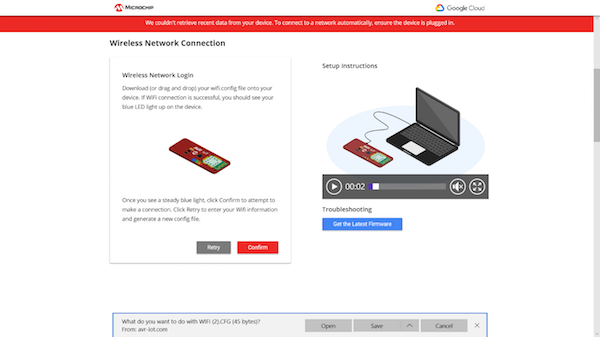
Once you've entered your network details, WIFI.CFG will prompt you to download a file. Click Save and open the folder.
Once you enter you network details, WIFI.CFG will prompt you to download a file.
Next, simply drag and drop the file into your CURIOSITY drive to configure the WG board. After this, you can move back to your browser window.
The window after dragging and dropping the completed setup file.
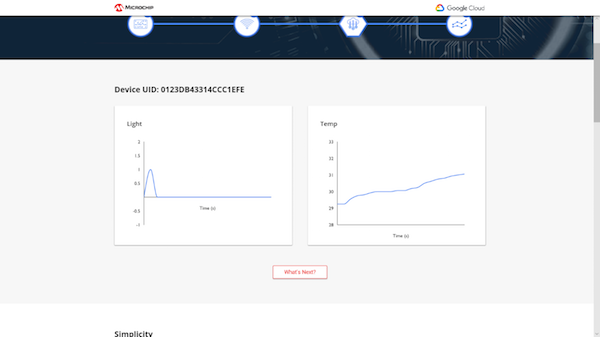
Successful Connection
Once the WIFI.CFG file is moved to your board, you should notice two things upon a successful connection:
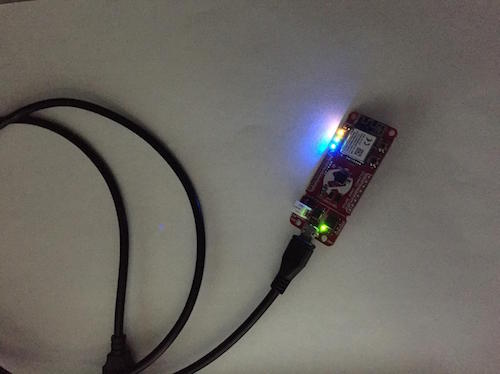
First, your IoT board will now have a blue light on, rather than the initial red light. If the red LED is still on, double check the Wi-Fi information you entered. Simply delete the current WIFI.CFG file and replace it with a new one from the CLICK-ME.HTM setup website.
A blue light on your board indicates a successful Wi-Fi connection.
Second, you should notice light and temperature graphs on your browser. These are readings from your device; they are not random data. Feel free to test this by placing your hand over your board or shining a flashlight on it.
The sensor data changed after I covered the board with my hand.
That should be all you need to get started with this IoT board. The Google Cloud Sandbox is for demo purposes only. You can find additional tutorials showing how to move your device to a private Google Cloud Project. Thanks for reading and happy developing!
Have you tried this board or Google Cloud IoT's development platform? Let us know about your experiences in the comments!