The technical story of development for the e-Tshirt project.
This page covers the technical story of development for the E-T-shirt project. The final prototype of the E-T-shirt was created after multiple iterations, and I am sharing each version here. Here are some important reads for this project.
E-T-Shirt: Concept and BackgroundE-T-Shirt: DIY tutorialAnd here is a short project video.
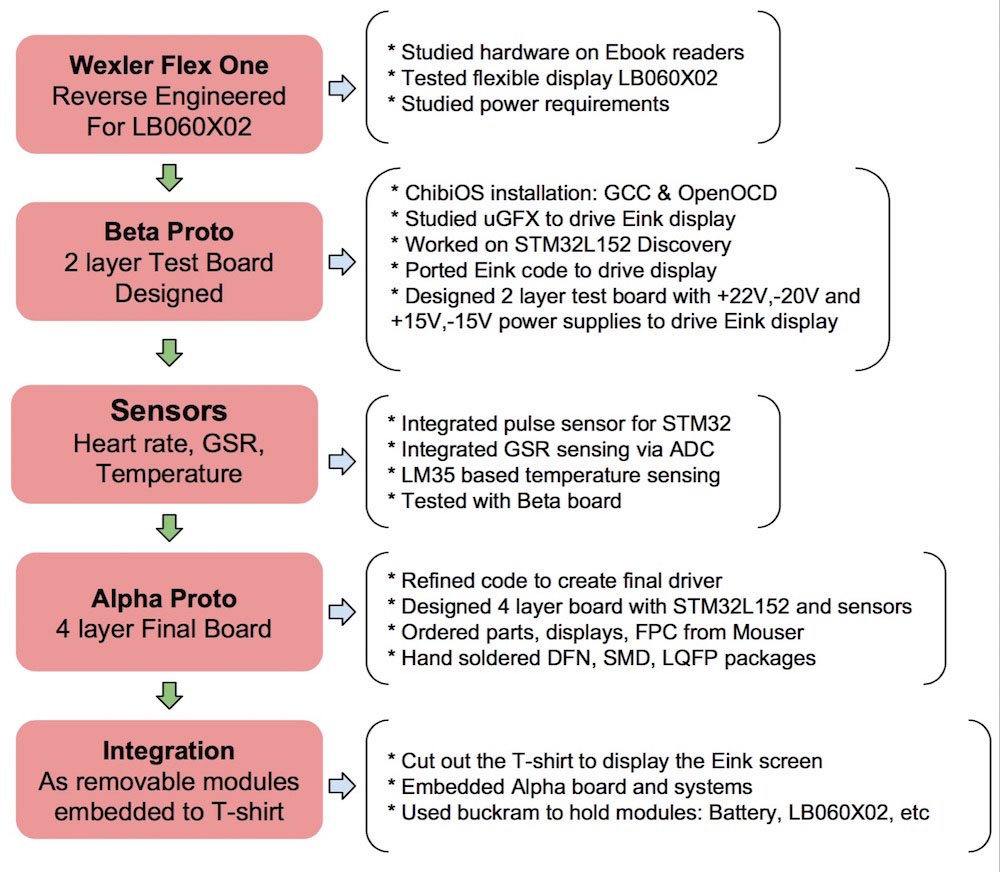
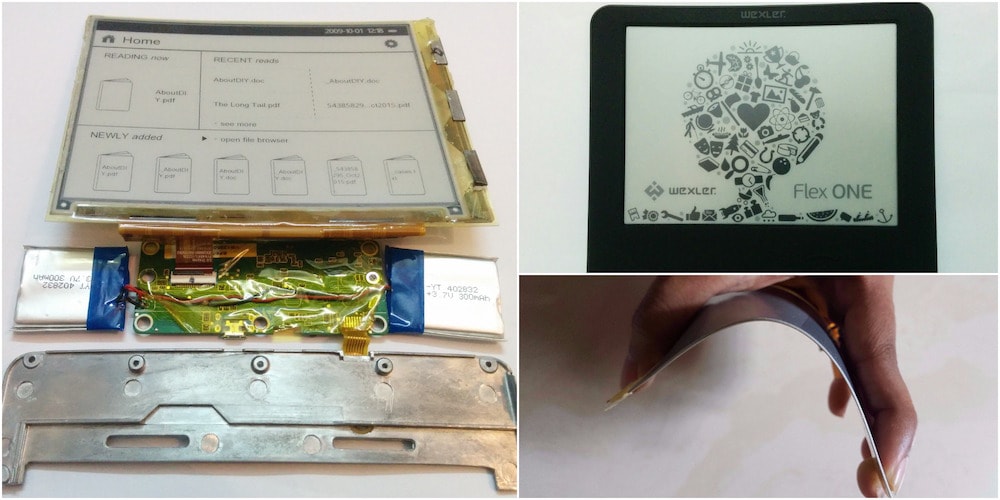
Reverse Engineering 'Wexler Flex One'
"Wexler Flex One" is an e-book that was released in 2012 and made in Russia. It is no longer in production, and it was one of the very few e-books that were flexible. This was because of the eink display it had, made by LG: LB060X02. I tinkered around with this e-book and hacked it apart to understand more about its hardware. This helped me understand more about the LB060X02 eink display used in it.
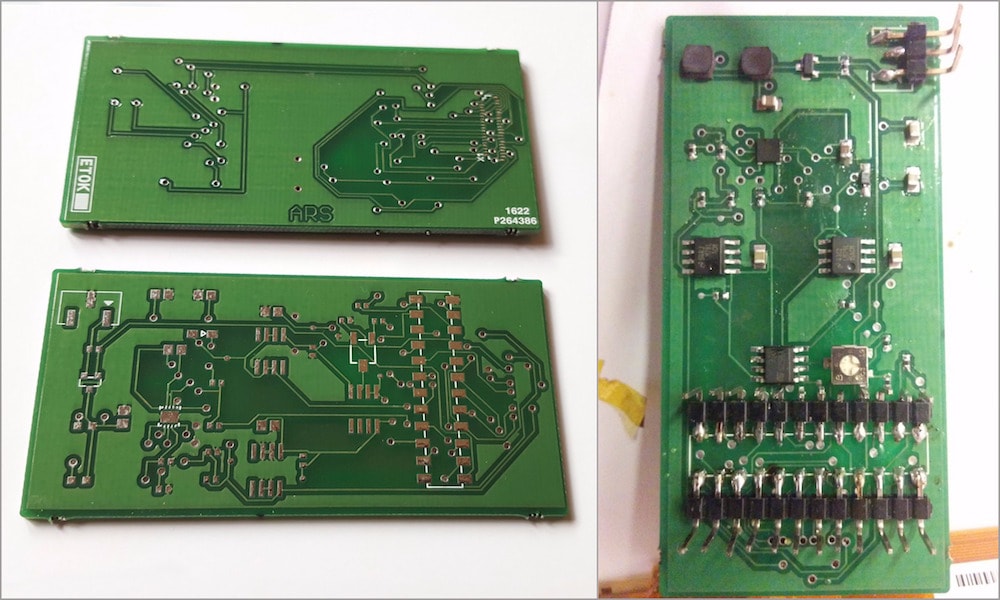
Beta Proto
- ChibiOS installation: GCC and OpenOCD
- ChibiOS is a complete development environment for RTOS, HAL, etc. I am using this platform to develop the driver for the e-ink display using STM32L152. Check this out.
- I studied uGFX to drive e-ink display.
- uGFX is an embedded library for integrating displays and developing GUIs. Learned various commands for creating the GUI on the E-ink display.
- I worked on STM32L152 discovery.
- In order to drive the e-ink display LB060X02, I had to choose a controller for driving it. The STM32L152 is an ARM Cortex M3 controller with low power consumption was the ideal choice.
- I ported the e-ink code to drive display.
- I studied and ported the code developed for driving an e-ink display to suit LB060X02.
- I designed a two-layer test board with +22V,-20V and +15V,-15V power supplies to drive the e-ink display
- I used Eagle to design a two-layer board that can supply +22V, -20V, +15V and -15V to drive the e-ink display. I also made additional packages for LT3463, LM79L15 in Eagle.
Sensors
- I integrated the pulse sensor for STM32.
- I used this sensor to detect hear beat. I made the code for Arduino and ported it for suiting STM32L152.
- I integrated GSR sensing via ADC.
- I increased the resolution of ADC to 12 bit to accurately sense skin conductivity as galvanic response.
- LM35 based temperature sensing
- Used LM35 to obtain skin temperature readings.
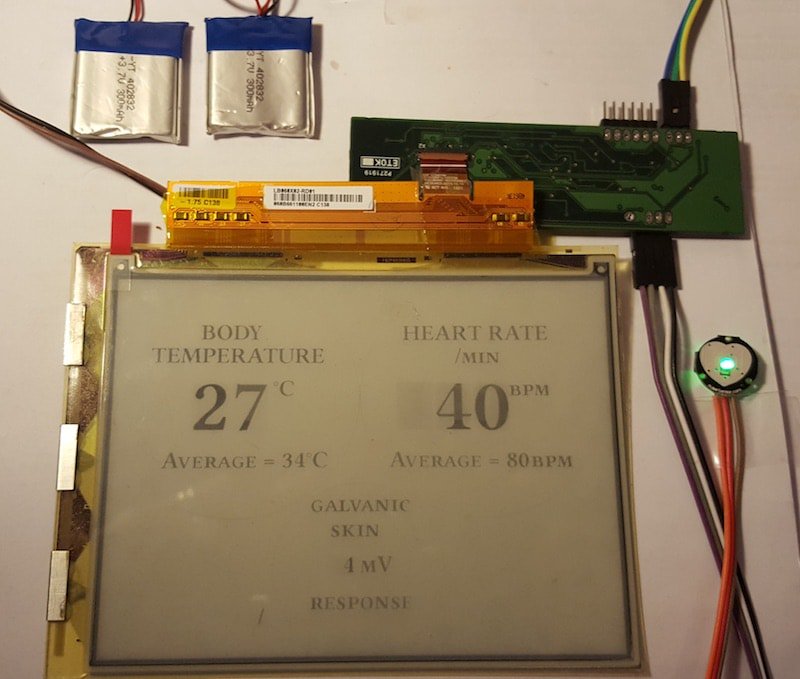
- I tested with the Beta board
- I connected the sensors to the Beta test board and displayed data on the e-ink display.
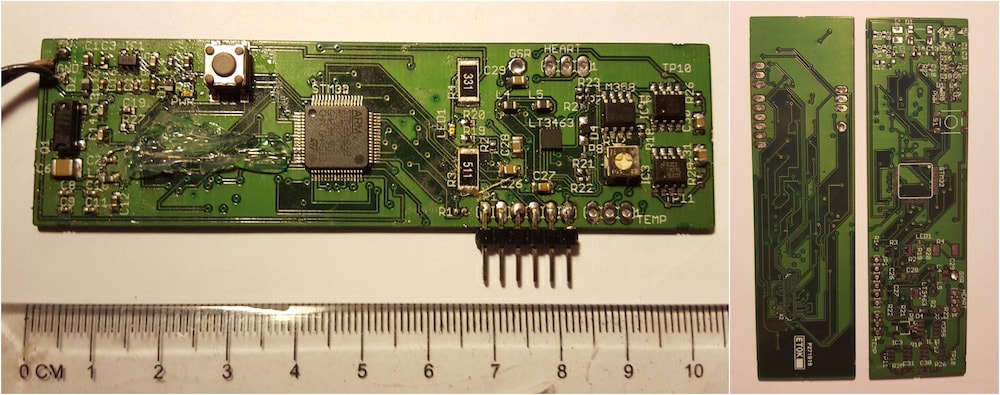
Alpha Proto
- I refined code to create final driver.
- I refined code to remove redundancies and make the final code for the LB060X02 E-ink display to output sensor data.
- I designed a four-layer board with STM32L152 and sensors.
- I designed a four-layer board in Eagle to incorporate the STM32L152, power circuitry for the e-ink display and the sensors and made an LQFP64 part in Eagle for STM32L152.
5. I ordered parts, displays, and FPC from Mouser and ordered these parts from Mouser to be assembled on the alpha prototype board.
6. I hand-soldered DFN, SMD, and LQFP packages and used a hot air blower for soldering the DFN, SMD, and other packages.
Integration
- I cut out the T-shirt to display the e-ink screen and made a cutout on the T-shirt to display the e-ink screen through it.
- I embedded the Alpha board and systems and made custom wires and connectors for connecting various modules.
- Used bakram to hold these modules: battery, LB060X02, and sensors. I also created pockets on the inner layer of the T-shirt to hold the controller board, battery, sensors and the e-ink display.