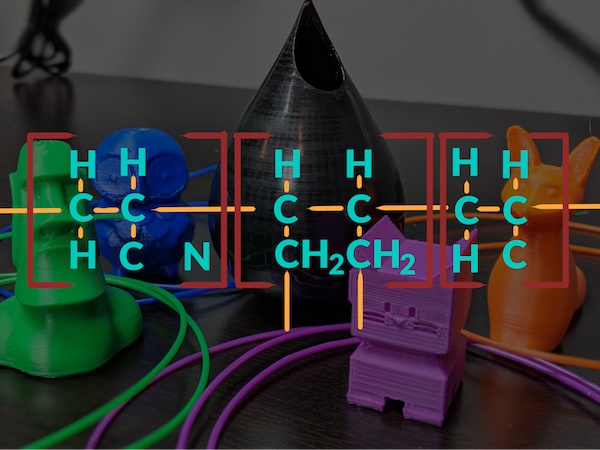
Learn about the benefits and drawbacks of using popular ABS materials for 3D printing your designs.
Acrylonitrile butadiene styrene (ABS) is the second most common type of 3D printer filament behind PLA. Compared to PLA, ABS is more challenging to print, but it also offers better mechanical properties.
Though not quite as durable as nylon, parts printed from ABS are more durable than parts printed from PLA because ABS is slightly ductile. This means that ABS parts can deform slightly when impacted or subjected to a large load, and then spring back to their original shape without suffering permanent damage.
ABS is also easy to post-process using a range of techniques including manual sanding, mechanical polishing, and chemical smoothing.
It is available in a wide range of colors from various vendors. There are also a number of specialty formulations of ABS available on the market that give prints a more attractive finish straight off the printer.
Cost
As mentioned above, ABS is only slightly more expensive than PLA. A one-kilogram spool of ABS costs anywhere from $20 to $50.
Vendors offering spools at the higher end of the price range tend to have tighter dimensional tolerances on their prints and they sometimes offer ABS with additives for better surface quality after printing.
Strength
The biggest advantage offered by ABS filaments over other 3D printing feedstocks is its great mechanical strength.
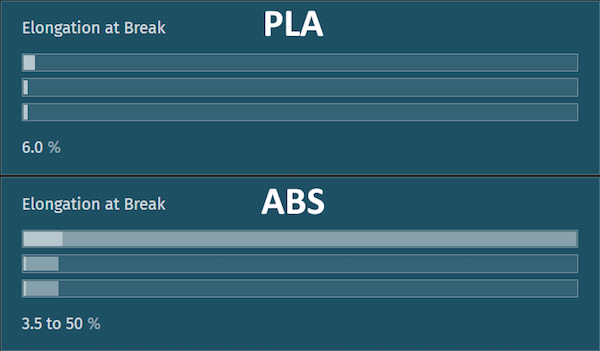
ABS has the ability to bend or deform when acted upon by a large force or impact, and then spring back to its original shape. This material property is measured as elongation at break, which expresses how much a material can change shape before it breaks. ABS has an elongation at break, on average, about four times greater than PLA.
Comparison of PLA and ABS to polyester plastics (top bar), all thermoplastics (middle bar), and all common manufacturing materials (bottom bar). Image courtesy of Make it From.
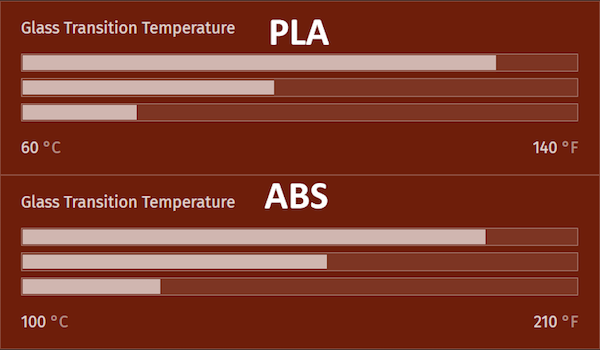
Compared to other common 3D printing materials, it also has much higher heat resistance. The glass transition temperature of ABS, the temperature at which plastic softens and permanently changes shape, is significantly higher than other common feedstocks including PLA.
The bars compare the properties of each plastic to polyester plastics (top bar), all thermoplastics (middle bar), and all common manufacturing materials (bottom bar). Image courtesy of Make it From.
Post-Processing
This higher glass transition temperature also makes sanding ABS parts much easier because it does not soften and gum up sandpaper unlike PLA and Nylon.
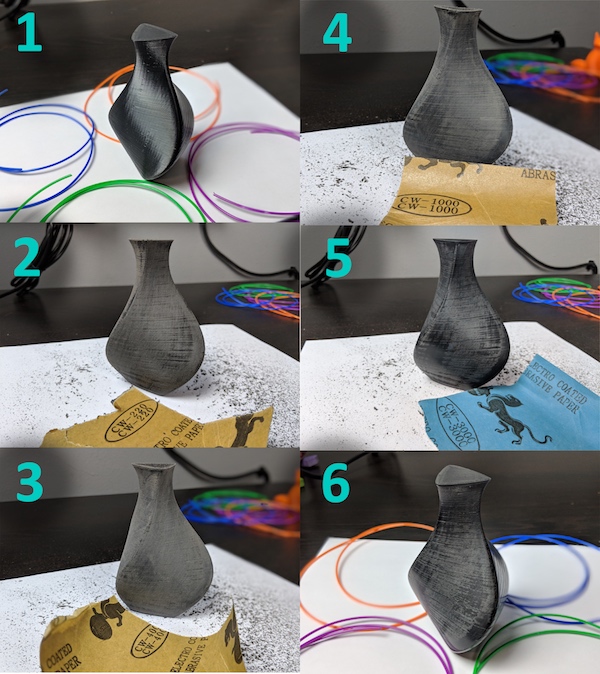
Therefore, ABS does not require wet sanding. As with most sanding, you should start with coarser sandpaper and gradually work your way down to finer grits for the best results.
In this progression, an ABS print is sanded with progressively smaller grits (220, 400, 1000, 3000) and finally cleaned. While the layer lines are still visible, the part feels almost completely smooth.
Another post-process technique that is particularly popular for ABS parts is chemical smoothing. ABS parts are most commonly smoothed with acetone vapors.
The general process is to place an ABS 3D printed part into a sealed container on some kind of platform over acetone. As the acetone evaporates, the container fills with acetone vapor. Since ABS is highly soluble in acetone, this vapor (quite quickly) dissolves the top layer of the plastic. The surface tension of the liquified ABS smooths out the part.
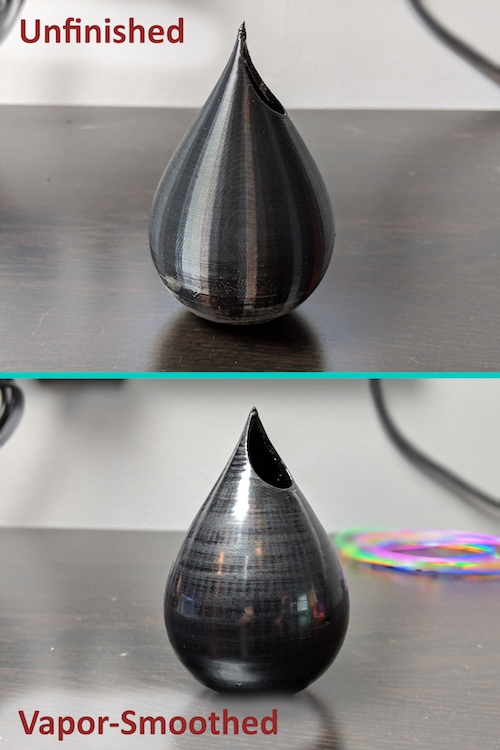
Take a look at the image below to see the difference between unfinished and vapor-smoothed prints. The top photo shows an unfinished ABS 3D print with a layer height of 0.2mm. Aside from removing the support material, this print is straight off the 3D printer. The bottom image shows the same part after cold vapor smoothing. The surface is extremely smooth and glossy enough to be reflective.
A comparison of an unfinished and a vapor-smoothed ABS print.
It should be noted that polishing ABS parts with acetone vapor is not particularly safe — great caution should be taken if you try this method. Also, acetone vapor is highly flammable, it is not very healthy to breathe in, and can easily damage other plastic parts in your work area if not properly contained.
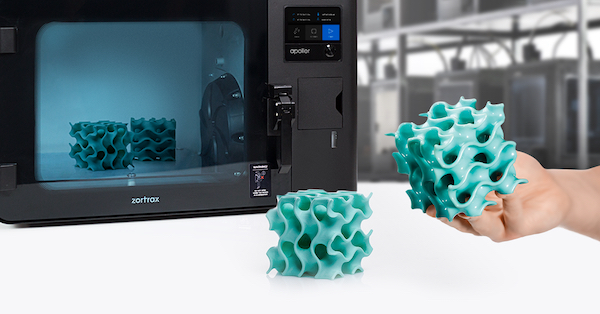
To make the process a little easier and safer, several products attempt to automate vapor smoothing with dedicated post-processing machines, like the recently-released Zotrax Apoller.
The Zortax Apoller smart vapor smoothing device. Image courtesy of Zortax Apoller.
Ease of Use
ABS certainly has some advantages over other common 3D printing materials, but its major downside is that ABS is much more difficult to use, especially compared with PLA.
First, ABS prints at a higher temperature than other plastics, around 230°C. For some lower-cost 3D printers without all-metal hotends, this temperature can be close to the maximum hotend temperature the printer can achieve.
This can be an issue because those more basic 3D printers may not have heat breaks designed to keep the extra heat isolated in the hotend. This can increase the chance of a clogged hotend.
Warping
As it cools, ABS shrinks more compared to other plastics. Because of this, warping is a significant problem for ABS prints. As different parts of the print cool at different rates, ABS prints can become distorted.
This is especially evident when the warping part curls away from the print bed. This can affect bed adhesion and cause all the layers above the warped area to become distorted as well. Parts may also split along layer lines in the middle of the part.
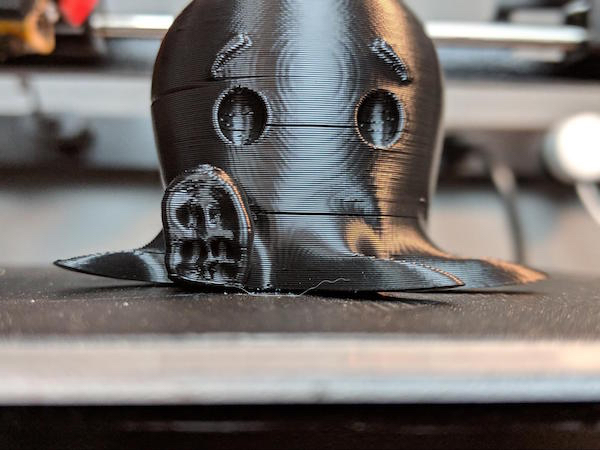
Take a look at the example below. In this image, you can see a moderate level of warping on the octopus’ tentacles. As the ABS plastic cooled and contracted, the plastic pulled off the build platform. Aside from deforming your part, this effect can easily result in print failure if the part falls off the bed or if the extruder runs into the part.
An example of ABS warping as it cools and contracts.
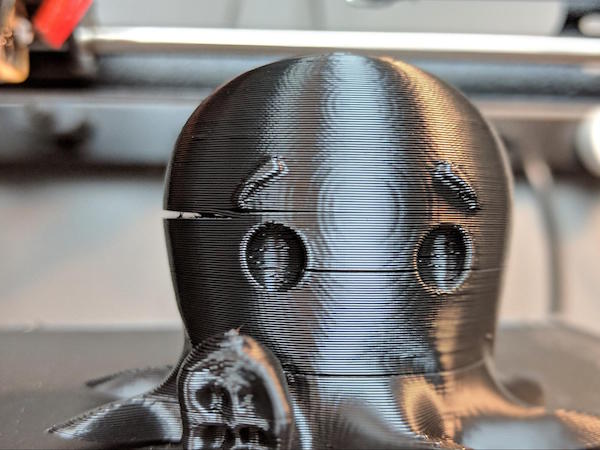
While curling off the print bed is a common issue with ABS warping, another is layer delamination. In the print below, layers of the part have separated in several places as different areas of the print cooled and contracted at different rates.
An example of layer delamination in an ABS print.
Ways to Avoid ABS Warping
Several methods can be used to avoid ABS’ warping tendency. The most common is the use of a heated bed, which is all but required for successful printing with ABS.
A heated bed keeps the part warm during printing, allowing the part to cool evenly. A heated bed also greatly improves bed adhesion of ABS.
One way to avoid warping is to use a heated bed.
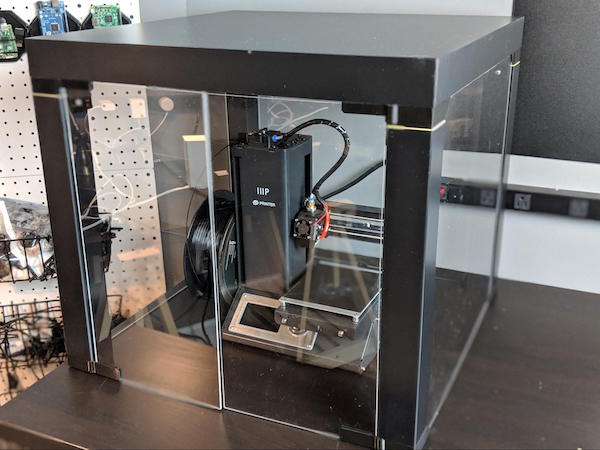
However, even with a heated bed, larger parts can still suffer from deformation including splitting. Therefore, some Makers build enclosures for their 3D printers. By placing your 3D printer inside an insulated enclosure, the ambient temperature inside the enclosure will increase.
This 3D printer enclosure is made from an Ikea Lack side table, some clear acrylic panels, and some 3D printed parts. A tutorial for building this enclosure can be found at Prusa Printers.
Utilizing an insulated enclosure has a similar purpose as using a heated build platform, it allows the part to cool evenly, reducing chances of warping. Enclosures have the added benefit of reducing drafts from air movement in the environment around the printer, which further helps maintain a consistent temperature throughout the printed part.
The Smell
The final ease of use consideration for printing with ABS is the smell it produces. While all 3D printing materials produce some smell while the 3D printer operates, ABS is a bit more unpleasant than the others. During printing, ABS smells strongly of melting plastic (which makes sense —that’s what it is).
Not only are these fumes foul-smelling, but emerging research is also showing that it may have negative health effects. Containing some of these off-putting odors is another reason for using an enclosure.
3D Printer Settings for ABS
Printer settings for ABS.
Extruder Temperature
ABS prints at a moderately high temperature of about 240°C. This puts it at the top of the temperature range for some entry-level 3D printers, but 240°C is achievable even without an all-metal hotend.
Printer Bed Temperature
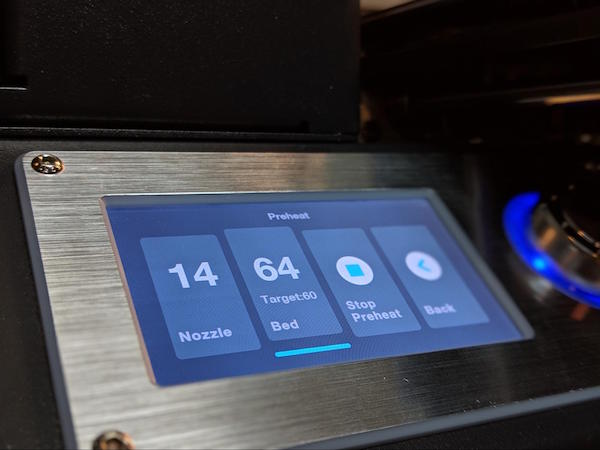
As with any 3D printing job, it will take some trial and error on your specific printer to find the temperature that works best. In order to print anything but the smallest parts, you will also need a heated bed. The bed temperature for ABS should be set to about 80°C.
Bed Adhesion
Finally, several bed materials can be used on the print bed to encourage good adhesion. The most common trick is using Kapton tape and hairspray. Kapton tape is a brand name for a polyamide film developed by DuPont. It typically comes in self-adhesive rolls that can be applied to heated build platforms.
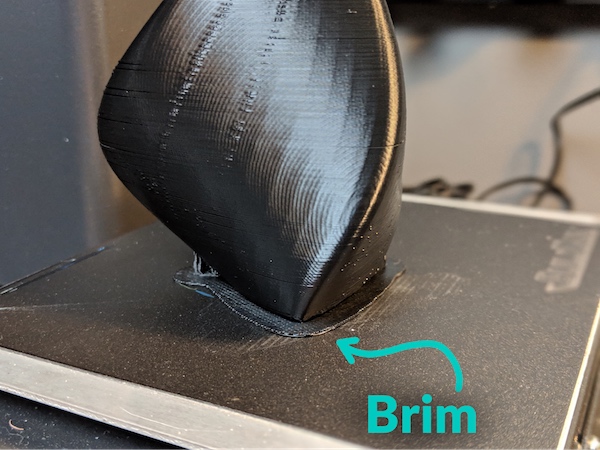
After applying a layer of Kapton tape, a light misting of hairspray, allowed to dry for 10-15 minutes, creates a combination that works well for improving the bed adhesion of ABS. Another technique that can be used to improve bed adhesion and avoid warping is printing with a skirt or brim. These two techniques increase the contact area between the bed and the print, which improves overall adhesion.
Printing with a brim helps with the adhesion of the ABS print to the bed.
There are also a number of specialized printing surfaces designed specifically for optimizing ABS adhesion like BuildTak.
Best Project Types for ABS
Functional, Durable Parts
ABS is often used for designs involving functional parts like gears, mounting brackets, hooks, shelves, repair parts, and all kinds of other objects that require durability.
Prototyping
ABS is often used for product prototyping because ABS is easy to finish using a variety of processes. ABS is also an extremely common plastic in injection molding. Therefore, 3D printing prototypes in ABS gives designers a good idea of how an injection molded design would function.
High-Temperature Projects
ABS has a higher tolerance for heat compared to other plastics, making, 3D printed ABS objects useful in environments where the parts encounter relatively high temperatures such as inside cars or around cooking equipment.
Additional 3D Printing Resources
Looking for some tutorials about creating your 3D designs? Read up on how to use Tinkercad in this series:
If you haven't taken the plunge and purchased your own 3D printer, check out these articles that highlight some 3D printing services for your projects:
