There are few ways to model an impeller in SelfCAD and one of them is using Twist tool. Thanks to this tool we w
There are few ways to model an impeller in SelfCAD and one of them is using Twist tool. Thanks to this tool we will make two impellers.
There are few ways to model an impeller in SelfCAD and one of them is using Twist tool. Thanks to this tool we will make two impellers.
Step 1: 1st Impeller: Add a Cube to the Scene
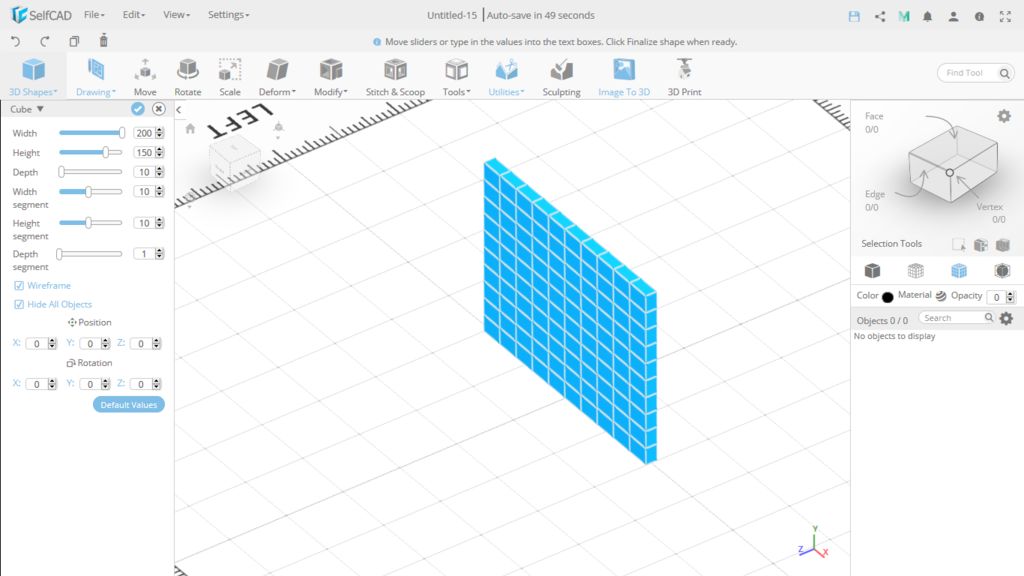
Add a cube to the scene and set its Width to 200, Height to 150 and Depth to 10. It's just an example, you can enter your own values. Now set height and width segments to 10. The higher these values are, the smoother the object will be.
Create new project. You can leave default values (700 for workspace size and 50 segment size).
Add a cube to the scene and set its Width to 200, Height to 150 and Depth to 10. It's just an example, you can enter your own values. Now set height and width segments to 10. The higher these values are, the smoother the object will be.
Step 2: Move the Cube to the Right
Choose Move tool (M) and in advanced settings select left position of the origin. Move the object by setting X position to 50.
Choose Move tool (M) and in advanced settings select left position of the origin. Move the object by setting X position to 50.
Step 3: Twist the Object
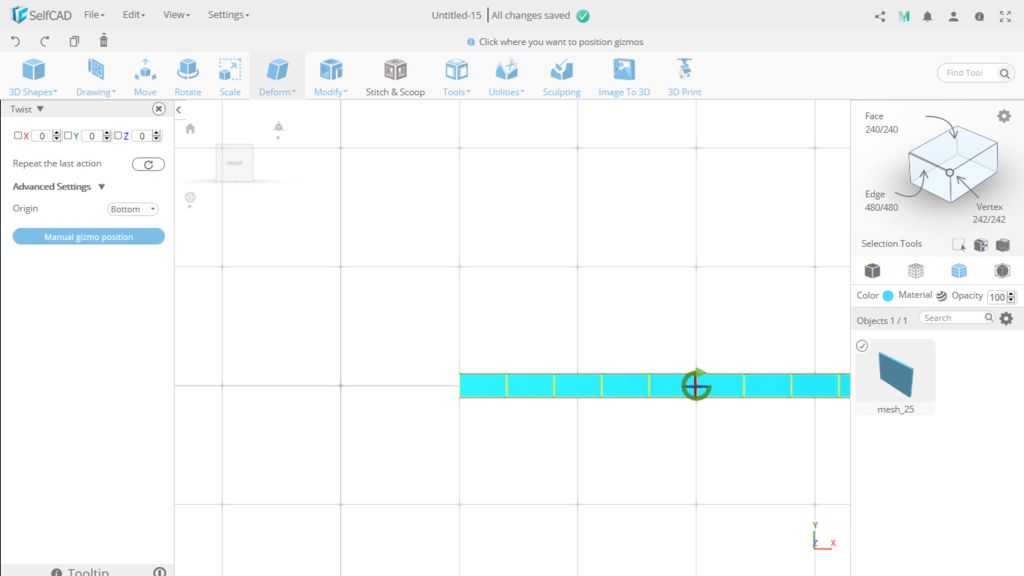
Setting the gizmo position on the front-left corner means that all axes of rotation cross in this point, including Y axis. By setting the upper corner we chose the entire top plane to stay in its place. Everything else rotates.
Choose Twist tool (Deform → Twist or D+W). Open advanced settings and choose Manual gizmo position. Click on the upper front-left corner of the object. Then you can twist the object. Enter value 45 in Y axis.
Setting the gizmo position on the front-left corner means that all axes of rotation cross in this point, including Y axis. By setting the upper corner we chose the entire top plane to stay in its place. Everything else rotates.
Step 4: Create the Impeller
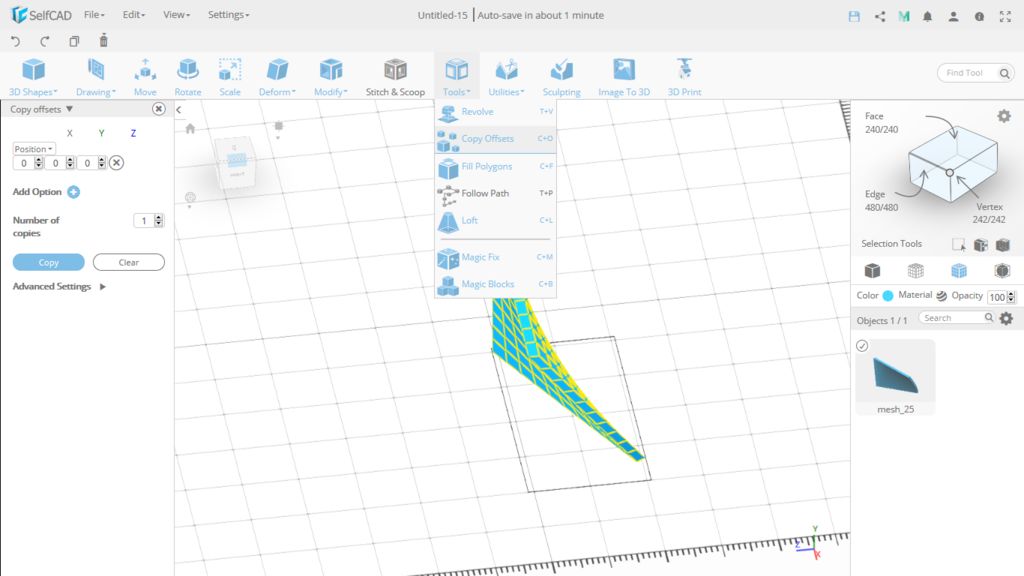
Now we want to copy our object around the center of our workspace. Choose Copy Offsets (Tools → Copy Offsets or C+O). Select Pivot from the list and leave values 0, 0, 0. Enter number of copies. I copied the object 16 times so my impeller has 17 blades.
Now we want to copy our object around the center of our workspace. Choose Copy Offsets (Tools → Copy Offsets or C+O). Select Pivot from the list and leave values 0, 0, 0. Enter number of copies. I copied the object 16 times so my impeller has 17 blades.
Step 5: Complete the Impeller
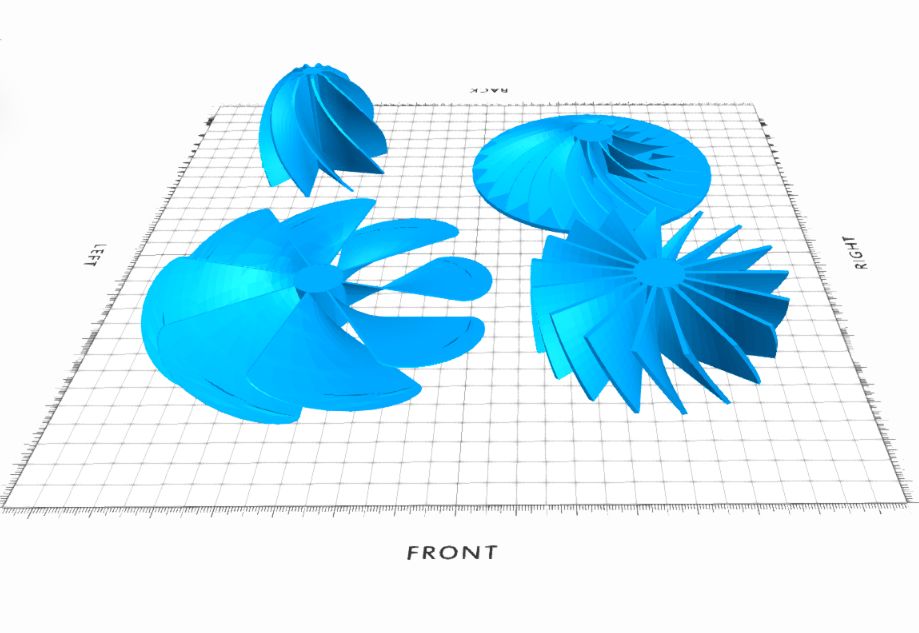
The first impeller is ready. You can select all object and group them (Edit → Group or Ctrl+G).
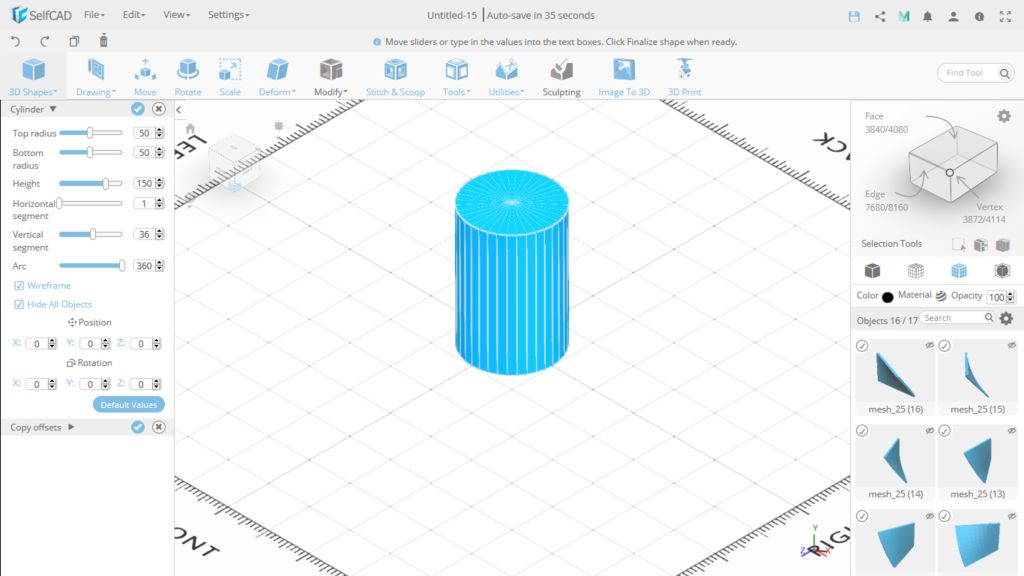
Add a cylinder to the scene. Set its height to 150 and radius to 50.
The first impeller is ready. You can select all object and group them (Edit → Group or Ctrl+G).
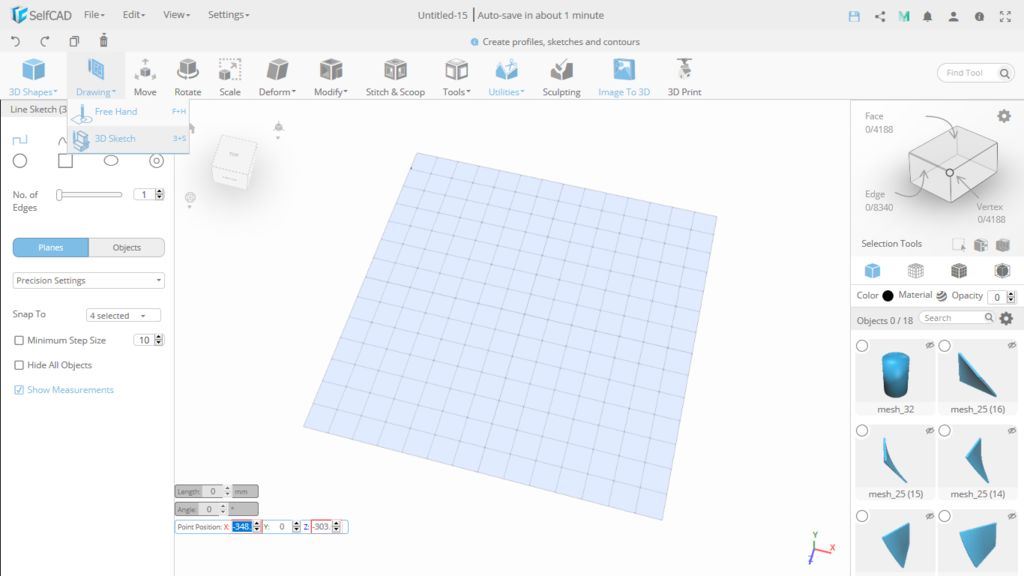
Step 6: 2nd Impeller: Draw a Shape of a Blade
Choose 3D Sketch (Drawing → 3D Sketch or 3+S). Go to Precision Settings and select the minimum step size. You can leave its value 10. Draw a shape by using lines and splines.
Choose 3D Sketch (Drawing → 3D Sketch or 3+S). Go to Precision Settings and select the minimum step size. You can leave its value 10. Draw a shape by using lines and splines.
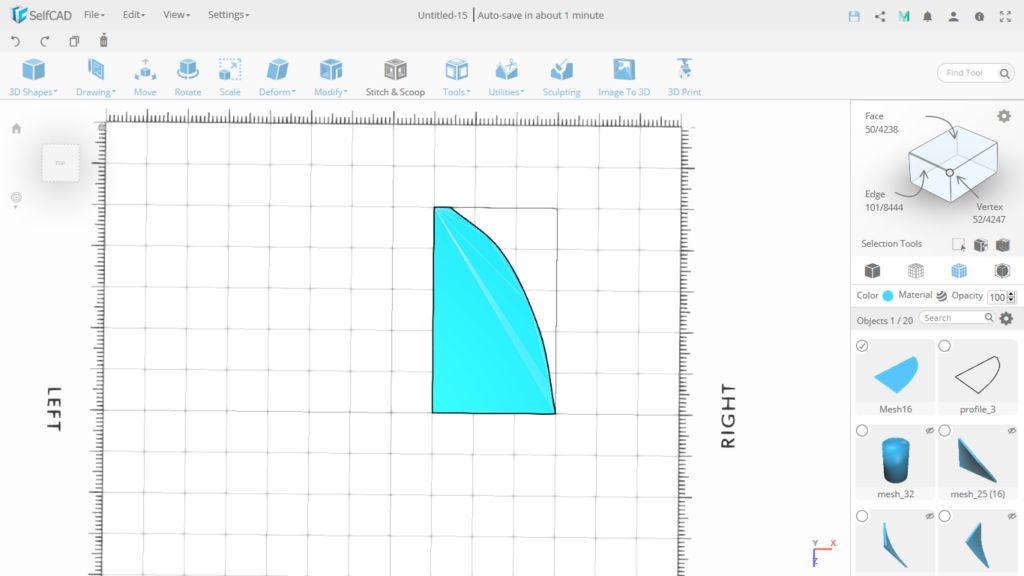
Step 7: Fill Polygon
Select the profile you have just drawn and choose Fill Polygons (Tools → Fill Polygons or C+F).
Select the profile you have just drawn and choose Fill Polygons (Tools → Fill Polygons or C+F).
Step 8: Add Thickness
Rotate the blade and move it to the right position. Then choose Add Thickness (Modify → Add Thickness or M+A).
Rotate the blade and move it to the right position. Then choose Add Thickness (Modify → Add Thickness or M+A).
Step 9: Twist the Blade
Use Twist tool as in the first impeller.
Use Twist tool as in the first impeller.
Step 10: Complete the Impeller
The second impeller is ready.
Use Copy Offsets as before and add a cylinder to the center.
The second impeller is ready.