Each lithophane is an amazing work of art and nowadays you don't have to buy any porcelain plate to have it in your house. You can simply print your own lithophane. Look how easy it is in SelfCAD - an online 3D modeling application.
"A lithophane is an etched or molded artwork in very thin translucent porcelain that can only be seen clearly when back lit with a light source. It is a design or scene in intaglio that appears "en grisaille" (in gray) tones."(https://en.wikipedia.org/wiki/Lithophane).
Each lithophane is an amazing work of art and nowadays you don't have to buy any porcelain plate to have it in your house. You can simply print your own lithophane. Look how easy it is in SelfCAD - an online 3D modeling application.
Step 1: Create New SelfCAD Project
Launch SelfCAD editor and create a new project.
Launch SelfCAD editor and create a new project.
Step 2: Generate a 3D Model From Image
Use Image to 3D tool and import your photo.
Under the image viewer you can see several sliders and checkboxes.
- the higher Resolution value is, the more detailed the model will be- the Tolerance value has to be equal to 1 in our project.- the Amount value has to be negative. The closer it is to 0, the flatter the model is, and that's not what we want. Values like -13 should work well.- blur makes the image less sharp. Leave the value 0 here.
The checkboxes should be unchecked.
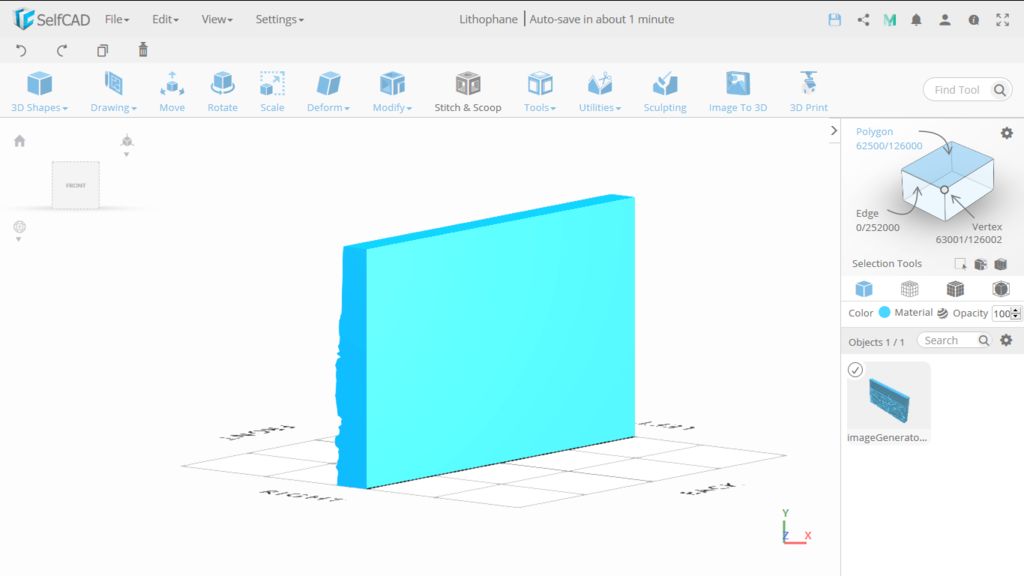
Step 3: Make the Object Thinner
Use the polygon selection mode to select the back flat polygon of the model. Move the polygon to make the object thinner. Be careful not to overdo it.
Use the polygon selection mode to select the back flat polygon of the model. Move the polygon to make the object thinner. Be careful not to overdo it.
Step 4: Transform the Object
Scale the model as you want. Open advanced settings and turn on keep proportion option when you change the dimensions of the whole object, and turn off it when you change only the Y dimension. As you can see, my object was 3.5 mm high and I had to make it thinner. I noticed that 2.5mm - 2.8mm should be the maximum here and decided to set 2.5mm here. After scaling you have to move the object lower.
Rotate the object so that the flat surface is at the bottom. Move it as low as possible.
Scale the model as you want. Open advanced settings and turn on keep proportion option when you change the dimensions of the whole object, and turn off it when you change only the Y dimension. As you can see, my object was 3.5 mm high and I had to make it thinner. I noticed that 2.5mm - 2.8mm should be the maximum here and decided to set 2.5mm here. After scaling you have to move the object lower.
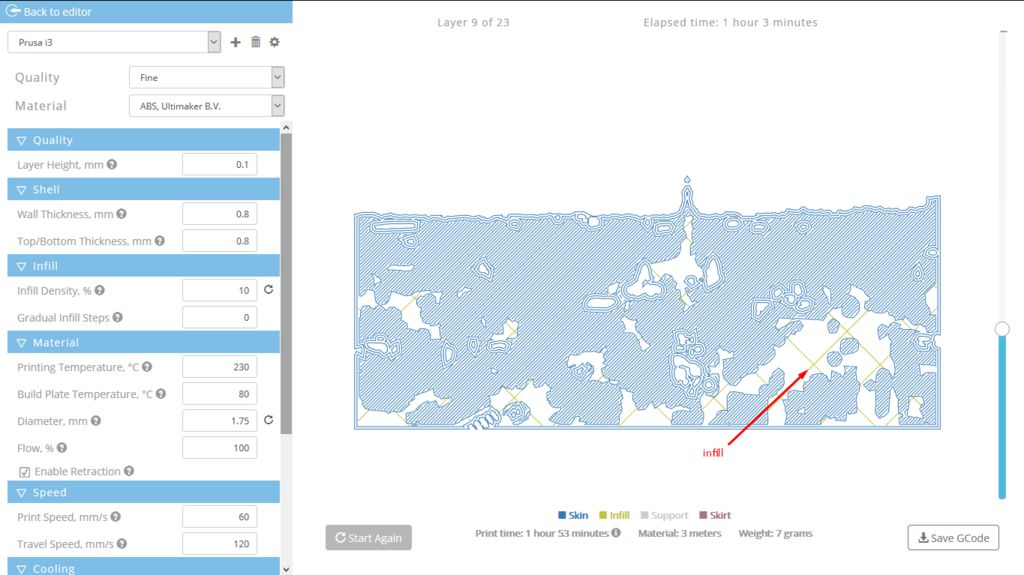
Step 5: 3D Print
Generate Gcode and print your lithophane.
Use SelfCAD's built-in slicer to generate a Gcode. Make sure there will be no infill in your printed model. If there are any holes in the first layer, you can make the lithophane thicker by moving the bottom polygon. That's why my object is 2.6mm high instead of 2.5.
Generate Gcode and print your lithophane.
Step 6: Litophane
Well, the city image was not the best to make a lithophane from it, but look at my other models. The wedding photo of my grandparents is definitely my favorite one :)
Well, the city image was not the best to make a lithophane from it, but look at my other models. The wedding photo of my grandparents is definitely my favorite one :)