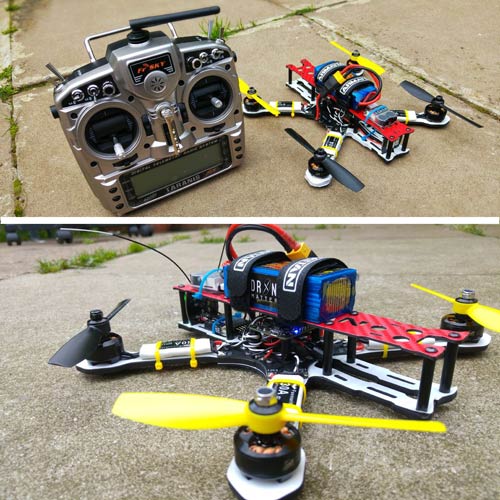
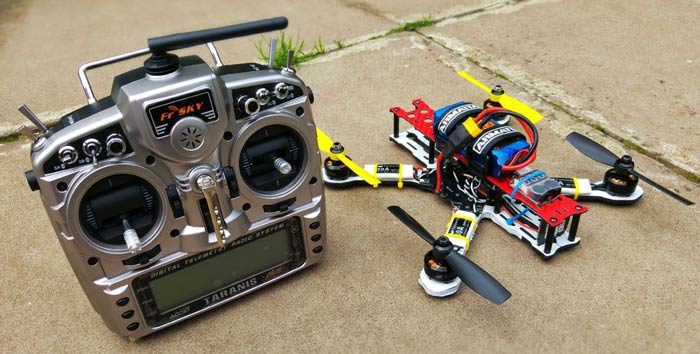
Use this comprehensive guide to build and pilot your own quadcopter.
About a year ago I set on my journey toward becoming a quadcopter pilot. Back then, I had no idea what I was doing, and I was treading into new territory as I had never built anything as substantial as this before. I spent five months researching: visiting countless websites, watching tons of videos, and posting a lot of noob questions on RC forums until I found myself ready to build my first DIY quadcopter.
So, I got out the soldering iron, put on my safety goggles, and began soldering. I ended up destroying an ESC (electronic speed controller) within 5 minutes, but luckily I had bought a spare. Eventually, I managed to complete it without destroying everything, and connected the battery for the first time. This is the moment where my heart was racing, because it could only go two ways: It could work, or it could end up in a small cloud of black smoke. But in the end, my quadruple checking of all the connections paid off, and no smoke came out. I was thrilled!
I put this DIY quadcopter tutorial together as a collection of all the information I learned across the hundreds of websites, videos, and tutorials I encountered since the beginning. Now you don’t have to spend five months researching, but instead can get started with your quadcopter within a day.
This is a very informative and rather extensive guide. It covers ...
- How to choose the perfect combination of components.
- How to put it together.
- What tools and equipment you need.
- Health and safety considerations to ensure that you won’t be reading this from a hospital bed.
- Learning how to fly and repair your DIY quadcopter.
To get you started right away, there are some recommendations of different setups including a setup that will give the most performance, and a setup that will give similar results, but won't be as costly. There are also some nifty tips and tricks scattered throughout that will help you on your journey toward becoming a quadcopter pilot. Once you finish reading it, you will know everything you need to know about building, flying, and repairing DIY quadcopters.
You can apply these techniques to build a quadcopter of any size. This guide will focus on mini quadcopters, which range from 180mm to 300mm (measured diagonally, motor to motor). In this instance, I chose 250mm. There is a good amount of detail included, so brace yourselves. This tutorial is structured in the following way and divided into two parts:
Part 1 of This DIY Quadcopter Tutorial Covers ...
- Required Materials
- How does it work?
- Choosing the best components
Part 2 of This DIY Quadcopter Tutorial Covers ...
- Step 1: Assembling the frame and soldering connectors
- Step 2: Preparing the flight controller
- Step 3: Prepping the motors
- Step 4: Testing motor direction
- Step 5: Soldering the motors to ESCs
- Step 6: Soldering ESCs and connectors to PDB (power distribution board)
- Step 7: Adding accessories — buzzers & LEDs
- Step 8: Connecting the wires and battery
- Maintenance and repairs for the quadcopter
- Health, safety, and the law
- Learning to fly
Required Materials
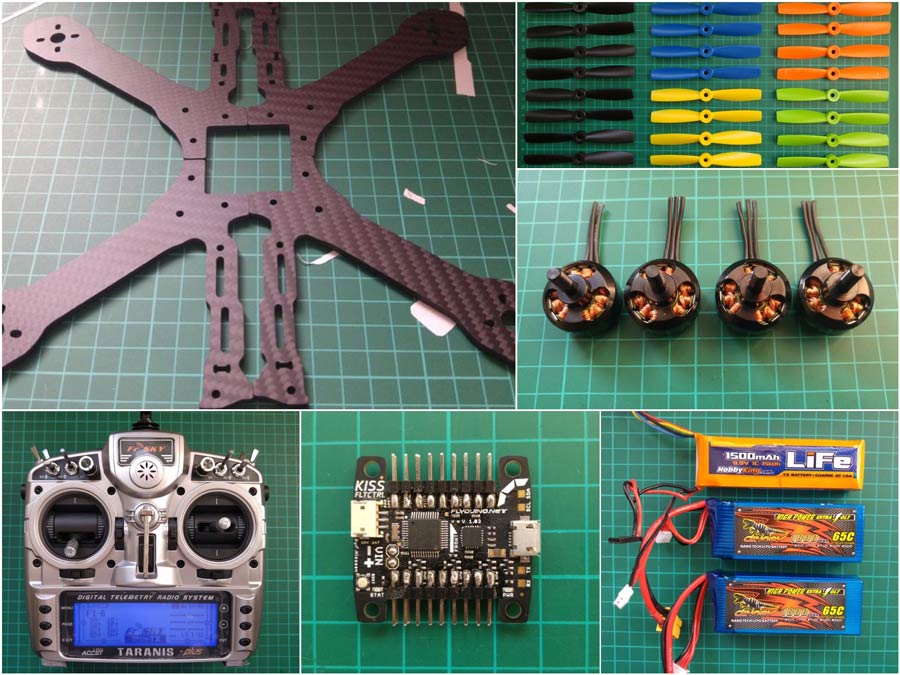
Below are all the components, items, tools, and equipment that we will need to build a DIY quadcopter.
This guide does not include instructions on adding FPV, but I included the FPV parts list anyway. Here is a tutorial from DroneFlyers on how to add FPV to your DIY quadcopter, should you choose to do so.
If you want to get started right away, below are some setup recommendations.
Advanced Quadcopter Setup (Best Performance)
This setup has a top speed of 80 mph and a vertical acceleration of 90ft/s.
- Armattan F1-5 or F1-6 frame: $115 (F1-6 = larger propellers = more thrust)
- KISS Flight Controller: $37.99
- 4 x KISS 24A Racing Edition ESCs: $24.93
- 4 x T-motor 2206 2000Kv motors: $56
- 4 x HQ 5030 propellers: $3.30
- SMC 37A 4S 1300mAh True Spec LiPo Battery: $46.75
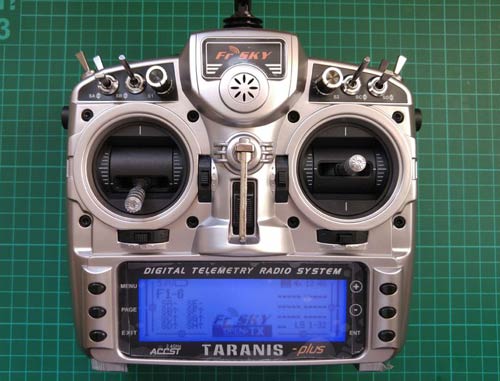
- FrSky Taranis X9D Plus Transmitter: $210
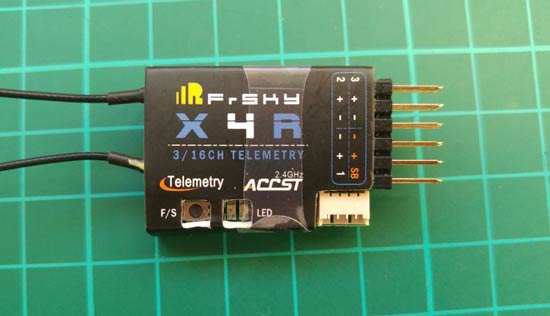
- FrSky X4R-SB receiver: $25.40
Total = Approx. $540
Economic Quadcopter Setup (Similar Performance but Cheaper)
- ZMR 250 V2 Carbon Fiber frame: $28
- Naze32 Flight Controller: $25
- 4 x SunnySky X2206S 2100Kv Motors: $9.99
- 4 x Littlebee 30AESCs: $16.24
- 4 x HQ 5045 propellers: $4.35
- Turnigy Nanotech 3S 1800mAh LiPo Battery: $22
- FlySky FS-TH9X: $80
Total = 220€/Approx Rs.16,000/Approx 236$
How Does the Quadcoptor Work?
Before you start choosing your components, it’s a good idea to learn about how they work with your DIY quadcopter.
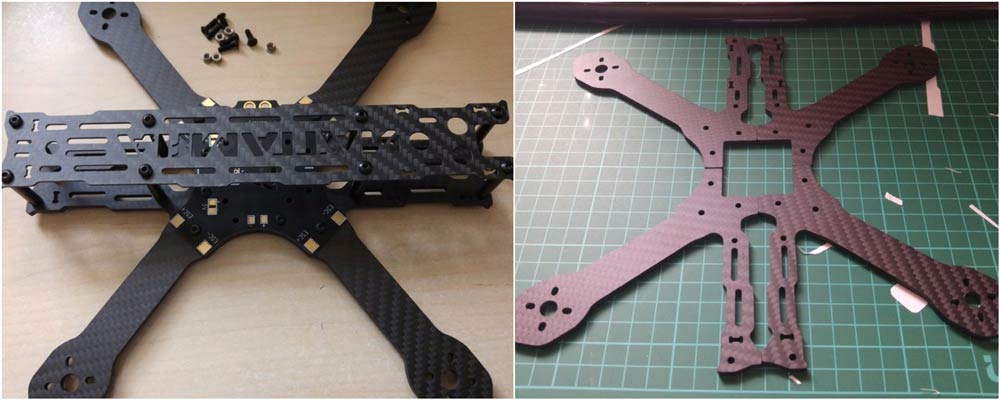
Let's begin with the frame of your quadcopter. The frame provides the structure and rigidity and it's where all the components will be mounted.
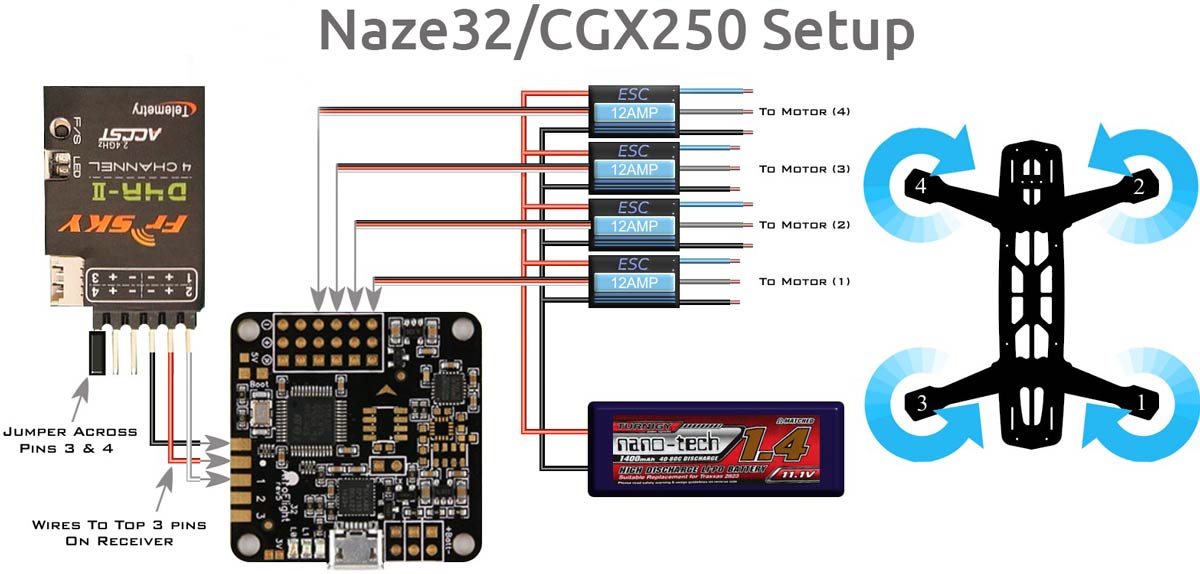
The flight controller manipulates the RPM of the individual motors in response to the user's input. If you tell it to go forward, the flight controller will adjust the RPM of the rear motors.
The ESCs take the signals from the flight controller and adjust the speed of the motors.
The motors and propellers provide the thrust and the lift for your DIY quadcopter.
The battery provides the power to all the components.
The radio (transmitter and receiver) allows you to control the movements of the quadcopter.
“Give a man a fish and you feed him for a day, teach a man how to fish and you feed him for a lifetime”. –Lao Tzu
If you learn how to fish, you won’t have to depend on anyone to give you one; you’ll be able to get a fish whenever you please. The same applies to quadcopters. If you learn about how the components work and interact with each other, you won’t have to depend on others much. Things will make more sense and you will be able to answer most of your own questions. Learn about how each component interacts with the next and how they all work together. Once you do, you'll know exactly why things are the way they are and why it behaves in the way that it does. When something doesn't go as expected, diagnosing the problem becomes that much easier because you know how it should work.
To get you started, here is an excellent video by Painless360 that explains how the ESCs control the motors in your DIY quadcopter.
A great resource for information on DIY quadcopters is the blog created by Oscar Liang. His blogs often answered the exact question that was stuck in my mind.
Choosing the Components for Your DIY Quadcopter
Below are explanations of what to keep in mind for each component. In the above section (Required Materials) there are some recommended setups depending on what you’re looking for:
Highest performance
Similar performance but lower price
Here are a few useful tips and places with great information that you should definitely check out:
Use eCalc: This is a great tool that helped me tremendously in determining whether my component combination would work well. Once you have chosen your components, punch their values into eCalc and it will tell you your flight characteristics such as max amp draw, flight time, top speed, climb rate, and much more. You can then use this data to determine whether the components will work well together with your quadcopter.
Visit RC forums: If you ever find yourself confused or encounter a problem that you don't know how to solve, the first thing you should do is visit RC forums such as RCGroups. There is a thread on virtually every topic, and chances are someone will have already encountered the same problem. Search around for answers, and if you can't find any, post a question in the relevant thread. The awesome community will be more than willing to help you.
Try to buy from sellers in your country: You can save money if you buy from national sellers, as shipping costs and customs charges can add up. If you're buying from an international seller, make sure to consider shipping costs and customs charges. I made the mistake of not taking this into consideration and ended up paying a hefty amount in customs charges alone. Each country has their own customs charge rates, so be sure to check this before buying. Here are some good places to buy from:
- HobbyKing
- BangGood
- GoodLuckbuy
- HobbyRc
- Flyduino
Watch out for clones: There are many out there. Some are easy to differentiate, and others are much harder. Stay away from eBay for the main components such as the motors ESCs and batteries. You want a high quality and reliable product for the main components. Most of the sellers on eBay sell clones. Generally, clones are unreliable and are of low quality, but not always. There are some higher quality clones out there, and if you're on a budget, clones can be an option for your DIY quadcopter.
Use zip ties to fasten: Zip ties are handy for securing components to your frame and to keep wires in one place. If you need to secure something, think zip ties.
Use Magic Smoke Stopper: The Magic Smoke Stopper is a useful tool that costs only a few dollars to make. It's a current-limiting device, and it allows you to diagnose any faults before they do major damage to your components. You can potentially save the life of an ESC or motor.
Use a low voltage battery alarm: This little guy is very useful for telling you quite loudly when it's time to land. It's very difficult to guess this, because usually you're having too much fun to take notice of the battery voltage and you end up with a dead battery.
Use multimeters: You can use a multimeter to check the voltage of a terminal before you solder the component onto it, to check whether you are receiving the correct voltage. You can also use it to check the power requirements of components such as LEDs (if you don't know it already), or to check the exact current/voltage draw of the system as a whole or as individual components and gather technical data about your DIY quadcopter.
Now, onto the components. There are nine basic components to consider when choosing your parts for your quadcopter. Below is a detailed explanation for each of them that will help you understand it better.
1. Quadcopter Frames
Frame Styles: Two types of frame styles are common:
acro and
FPV. Acro frames are what's known as "true X" frames, because the arms form a perfect X shape. FPV frames are different in shape and come in multiple styles such as X and H. Here is a
comparison of acro and true X frames. They're also referred to as bus-style frames because of the bus shape in the center. This shape allows for better placing and spreading of the components.
How to Choose the Frame: To start, you want to determine the size of your frame — 180mm to 300mm are very popular sizes for FPV and acrobatics. Anything bigger is delving into the aerial photography range. Larger size quadcopters aren’t as twitchy, allowing for smoother footage. So first, determine the purpose of your DIY quadcopter, and then, depending on that purpose, you will know what size bracket you're in. Once you’ve chosen the size of your frame, you want to determine the motorsize and Kv rating.
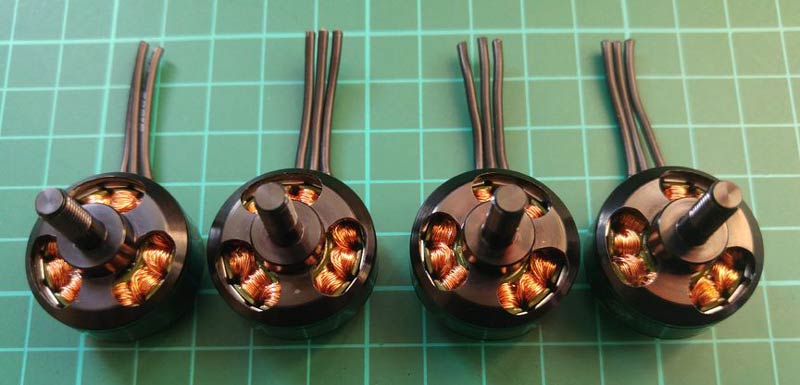
2. Quadcopter Motors
Types of Motors: There are two types of motors—
inrunners and
outrunners. Inrunners are where the rotor is inside the motor, outrunners are when the inside remains stationary and the outside of the motor rotates. Inrunners can spin faster, but outrunners produce more torque to be able to drive the propellers of your quadcopter, which is why outrunners are very common with multirotors.
Motor Numbers Explained: When looking for a motor, you will see two sets of numbers. The first set is the size of the motor/rotor (the first two represent the diameter and the second two represent the height) and the second set is the KV rating. KV doesn’t stand for kilovolts like you would think it would; it stands for RPM per volt applied. So if you have a 2000KV motor and a max supply voltage of 12.6, the motor will have a max RPM of 25,200 (2000*12.6).
Here are a couple of examples of the numbers you would find written on a motor:
2206 2100Kv
2212 980Kv
You may find a letter or two before the first number. This is usually the series of the motor from the manufacturer. For example, SunnySky has the X series, Cobra motors have the CM series, and T-motor has the MN series, among other series of motors.
The Inverse Law: Follow the inverse law, where higher KV rated motors spin at higher RPMs but swing smaller propellers. Lower KV motors spin at lower RPMs and swing larger propellers. Lower KV motors tend to be larger in size, therefore the first set of numbers would also be larger. Higher KV motors tend to be smaller in size, therefore the first set of numbers would be smaller. You can use this information to determine what motor you need. Larger DIY quadcopters tend to use larger propellers, which mean lower KV motors are used. Smaller DIY quadcopters tend to use smaller props, which means higher KV motors are used.
How to Choose the Right Motor: The first step is to calculate the amount of thrust you need from the motors. Thrust is measured in grams, so your motors must produce enough thrust to be able to lift your DIY quadcopter off the ground; but in order to hover, the motors must produce at least twice as much thrust. This ensures that the motors have no trouble lifting and maneuvering the quadcopter.
To do this, take the take-off weight of the quadcopter and multiply it by 2 then divide by 4 (because we have 4 motors) to get the amount of thrust that each individual motor must produce. If you want a higher thrust-to-weight ratio, replace the 2 with the ratio in mind. So if you want a ratio of 4:1, you multiply it by 4 then divide by 4.
But you may be wondering, "How do I know the take-off weight when I haven’t even chosen my components?" Well, we use a rough estimate weight, which is calculated by adding the weight of the individual components. The average weight of a mini quadcopter is around 550g, so this will be the weight we’ll be using.
Higher ratios are better suited for racing and acro ranging from 3:1 to 6:1. I’d recommend starting with 4:1, as 6:1 will be too much to handle, and you will struggle to fly for months because it will be so sensitive.
3. Propellers
Propellers are measured by the
diameter and the
pitch, and are measured in
inches. The diameter is essentially the length of the propeller, and the pitch is how far the propeller would move in space in one revolution. So if you have a propeller that has a pitch of 4.5 inches, in one revolution, the propeller will have moved 4.5 inches. The motor manufacturers provide a datasheet that can be found on their website and tells you which propeller size they recommend. It's best to follow their recommendations, otherwise you could end up either underpowering the motors, resulting in poorer performance, or overpowering the motors, causing them to draw too much current and possibly blow the ESC, resulting in a lovely cloud of smoke and a shameful visit to
Hobbyking.
How Different Propellers Affect Your DIY Quadcopter: By increasing the propeller size on your setup, you can drastically increase the thrust produced by the motors, but this is not without its downside. Larger propellers draw more current, and the responsiveness of the quadcopter is decreased because they're not spinning as fast as smaller propellers. 250 size quadcopters typically run 4-inch, 5-inch, and 6-inch propellers. 4-inch propellers offer greater response, but don't provide enough power. Six-inch propellers offer greater thrust, but a lower response. Five-inch propellers sit comfortably in the Goldilocks zone and provide a good balance between thrust and response.
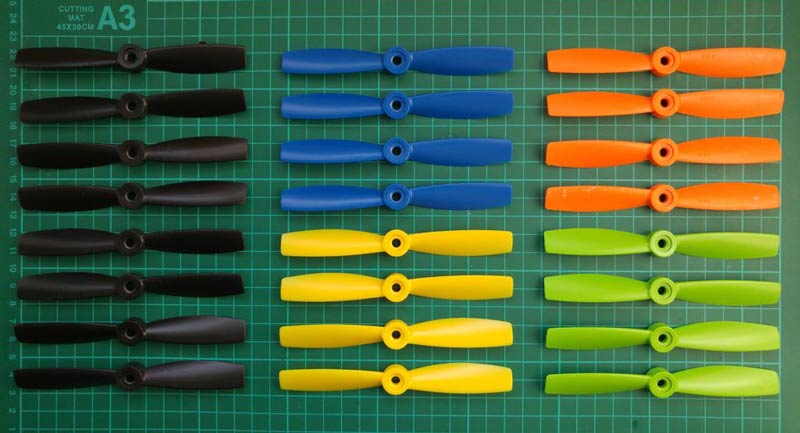
Bullnose Propellers: Bullnose propellers allow the propeller to be smaller while offering the same thrust of the larger propeller. This is because the surface area of the blades is increased. The same can also be achieved by increasing the number of blades. A bullnose propeller is essentially a regular propeller with the tip chopped off, making it flat instead of curved at the tip.
A 5-inch bullnose propeller will produce similar thrust to a regular 6-inch propeller. But again, this is not without its downside. Bullnose propellers tend to be slightly less efficient, resulting in slightly lower flight times. This decrease in efficiency is due to the shape of the propeller. The flat tip increases wingtip vortices, which mean that more turbulent air is produced, decreasing the amount of clean air for the aircraft to move through, making the motors work harder and draw more current.
The propellers shown in the pictures above are all examples of bullnose propellers.
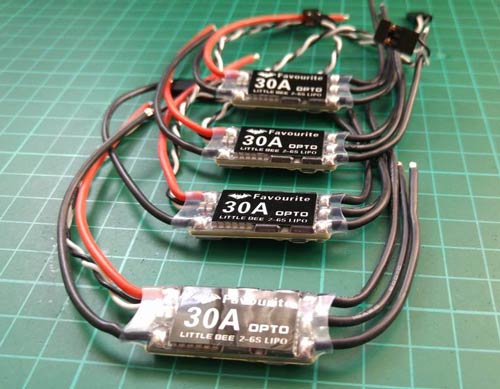
4. ESCs (Electronic Speed Controllers)
ESCs are measured in amps. To determine the ESCs, you want to find the max current draw of the motors, which can be found in the motor datasheet. It is recommended to leave a little headroom and buy an ESC that has a value of at least 5A above the maximum current draw of the motors of your DIY quadcopter.
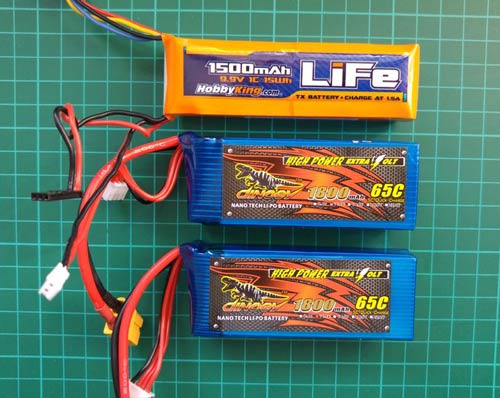
5. Battery for the DIY Quadcopter
All quadcopters almost exclusively use LiPo batteries. This is due to their high discharge rates. But they are also quite delicate in their construction and are very sensitive to overcharging and over-discharging. They can easily puff, making them unusable or even burst into flames. It is not uncommon for houses to catch on fire due to improper handling and care of LiPos, but as long as you treat it with the respect it deserves, you can fly for years without having any trouble.
How to Take Care of LiPo Batteries: Your best bet is to use a LiPo fire-safe bag when charging, which can contain the flames in the event of it bursting. Never charge indoors or near any flammable materials, such as on top of your desk. Never discharge the battery past 20% capacity, and never overcharge past its maximum capacity. If you do, the battery life can be decreased dramatically and it may swell or puff, rendering it useless for your quadcopter.
What do the Numbers mean?
When looking for a LiPo battery, you will find three numbers: the C rating, the capacity, and the voltage/number of cells. The capacity is how big the battery is and the C rating is how quickly it can deliver the current. The number of cells is written as ‘S’ so 3S would be 3 cells and 4S would be 4 cells and so on. Each cell has a nominal voltage of 3.7V and a max voltage of 4.2V. Usually, the combined nominal voltage of all the cells would be written along with the cell count. They essentially mean the same thing. If you see 14.8V written, divide the 14.8 by 3.7 and you get 4, therefore the battery has 4 cells so it is a 4S battery. In motor datasheets, the voltage written is the total nominal voltage of the battery.
These numbers are displayed on the pack. For mini quadcopters, 3S and 4S are the most common. 5S batteries may be too heavy and can offer more disadvantages than advantages. Increasing battery size to maximise flight times only works to a certain point where if you go any higher, you end up achieving the opposite because of the increase in weight. 3S and 4S strike the perfect balance between weight and flight time for your diy quadcopter.
How the Battery Size Influences the Speed
The battery and motors have the biggest influence on flight characteristics such as top speed, vertical acceleration and flight time. Simply changing the battery from 3S to 4S can increase top speed by as much as 20mph or more and increase vertical acceleration by as much as 20ft/s or more. But, increasing the battery size may cause the motors to draw excess current and increase the operating temperatures above safe working level. This is where eCalc comes in handy because you can check beforehand whether increasing the battery size on your setup would work or not.
You can use this information to make adjustments on the setups recommended below by changing the battery size to either increase the speed or even decrease the speed if it's too powerful for you. If you're starting out, it's better to start slow and work your way up. Feel free to switch around any other components to suit your DIY quadcopter.
How to Choose the Right One: To determine what battery you need, you need to add up the maximum current draw of the entire quadcopter. So let’s say each motor draws 15A. 15 x 4 = 60A. Add a few amps for headroom, and you have your maximum current draw. If you multiply the C rating by the capacity, you get the amount of discharge current of the battery. If you have a battery with an 1800mAh (1.8A) capacity with a 65CC rating,1.8 x 65 = 117A, which is plenty.
I highly recommend you read this article from The Drone Girl, 15 Things Every LiPo Battery User Should Know. It's an excellent source of information on LiPo batteries.
6. Transmitter
A transmitter is a long-term investment. You want to make sure your transmitter is reliable and that you can trust it because if your transmitter fails on you while you’re flying, your quadcopter can drop out of the sky and potentially injure or even kill someone or damage property.
Channels: The biggest thing you need to consider is the number of channels. As long as you have enough channels, you’re good to go. The minimum number of channels is 4: one for throttle, one for pitch, one for roll, and one for yaw. More channels are needed for extra functions such as arming with a switch, turning LEDs on and off, etc. I recommend getting at least 6 channels so you’re not so restricted.
Recommendations: The best beginner radio is the Turnigy 9X/FlySky FS-TH9X. It has 9 channels and offers features that you would expect to find in a transmitter three times the price. The Turnigy 9X and FlySky FS-TH9X are exact clones except for a few minor differences. The biggest difference is that the antenna isn’t hardwired into the module on the FlySky. This makes it easier to swap modules than in the Turnigy, because you don’t have to desolder anything like you would if you had the Turnigy. The FlySky turns out to be the better option since it has a smarter layout. As far as the internal electronics go, they're exactly the same.
For an excellent transmitter that you can’t beat for the price, I recommend the FrSky Taranis X9D Plus. It comes with an included aluminum carry case and is by far the most popular transmitter on the market. It is highly reliable, offers great features, and allows you to customize any and all of the switches — something you can’t do with the FlySky without an upgrade. By the time you add all the needed upgrades to the FlySky, you will have ended paying the same price as the Taranis, and you still wouldn't have all the features the Taranis offers.
7. Receiver
Some transmitters come with the receiver, but some don’t. To choose the receiver, you need to consider the number of channels it supports and what type of channel it is, such as
PPM,
PWM,
SBUS,
SUMD,
DSM2, and
DSMX. The differences between them are mainly how the signal travels between the receiver and the flight controller. Out of the list, SBUS seems to be one of the best options, as it is digital and you can use one wire to carry up to 16 channels, and maybe even more, depending on the receiver. It also has faster response times because it is digital, whereas with PWM, you need one wire for each channel. If you have 6 or 7 channels, your quadcopter build can become quite messy.
For the Taranis, I recommend the FrSky X4R-SB. It was designed to run SBUS, and you can even switch between PWM and SBUS. There is also a 6-channel version (X6R) and an 8-channel version (X8R). Another thing to consider is whether the transmitter module and receiver are compatible. If not, you may need to buy an additional module for the transmitter in order to make it work.
8. Battery Charger and Power Supply
The battery charger needs to be able to charge LiPo batteries. LiPo batteries have to be charged differently to NiMH or NiCd due to their construction. If you charge a LiPo with a NiMH charger, bad things will happen.
Chargers have a maximum output current and maximum output power rating. This will determine how quickly a battery will charge. But with LiPos, you don’t want to charge them too quickly. You want to charge LiPos at 1C, maybe even 2C, but the quicker you charge it, the more likely the battery life will decrease. "1C" simply means 1 multiplied by the capacity. If you have an 1800mAh battery, you would charge it at a rate of 1.8A for 1C (1.8 x 1) or 3.6Afor 2C (1.8 x 2).
Depending on the charger itself, you may need an external power supply. Some chargers have a power supply built in and some don’t. Just make sure that the power rating of the power supply is greater than the output power of the charger to ensure healthy operation with your DIY quadcopter.
I recommend the Turnigy Reaktor 250W 10A or the 300W 20A version paired with the HobbyKing 350W 25A power supply. This is an excellent charger that is reliable and has a broad range of functions, such as regenerative discharging, and can charge almost any kind of battery, not just LiPos.
9. Voltage Regulator (Optional)
Most of the time, the electronics (flight controller, receiver, camera etc.) only need a
5V power supply, but the voltage from the LiPo battery is greater than that and would fry the electronics if you were to power it off the LiPo. Therefore, a
voltage regulator/
UBEC is needed. The
Pololu 5V step down regulator is a popular choice. It's small, extremely light, and is reliable for your DIY quadcopter.
BEC stands for battery eliminator circuit, and all it does is eliminate the need for a separate battery to power the electronics. Instead, you can use the same LiPo battery to power the electronics, because a BEC reduces the voltage of the LiPo to the voltage required. Most ESCs have a BEC built in, but are of the linear BEC variety, which is highly inefficient and produces a lot of heat. An external BEC or UBEC (universal battery eliminator circuit) of the switching kind is preferred, since it's much more efficient and more reliable.
OPTO ESCs don't have any BEC in them and require you to use a voltage regulator/UBEC to power the electronics. OPTO ESCs are lighter and smaller, which makes a big difference with mini quadcopters. This is the demo flight video for my DIY quadcopter.
Check Part 2 of this DIY quadcopter tutorial to start building your quadcopter!
