Learn different ways to unit test your Arduino code with these methods and frameworks.
Unit Testing is a common practice in software development where you basically test units of code to check that they work as expected. Those units are usually methods of your code, ideally specialized in a certain task, like performing a certain calculation or parsing an input. Your test code will then stress that method with different inputs and check if the output matches the expected value.
Even though unit testing is often a software industry thing, there is no reason why you shouldn’t unit test your Arduino sketches. It becomes a must if you are planning to release your code as open-source. In this tutorial, I will show you some examples on how to unit test your Arduino code.
Code Examples
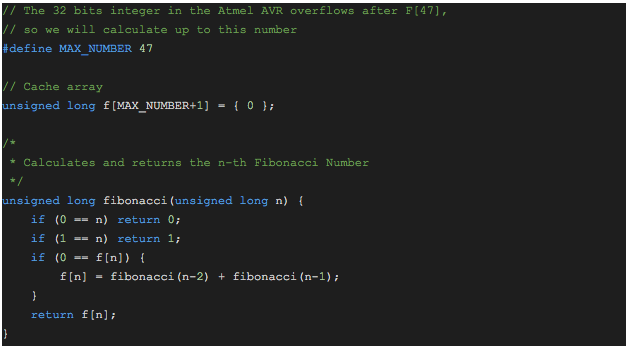
In this post I will use different code examples you can find on Github. The examples are all based on the same sketch which calculates and outputs the Fibonacci number for different values. Here is the key code for this sketch (check the fibonacci_00 example in the repository):
// The 32 bits integer in the Atmel AVR overflows after F[47],
// so we will calculate up to this number
#define MAX_NUMBER 47

// Cache array
unsigned long f[MAX_NUMBER+1] = { 0 };

/*
 * Calculates and returns the n-th Fibonacci Number
 */
unsigned long fibonacci(unsigned long n) {
    if (0 == n) return 0;
    if (1 == n) return 1;
    if (0 == f[n]) {
        f[n] = fibonacci(n-2) + fibonacci(n-1);
    }
    return f[n];
}
As you can see the Fibonacci method receives a number and calculates and returns the Fibonacci number for it. The Fibonacci series is a recursive series by nature (it uses previous results for new calculations), and the Fibonacci method does the same: it calls itself. Also note that I’m using a cache array to store previous values and speed things up. Thanks to this trick the total calculation time goes down from several hours (!!) to 12 milliseconds.
But how can I be sure the calculations are correct? Well, let’s test the Fibonacci method!
Writing Your Own Test Methods
We want to call a method in our code with some input value and check the output to see if it matches an expected value. We can create our own testing code, something like (this is the fibonacci_01 example in the repository):
void testFibonacci(unsigned long input, unsigned long output) {
    Serial.print("Testing F[");
    Serial.print(input);
    Serial.print("]: ");
    Serial.println((fibonacci(input) == output) ? "OK" : "ERROR");
}
Now we can call our testFibonacci method like this:
void setup() {

    // … Serial init code here …

    // Expected values taken from https://www.tools4noobs.com/online_tools/fibonacci/
    testFibonacci(0, 0);
    testFibonacci(1, 1);
    testFibonacci(2, 1);
    testFibonacci(3, 2);
    testFibonacci(5, 5);
    testFibonacci(10, 55);
    testFibonacci(20, 6765);
    testFibonacci(30, 832040);

}
Testing F[0]: OK
Testing F[1]: OK
Testing F[2]: OK
Testing F[3]: OK
Testing F[5]: OK
Testing F[10]: OK
Testing F[20]: OK
Testing F[30]: OK
That’s OK but it has some drawbacks: you will have to write a test method for every method you want to test, including the checking and the serial monitor output. If your code base is small (like the one we have here) it might be OK to do it like this. But once it starts growing and you start having tens or maybe hundreds of testing methods it will quickly become a nightmare.
That’s why special libraries exist that are specifically meant to deal with unit testing. These are called Unit Testing Frameworks.
Arduino Unit Testing Frameworks
There are several testing frameworks for Arduino. Let me just mention here the three I find more interesting: ArduinoUnit, AUnit, and PlatformIO Unit Testing. The last one is part of the PlatformIO ecosystem which runs outside the Arduino IDE so we will skip it for now. The other two are very similar. I will show you an example with AUnit but for no special reason, so if you want to try ArduinoUnit go ahead!
How to Use AUnit for Unit Testing
We will have to add the AUnit library to our IDE. Look for it in the Library Manager. Now let’s code the tests (this is the fibonacci_02 example in the repository).
First we include the library in our code:
#include <AUnit.h>
Now code a testing method, using special assert functions to compare the actual to the expected values:
test(fibonacci) {

    // Expected values taken from https://www.tools4noobs.com/online_tools/fibonacci/
    assertEqual(fibonacci(0 ), (unsigned long) 0);
    assertEqual(fibonacci(1 ), (unsigned long) 1);
    assertEqual(fibonacci(2 ), (unsigned long) 1);
    assertEqual(fibonacci(3 ), (unsigned long) 2);
    assertEqual(fibonacci(5 ), (unsigned long) 5);
    assertEqual(fibonacci(10), (unsigned long) 55);
    assertEqual(fibonacci(20), (unsigned long) 6765);
    assertEqual(fibonacci(30), (unsigned long) 832040);

}
And finally run the tests from our loop:
void loop() {
    aunit::TestRunner::run();
}
Fibonacci number generator - test 02

TestRunner started on 1 test(s).
Test fibonacci passed.
TestRunner duration: 0.002 seconds.
TestRunner summary: 1 passed, 0 failed, 0 skipped, 0 timed out, out of 1 test(s).
Check the summary. Our only test method passed without issues. Good!
The AUnit library has a lot of options so I recommend you to read the documentation to know all the goodies it has.
Advanced Unit Testing Topics
There is a lot more around unit testing. If you are curious about what can you do and how you can do it, I recommend reading about these subjects:
- Testing real numbers: Arduino uses a 32-bit representation for real numbers which has some problems with precision. AUnit provides a special assert to test them (assertNear) which accepts an error parameter.
- Regression testing: testing your code is not only about checking that it works while you are writing the code itself. It’s also (and maybe most important) about ensuring it keeps on working after you have changed the code to add new features or refactor it. Unit testing helps you avoid “regressions” in your code.
- Fixtures: fixtures are data you feed to your test so you don’t have to call testFibonacci several times with different inputs.
- Mock-ups: sometimes you will need to test code that depends on another code o library. If you write your code properly you can mock that dependency so you control what it delivers.
- Automating testing locally: no matter what, you will forget about running your tests if you are doing it manually. You can automate your testing by using a pre-commit hook if you are using a version-control system like Git, and you should be using one!
- Continuous Integration: Finally you can integrate your testing with continuous integration tools like Travis or Jenkins. You can check this post about Automated Unit Testing in the Metal.